[2026 Full Guide] How to Use iPad as iPhone Camera Monitor
This article shares how to use iPad as iPhone camera monitor with easy methods, including screen apps, mirroring iPhone screen, and transferring iPhone camera files.
By Clara / Updated on May 14, 2026
Is it possible to use iPad as iPhone camera monitor?
I want to mount my iPhone on a tripod, away from where I want to shoot. I want to keep my iPad close to me so I can see the camera feed from my iPhone camera. Is it possible to view iPhone camera on iPad?
- Question from Reddit
iPad has a larger screen, so many people tend to use iPad as iPhone camera monitor in some specific situations. For example, when you need a larger display for a better viewing experience, or want to remotely monitor the iPhone camera while taking photos or videos.
So, can you use your iPad as a screen for the iPhone camera? In the following guide, we will introduce some apps and features to help you connect iPhone to iPad and share iPhone camera viewfinder and files using iPad's large screen.
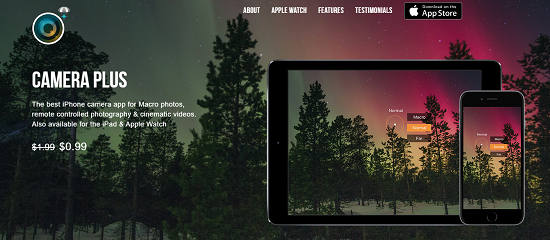
Option 1. Camera Plus - Remotely Control iPhone Camera
Camera+ is a great tool for controlling your iPhone camera. It offers a wonderful feature called "AirSnap". With AirSnap, you can remotely control your iPhone or iPad using another iOS device, allowing you to capture photos and videos wirelessly.
The steps of this app are simple enough; you can follow the guide below:
Step 1. Install and open the Camera Plus on both devices > Connect your iPhone and iPad with the same Bluetooth or Wi-Fi.
Step 2. Choose one device to be the camera and the other to be the trigger.
Step 3. After that, the remote iOS device can change the settings and see exactly what the camera iOS device is.
![]() Pros:
Pros:
- It supports remote-controlled photography.
- It is able to shoot brilliant macro photos and is compatible with the Apple Watch.
![]() Cons:
Cons:
- The distance of the remote control is relative.
With Camera Plus, you can link two iOS devices to a remote control, such as an iPhone, iPad, or Apple Watch, when one becomes the camera and the next one is a trigger. In other words, it helps you use iPad as monitor for iPhone camera.
Option 2. Mirror iPhone Screen to iPad as Camera Monitor
Also, you can use other apps to help you mirror your iPhone screen to iPad at first, and then you can use iPad as a camera monitor for iPhone. In this article, 2 options are given to you. Let’s continue reading and get them!
Way 1. Monitor iPhone Camera on iPad with AirPlay
AirPlay is a built-in feature found on Apple devices that allows for screen mirroring and sharing between iOS devices. It allows users to seamlessly display the iOS device screen on other AirPlay-compatible devices. With AirPlay, you can effortlessly connect your iPhone and iPad to prepare for using your iPad as iPhone camera monitor.
![]()
Below are detailed guides to mirror iPhone to iPad by using AirPlay:
Step 1. Connect both your iPad and iPhone to the same Wi-Fi network.
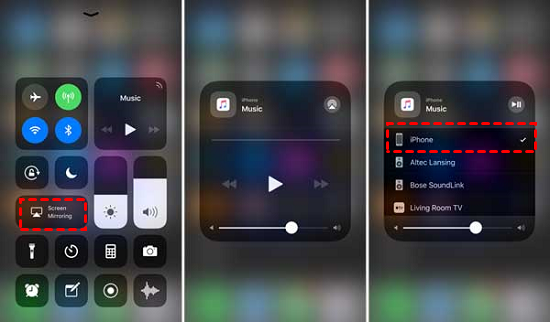
Step 2. On your iPhone, swipe down from the top-right corner to find the Control Panel.
Step 3. Tap the "Screen Mirroring" or "AirPlay" option. The name may depend on your iOS version.
Step 4. Select the Apple device name you need to connect from the list.
Step 5. Once connected successfully, your iPhone's screen will be mirrored on your iPad.
![]() Pros:
Pros:
- While screencasting, you can still check emails or play games.
- It supports you to control the volume on both your iOS device and your AirPlay device.
- The range of iPhone AirPlay to iPad is dependent on the Wi-Fi range.
![]() Cons:
Cons:
- Apple products only.
- All your devices must be networked for AirPlay.
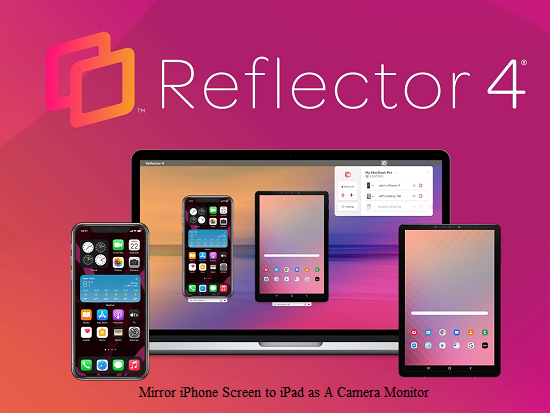
Way 2. View iPhone Camera Screen on iPad with Reflector 4
The Reflector 4 is an incredibly useful all-in-one screen mirroring and streaming receiver that offers a wide range of functionalities. This software enables you to effortlessly cast and mirror all your iPhone activities wirelessly onto your iPad. After you complete the screen mirror, though, you can learn how to use iPad as camera monitor for iPhone.
Here are instructions to cast iPhone to iPad by using Reflector 4:
Step 1. Swipe up the screen on the iPhone or the iPad to find the Control Center.
Step 2. Choose your computer's name from the drop-down menu.
Step 3. On your computer, the program will show a code that you need to type into your iOS device.
Step 4. After the code is approved, your iPhone gets mirrored on your iPad.
![]() Pros:
Pros:
- It supports compatibility with a diverse range of receiving devices, including Windows, macOS, and so on.
- You can see real-time previews of your devices connected, and decide which ones to show or hide.
![]() Cons:
Cons:
- It is more costly than similar apps.
- Requires a faster internet connection and low latency.
Bonus Tip: How to Transfer and View iPhone Files Easily
Besides the methods through the monitoring app and mirroring iPhone screen, another convenient way to do this is to transfer iPhone camera files to iPad first, and then enjoy and watch your transferred files on your iPad.
Way 1. AirDrop iPhone Camera Photos to iPad
AirDrop is one easy tool that helps you share files between your two devices. If you do not want to install any app on the device, you can choose to AirDrop photos from iPhone to iPad, can also Airdrop photos from iPhone to iPhone. With it, you can send the files in smaller groups smoothly.
- If you want to transfer a few photos, AirDrop is a good choice. Because transferring all photos in one click with AirDrop will cause problems.
- If you prefer to transfer hundreds of photos at once, FoneBackup can help you. Go to the next part directly!
Let's take a look at the following steps to Airdrop iPhone photos to iPad!
Step 1. Ensure Wi-Fi and Bluetooth on iPhone and iPad are turned on.
Step 2. Go to access AirDrop > Turn it on and select Contacts Only or Everyone.
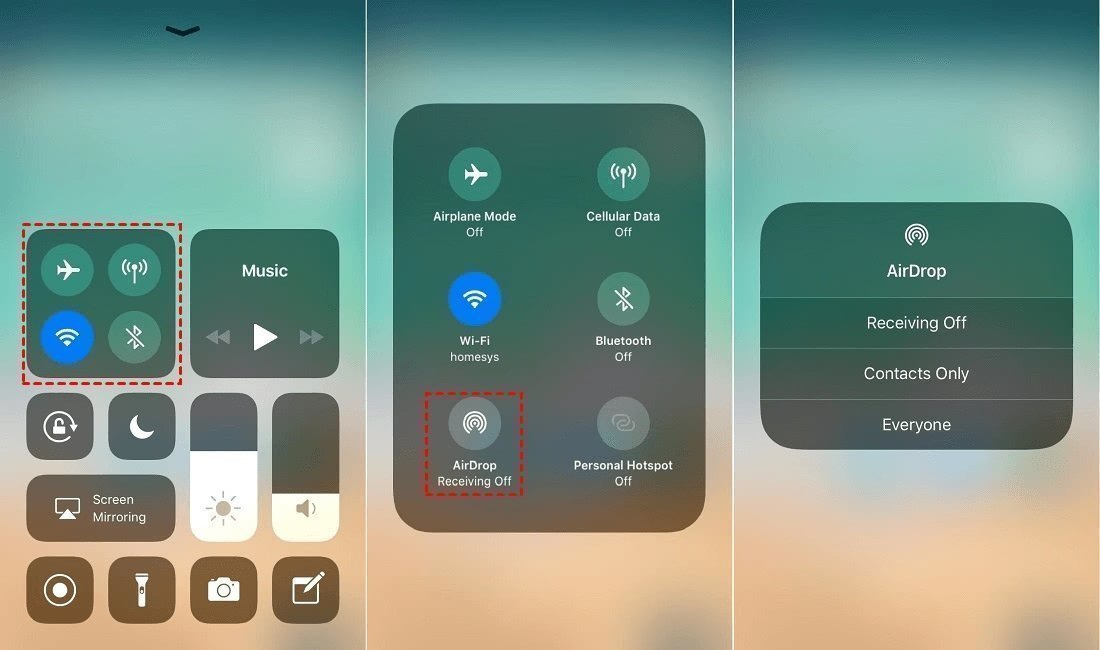
Step 3. Open Photos app > Find the pictures you want to transfer > Click the Share icon in the lower-left corner > Then choose AirDrop option > Select iPad.
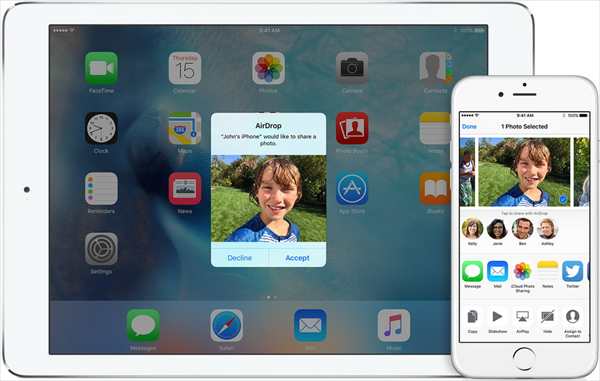
Step 4. Pick Accept to receive the photos shared from your iPhone.
![]() Pros:
Pros:
- It allows you to transfer data from iPhone to iPad without a USB or PC.
- You can AirDrop multiple photos, but no more than 50 photos at a time.
![]() Cons:
Cons:
- Require strong network connectivity.
- Keep the devices close (around 30 feet) for a successful transfer.
Way 2. Transfer iPhone Photos via FoneBackup
FoneBackup, a powerful data transfer tool with high speed for iPhone/iPad, allows you to easily and wirelessly transfer recorded videos, photos, contacts, music, or any other files from iPhone to iPad, or between iPhone and PC.
- ★ Advantages of FoneBackup:
- User-friendly and free, you can use it quickly on first use.
- Transfer multiple photos at the same time and doesn’t limit the size.
- USB connection enables a stable and offline transmission without data leakage.
- Supports full and selective transfer data from iPhone to iPhone/iPad and PC.
Now install FoneBackup on your computer and follow the guide below to transfer pictures from iPad to iPhone in minutes.
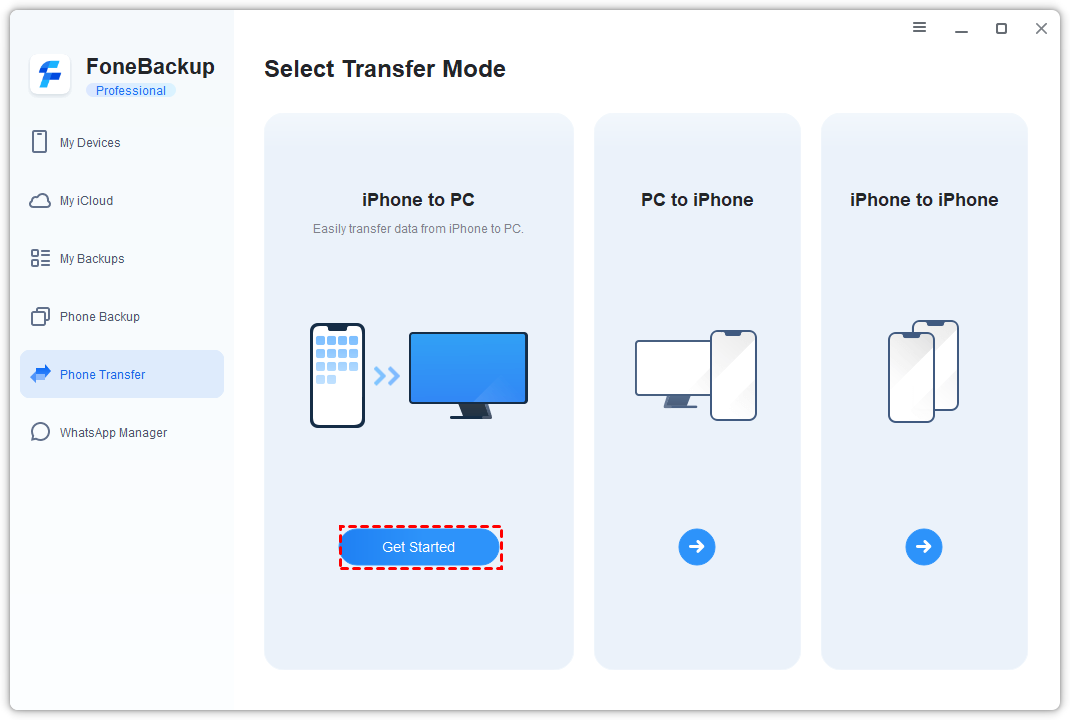
Step 1. Run FoneBackup > Connect your iPhone to the computer via a USB.
Step 2. Tap the Phone Transfer option > Then select the iPhone to PC > Click Get Started to begin.
Step 3. Click the “+” icon > Choose the pictures you want to transfer > Click OK to continue.
Step 4. Click the Start Transfer to transfer these pictures to the computer.
Step 5. Unplug your iPhone and plug in your iPad > Click Phone Transfer > and select the PC to iPhone option.
Step 6. Click Photos > Tap the add icon to choose the photos you exported before > Finally, click Start Transfer to import photos to the iPad.
Conclusion
The above methods give you guidance about using an iPad as iPhone camera monitor. You can pick the monitor app directly, also can mirror your iPhone screen to iPad at first, or transfer your iPhone camera files to iPad before monitoring.
In situations where internet access is unavailable, the final option that offers the highest level of security, we highly recommend is the one.
By the way, FoneBackup can not only assist you in transferring data between iPad and PC, but it also gives powerful iPhone backup and restore functions, download and find more!