Transfer Media (Photos/Videos) from iPhone to PC: 100% Useful
This complete guide gives you every method on how to transfer media from iPhone to PC. Learn step by step and you will easily move all your iPhone photos or videos to Windows PCs and laptops.
By Kathy / Updated on May 14, 2026
How do I transfer photos and videos from my iPhone?
Many times you may want to transfer photos, videos, etc. to your PC to keep it safe, clear your iPhone's storage, or share content with others. The job is not difficult, and now we will discuss 7 ways on how to transfer media from iPhone to PC effectively, you can choose one according to your preference.
Media files usually refer to photos, videos, PDF files, music, etc., which take up a lot of space in your iPhone, so it will take a long time to transfer to your PC. You don't need to worry, this article shows you various ways to transfer media from iPhone to PC with or without iTunes, and the fastest few minutes will help you complete the whole process.
Way 1. Quick transfer media files from iPhone to PC [Easiest]
FoneBackup is one of the most excellent iPhone data transfer software, which can help transfer photos, videos, music, and other different types of files from iPhone to PC quickly and safely, and it no longer takes a long time.
- Fast and secure transfers, no internet connection required.
- Transfer full-resolution images and others without compression.
- Preview before fully or selectively transferring data.
- Supports media files in all sizes and formats.
- Intuitive interface with simple steps.
Click the download button to get FoneBackup, and we will give you detailed instructions on how to transfer all or part of your media files from iPhone to PC without losing quality efficiently.
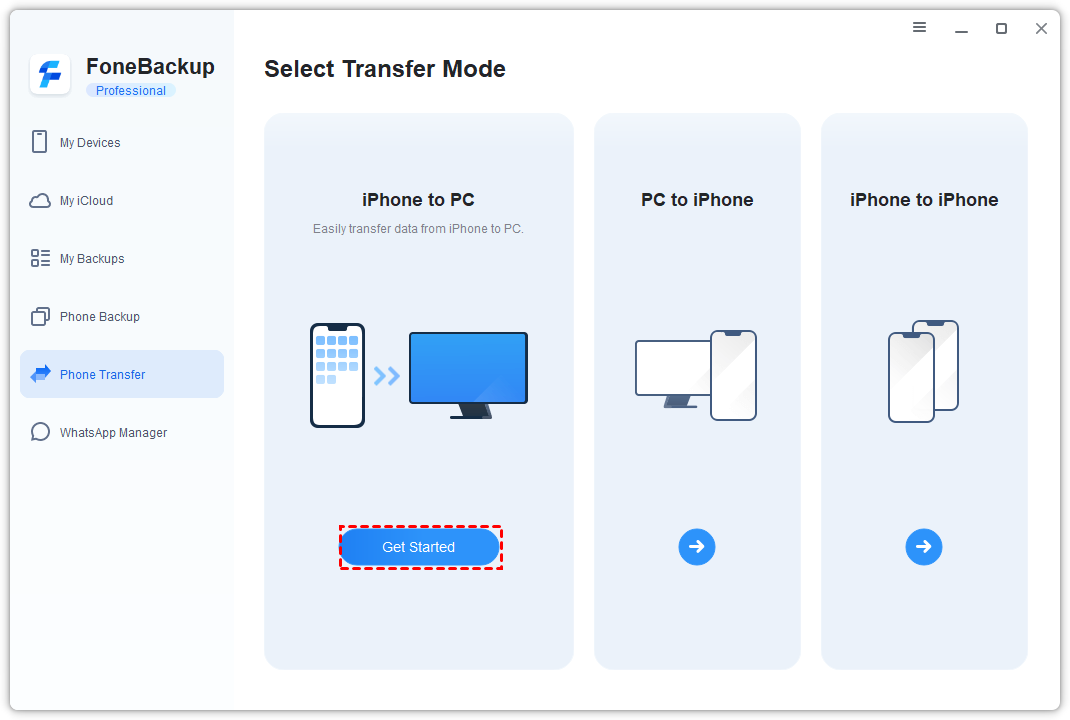
Step 1. Connect your iPhone to PC with a USB cable > Open FoneBackup and choose Phone Transfer > Click iPhone to PC and tap Get Started.
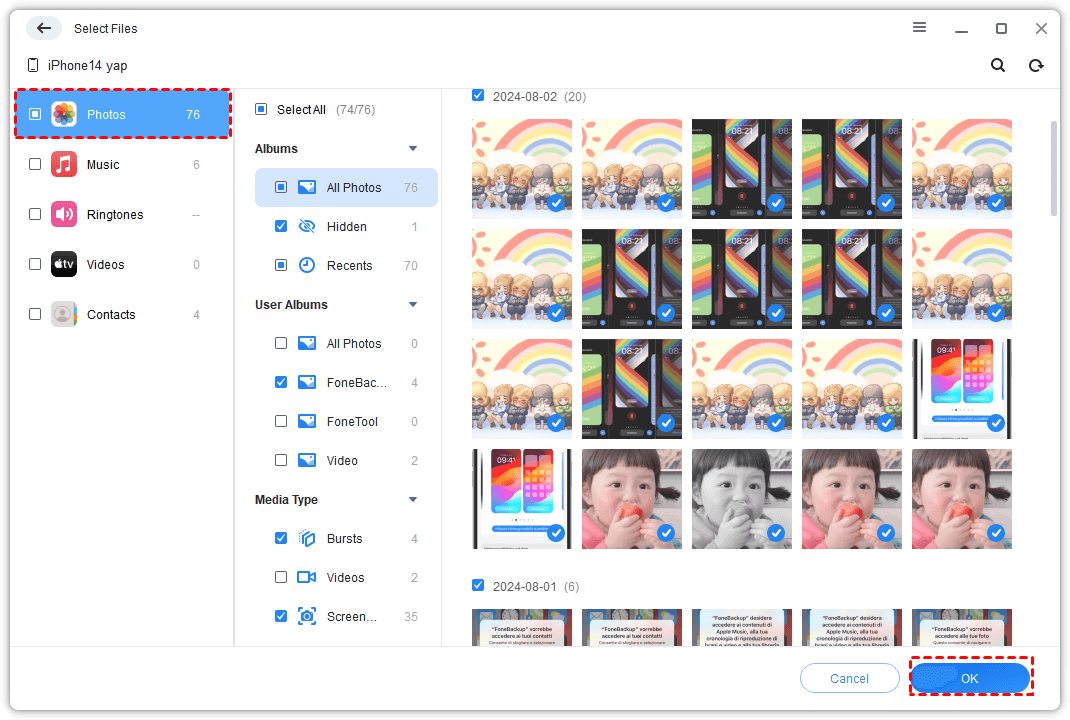
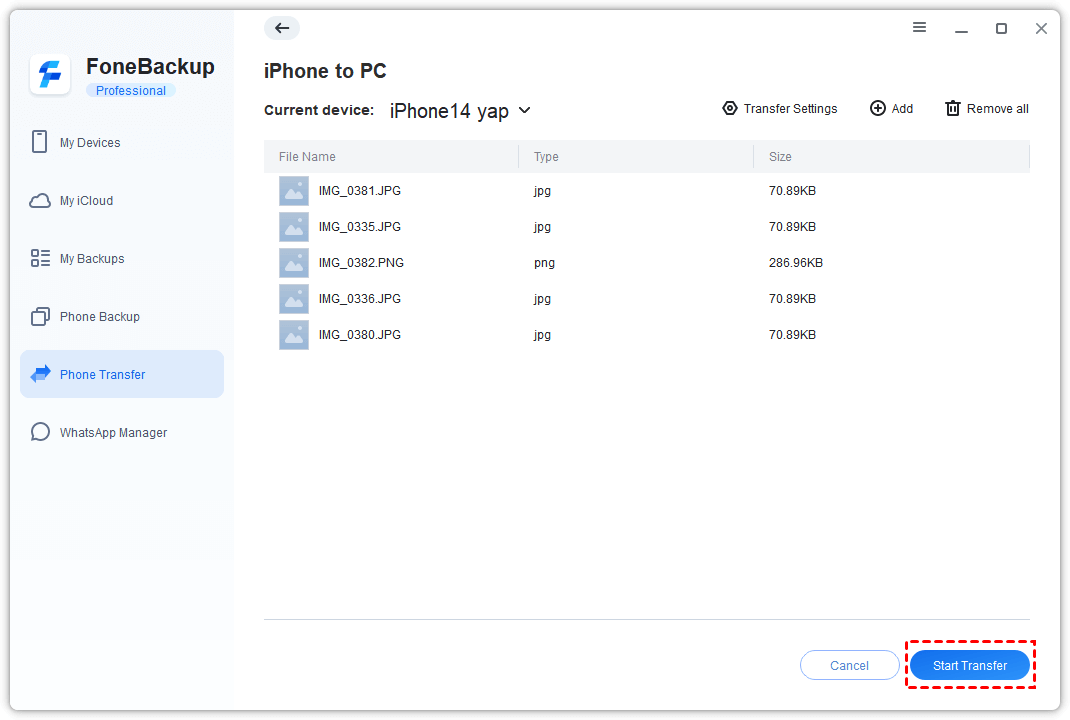
Step 2. Check each icon to preview and select the media files you’d like to transfer to the computer > Click OK to continue.
Step 3. Select a storage path and check other settings from Transfer Settings > Tap Start Transfer to begin the task.
Way 2. How to move media from iPhone to PC with Files Explorer
Windows File Explorer allows you easily access and transfer iPhone photos and videos on a PC via a USB cable. If you just want to transfer photos and videos, follow the steps of how to import media from iPhone to PC via File Explorer.
Step 1. Connect your iPhone to the PC using a USB cable.
Step 2. Once iPhone is recognized, Explorer should auto-launch. If your iPhone is not recognized in Windows Explorer, you can manually access it by tapping the Start Menu or finding it in the Taskbar.
Step 3. Navigate to This PC and you will find your iPhone listed as a Portable Device. Click on your iPhone to access its contents.
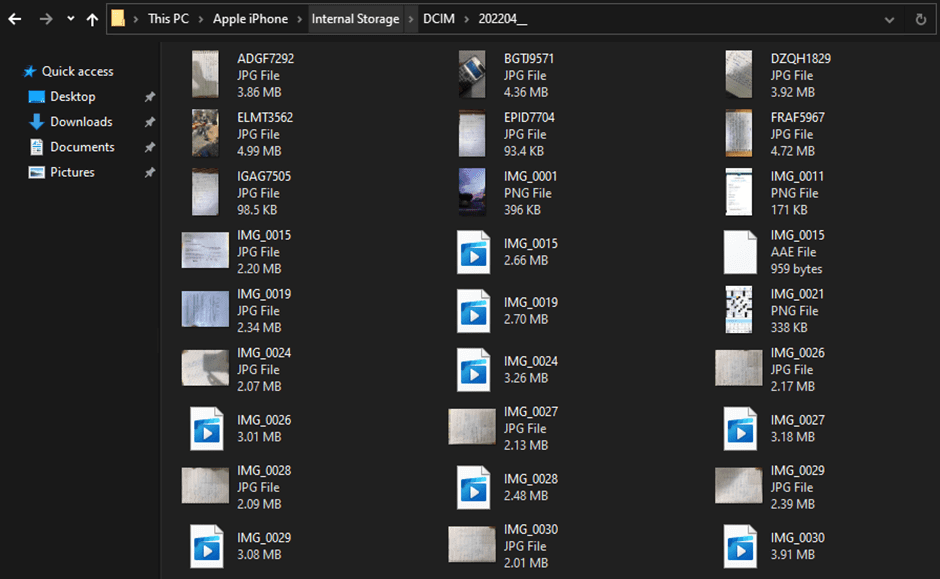
Step 4. Within the Portable Device, locate and enter the Internal Storage folder. Find where your media files store and choose the files you want to transfer.
Way 3. Download photos from iPhone to PC using iCloud wirelessly
iCloud is a cloud-based service provided by Apple, and you can also access your iCloud media files on Windows PC. But it is noted that iCloud offers 5 GB of storage space for free users to sync their data. So if you don’t need to transfer large photos/videos, iCloud is available for your data moving. Here’s how to download media from iPhone to PC:
Step 1. Enable the iCloud Photos option on your iPhone by going to Settings > Photos > iCloud Photos.
Step 2. Go to iCloud.com on your PC, and sign in with the same Apple ID, click iCloud Drive and download photos or other files to your PC.

Way 4. How to copy images and videos from iPhone to PC via iTunes
In addition to iCloud, you can also use iTunes to move files. And here we will take photos as an example to show you how to transfer media from iPhone to PC using iTunes:
Step 1. Download the latest version of iTunes on your PC and launch iTunes. Connect your iPhone to your PC using a USB cable.
Step 2. If prompted, unlock your iPhone using the screen passcode, and click Trust This Computer if needed. And click the device icon.
![]()
Step 3. Choose file sharing, in the list on the left, select the app on your device that you want to transfer a file from.
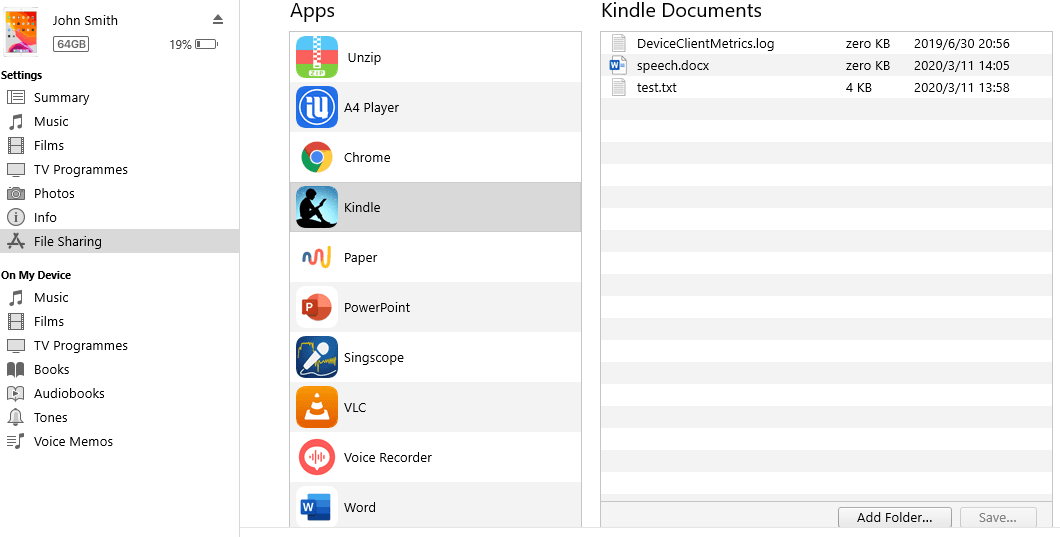
Step 4. Select the file you want to transfer in the list on the right, click Save to, select where you want to save the file, then tap Save To.
Then the media files will be saved in the location you specified on your computer.
Way 5. Transfer media from iPhone to Windows through OneDrive
OneDrive is Microsoft's official cloud storage service that can help you transfer media from iPhone to PC quickly. It provides users up to 10GB of free storage which lets you transfer a part of large files. Here’s how:
Step 1. Download OneDrive on both your iPhone and computer.
Step 2. Launch the OneDrive app on your iPhone and tap the blue plus icon.

Step 3. Tap Upload and then Photos and Videos. If it asks for permission to access more photos, grant them.
Step 4. Choose the photos and videos that you wish to upload and select Done in the top right. Then your media files will upload.
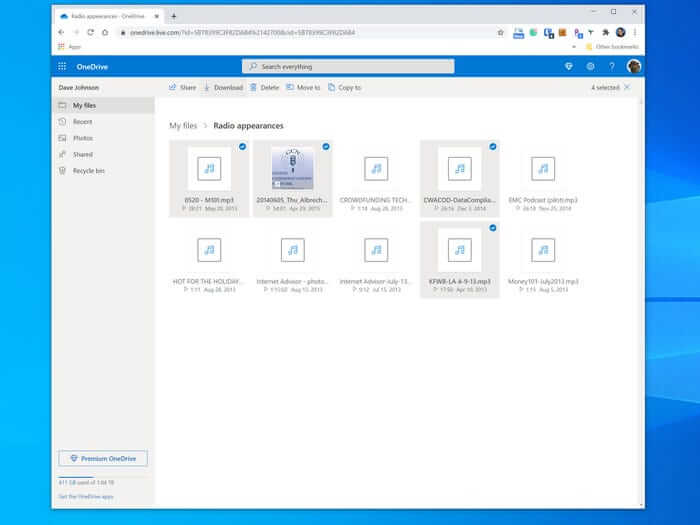
Step 5. Open the OneDrive app on your computer, choose the files to download and you can move photos and videos to your PC successfully.
Way 6. Send videos/photos from iPhone to Windows PC via Dropbox
Dropbox is a free cloud drive that provides users with up to 16GB of free storage. Because of its high compatibility, it is widely used by users to transfer photos from iPhone to PC. From the steps below, you can learn how to copy images and videos from iPhone to PC using Dropbox.
Step 1. On your iPhone download Dropbox in the App Store. Install and open it.
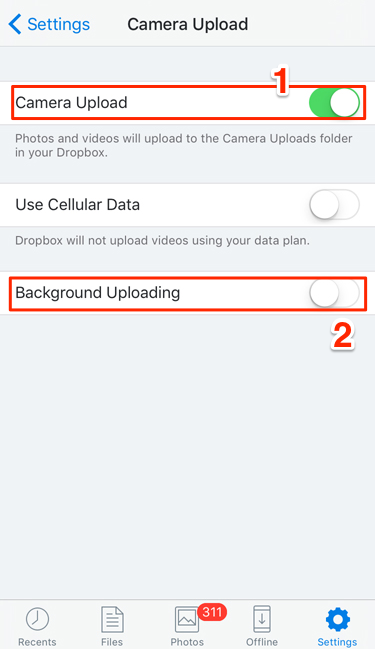
Step 2. Tap Settings > Camera Upload.
Step 3. Switch on Background Uploading to make sure that you don’t need to open Dropbox every time to store photos and videos.
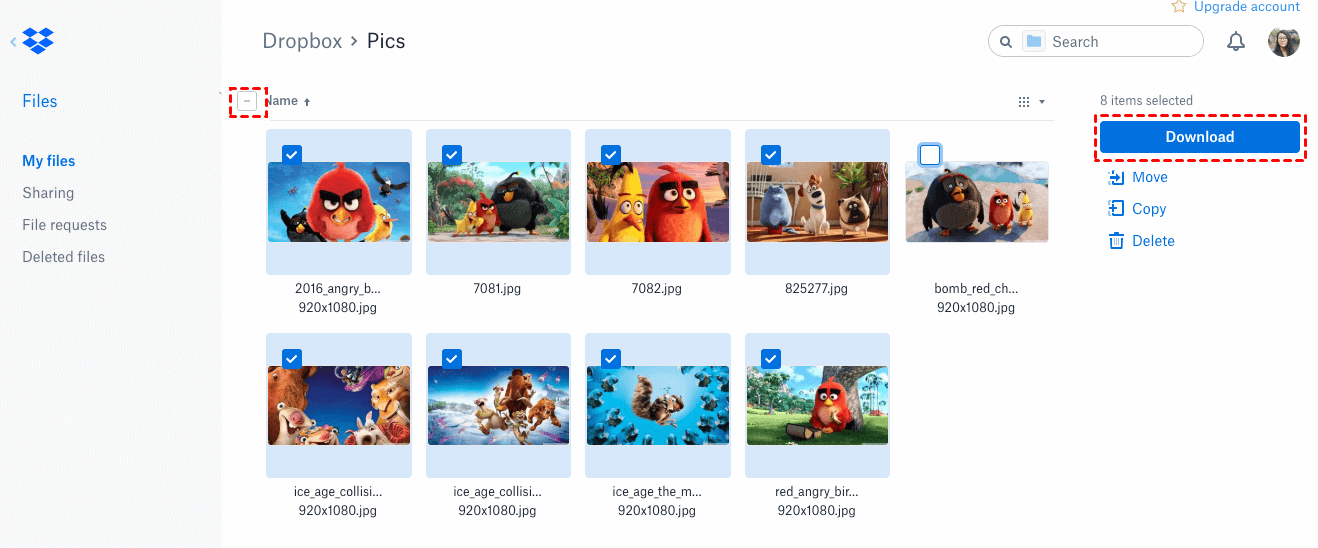
Step 4. When the uploading process is completed, you can launch Dropbox or go to Dropbox.com on your Windows PC to download them.
Way 7. How to extract files from iPhone to PC with Google Drive
Google Drive provides users with even more free storage space, offering a generous 15GB of storage. Besides, Google Drive is highly compatible with many services, providing convenience for iPhone users to play media files such as videos. Now you can follow the instructions to try how to import videos and photos from iPhone to PC.
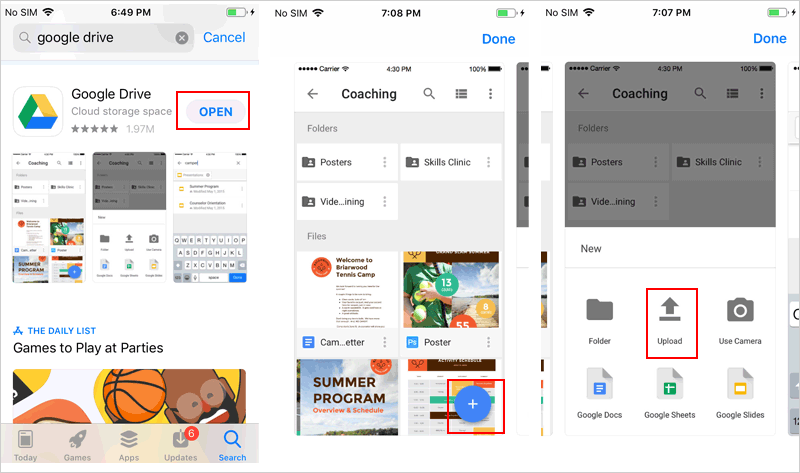
Step 1. Download Google Drive on your iPhone, then open the app and sign in.
Step 2. Choose the + icon > Tap Upload > Click Photos and Videos > Select the media files you want to upload to Google Drive.
Step 3. Then go to the Google Drive website on your Windows PC to download the files.
Faqs on transferring media from iPhone to computer
1. How do I transfer my iPhone media to my Mac?
If you are Mac user, you can transfer media files such as photos, videos, etc. from iPhone to Mac through iTunes mentioned above, and the steps are the same.
2. Why can't I transfer photos from iPhone to PC?
Usually, there are several reasons why you can't transfer photos from iPhone to PC: USB connection error, outdated or incompatible software, photos that are corrupted, no transfer permissions, software conflicts, etc. You can check your cables, update your software, and adjust your settings to fix the issue.
Conclusion
In the above content, we have shown 7 effective ways about how to transfer media from iPhone to PC, rest assured to learn and operate, all methods have been verified.
We recommend you to use FoneBackup, the best iPhone to PC transfer software that simplifies the whole process and allows you to easily transfer iPhone files (from music to photos and other documents) to PC. Don't miss out on this best option!