Transfer Photos from iPhone to iPad with or without iCloud
This guide will tell you 5 methods about how to transfer photos from iPhone to iPad. Whether you want to transfer photos from iPhone to iPad without iCloud or without computer, you will find the solution you need.
By Lena / Updated on May 14, 2026
With an advanced CMOS and focalizing system, iPhone can be one of the best phones to take photos. However, an iPad probably is a better device to edit, view, manage a large volume of photos, especially the iPad Pro 2022, which has an amazing M2 chip and great display.
![]()
In this guide, we will familiarize you with 5 ways to transfer photos from iPhone to iPad. So, what are you waiting for? Read on and learn how to get photos from iPhone to iPad without effort.
-
Part 1. How to Transfer Photos from iPhone to iPad with iCloud
-
Part 2. How to Transfer Photos from iPhone to iPad without iCloud
Part 1. How to Transfer Photos from iPhone to iPad with iCloud
If you want to transfer photos from iPhone to iPad automatically, iCloud is a good choice. This official cloud-based storage service can help you store data and make them accessible on all your devices.
However, this method also has disadvantages. For example:
● You need to use the same Apple ID on your iPhone and iPad. If you want to transfer photos to a friend's iPad, it's not that easy.
● iCloud only offers 5 GB of free storage space to store your data. If you have a lot of photos, you will run out of space very quickly.
Fortunately, iCloud is not the only way to transfer photos. If you want to transfer photos from iPhone to iPad with different Apple ID, Way 1 in Part 2 can be the best choice.
Way 1. How to Sync Photos from iPhone to iPad with iCloud Photos
iCloud Photos can help you sync all photos from iPhone to iPad.
● On iPhone: Go to Settings > Tap your account > Tap iCloud > Tap Photos > Turn on iCloud Photos (or iCloud Photo Library).
● On iPad: Do the same above to turn on iCloud Photos.
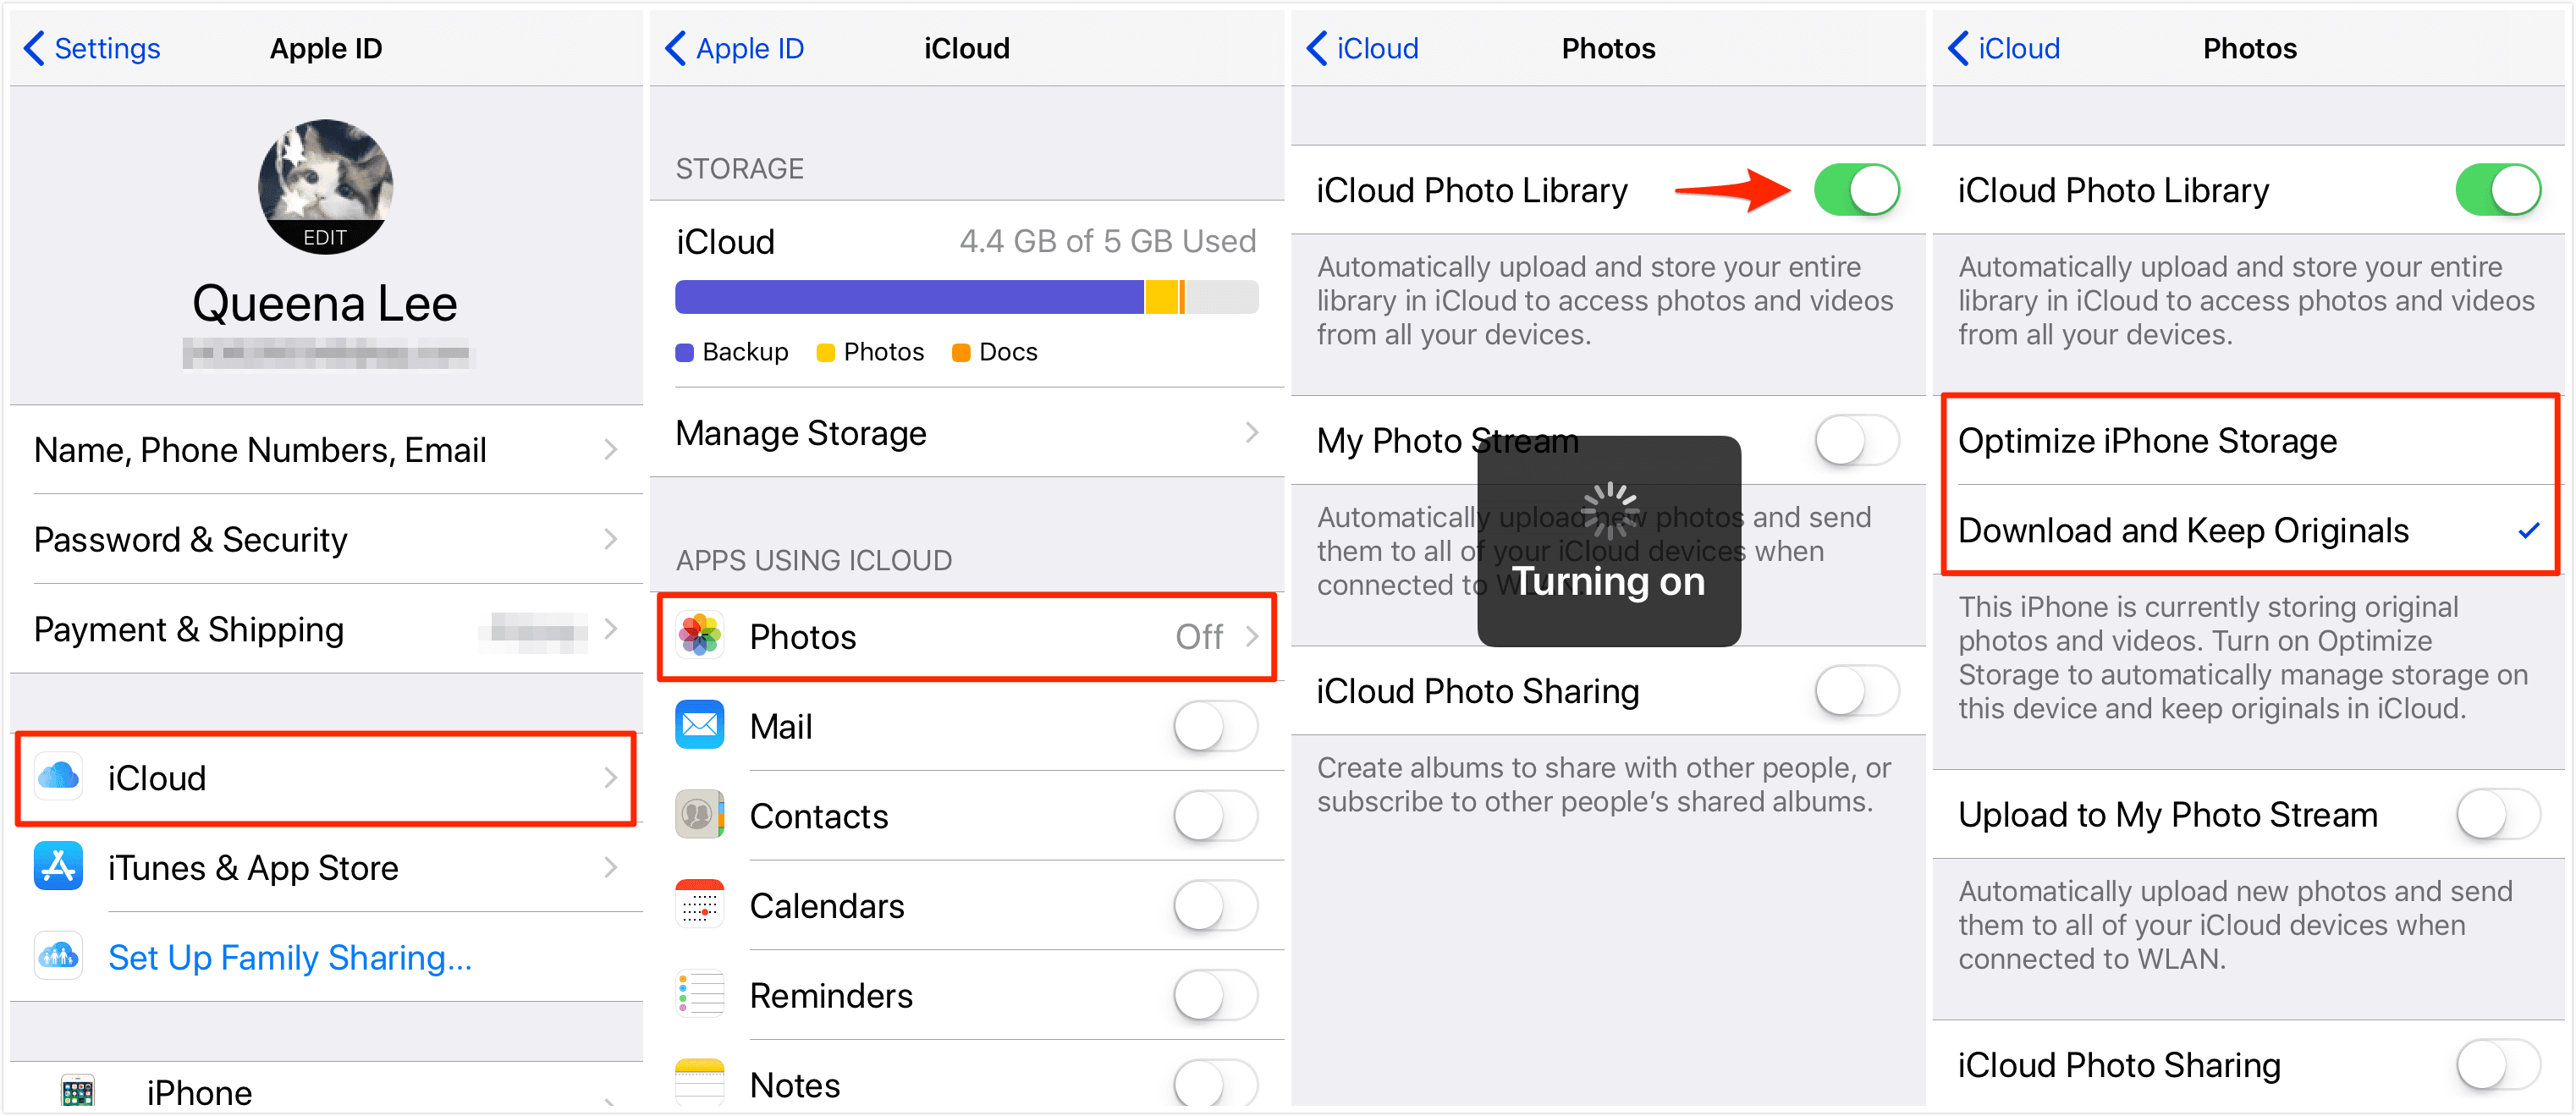
When your devices are connected to Wi-Fi network, iCloud will automatically start the sync.
Way 2. How Sync Photos from iPhone to iPad with iCloud Photo Stream
Photo Stream can help you sync photos in the most recent 30 days (up to 1000 photos. After that, they’re removed).
● Turn on Photo Stream on iPhone and iPad: Go to Settings > Tap your account > Tap iCloud > Tap Photos > Enable Upload to My Photo Stream.
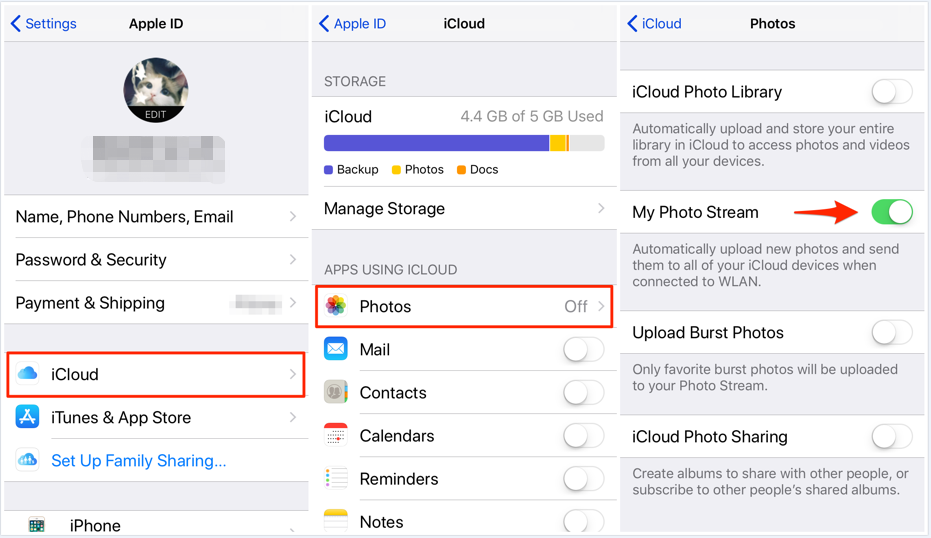
It will not count against your iCloud storage. When you leave the Camera app and connect to Wi-Fi, photos are automatically synced between iPhone and iPad.
Part 2. How to Transfer Photos from iPhone to iPad without iCloud
Here are 3 ways that can help you transfer photos from iPhone to iPad without iCloud. Way 1 and Way 2 can help you transfer photos using cable; Way 3 can help you transfer photos wirelessly.
Way 1. Transfer Photos from iPhone to iPad Like A Specialist
As an iPhone data transfer tool, FoneBackup can help you transfer files between two iOS devices (iPhone/iPad) or iPhone/iPad and PC with a USB cable in a very short time. If you have a large number of images to transfer, this tool can be the best choice.
You can let it help you transfer photos from iPhone to iPad with different Apple ID. What's more, it will not erase any existing photos on the target device.
FoneBackup Free Download
It is fully compatible with the latest iPhone 15/14/13/12/11/X/8/SE/7/6, iPad 2022, iPad 10/Air 6, and other models. It is always compatible with the latest iOS and iPadOS.
Click the download button and install FoneBackup on your PC.
Follow these steps and learn how to quickly transfer photos.
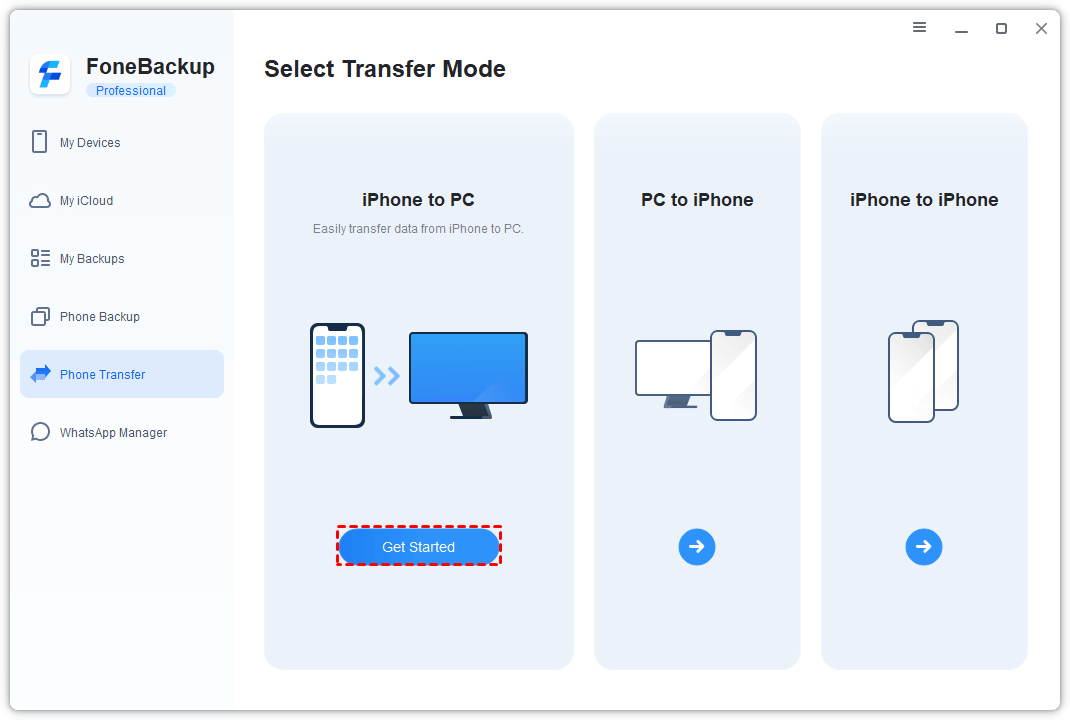
Step 1. Launch FoneBackup > Connect source iPhone with a USB cable.
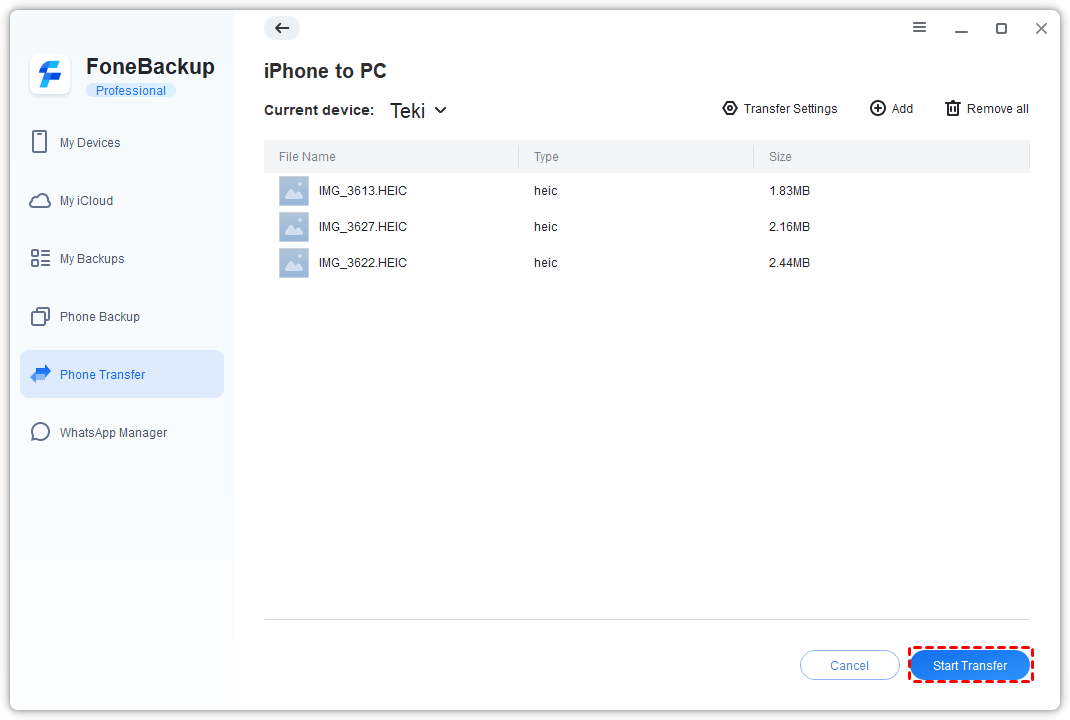
Step 2. Click Phone Transfer > Choose iPhone to PC and click Get Started.
Step 3. You can click the photo icon to choose which photos to be transferred.
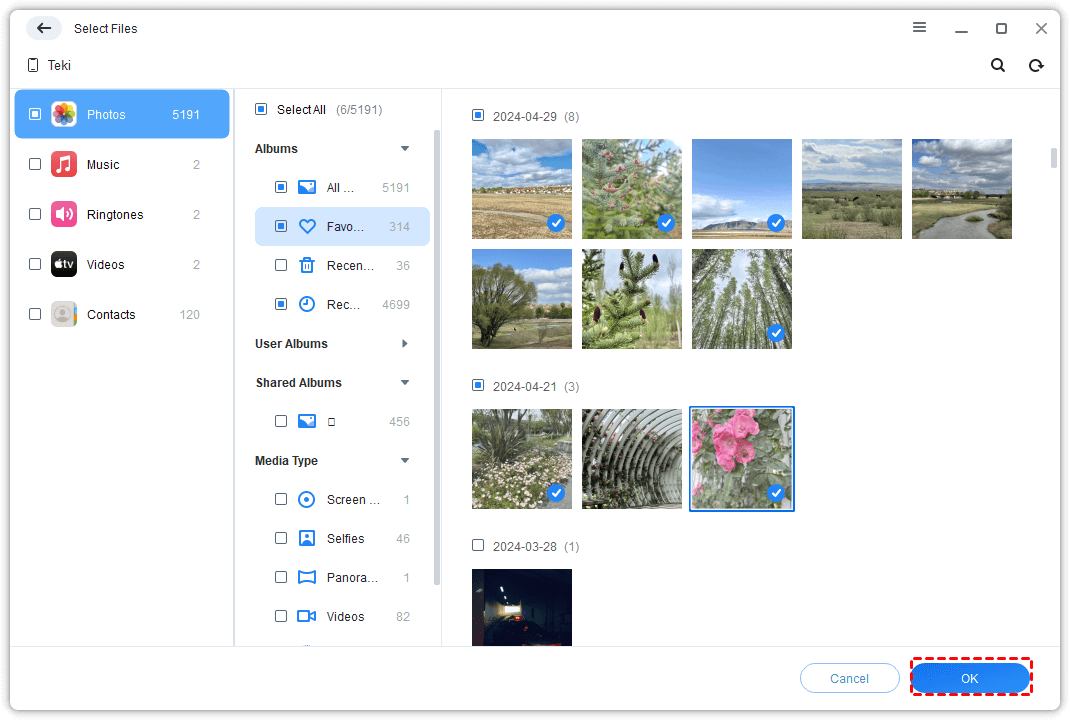
Step 4. Then you can select a storage path from Transfer Settings. Click the orange button Start Transfer to transfer photos to computer.
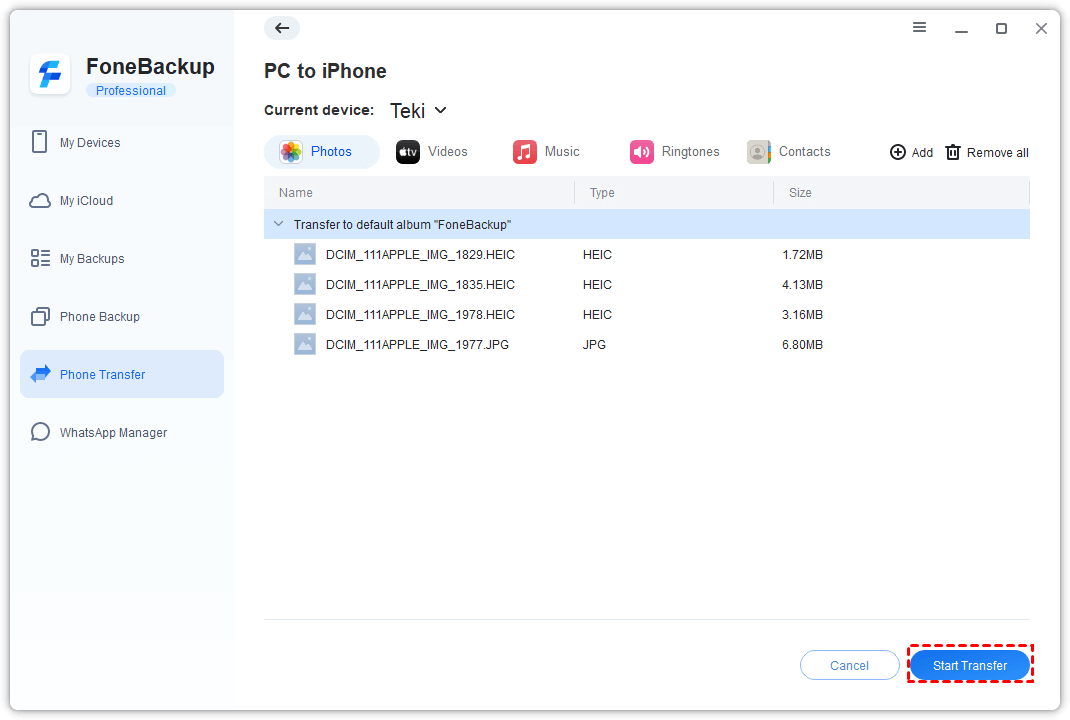
Step 5. Connect your iPad to the computer > Choose PC to iPhone option.
Step 6. Click the Plus icon to browse your computer and choose the photos > Click Start Transfer to add photos to iPad.
Way 2. How to Transfer Photos from iPhone to iPad Using iTunes
You could export the photos to your PC via Photos app and then use iTunes to sync these photos to your iPad. You could follow the steps here.
Notes:
-
1. The iCloud Photos, shared photos can’t be detected by Windows Photos, you can only transfer photos from Camera Roll, and when you sync photos via iTunes, you need to turn off iCloud Photos first.
-
2. Syncing photos via iTunes will overwrite your current photo library on your iPad and replace it with the files in the iTunes library.
Step 1. Connect your iPhone to computer and tap Trust when asked. Windows photos would automatically pop up. If not, you need to click Start button > Photos.
Step 2. Select the photos you want and click import. After it finishes, disconnect your iPhone.
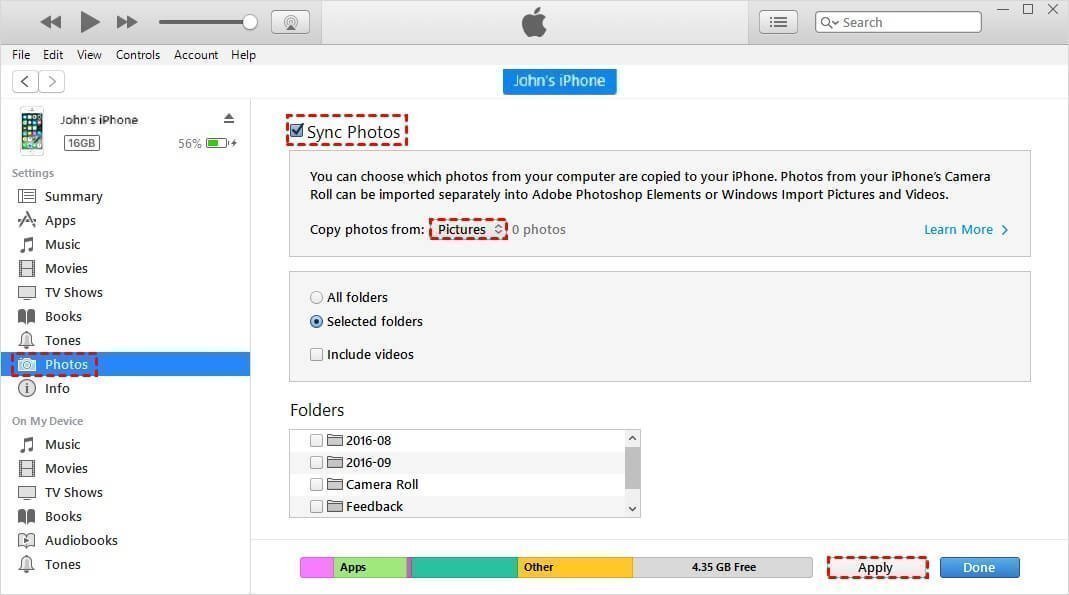
Step 3. Connect your iPad to computer and tap Trust. Click the phone-shape icon in iTunes and click Photos.
Step 4. Check Sync Photos option > Click Apply to sync photos to your iPad (the screenshot takes iPhone for an example).
Way 3. How to AirDrop Photos from iPhone to iPad
To make it easier for its users to move their content from one iOS device to another wirelessly, Apple introduced a dedicated AirDrop feature.
With it, you can share several files between Apple devices. All you have to do is enable the feature on both of the devices and then share photos from one device and those photos will be quickly available on the other device. You could also use AirDrop to transfer songs from iPhone to iPhone.
Steps to AirDrop Photos from iPhone to iPad:
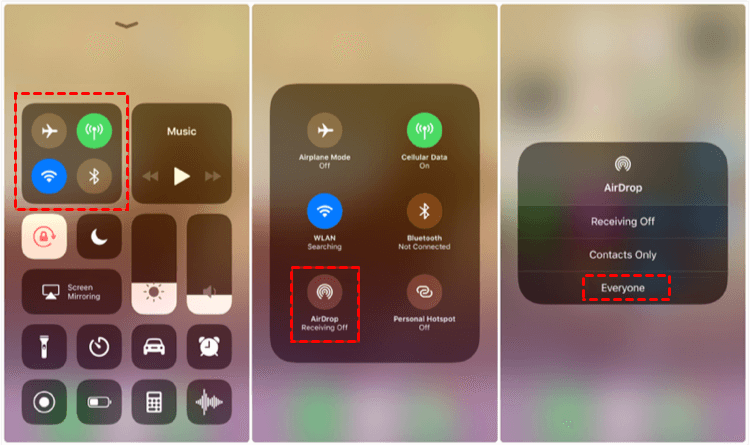
Step 1. Go to “Control Center” on both your iPhone and iPad.
Step 2. Turn on AirDrop on both the devices and turn on Wi-Fi (it doesn’t require a network) and Bluetooth.
Step 3. Choose Everyone on the menu.
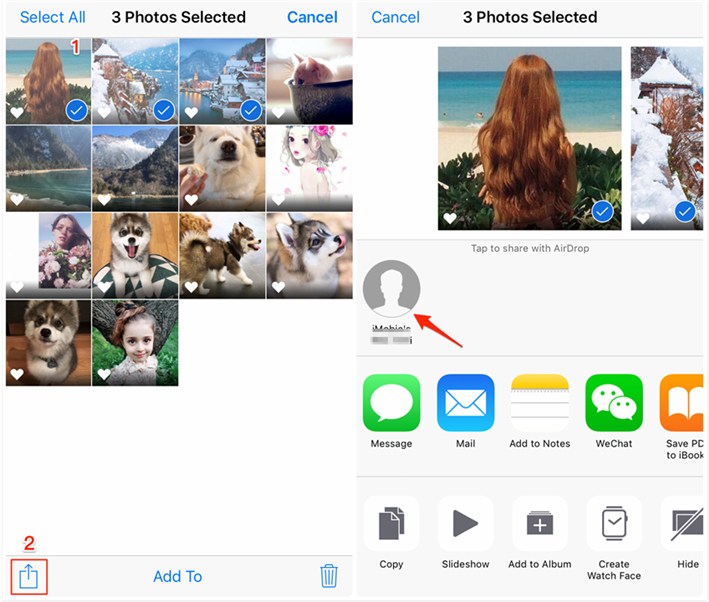
Step 4. Launch the Photos app on your iPhone. Then, click Select in the upper right corner and select the photos you want to transfer.
Step 5. Tap on the Share button and tap the name of your iPad.
Step 6. Click Accept on your iPad to confirm.
Step 7. After the photo-sharing is finished, the photos are saved on your iPad and you can view them as you like.
The disadvantage of this method is that it is not friendly for bulk transfers. So, if you want to copy multiple photos from PC to iPad using a quick and straightforward method, go back to Way 1 to do it.
Conclusion
That’s all about how to transfer photos from iPhone to iPad. You can use FoneBackup, AirDrop, iCloud, or iTunes to complete the task.
And no matter you want to transfer all photos or select ones, FoneBackup would be the best assistant. It is an iPhone to PC transfer software to help you save iPhone photos and transfer photos from iPhone to iPad without iCloud/iTunes/AirDrop.
Download FoneBackup! It can help you always put your lovely pictures in the right place and move photos among iPhone, iPad, and computer.