Transfer Photos from iPhone to Desktop in Windows 7/8/10/11
Want to know how to transfer photos from iPhone to desktop? This article shows you 4 ways to transfer photos from iPhone to desktop in Windows 11, 10, 8, 7.
By Lena / Updated on September 5, 2024
Why Do You Need to Transfer Photos from iPhone to Desktop?
Many people want to transfer photos from iPhone to desktop mainly for the following three reasons.
-
1. Solve the issue of insufficient storage space
iPhone can take beautiful pictures. Owning an iPhone, everyone enjoys its excellent image quality. However, as the Photo Collections grows day by day, you are consuming the free space on iPhone, which might force your iPhone to function weirdly.
Did the 4k photos and HD videos on your iPhone occupy a good chunk of storage space, thereby making it hard to leave enough storage space for other important files, apps, and data?
For that matter, it is important to transfer photos from iPhone to Windows desktop.
-
2. Make a backup of your photos
iPhone users tend to keep a backup of their precious photos for further use.
If you want to have a long-term sorting plan for your shoots and want to securely save your iPhone photos in a backup, you need to transfer photos from iPhone to PC desktop.
-
3. View photos on a larger screen
You've been taking some beautiful photos with your iPhone or iPad, and you want to be able to see them on your computer, or maybe there's some postprocessing you want to make in desktop before sharing these photos with your friends.
At this time, you may need to transfer photos from iPhone to Windows desktop.
How to Transfer Photos from iPhone to Desktop in Windows 11, 10, 8, 7
When choosing a method, you might think of using iTunes or iCloud. But neither of these methods is good. iTunes only allows you to backup the whole iPhone content, while iCloud only provides 5 GB of free storage space.
Fortunately, there are other 4 ways that can help you transfer photos from iPhone to Windows desktop.
-
Way 1. The Easiest Way to Transfer Photos from iPhone to Desktop
-
Way 2. Transfer Photos from iPhone to Desktop via File Explorer
-
Way 3. Transfer Photos from iPhone to Desktop via Photos App
Way 1. The Easiest Way to Transfer Photos from iPhone to Windows Desktop
FoneBackup is a preferred alternative to iTunes in transferring files like photos, videos, music, movies, contacts from iPhone to PC desktop.
● It allows you to select specific photos instead of transferring all photos each time.
● It can transfer photos from different albums, such as Cameral Roll, Photo Library, Photo Share, etc.
● It has a clear interface and user-friendly design, so, you can figure it out quickly even for the first time.
Anyway, FoneBackup won't let you down! Just follow these simple steps to transfer photos from iPhone to desktop computer.
Free download FoneBackup and launch it. Connect your iPhone to your PC with a USB cable.
Best iPhone to PC Transfer Software | FoneBackup
Fully compatible with most all types of iPhone, iPad, or iPod touch and latest iOS 16 (also compatible with older iOS versions) and Win 11/10/8.1/8/7. Always keep your data safe.
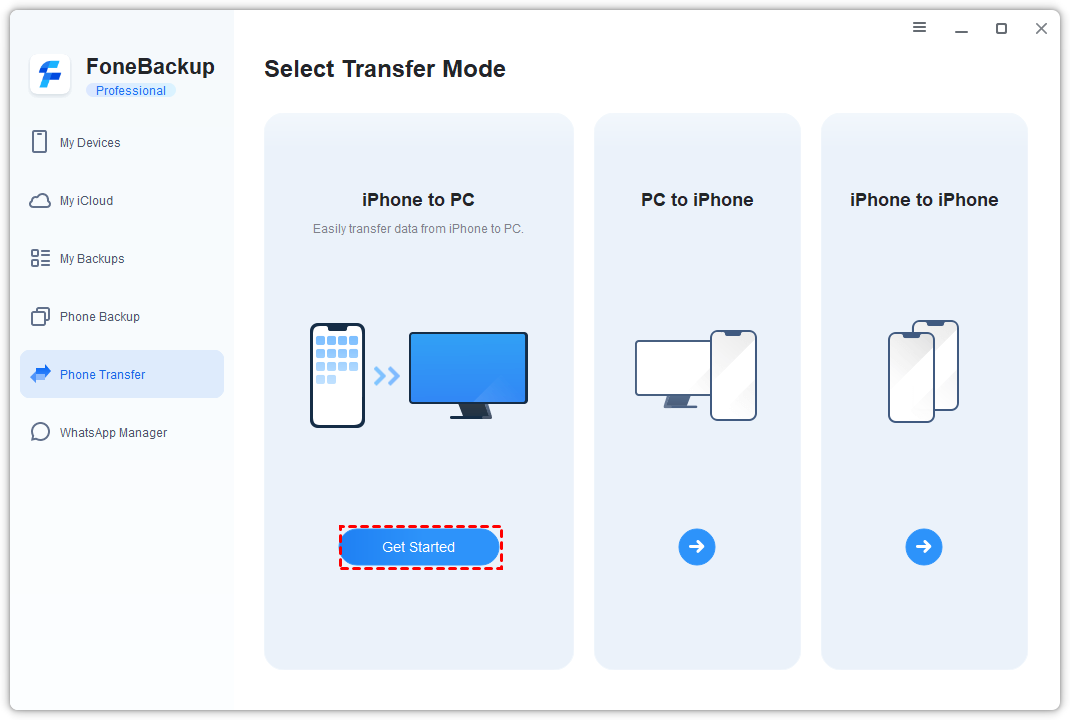
Step 1. On the home screen, click Phone Transfer option. Go to iPhone to PC and click Start Transfer.
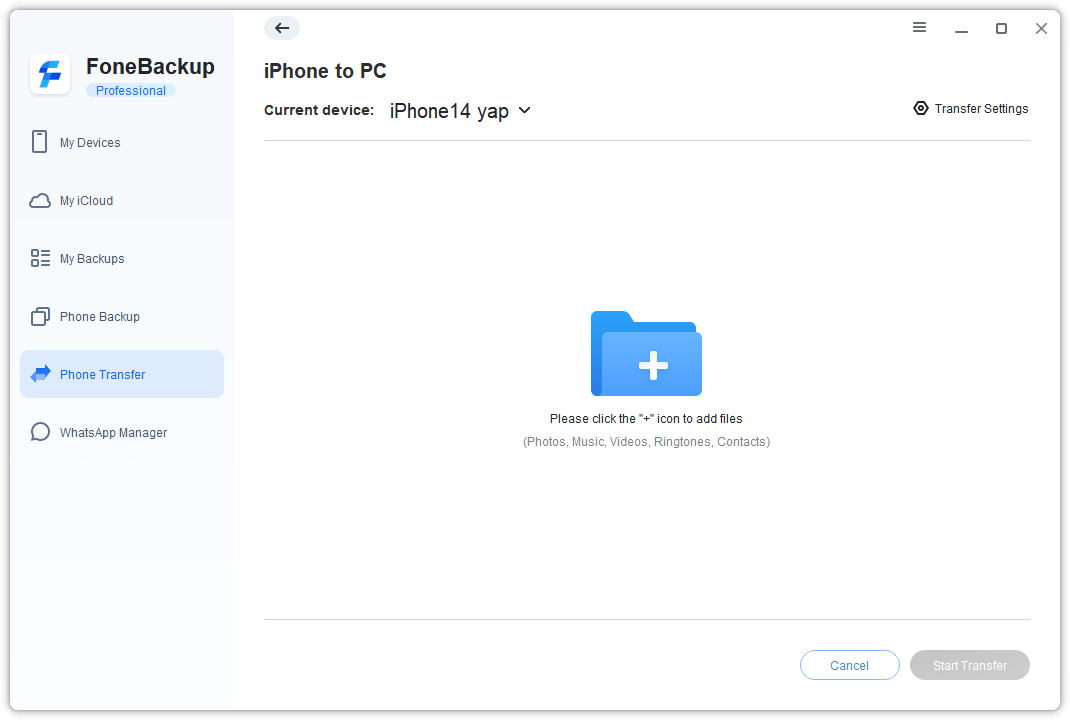
Step 2. Click the "+" icon.
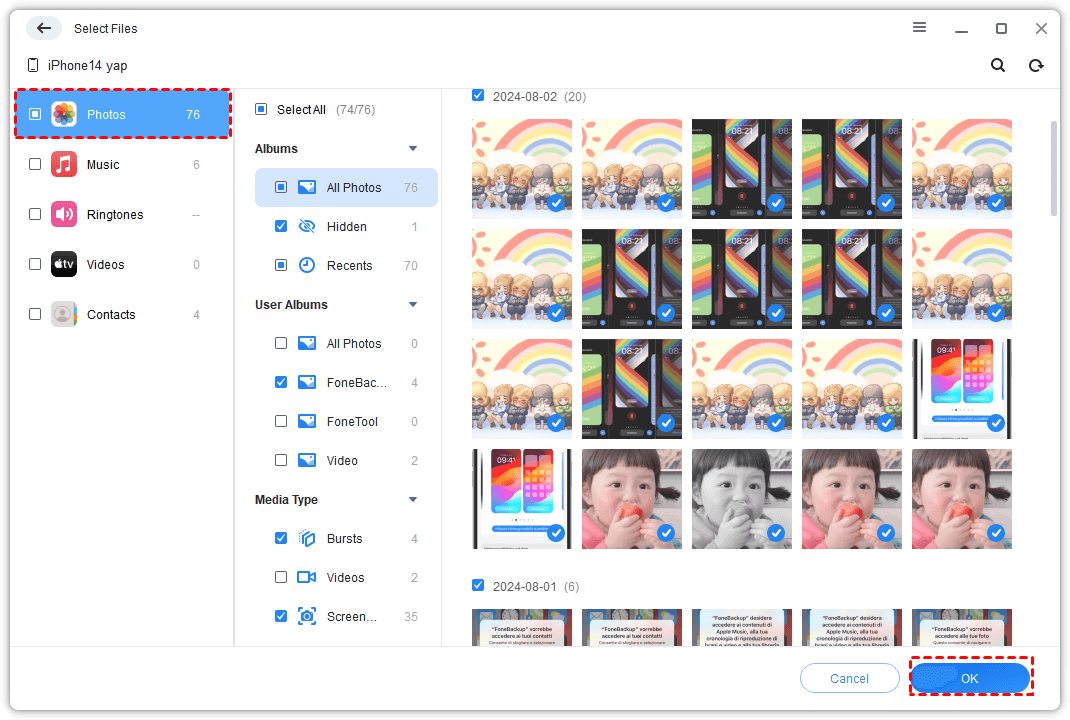
Step 3. Select the photos and click OK.
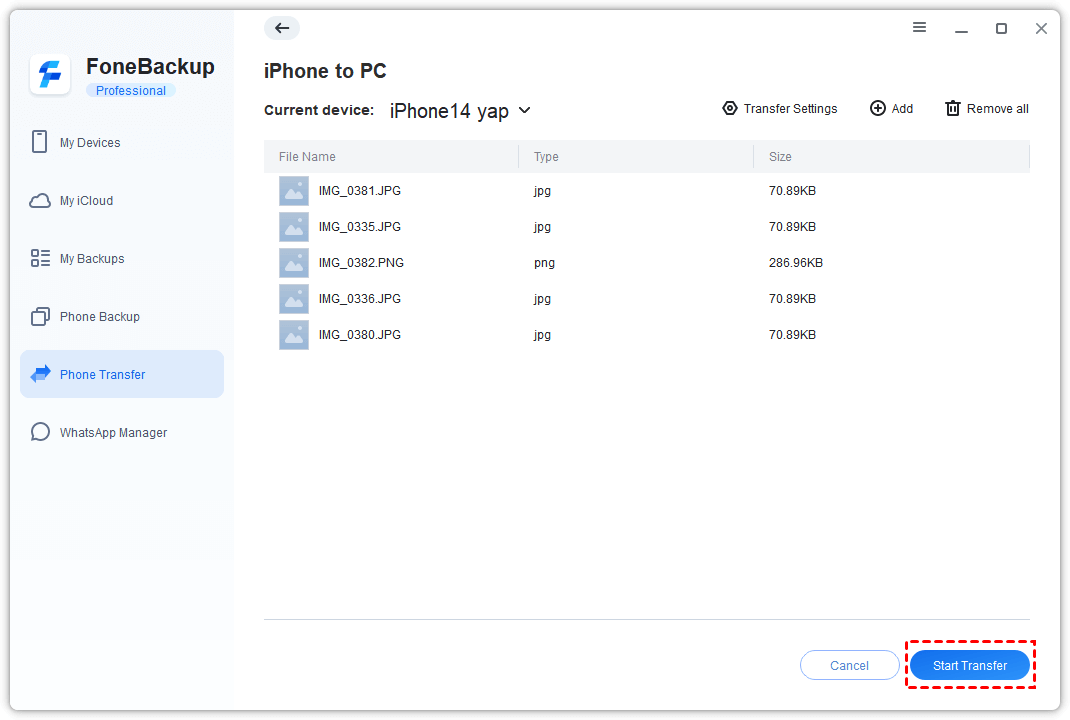
Step 4. Click Start Transfer > Choose a storage path to save the pictures and click Transfer to start the transfer process.
This method is very easy and fast, no need to download and install iTunes. It can save you a lot of time and energy. This is the best choice among all the methods, highly recommended.
Way 2. Transfer Photos from iPhone to Windows Desktop via File Explorer (Windows 11/10/8/7)
Windows takes iPhone as a digital camera or storage device, so you can use Windows Explorer to manually copy photos to your computer desktop just like you do that from a memory card or other disk. In this way, iPhone photos can be smoothly transferred to desktop.
★File Explorer is a built-in function of Windows PC with which you can view and manage files in your devices and drives. As for this function, Windows 10 has the performance more outstanding than Windows 8 and Windows 7.
Using File Explorer to transfer photos from iPhone or iPad to desktop won't take long if you follow the steps below.
※Prepare:
► Before you start, be sure that you have installed iTunes for your PC to recognize the iPhone in File Explorer. Installing iTunes allows the Windows PC to easily communicate with iPhone or iPad even if you don't use iTunes here to transfer any photos.
► Besides installing iTunes, you just need a USB cable to transfer the photos from iPhone to desktop in this way.
► This way only transfers Camera Roll photos, if the photos you want to transfer to desktop are stored in other folders, you can refer to Way 1 to get the solution.
Step 1. Connect your iPhone to your Windows PC using a suitable USB cable.
Check your iPhone screen now and a notification of “Trust” option will appear. Choose “Trust” option to continue.
Step 2. Open Windows File Explorer from your desktop.
Go to Start menu > Windows System > File Explorer, or seach it in taskbar. You can also use “Windows + E” on your keyboard to enter File Explorer.
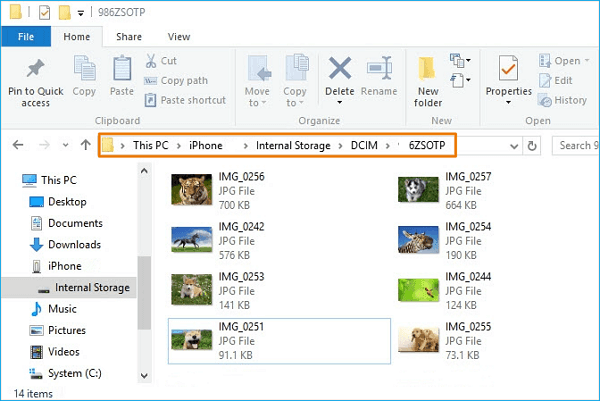
Step 3. Under Portable Devices section of “This PC”, you should see your iPhone as a drive. Double-click the icon for your iPhone. Then open “Internal Storage” > “DCIM” to access photos.
Step 4. Photos saved on your iPhone should now be visible. You can select the photos you want to transfer to Windows desktop. Then copy them > Paste them to your computer desktop (or use the toolbar Copy/Copy to).
✎Note:
-
You can hold the Ctrl key on your keyboard and click to select multiple photos. You can also use the “Ctrl + A” shortcut on your keyboard to select all photos at once.
-
Make sure not to unplug your iPhone during the process.
Way 3. Transfer Photos from iPhone to Desktop in Windows 11, 10, 8
For Windows 10 desktop, you can use the built-in Photos app to transfer Camera Roll photos. If you find that iPhone not importing photos with Microsoft Photos, you could still use Way 1 or Way 2 to transfer photos.
Follow the steps to transfer photos from iPhone to Windows 10 desktop with Photos app as below.
Step 1. Plug your iPhone into your PC with a suitable USB cable.
Step 2. Launch the Photos app from the Start menu, desktop, or taskbar.
Step 3. Click Import button. It is in the top-right corner of the window. Choose “From a USB Device”, which will allow you to import photos from your iPhone to your PC desktop.

Step 4. Click any photos you'd like to not transfer (Or select the pictures you want to import to Windows 10 desktop); all new photos will be selected for transfer by default.
5. Click Continue. The next pop-up will show you where the photos will be saved and give you the option to change the location. Here, you can select the desktop path.
6. Click Import. The Photos app will begin the import process.
※Note: Make sure not to unplug your iPhone or iPad during the process!
The way to transfer photos from an iPhone to Windows 10 desktop with the Photos app may be very easy. This also allows you to easily transfer bulk of photos from iPhone to desktop without effort.
Way 4. Transfer Photos from iPhone to Windows Desktop via Snapdrop
The above three methods all require USB connection. Here comes the way that can help you transfer photos from iPhone to Windows desktop wirelessly.
Although Windows desktop does not support AirDrop, there are many AirDrop-like apps that can help you transfer photos and more from iPhone to PC wirelessly. Snapdrop, Xender, SHAREit are the most recommended ones.
Here we take Snapdrop as an example to show you how to transfer photos from iPhone to Windows desktop.
1. Visit Snapdrop website (https://snapdrop.net/) on iPhone and computer.

2. Tap the icon on your iPhone screen and it will give you three choices: Take Photo or Video, Photo Library, Browse.
3. Click one option to select the photos you need.
4. When the transfer is completed, click the Download button to save photos on computer.
Conclusion
From this article, you’ve known how to transfer photos from iPhone to desktop in Windows 11, 10, 8, 7.
You can use FoneBackup, Windows 10 Photos app, File Explorer to transfer photos from iPhone to desktop via USB connection. Besides, you can use Snapdrop to "AirDrop" photos to desktop.
If you think this article is helpful, please share it with your friends and help them solve the same problem.