


Hyper-V How to Export VM to Network Share
If you want to copy a Hyper-V VM to another host, you may consider export and import features. In this article, I will introduce 3 ways of Hyper-V how to export VMs to network share easily.
By Crystal / Updated on December 23, 2024
Can you export Hyper-V VM to network share?
Exporting a virtual machine to OVF/OVA is one of virtual machine backup measures. By exporting a Hyper-V VM, you can create a copy of its VHD files, VM configuration files, and snapshots. You may want to store the exported files to a network share, to restore entire VM on another machine, or just keep the backup files more secure.
This article will offer 3 methods to export Hyper-V VM to network share.
- Using Hyper-V Manager: The built-in GUI tool helps you export VM one-by-one to selected network shares.
- Using PowerShell: The “Export-VM” cmdlet is used for bulk exports or scripted automation
- Using third-party tool: AOMEI Cyber Backup simplifies the Hyper-V import and export process with more additional options.
✏Note: Before Windows Server 2012, you cannot directly export VM to network share. You will get an error 0x80070005 when you export Hyper-V VMs over the network.

Way 1. Easily export multiple VMs to network share (free tool)
AOMEI Cyber Backup is designed for Hyper VM backup and recovery. It is able to export multiple Hyper-V virtual machines at once, and allows users to import Hyper-V virtual machines from backup easily. In addition, it has the following benefits.
Ease of use: With its intuitive, it's easy to backup and restore Hyper-V/VMware VMs whether you are an IT professional or amateur.
Scheduling backup: Automating Hyper-V exported process and ensures your VMs are protected without manual intervention.
Network share support: Directly backing up Hyper-V VMs to network shares, simplifying the export process.
Scalability: Continuously scaling of your virtual environment with its flexibility.
Centralized management: Backing up and monitoring Hyper-V VM backup and recovery from a centralized console.
AOMEI Cyber Backup supports Hyper-V in Windows 8/8.1/10/11, Windows Server/Microsoft Hyper-V Server 2012 R2 and later versions. Click the following button to download the freeware.
*You can choose to install this VM backup software on either Windows or Linux system.
3 easy steps to export multiple Hyper-V VMs to network share for free
1. Bind Devices: Access AOMEI Cyber Backup web client, navigate to Source Device > Hyper-V > + Add Hyper-V to add a host, and then click … > Bind Device.
Note: Once bound the host, you do not need to repeat this step later.

2. Create Backup Task: Navigate to Backup Task > + Create New Task, and then choose Hyper-V Backup.
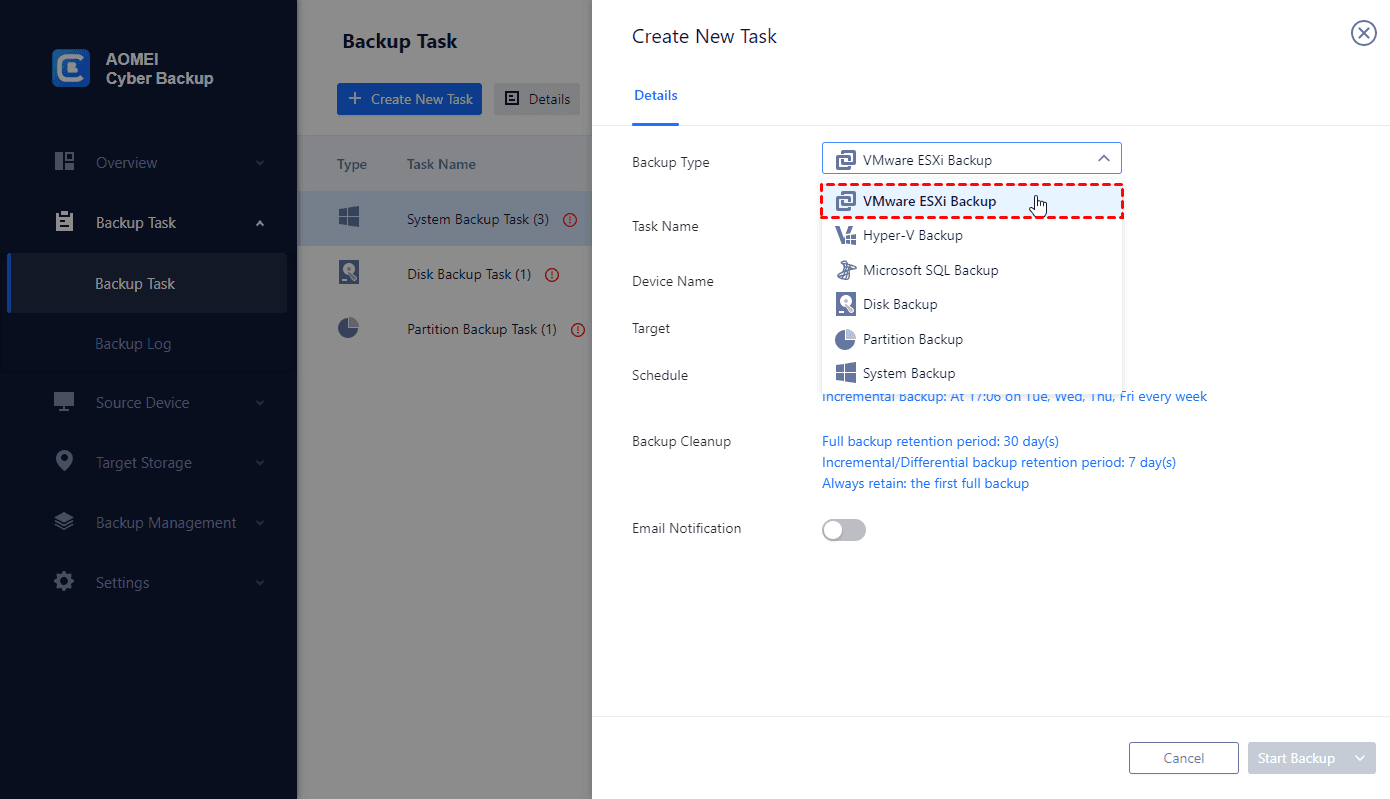
Configure the Task Name, Backup Type, Device, Target, Archive and Schedule.
- Device: Cover multiple VMs on the host in one backup task.
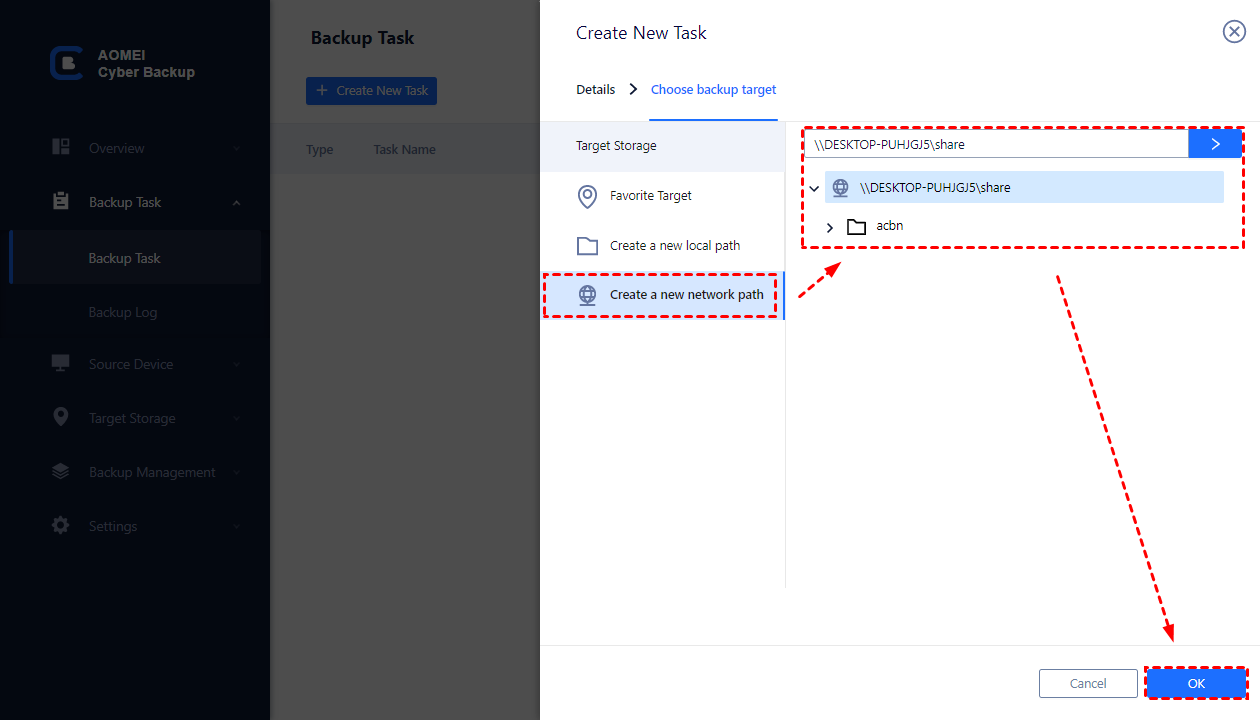
- Target: Selecting to back up to a network share. Used paths will be saved in Favorite Storage for handy selection.
- Archive: Add an Amazon S3 storage, and archive backup versions to it.
- Schedule: Perform full, differential or incremental backup, and automate execution daily, weekly or monthly according to the frequency you specified.
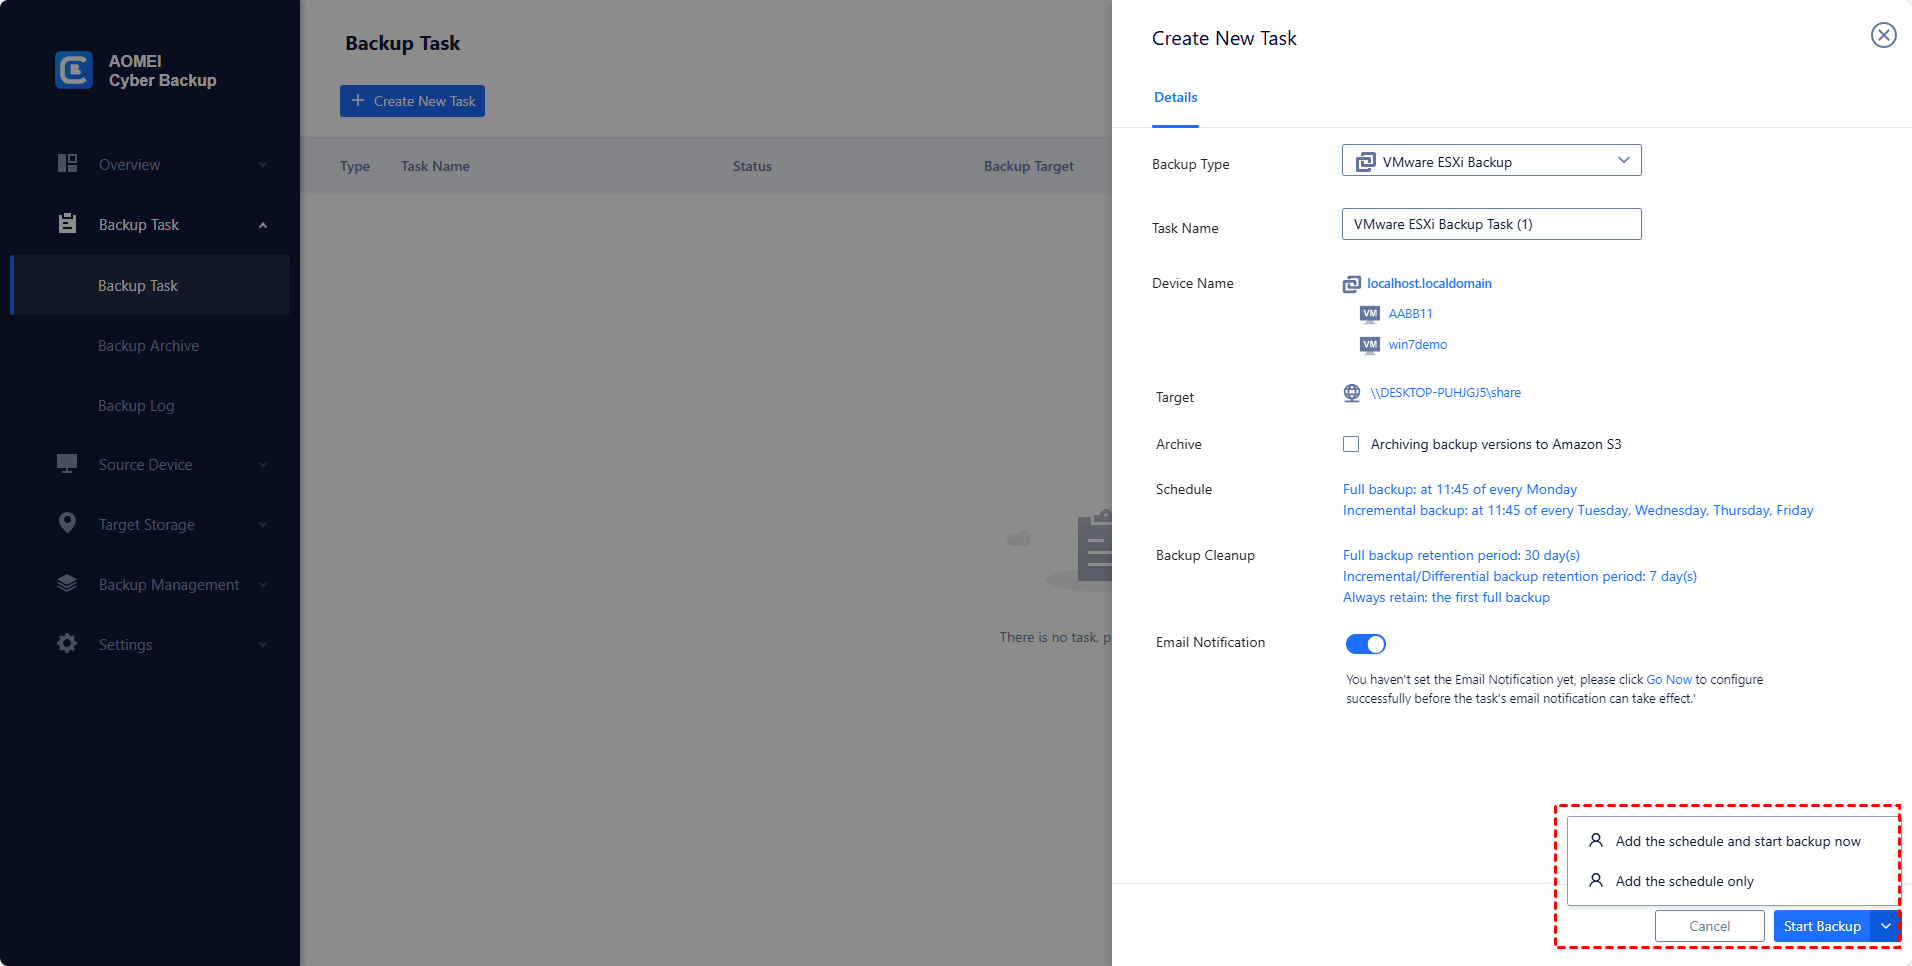
3. Start Backup: You can select to Add the schedule and start backup now, or Add the schedule only.
Created backup tasks will be listed and monitored separately, for restoring, progress checking and schedule changing.
While the Free Edition covers most of VM backup needs, you can also upgrade to Premium Edition to enjoy:
▶ Batch VM backup: Batch backup large numbers of VMs managed by vCenter Server or on standalone ESXi hosts.
▶ Backup cleanup: Configure a retention policy to auto delete old backup files and save storage space.
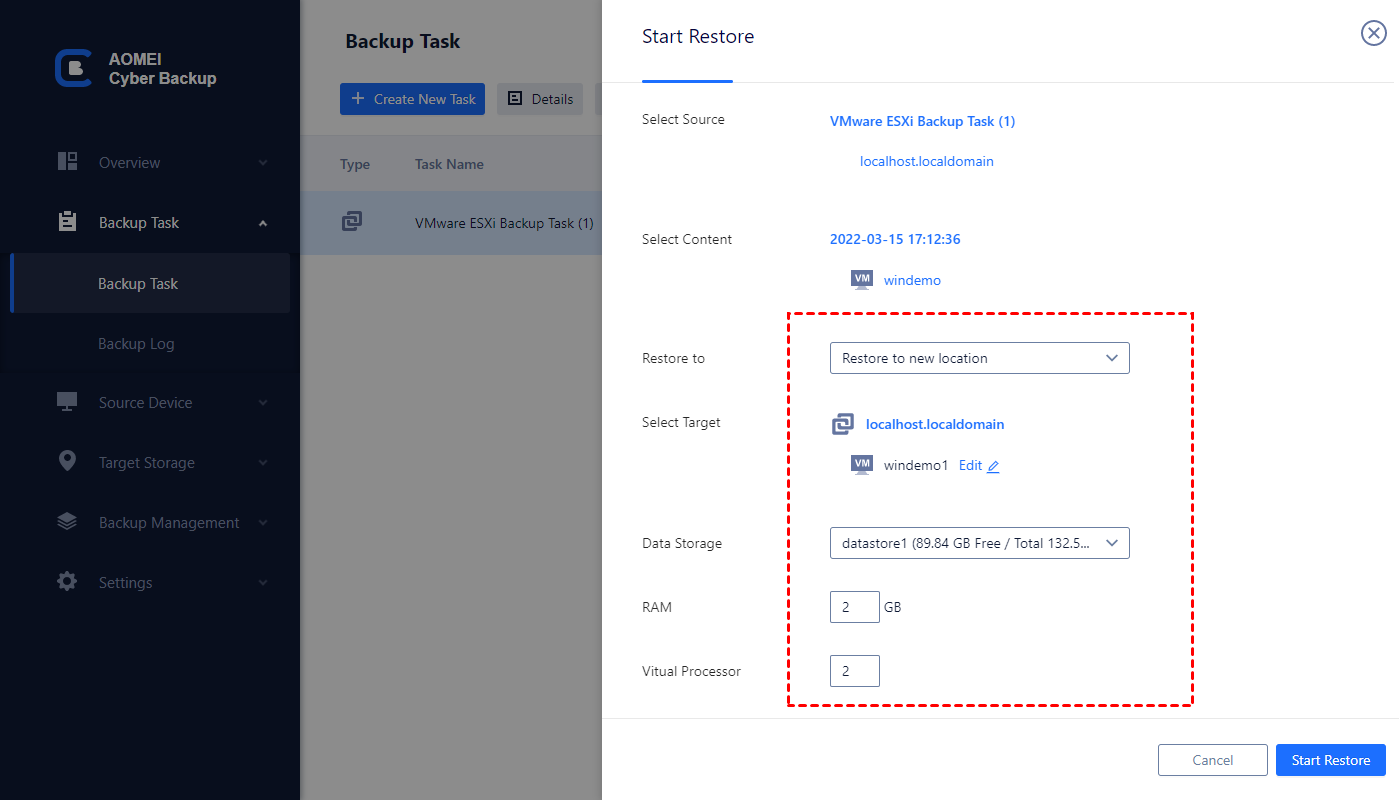
▶ Restore to new location: Create a new VM in the same or another datastore/host directly from the backup, saves the trouble of re-configuring the new VM.
Way 2. Export VM to network share via native feature
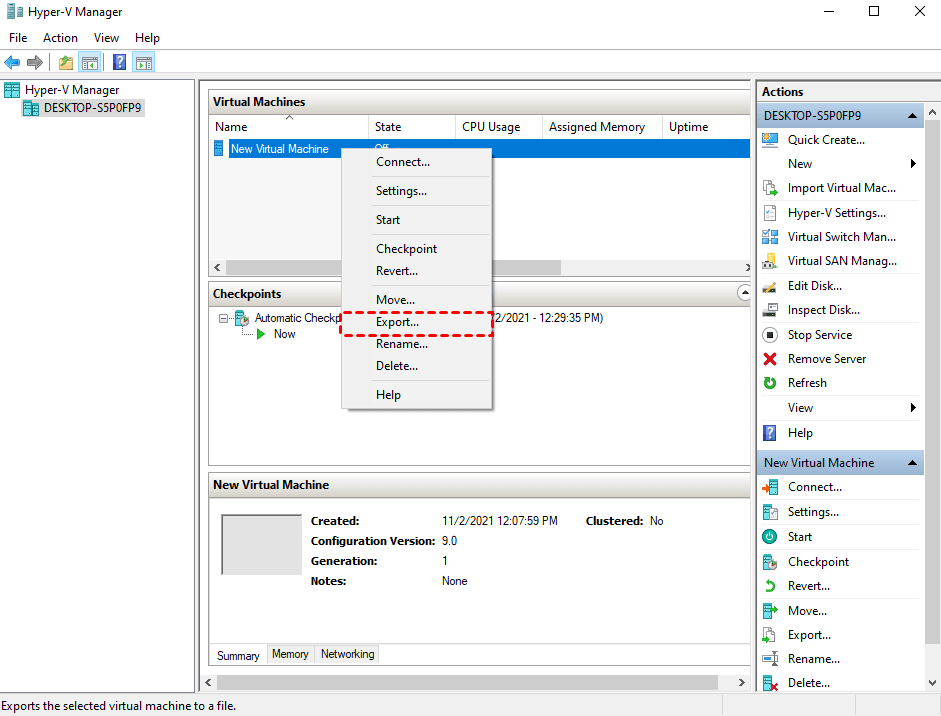
1. Launch Hyper-V Manager. Right-click on the name of the target VM, and select Export…
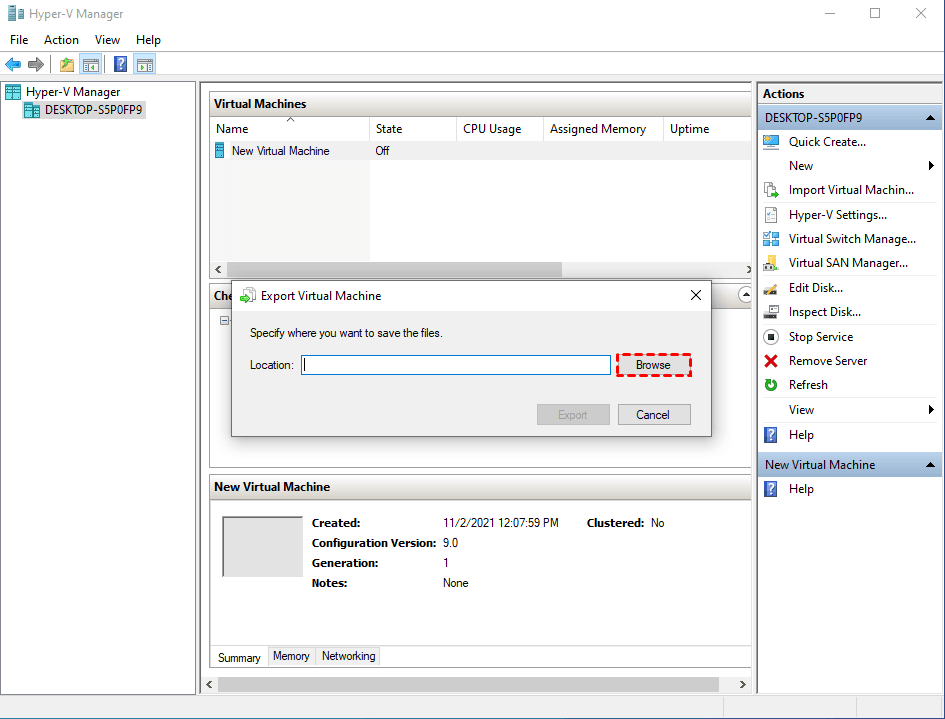
2. In the pop-up window, click Browse to specify a network share as the storage destination to the exported files.
3. You can monitor the export progress under State.
When it’s accomplished, you will find 3 folders, the VM configuration files, the snapshots, and the Hyper-V VHD on network share folder.
Way 3. Export Hyper-V VMs to a network share with PowerShell script
1. Open PowerShell as administrator, and to identify the VMs, run the following command
Choose the VM you want to export from the list.
2. Define the path of the network share where you want to export the VM. Ensure that the path is accessible and that you have write permissions.
3. Use the Export-VM cmdlet to export the Hyper-V VM to the D drive.
Error 0x80070005: Hyper-V exporting to network share access denied
You are using Hyper-V to try to export a virtual machine to a network share on a computer running Windows Server 2008 or Windows Server 2008 R2. And have full control rights to the network share, but you find an error similar to the following:

The error 0x80070005 means that your Hyper-V host does not the necessary permissions to on the specified network share when attempting to export Hyper-V virtual machines (VMs). When Hyper-V export to network share access is denied, perform the following steps.
1. Right-click on the shared folder on the destination server, then choose Properties.
2. Go to the Security tab.
3. In the permissions dialog box, pick the Edit button and then the Add button.
4. If you haven't already, choose Object Types > Computers, and then click OK.
5. Enter the object names to choose the Hyper-V host machine's name in the dialog box, then click Check Names.
6. Choose Allow by Full control and then click OK while the Hyper-V host machine name is selected.
After completing Hyper-V exporting VMs, you can also easily import Hyper-V virtual machines to restore data or deploy new VM on different hosts or within different environments.
Summary
Exporting and importing VMs in Hyper-V allow you to migrate virtual machines from one Hyper-V host to another. In this article, I introduced 3 ways of Hyper-V export VM to network share.
If you only need to export several Hyper-V VMs, the native export and import features would be enough. But if you still want to export or backup multiple Hyper-V VMs, AOMEI Cyber Backup definitely worth a try!

