


How to Use Disk2vhd to Convert a Physical to Virtual Machine
Do you have some physical Windows devices that you want to achieve virtualization, but you have no idea how to best perform that? In this article, you will convert a physical to Hyper-V virtual machine effciently by creating a virtualized copy of the physical disk.
By Crystal / Updated on June 28, 2024
What is Disk2vhd
Disk2vhd is a tool developed by Sysinternals, a part of Microsoft, designed to create Virtual Hard Disks (VHD or VHDX format) from physical disks or partitions on a running Windows system. This capability allows users to create a virtual machine from an existing physical machine, simplifying the P2V process, which can be useful for various purposes like:
- Backup and Recovery: Creating a virtual copy of a system for backup purposes.
- Virtualization: Moving physical systems to virtualized environments, such as Hyper-V.
- Testing and Development: Creating virtual environments for testing software or configurations without affecting physical hardware.
In this article, it offers 2 methods to run Disk2vhd in GUI mode or command line mode. However, Disk2vhdhas its limit that you can only convert one physical disk at a time, so if you are an enterprise with numerous virtual machines, you should probably consider other alternative tools.

Key features of Disk2vhd include
- Online Disk Conversion: Allows for conversion while Windows is running, leveraging the Windows Volume Shadow Copy Service (VSS) to create consistent snapshots.
- Selective Conversion: Users can select which disks or partitions to convert to virtual hard disks.
- VHD/VHDX Format: Creates virtual disks in the formats compatible with most virtualization platforms, with VHDX being more resilient and supporting larger sizes.
- Portable: It's a standalone executable, not requiring installation, making it easy to run from a USB drive or network location.
- File Compression: Supports the compression of virtual hard disks to save space.
How to use Disk2vhd on Windows 10
If you want to convert your physical machines to Hyper-V virtual machines, Disk2vhd is necessary for you to perform P2V migration. The following procedures will show how to run Disk2vhd on Windows 10. Before starting using it, make sure you have enough disk space to store the disk you want to convert.
Step 1. Download Disk2vhd on physical server
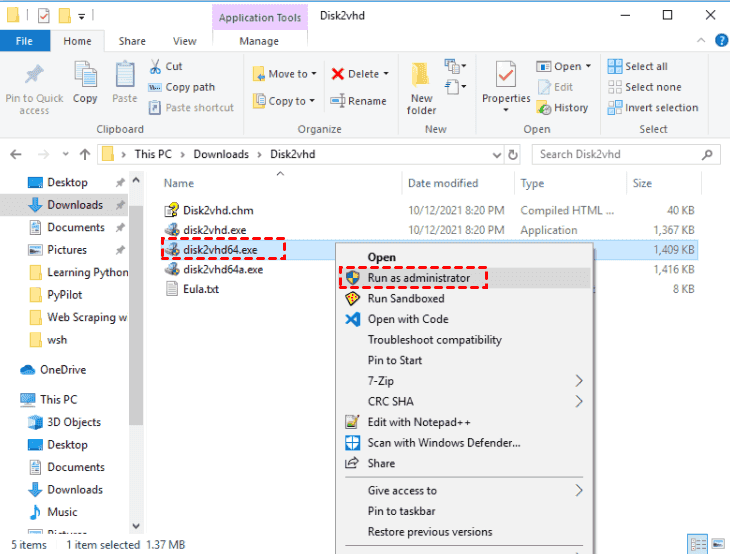
You can get Disk2vhd download from Microsoft website. After you have downloaded it, extract the zip file and select Run as administrator to run disk2vhd.exe.
Step 2. Convert disk to VHD(X) format
Now you can start converting the Windows 10 physical disk to VHD(X) format.
• In the open Disk2vhd wizard, you can check the options on the right side.
Prepare for use in virtual PC: It allows making the disk compatible with the deprecated Microsoft Virtual PC.
Use Vhdx: It generates a VHDX file instead of VHD file.
Note: What's the difference between VHD and VHDX?
VHDX is designed for today's hard drives. VHDX is more convenient with better performance and larger maximum disk size. It supports 64 TB instead of 2 TB in capacity, and its 4 KB size logical area size helps improve performance compared to VHD files. However, VHD can also be used in cases where cross-compatibility with other hypervisors is required.
Use Volume Shadow Copy: VSS service is crucial to keep data consistency. Using VSS is to create point-in-time snapshots of volume to ensure secure copy while using applications. If you leave this option unchecked, you will copy files directly from the live volume, not from the shadow copy.
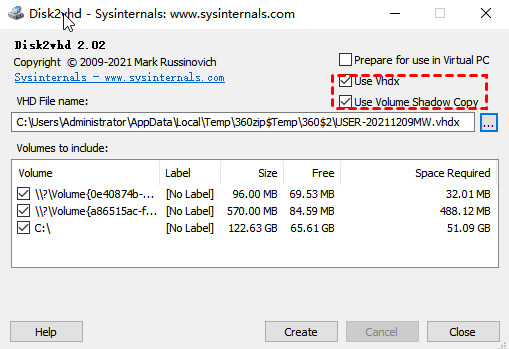
• Select a destination for the VHDX file. It is more recommended choosing a different disk from the one where you made the image or network path, otherwise it may cause an “inception”.
• Select the volumes you want to convert.
• Click Create to start the process, which may take a while according to your disk size.
Step 3. Create a new VM with VHDX file
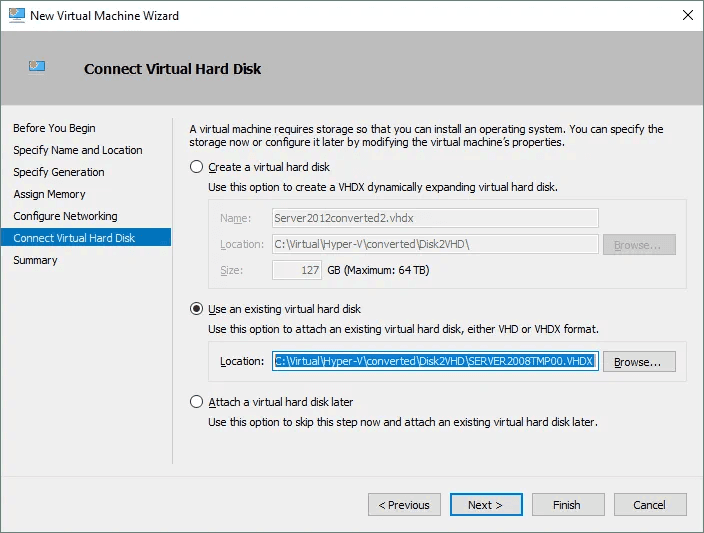
When the exporting is completed, you can go to Hyper-V manager to create a virtual machine with the VHDX file.
• Click Hyper-V host >> New >> Virtual Machine.
• In Connect Virtual Hard Disk wizard, select Use an existing virtual hard disk and click Browse to find the .VHDX file.
Use Disk2vhd command line to convert P2V
If you want to automate Disk2vhd or operate it remotely, you can write script to create VHDs. It can specify the volumes you want included in a snapshot by drive letter (e.g. c:) or use "*" to include all volumes.
Usage: disk2vhd <[drive: [drive:]...]|[*]>
Example: disk2vhd * c:\vhd\snapshot.vhd
Disk2vhd facilitates the process of virtualizing a physical machine in Hyper-V, which enables you to convert a physical disk to VHDX file directly. But if you need to manage numerous virtual servers and are afraid of losing data in the process of disk conversion, you should utilize a professional tool instead of Disk2vhd.
Alternative: Use backup and restore instead of Disk2vhd [Easier]
Besides Disk2VHD, you can use a centralized backup software for secure data migration, such as AOMEI Cyber Backup. It works by installing an agent on both physical and virtual machines, then you can back up and manage multiple physical disks simultaneously and restore them to VMs securely from a single central console.
Not only the entire disk, you can back up and restore files, operating systems, partitions and volumes accurately, so you can migrate any kind of data you want to the VM. Meanwhile, it fully supports Windows 11/10/8/7/XP and remote backup Windows Server 2022/2019/2016/2012/2008.
For AOMEI Cyber Backup, it offers many benefits such as:
🔰 Saves time and reduces the centralized management cost: Start, schedule, stop and monitor remote backup jobs within the same LAN.
🔰 Automates centralized backups with one click: Once, Daily, Weekly, Monthly to back up data, thus enhancing data security to a large extent.
🔰 Offers flexible backup management: Various backup schemes available for better storage management.
🔰 Instant disaster recovery: Restore your computer to another VM immediately to reduce the financial and reputation damage.
Please click the following button to start a 30-day free trial:
💡 How to convert multiple physical disk to virtual using backup:
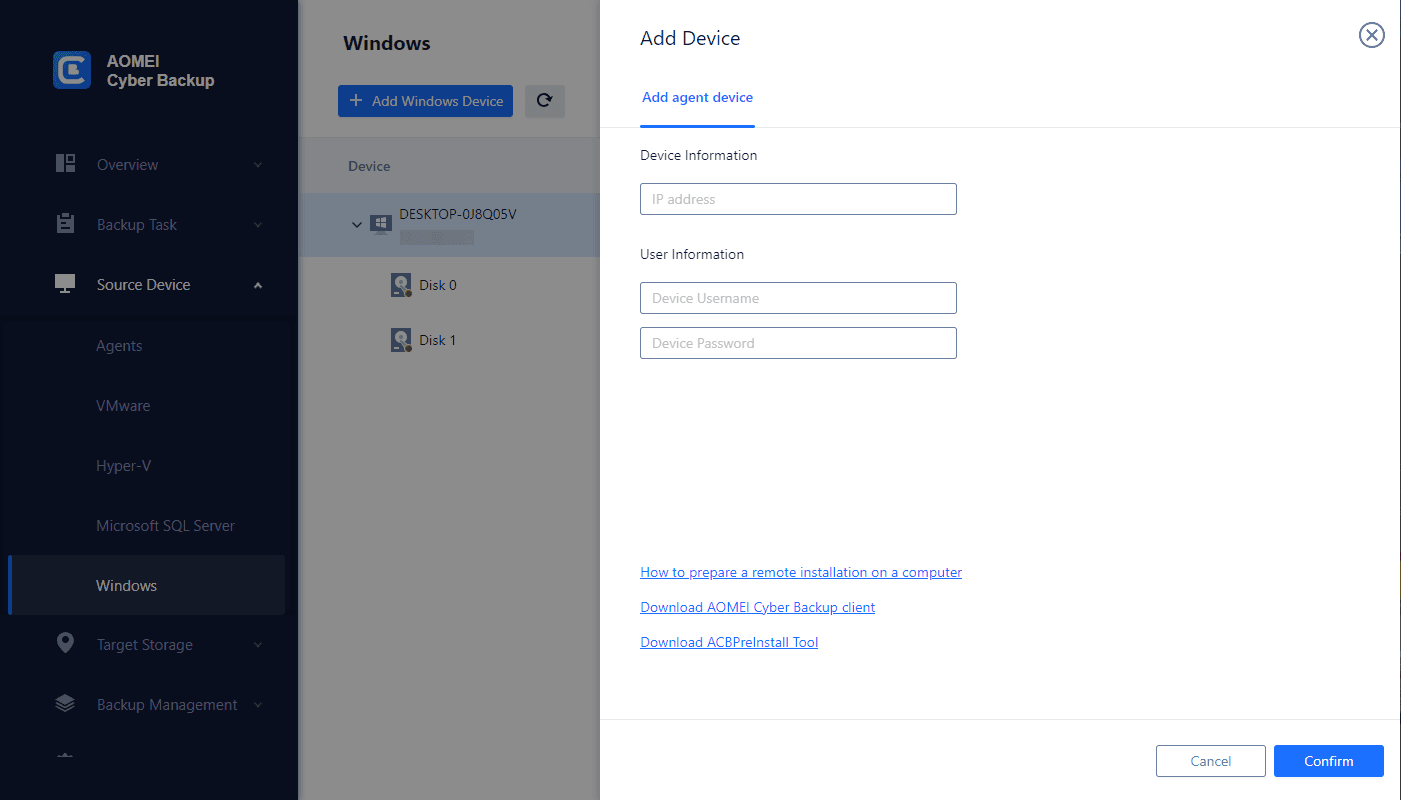
- Install the proxy program AOMEI Cyber Backup Agent on the device first on your physical Windows device.
- Access to Source Device > Add Windows Device, then fill in the correct IP address and user information.
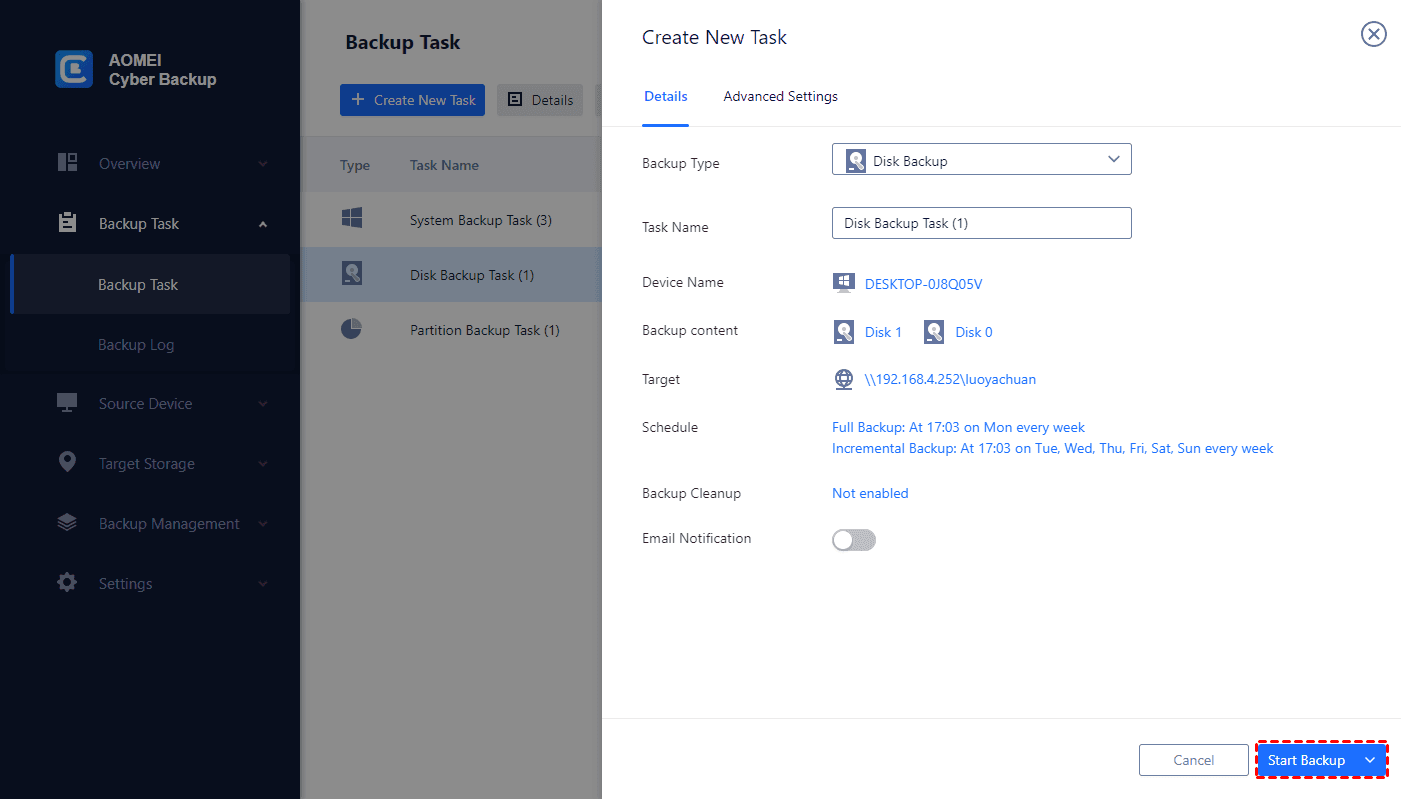
1. Click Backup Task > Create New Task >> Disk Backup.

2. Enter a name for the backup task and choose the disk you want to convert to virtual.
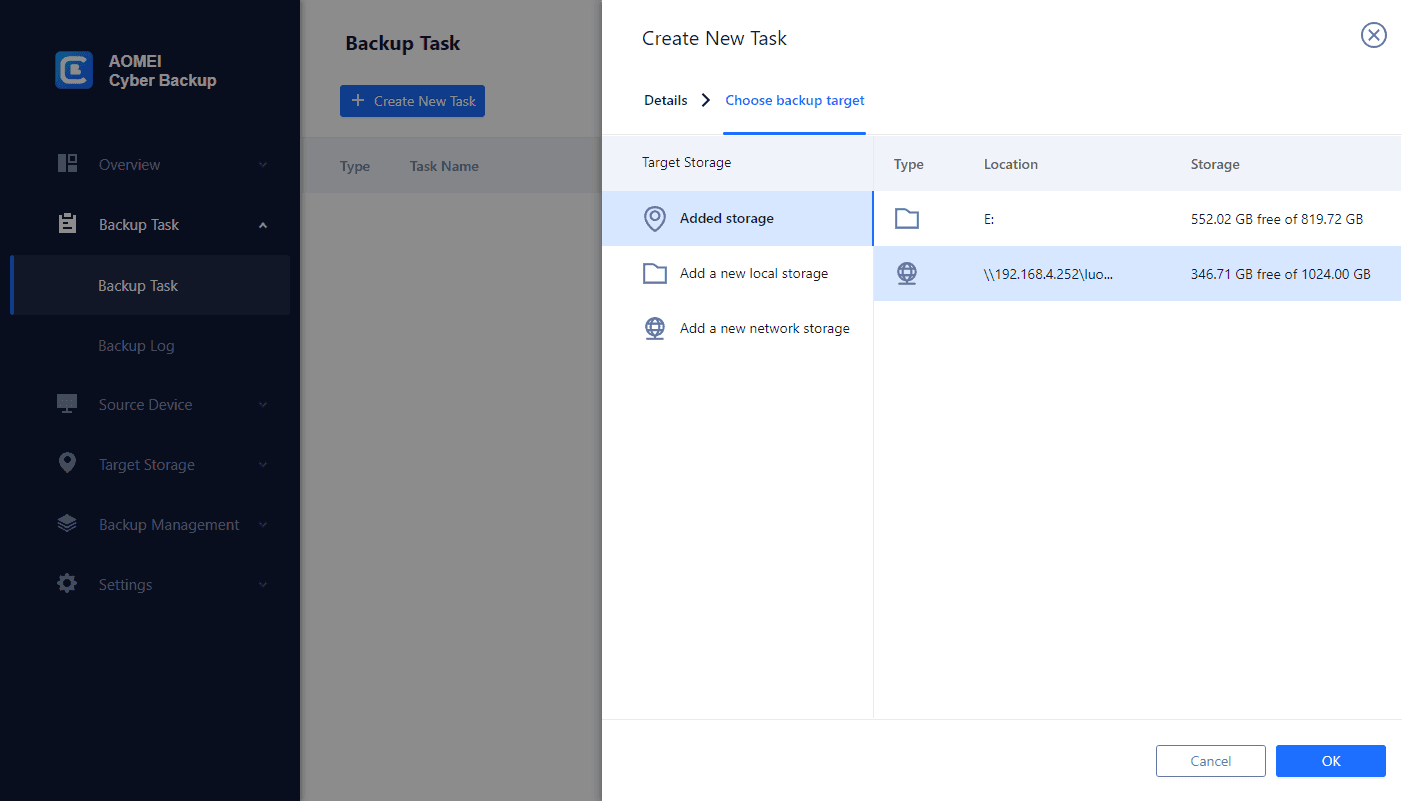
3. Select a destination to save the backup.
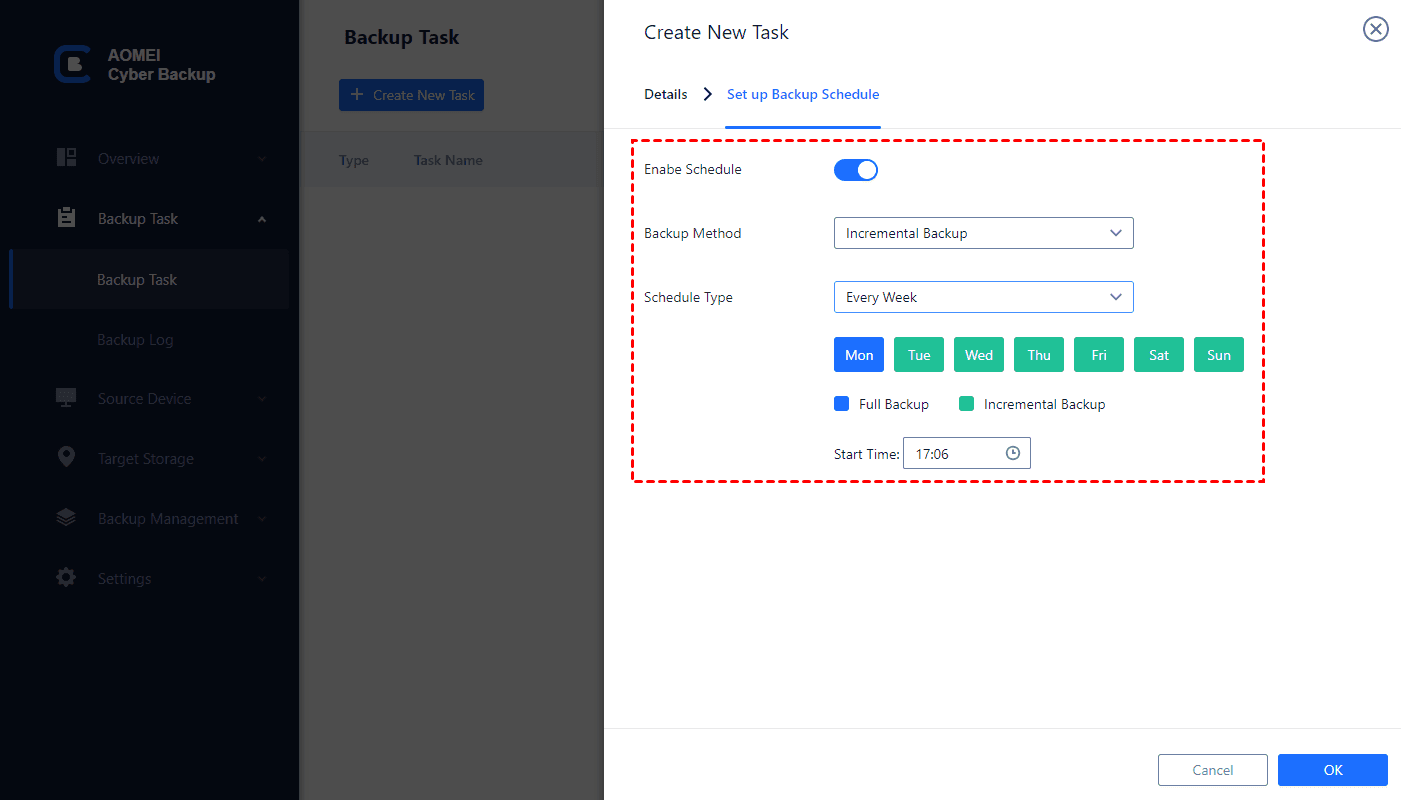
4. Schedule backup method as full / incremental / differential backup and run the backup tasks at daily / weekly / monthly.
5. Specify Backup Cleanup to auto delete the old backup files and save storage space.
Tip: You can enable the archive feature to save your backup to an Amazon S3 storage.
6. Click Start Backup to protect your Windows 10 disks.
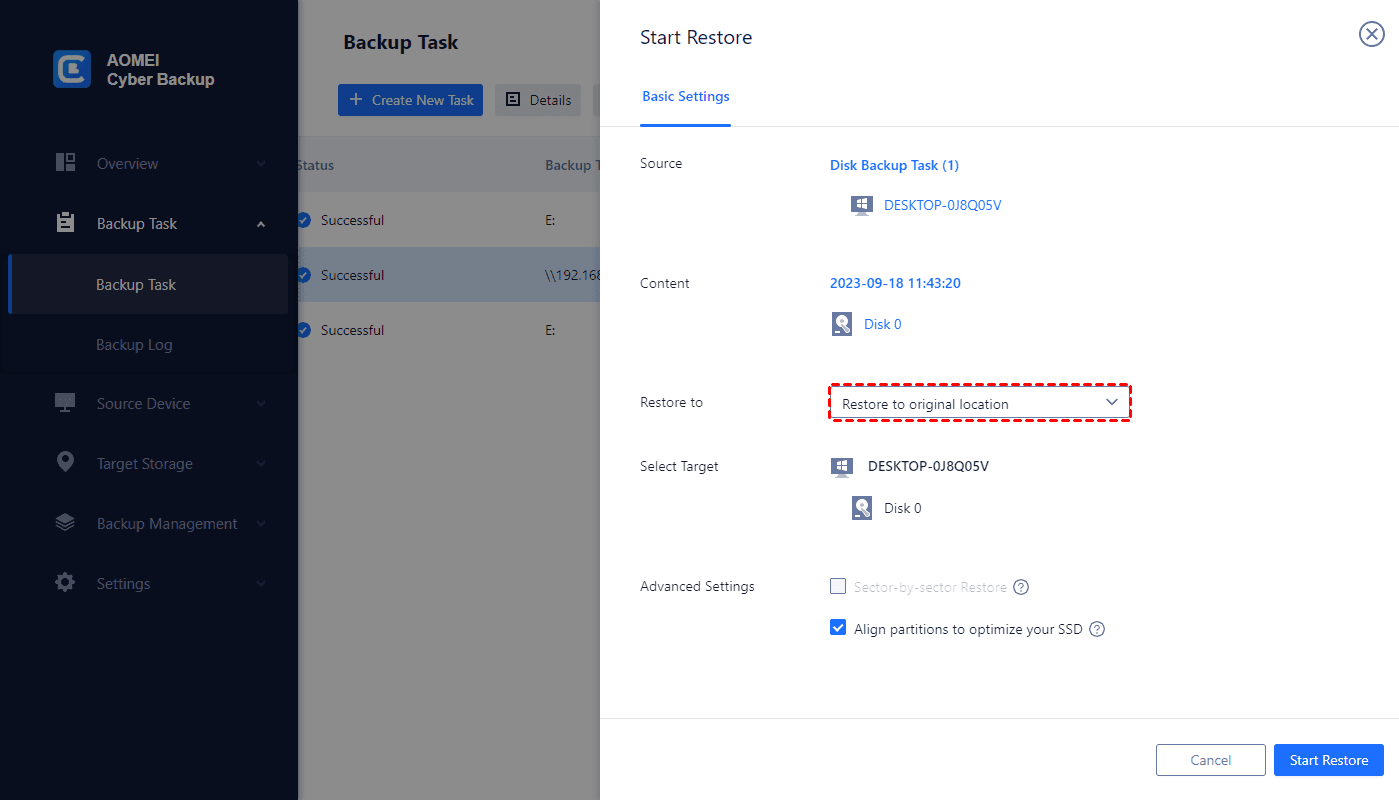
💡 How to restore a physical disk to another VM:
1. Go to Backup Task and click … >> Restore on the right of the backup task to start restoring a Windows disk to virtual environment.
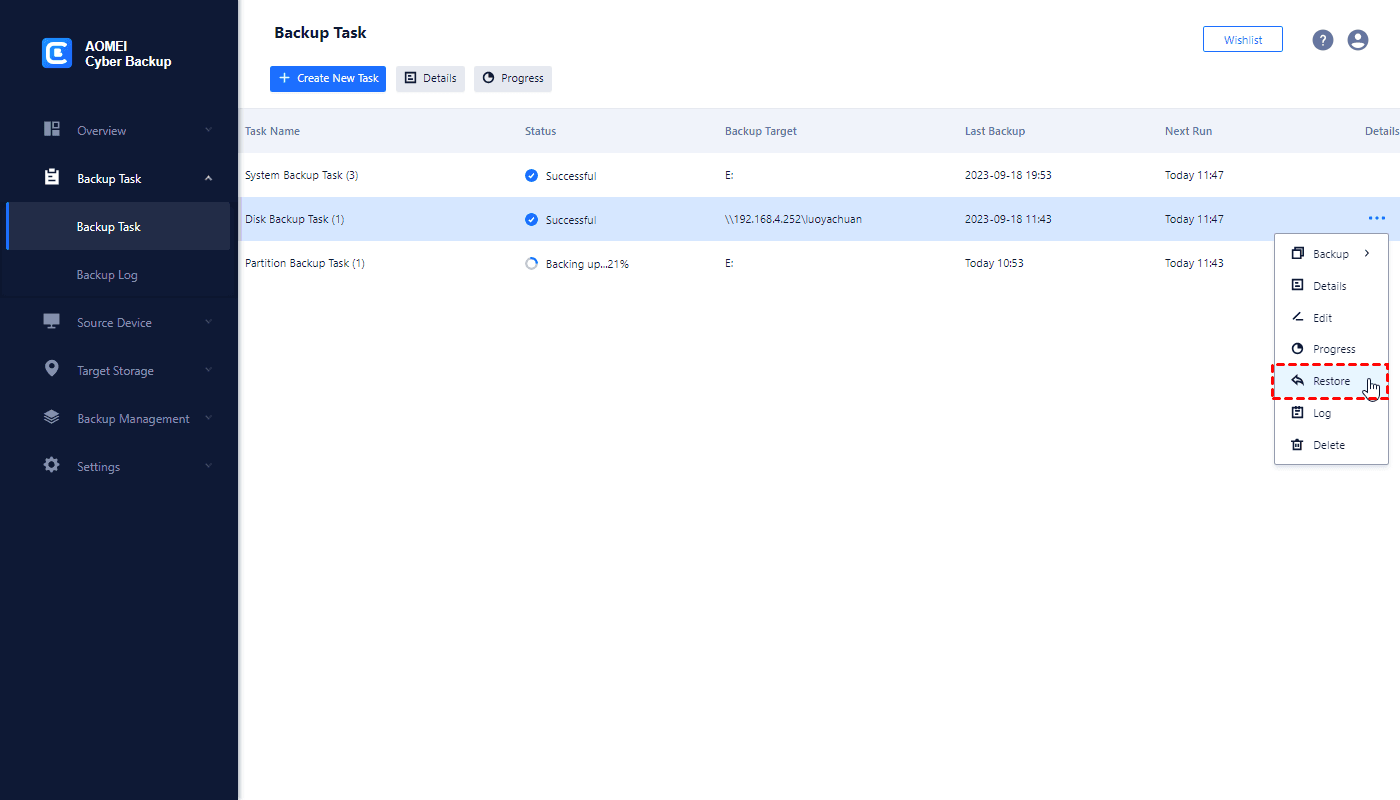
2. Choose location to restore to: Choose Restore to original location, you can easily restore the Windows disk backup to another server/host.
Summary
This article introduces how to use Disk2vhd to convert physical to virtual machine in Hyper-V. It achieves efficient data migration and optimizes utilization of resource. After creating a new virtual machine, do not forget to backup your virtual machines for secure data protection.
If you are in VMware environment, there was a tool named VMware Converter to achieve VMware P2V or V2V migration.

