Fixed: “File History Element Not Found” Error on Windows 10
What should you do if you encounter the “File History element not found” error when deleting an old backup on Windows 10? This article provides you with 5 solutions to this error and a professional backup software with automatic cleaning function.
By Yuka Updated on October 11, 2024
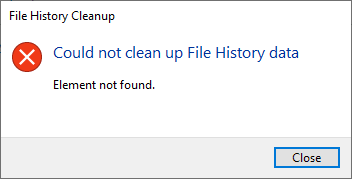
File History Cleanup Error- Element Not Found
“Can anyone help with this issue with File History giving Element Not Found when trying to do clean up? It happens on Fresh installs. This happens no matter what I have done. Even wiping the drive that is assigned to do the File history I still get the errors. I have seen many posts in Microsoft forums and feedback hub but still no solution was provided. I am not really sure which Windows 10 Version or build where this started to be an issue. Any help for this would be grateful!”
- Question from Reddit
File history is one of the built-in Windows 10 backup utilities to help you back up data and operating system files to the desired location. And you can simply delete the old backup if your backup folders take up too much drive space.
Unfortunately, the operating system may sometimes be unable to find the backup file and clean up your File History data. And there is an error message like the above user encountered – “Could not clean up File History data: Element not found..
Why does this error occur and how to fix it? Read on to find the solutions.
How to Fix “File History Cleanup Element Not Found” Error
The reason for this error may vary from person to person, but it is usually caused by system file corruption, hard drive problems, etc. In this section, I will provide you with 5 solutions to fix this error.
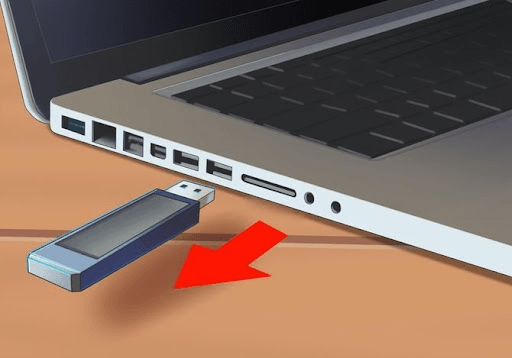
Solution 1. Disconnect Your Peripherals
Unplug all USB drives and devices connected to the computer. Your peripheral devices may sometimes prevent you from starting certain processes on your computer. Disconnect all external devices connected to your machine, and then try to perform File History Cleanup again.
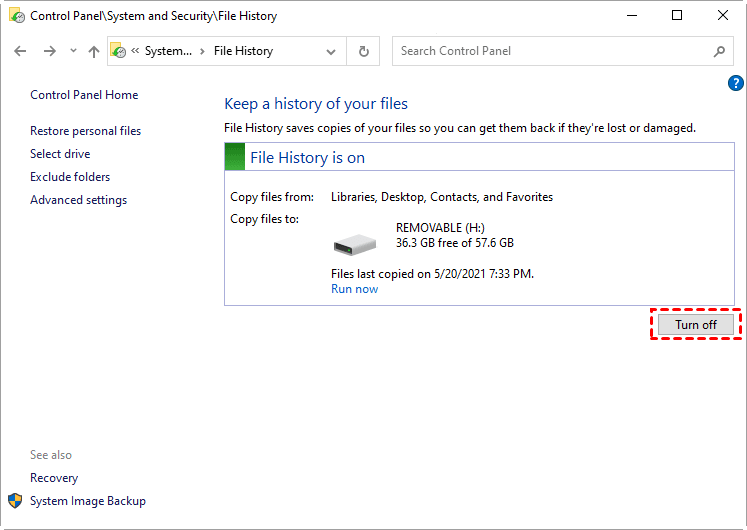
If you use an external hard drive to store backup files, turn off File History firstly. Go to Control Panel -> System and Security -> File History. Then disconnect the external drive and restart your computer. Connect the drive to the computer again and check if the problematic file can be deleted.
Solution 2. Scan Your System Files
If the error “File History element not found” still occurs after disconnecting the peripherals, it may be that your system file is damaged. To repair damaged system files, follow these steps:
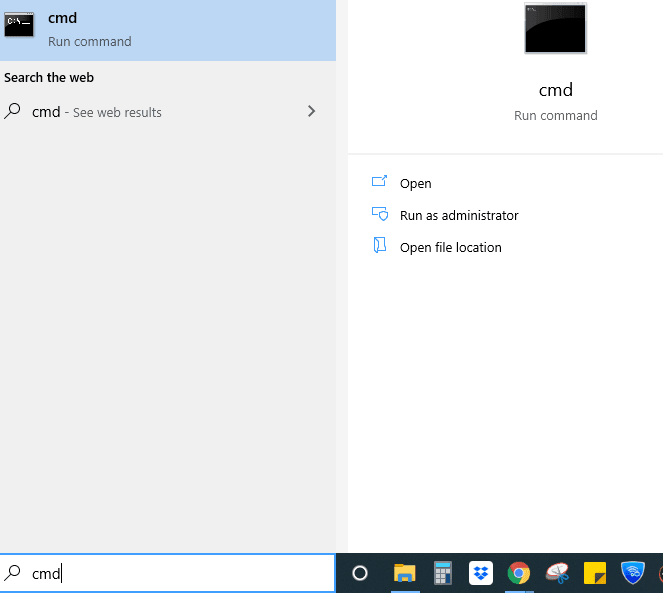
- Type cmd in the search box and click Run as administrator to open Command Prompt.
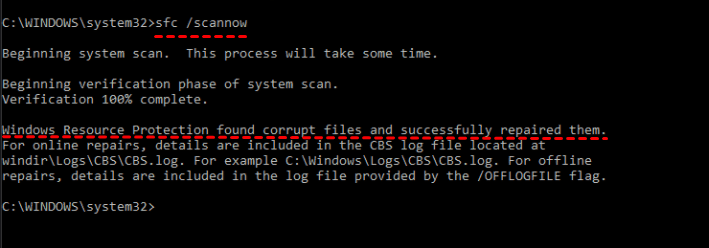
- Then run the SFC command. Type the below code in the Command Prompt window, and hit Enter. After the process is complete, restart the computer to see if you can perform File History Cleanup.
☞ sfc /scannow
- If the error persists, run the following commands in Command Prompt:
- DISM /Online /Cleanup-Image /StartComponentCleanup
- DISM /Online /Cleanup-Image /RestoreHealth
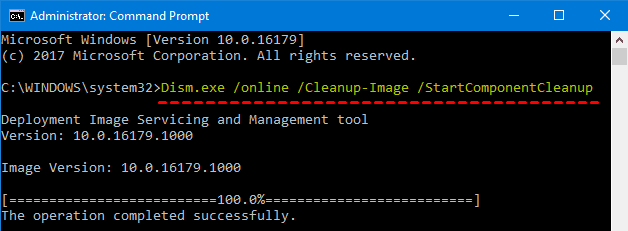
After completing this process, restart the computer again to see if the error is fixed.
Solution 3. Cleanup and Repair Your Drive
Some users solved the error by repairing their drives.
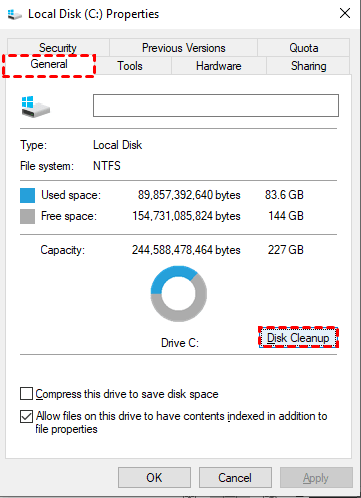
- Go to This PC, right-click on your drive, and select Properties.
- Click on the General tab and select Disk Cleanup.
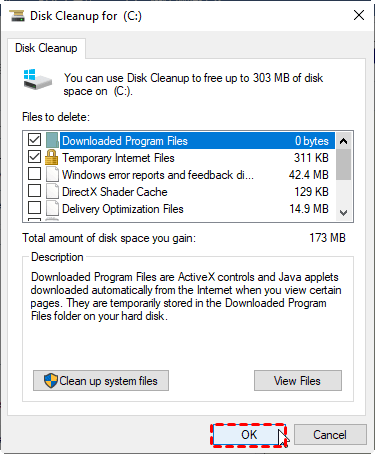
- Select the files you want to remove and hit OK. Make sure to include the temporary files on the list.
- Then, click on Tools and check your drive for file system errors.
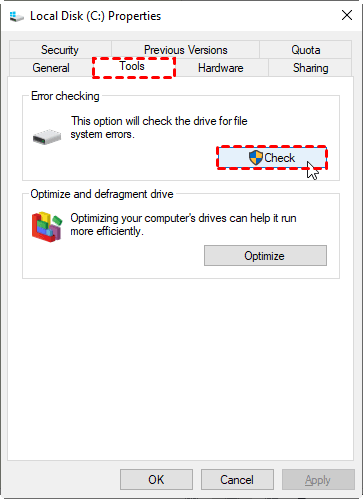
- After the process is complete, restart your computer and check if you can now delete the File History file.
Solution 4. Undo Recent Updates
If these File History problems start to occur after updating the operating system, uninstall the most recent update and restart the computer.
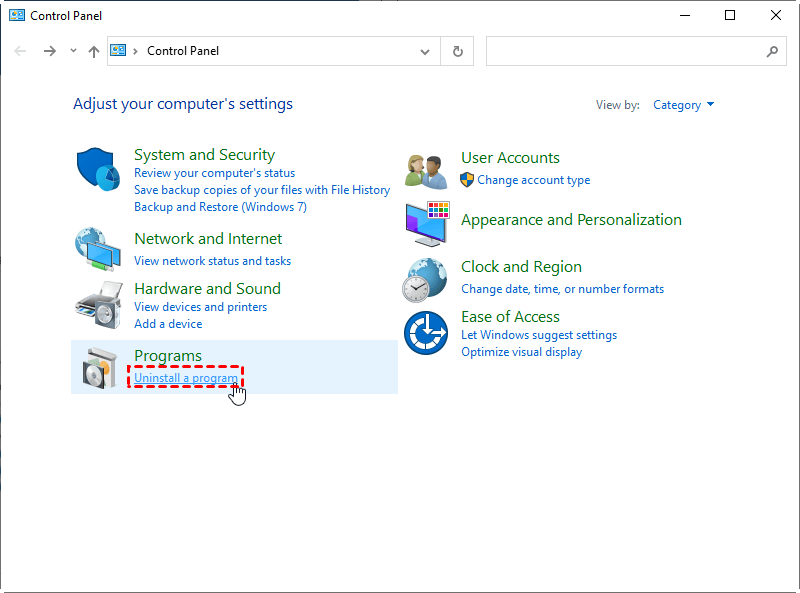
- Go to Control Panel and click Uninstall a program under Programs.
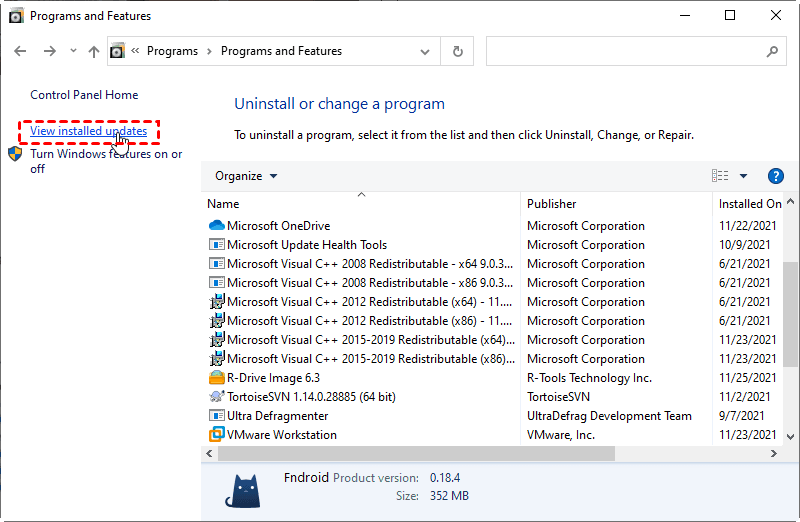
- Click on View installed updates to uninstall an update.
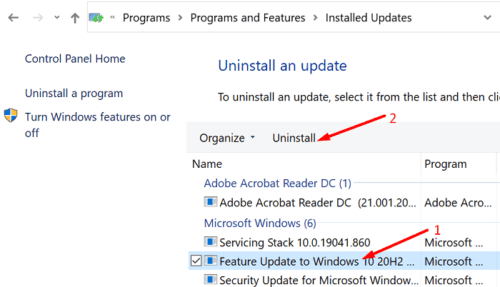
- Then find the newest update and delete it.
Solution 5. Reset File History
The final solution is to reset File History and back up specific folders in Windows 10 again.
- Go to Control Panel -> System and Security -> File History. Then, click Turn off if it says File History is on.
- Go to the folder %UserProfile%\AppData\Local\Microsoft\Windows\FileHistory. You can copy and paste this path to the address bar of File Explorer.
- Delete all files and folders you see.
- Go to File History in the Control Panel again and click Turn on.
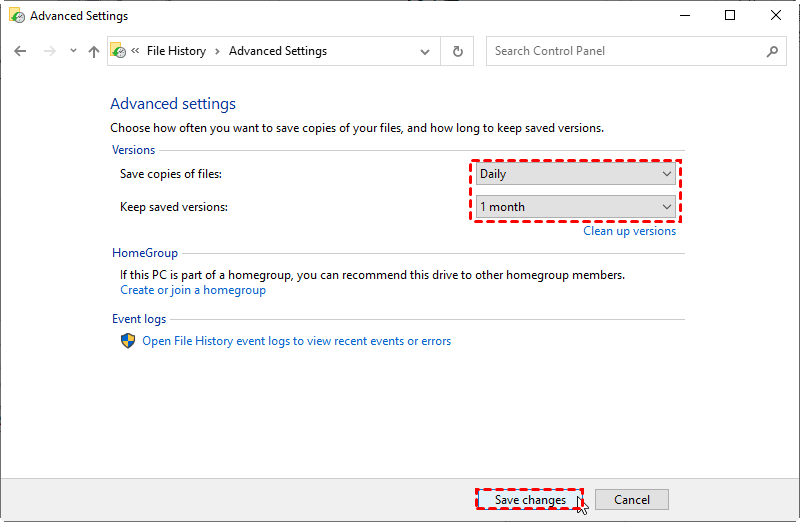
- Click Advanced settings in the left menu, set a longer backup frequency and shorter backup retention, such as, save copies of files in daily and keep saved versions for 1 month. Then Click Save changes.
File History can help you save a copy of the file so that it can be retrieved if it is lost or damaged. But during use, you may encounter "File History element not found" error, and potential failure with it, such as,File History service is not accessible, the file history drive is disconnected, no usable drives found, etc All in all, it's not a reliable file backup software.
If you want an effortless way to backup files or other items, try the best File History alternative.
Best File History Alternative with Auto Cleanup Function
AOMEI Backupper Professional, as the best File History alternative, is a full-featured backup and restore software for Windows 11/10/8.1/8/7. It supports File Backup, System Backup, Disk Backup, and Partition Backup, so you can back up any items you want, not limited to files or folders.
Most importantly, it has an automatic backup cleanup option that can help you delete backup image files in a scheduled task. It is very helpful for saving disk space and keeping all the latest backups.
And it further minimizes backup disk usage with different features, such as, backup only changed files with incremental or differential backup, compress backup image with normal or high compression level, etc.
Let's take a look at how to use it to set up a backup with automatic backup cleanup function.
Step 1. Download and install it. It has 30-day free trial, so you don't need to spend any money before making the final decision.
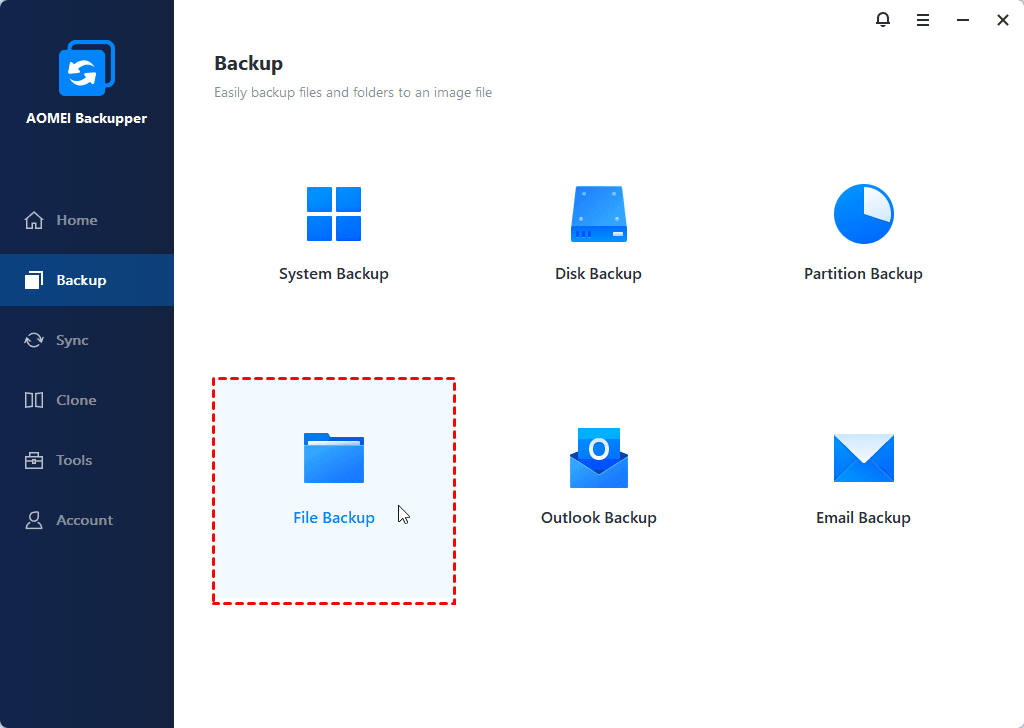
Step 2. Open AOMEI Backupper, click Backup ->File Backup in order. You can also choose the other 3 backup methods according to your needs.
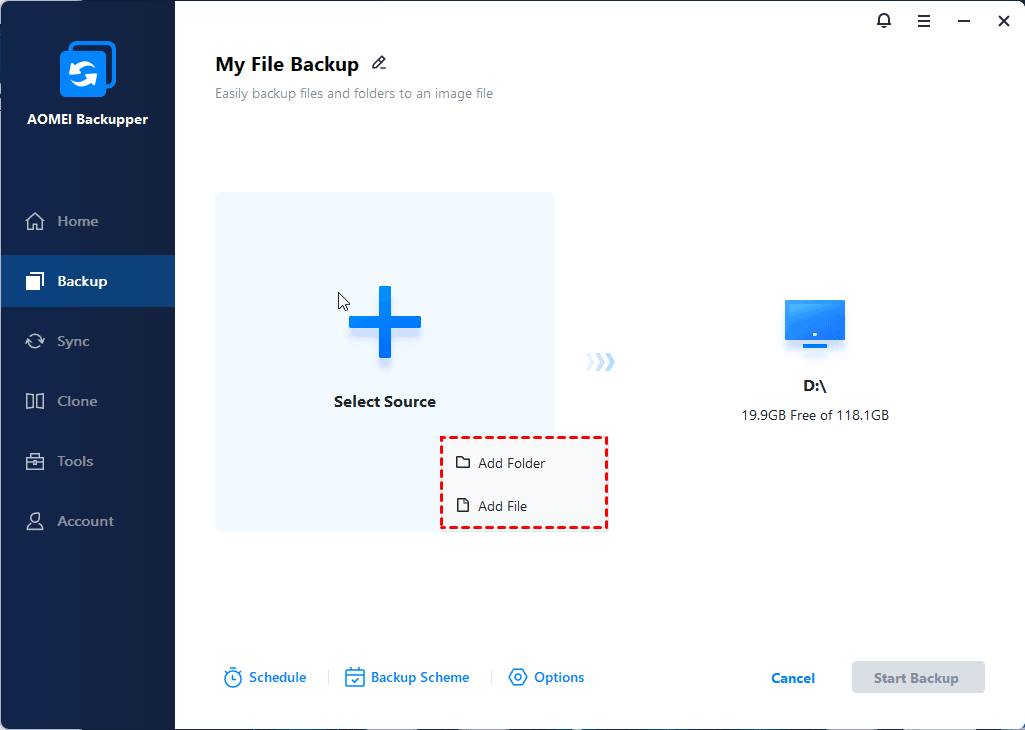
Step 3. Click Add File or Add Folder to select the files or folders you want to backup. Then, click the box below the arrow to select a backup destination.
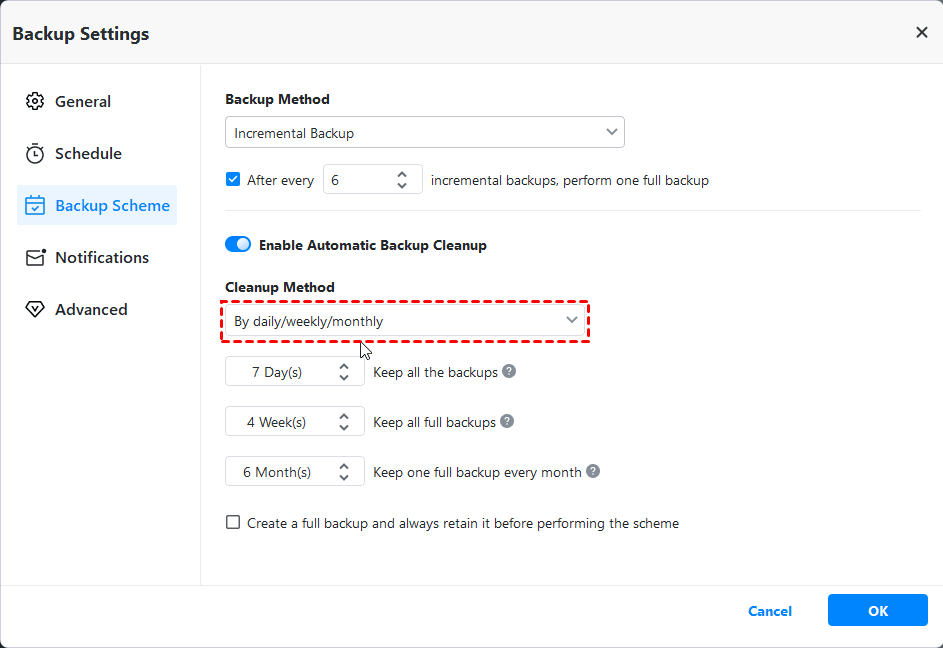
Step 4. Click Schedule Backup to set automatic backup at daily, weekly, monthly, event triggers, USB plug in. Then click Backup Scheme to configure backup method and auto cleanup method of your backup.
▶ For Backup Methods: This software offers 3 common backup methods, including full backup, incremental and differential backup. The incremental backup is selected by default.
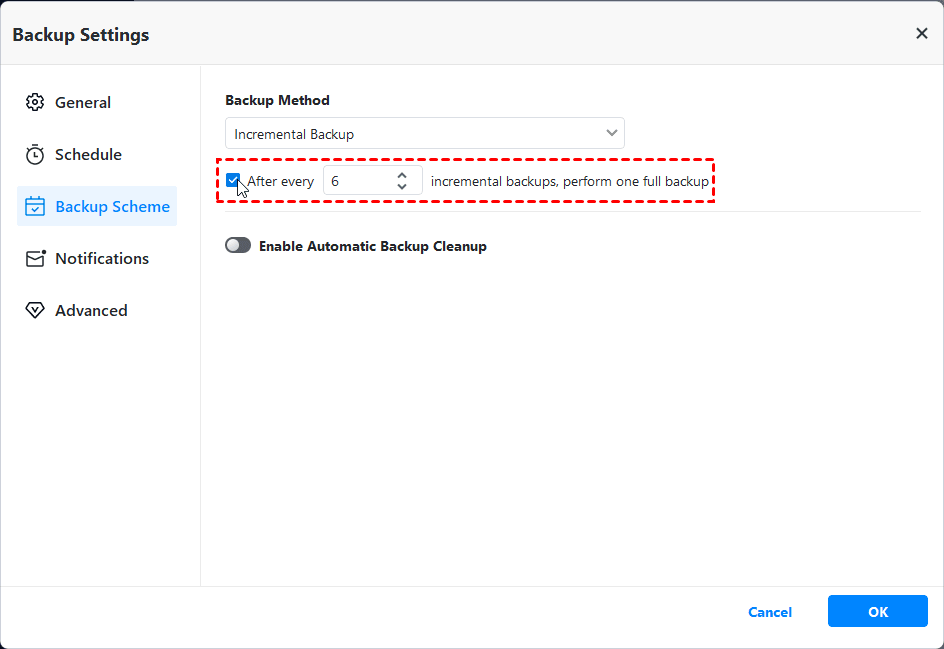
▶ For Automatic Backup Cleanup: There are 3 cleanup rules available in total. You can choose By quantity, By time, By day/week/month. Once the option “Enable Automatic Backup Cleanup” is activated, the program will automatically clean up image files and save your disk space usage.
Other Special Settings:
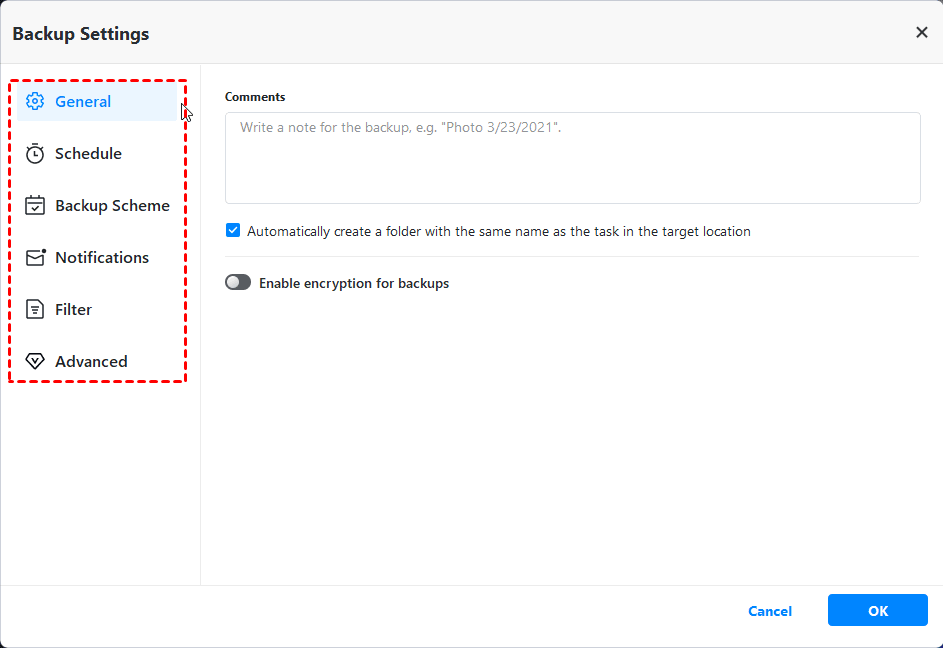
✦ Options: You can write a note for the backup to distinguish it from other backups so that you can find your backup easily. You can also encrypt the backup to protect your privacy.
Step 5. Confirm this backup task and click Start Backup. Then, it will start the first backup, and then automatically delete the backup files when the number of backups or the backup time reaches the value you set.

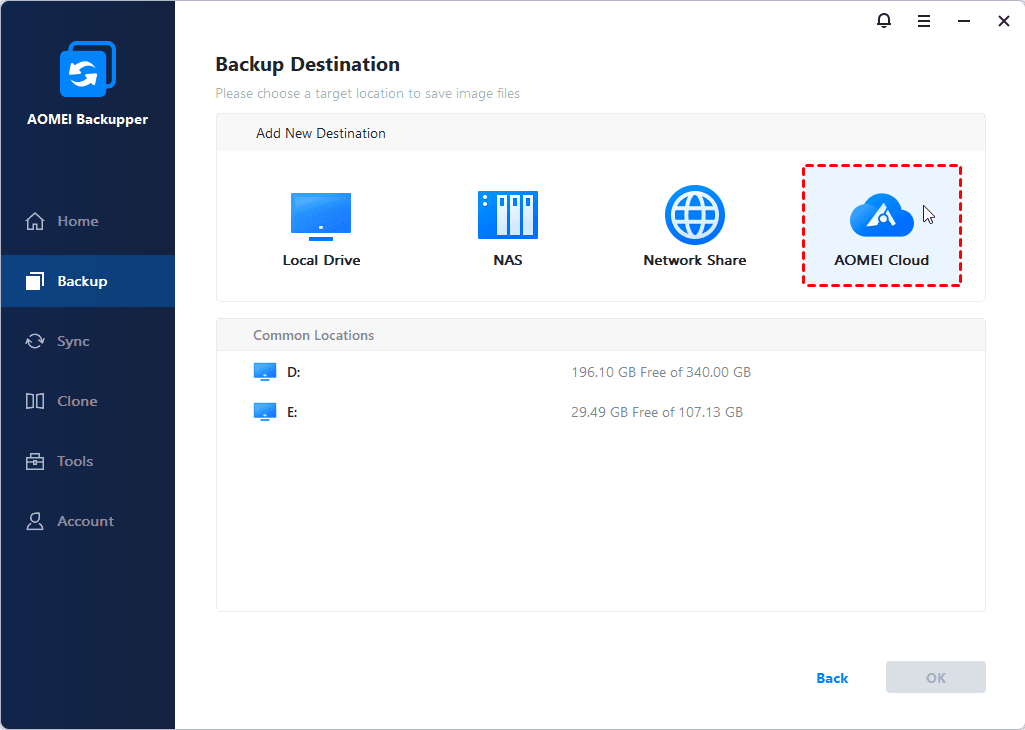
★ How to backup files to AOMEI Cloud
As cloud storage is becoming more and more popular, AOMEI offers users its own cloud - AOMEI Cloud. If you have an AOMEI account, you can backup files to AOMEI Cloud. It offers you 1TB free storage for 15 days after you sign up for an AOMEI account.
To Sum Up
After reading this article, I hope you can fix the "File History element not found" error through the solutions in this article. The backup tool that comes with Windows is far from meeting our backup needs, and problems often occur. In order to keep you away from these troubles, it is recommended that you use professional software—AOMEI Backupper to protect your system and files from the very beginning.
In addition to its Backup functions, you can use its Sync function to perform continuous file sync on Windows to save time and increase productivity. This feature keeps the original structure of files and you can directly use or modify it at any time. Try this powerful software now!

