
AOMEI Centralized Backupper allows you to create and manage sync tasks on the given machines controlled by AOMEI Centralized Backupper under the same LAN.
There are 3 types of sync tasks available: Basic Sync, Real-Time Sync, and Mirror Sync.
Basic Sync
The basic sync feature allows you to synchronize folders to other locations on client computers, such as an external hard drive, NAS, removable USB flash drive, etc. For Basic Sync, it is like Window's "copy" feature and it would not create an image file after the sync process is done so you can view your contents at any time.
How to set up a basic sync task in AOMEI Centralized Backupper?
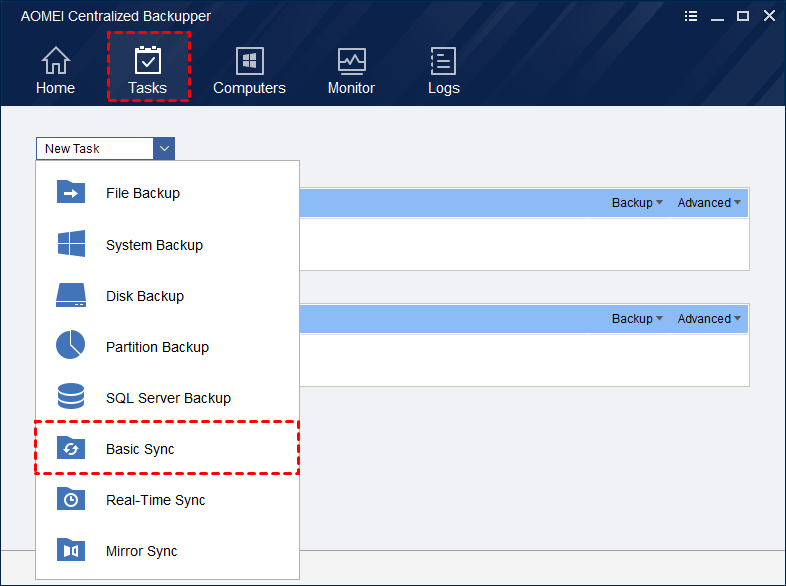
Go to Tasks Tab, click New Task, and select Basic Sync. Or, you can directly click "Basic Sync" on the Home screen.
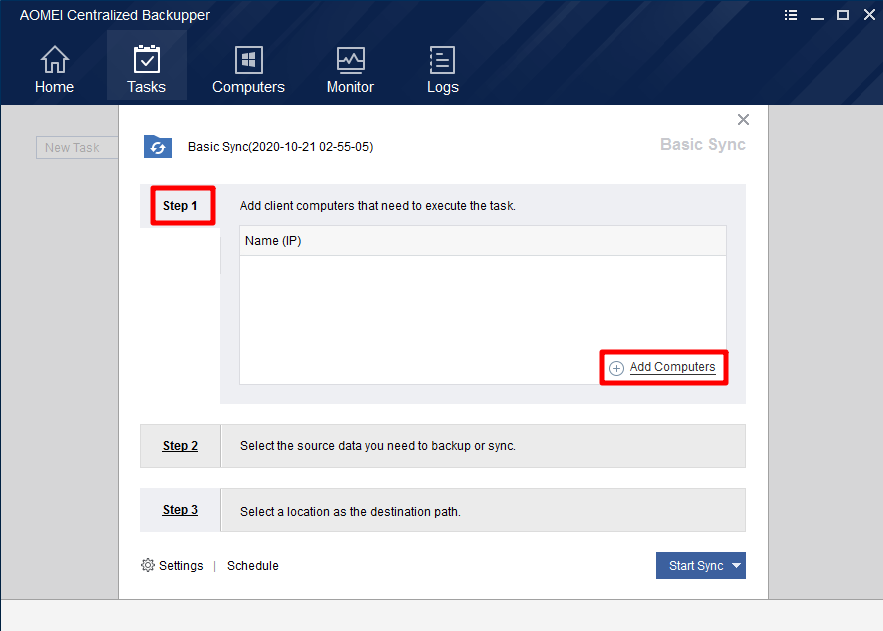
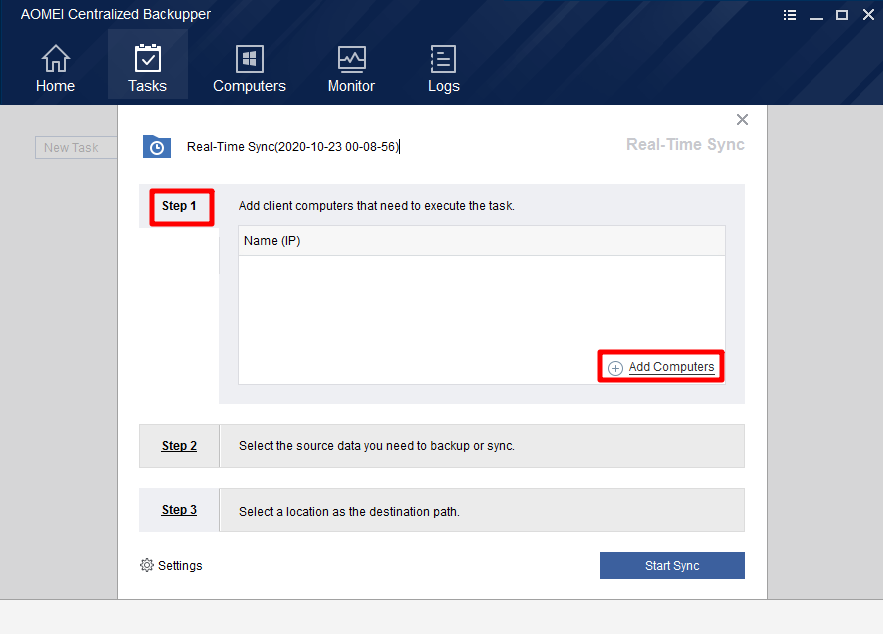
1. Select "Add Computers" in Step 1 to add these client computers you want to do the basic sync.
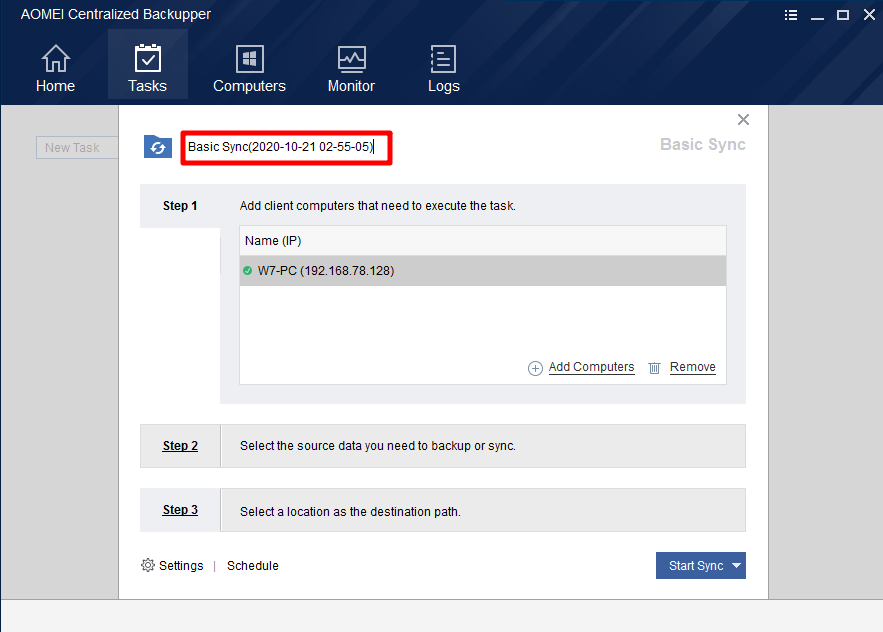
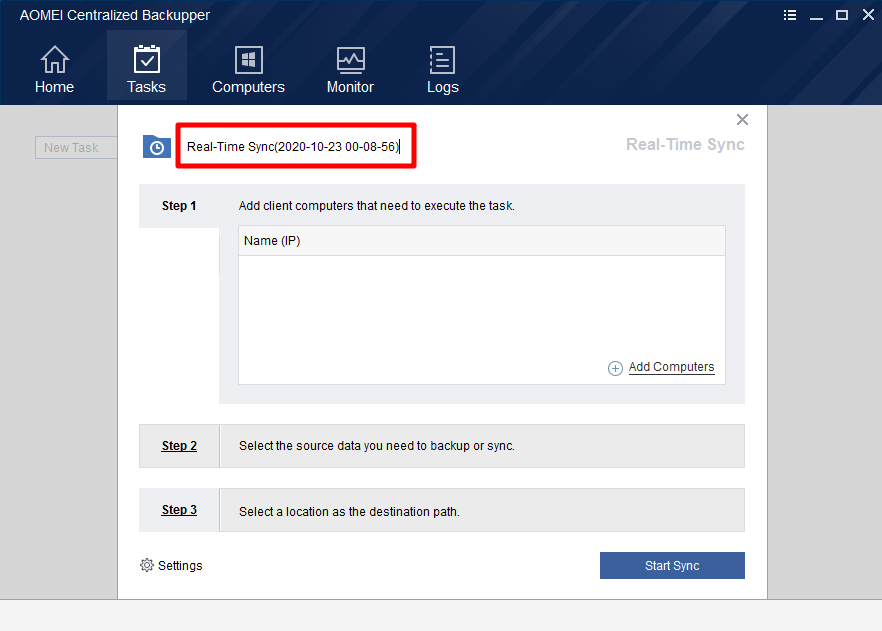
You can also customize the task name to distinguish it from other tasks.
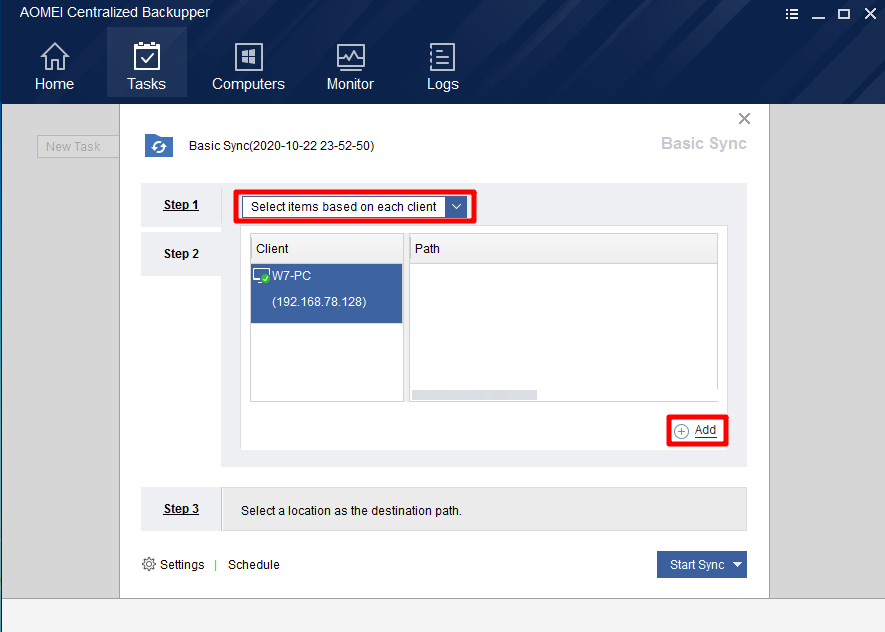
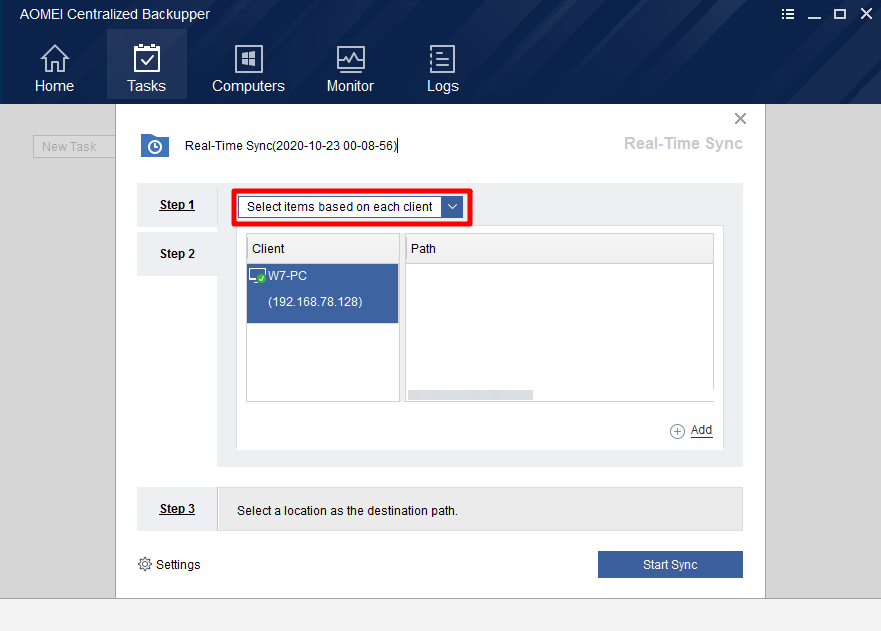
2. Hit "Select the source data you need to backup or sync" in Step 2:
-
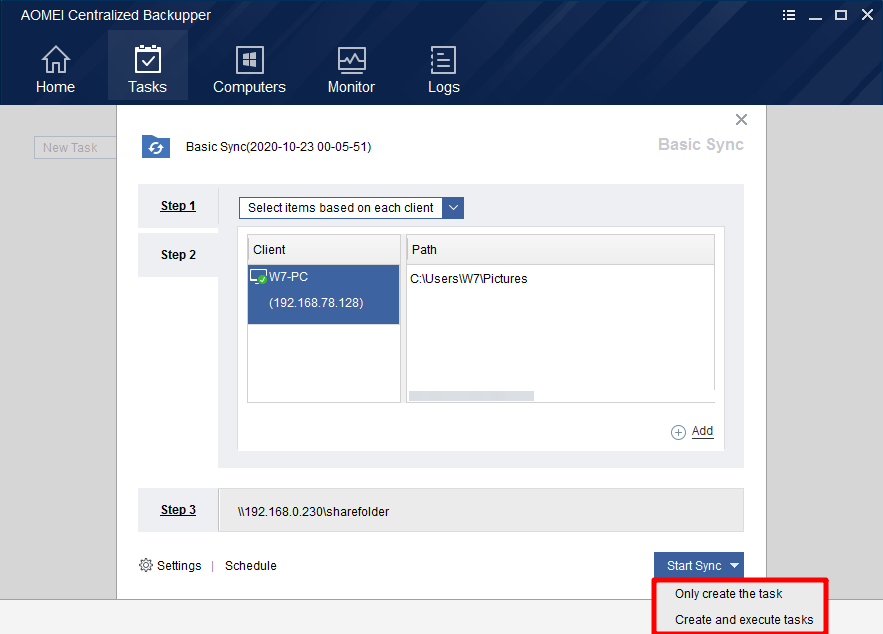
Select items based on each client: manually select files/folders path of one client computer you want to sync.
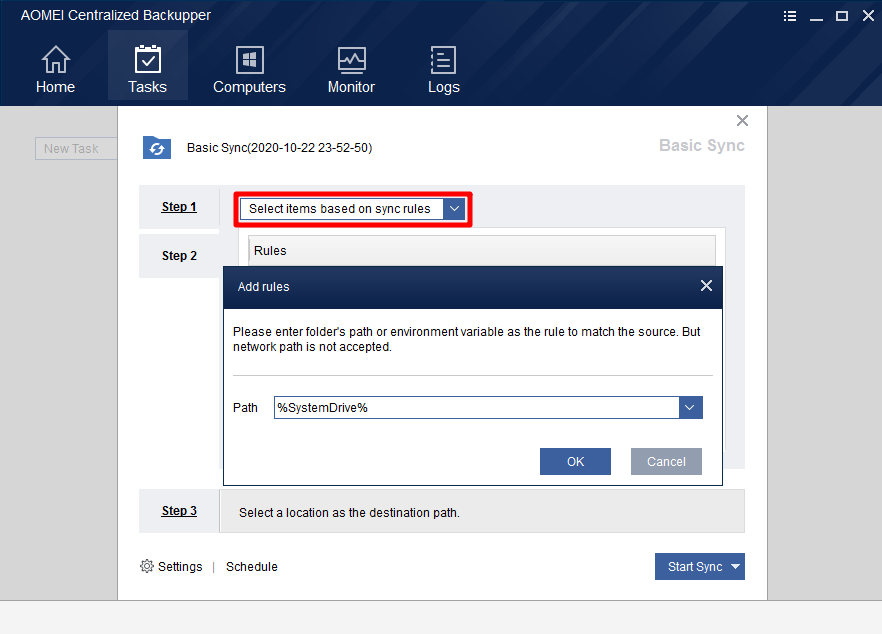
-
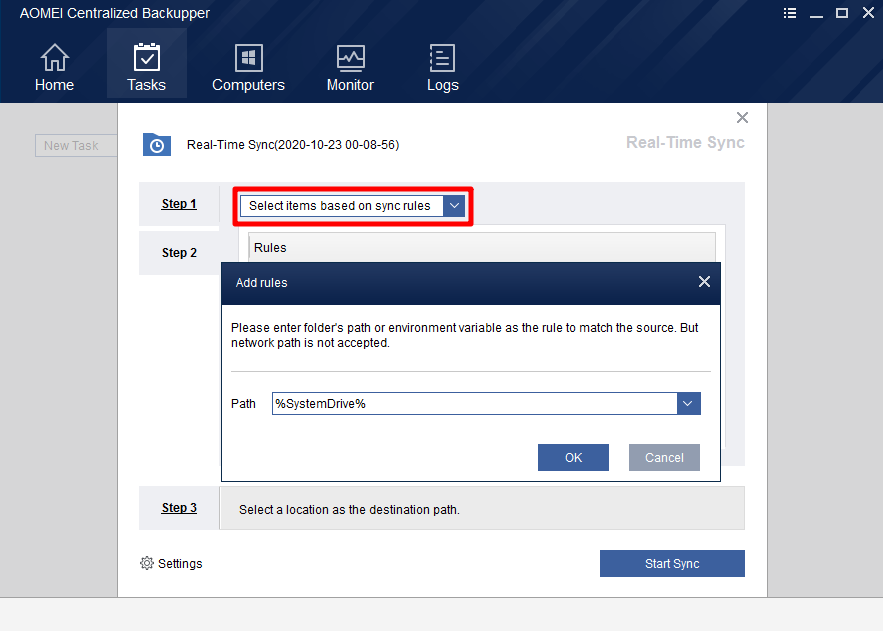
Select items based on sync rules: please enter the file's/folder's path or environment variable as the rule to match the sync source. But the network path is not accepted.
For example, sync User folder under C: drive of all clients you added, you can use C:\Users as a sync rule.
Or, you set "%Temp%" as a sync rule, it will sync all Temp folder under different paths of all clients you added. Note, Temp is an environment variable.
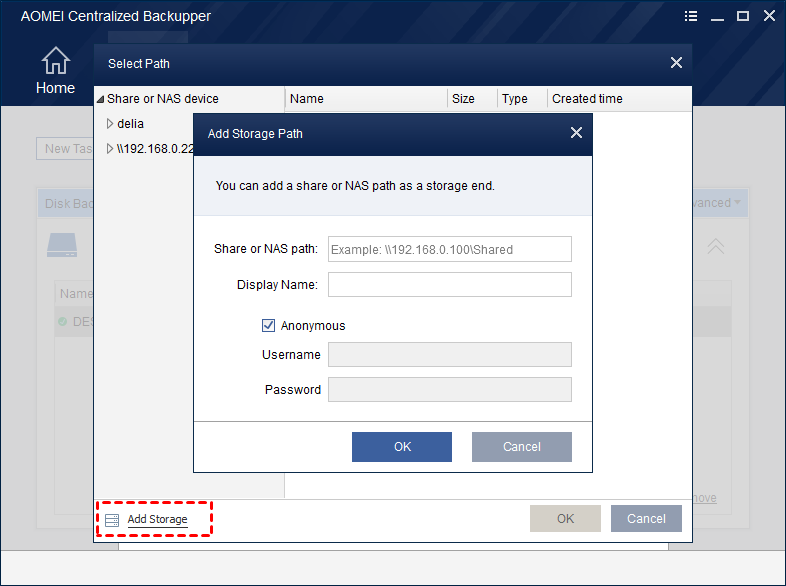
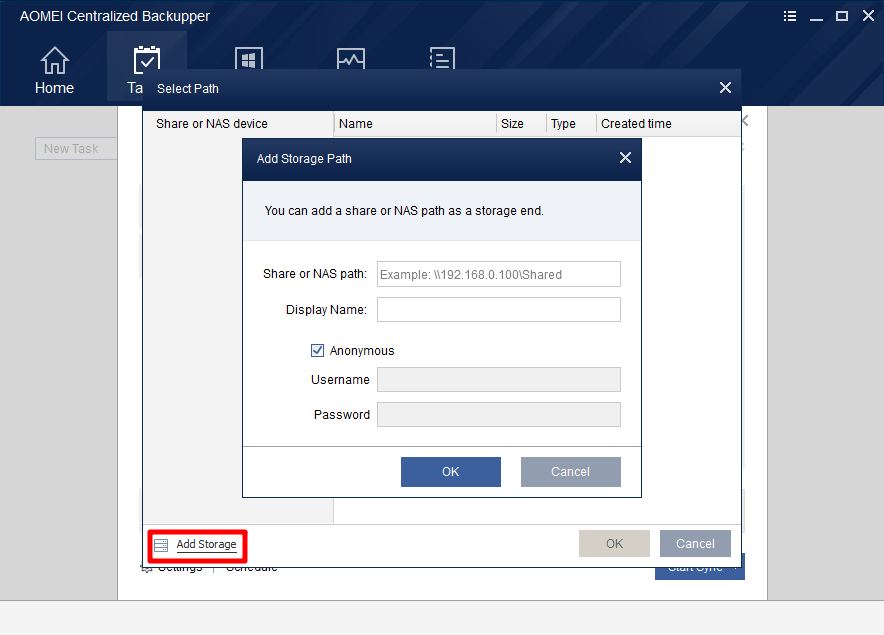
3. Click "Select a location as the destination path" in Step 3: right-click Share or NAS device or select Add Storage button to add storage path.
4. Click Start Sync to create the task or execute the task.
Sync Settings:
-
Comments: Write a comment for your current sync. Once you need to find it, a unique comment could help you distinguish it from others.
-
Enable email notification: In unattended operations, a notification can be emailed containing the result of each sync.
Schedule Sync:
Schedule the required sync task to sync files Daily, Weekly, Monthly, etc. Please click here to know more details. (Scheduled Sync and scheduled backup adopt the same scheduled settings.)
Note:
-
More advanced options for the current sync task can be set via Settings and Schedule.
-
You only can modify the sync task name during creating sync via AOMEI Centralized Backupper.
-
If you create a group to manage client computers, you can directly add this group in Step 1 (Add Computers) to create sync for all computers under the group.
-
AOMEI Centralized Backupper currently doesn’t support syncing files/folders from Network/Shared drive.
-
AOMEI Centralized Backupper only supports syncing file to Network/Shared drive.
-
After sync tasks are created, you can also check and run them from clients.
Real-Time Sync
The Real-Time Sync function will automatically real-time monitor the source directory needing sync. If there’s any change happens to any files or folder in the source directory, the program will sync them immediately and real-time backup your data.
How to set up a real-time sync task in AOMEI Centralized Backupper?
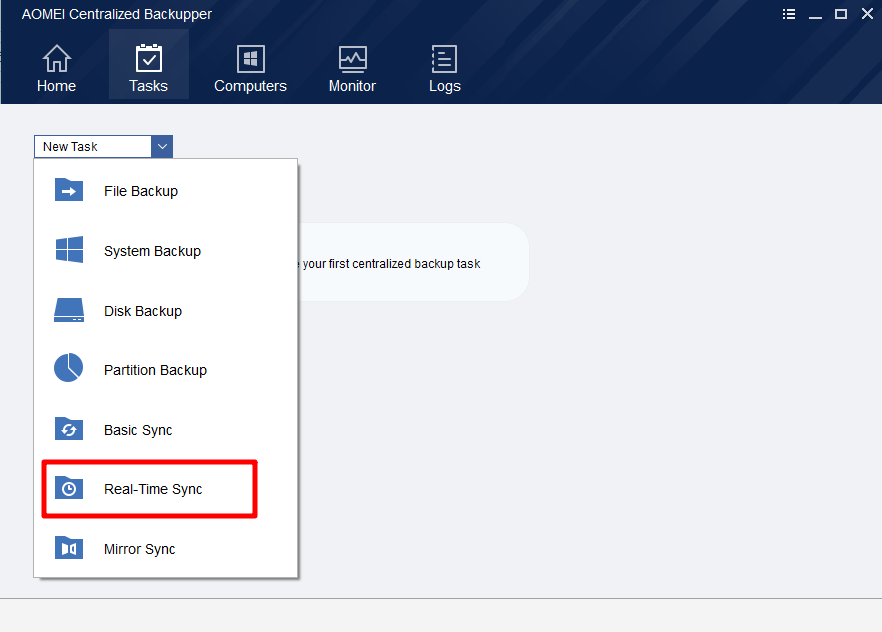
Go to Tasks Tab, click New Task, and select Real-time Sync. Or, you can directly click“Real-time Sync” on the Home screen.
1. Select “Add Computers” in Step 1 to add these client computers you want to do file sync.
You can also customize the task name to distinguish it from other tasks.
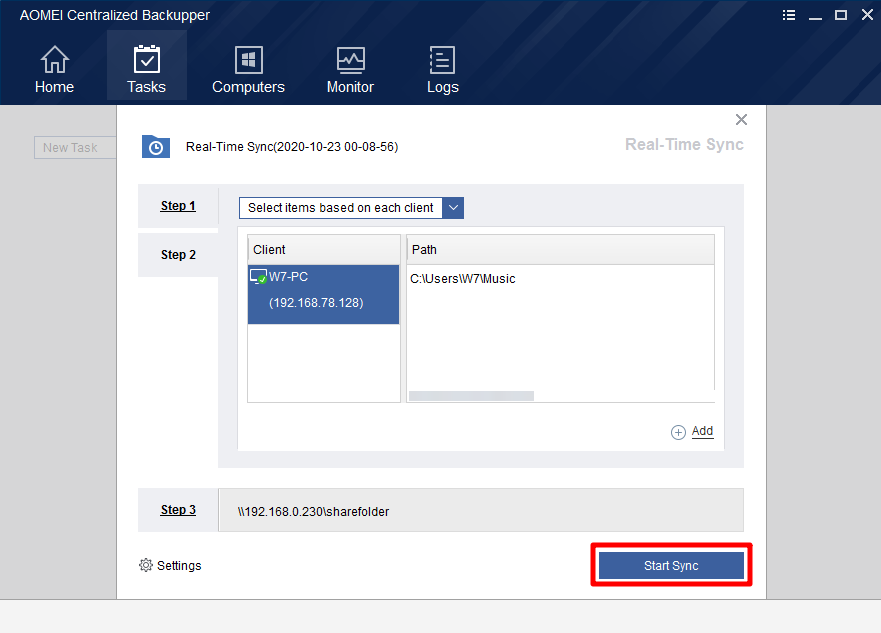
2. Hit “Select the source data you need to backup or sync” in Step 2:
-
Select items based on each client: manually select files/folders path of one client computer you want to sync.
-
Select items based on sync rules: please enter the file's/folder's path or environment variable as the rule to match sync source. But the network path is not accepted.
For example, sync Users folder under C: drive of all clients you added, you can use C:\Users as a sync rule.
Or, you set “%Temp%” as a sync rule, it will sync all Temp folder under different paths of all clients you added. Note, Temp is an environment variable.
3. Click “Select a location as the destination path” in Step 3: right-click “Share or NAS device” or select the “Add Storage” button to add sync's destination.
4. Click “Start Sync” to create the task or execute the task.
Sync Settings:
-
Comments: Write a comment for your current sync. Once you need to find it, a unique comment could help you distinguish it from others.
-
Verify the integrity of files in the destination directory during synchronization: If a file in the source directory does not exist in the destination directory, the missing files will be synced to the destination directory to ensure the integrity of files. (e.g. files in destination directory are deleted manually.) Tick this option will also increase the sync time.
Note:
-
More advanced options for the current sync task can be set via Settings.
-
You only can modify sync task name during creating tasks via AOMEI Centralized Backupper.
-
If you create a group to manage client computers, you can directly add this group in Step 1 (Add Computers) to create syncs for all computers under the group.
-
AOMEI Centralized Backupper currently doesn’t support syncing files/folders from Network/Shared drive.
-
AOMEI Centralized Backupper only supports syncing file to Network/Shared drive.
-
After sync tasks are created, you can also check and run them from clients.
Mirror Sync
Mirror sync is a feature that the newly added and modified files in the source directory will be synchronized to the target directory, and the files in the target directory will always be exactly the same as the files in the source directory. Files in the target directory that are inconsistent with those in the source directory will be deleted or overwritten.
How to set up a mirror sync task in AOMEI Centralized Backupper?
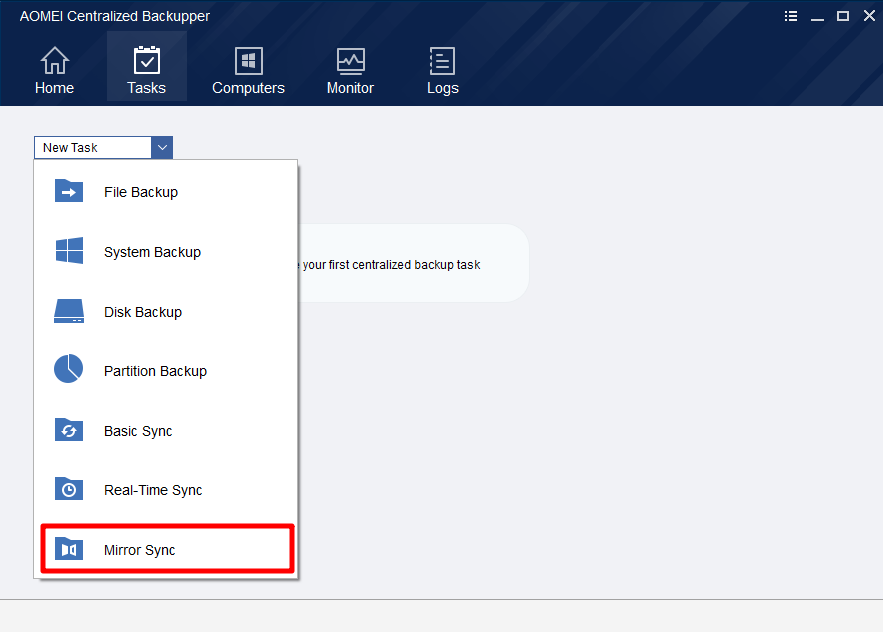
Go to Tasks Tab, click New Task, and select Mirror Sync. Or, you can directly click “Mirror Sync” on the Home screen.
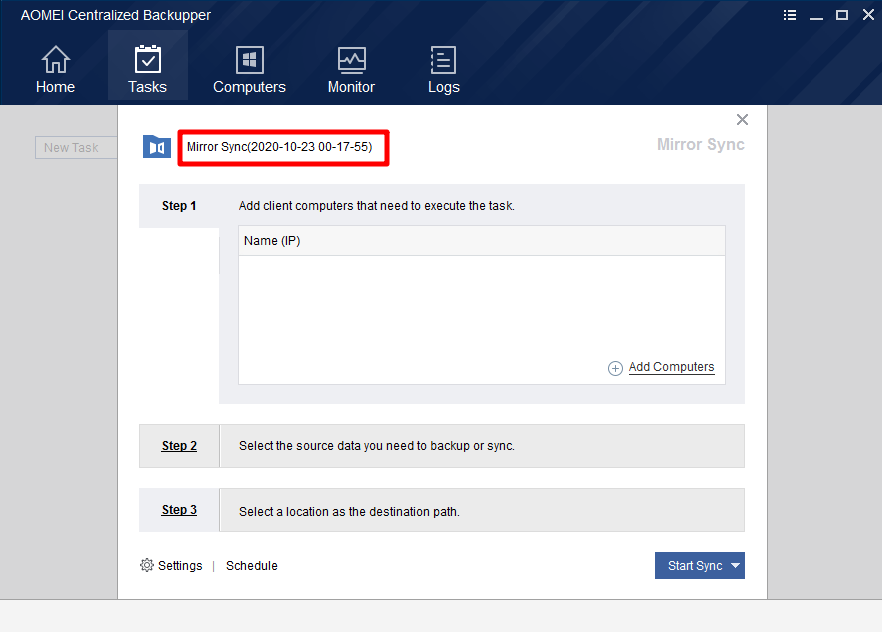
1. Select “Add Computers” in Step 1 to add these client computers you want to do file sync.
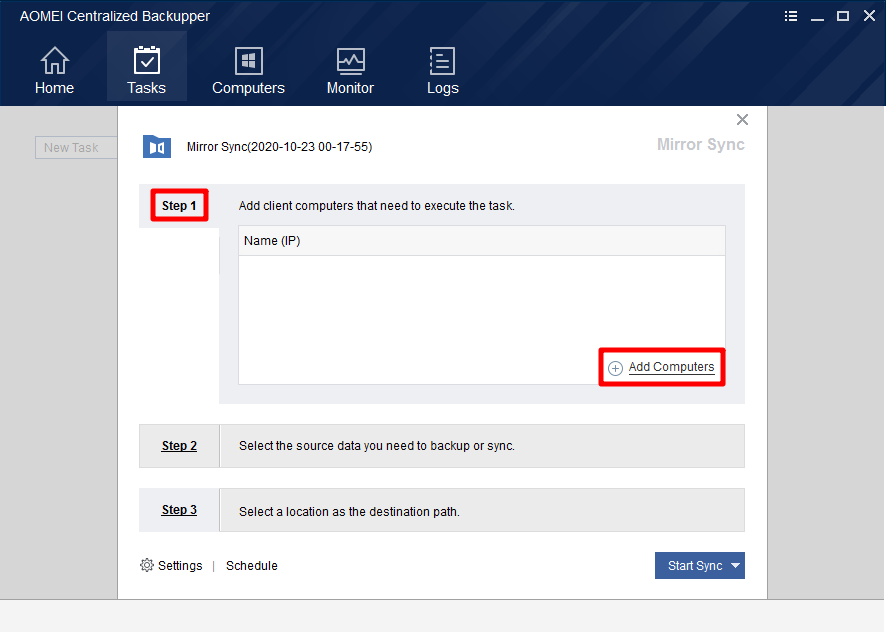
You can also customize the task name to distinguish it from other tasks.
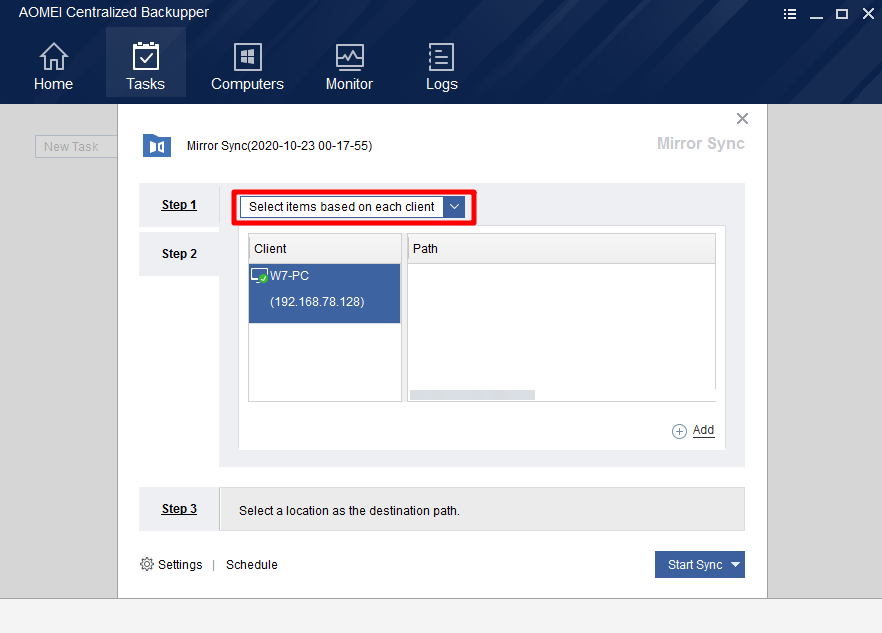
2. Hit “Select the source data you need to backup or sync” in Step 2:
-
Select items based on each client: manually select files/folders path of one client computer you want to sync.
-
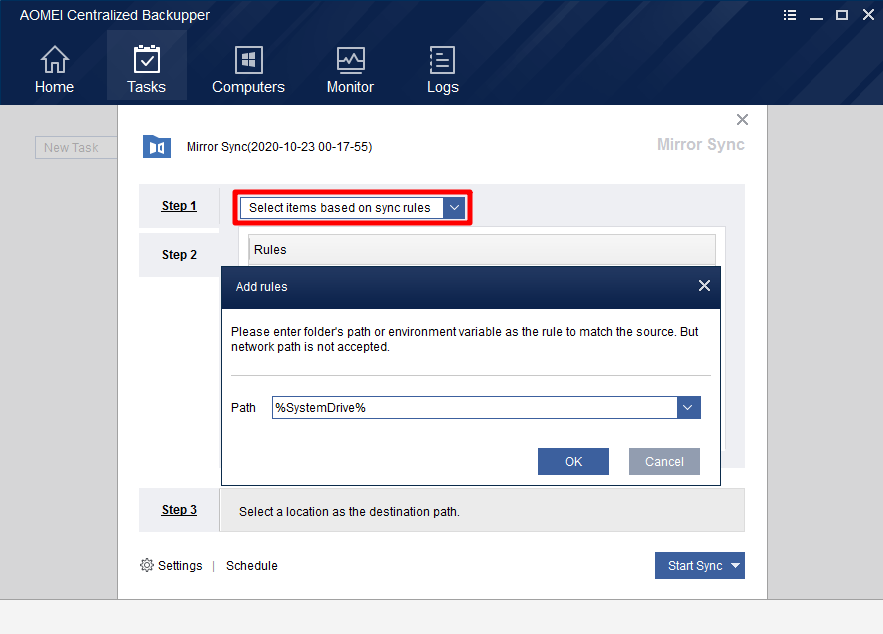
Select items based on sync rules: please enter the file's/folder's path or environment variable as the rule to match the sync source. But the network path is not accepted.
For example, sync Users folder under C: drive of all clients you added, you can use C:\Users as a sync rule.
Or, you set “%Temp%” as a sync rule, it will sync all Temp folder under different paths of all clients you added. Note, Temp is an environment variable.
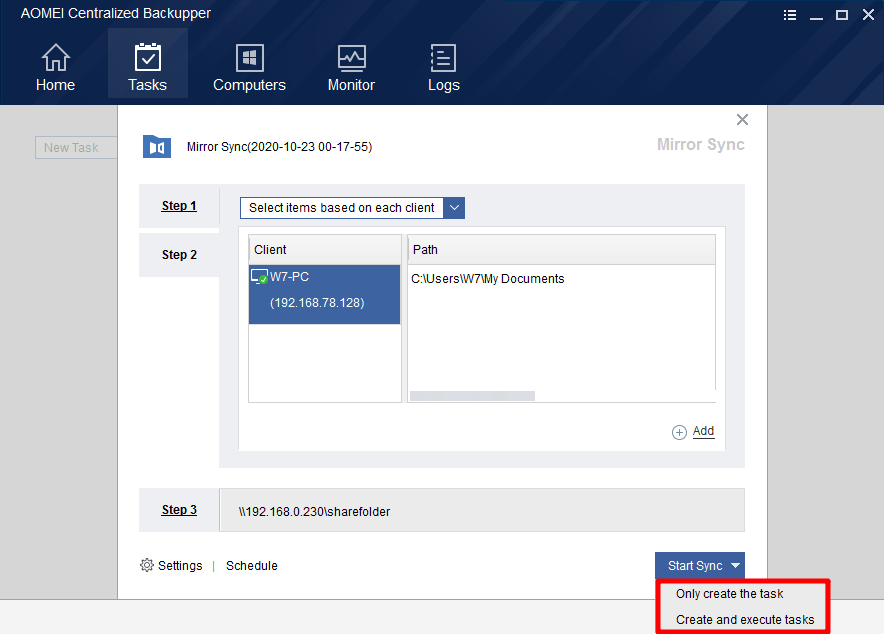
3. Click “Select a location as the destination path” in Step 3: right-click “Share or NAS device” or select the “Add Storage” button to add sync's destination.

4. Click “Start Sync” to create the task or execute the task.
Sync Settings:
-
Comments: Write a comment for your current sync. Once you need to find it, a unique comment could help you distinguish it from others.
-
Enable email notification: In unattended operations, a notification can be emailed containing the result of each sync.
Schedule Sync:
Schedule the required sync task to sync files Daily, Weekly, Monthly, etc. Please click here to know more details. (Scheduled Sync and scheduled backup adopt the same schedule settings.)
Note:
-
More advanced options for the current sync task can be set via Settings and Schedule.
-
You only can modify sync task name during creating task via AOMEI Centralized Backupper.
-
If you create a group to manage client computers, you can directly add this group in Step 1 (Add Computers) to create sync for all computers under the group.
-
AOMEI Centralized Backupper currently doesn’t support syncing files/folders from Network/Shared drive.
-
AOMEI Centralized Backupper only supports syncing file to Network/Shared drive.
-
After sync tasks are created, you can also check and run them from clients.