Take System State Backup and Restore in Server 2008 (R2) Easily
You will learn 3 methods to take system state backup and recovery in Windows Server 2008 (R2), including using Windows Server backup utility, command line or third-party server backup software.
By Lily Updated on March 21, 2024
Why Should We Backup System State for Windows 2008?
As we all know the data on the server machine must be very important for the company, no matter Windows Server 2003, or Windows Server 2008. However, there are many situations that can cause data loss or system crashes. Such as hard disk damage, virus invasion, operating errors, or even natural disasters. Once the system crashed, the company would suffer great losses.

Therefore, for the normal work of the company, it is necessary to back up the system state of your Windows Server 2008, for it can store the system state to a safe place, and it can be restored immediately after being damaged.
Don't worry about it too much, I’ll show you three solutions below to create system state backup for Windows Server 2008 (R2). You can first read and then choose the suitable one to follow.
#1. Create Windows Server 2008 System State Backup and Restore with AOMEI Backupper
AOMEI Backupper Server is one professional server backup software designed for Windows operating systems including Windows Server 2008 (R2), 2012 (R2), 2016, 2019, 2022, etc, and also supports Windows PC operating systems.

- It not only can help you backup the system state but also offers file, disk, and partition backup.
- It supports creating multiple scheduled backups: daily/weekly/monthly/USB plug-in/event triggers.
- It offers Incremental and Differential backup method to only backup the changed and modified data since the latest backup.
- It has a simple operating interface, so you can backup Windows Server OS easily with a few steps.
Now learn how to backup system state in Server 2008 (R2).
Create System Backup Windows Server 2008 via AOMEI Backupper
Step 1. Click Backup tab and select System Backup. It can also do Disk Backup, Partition Backup, File Backup, and File Sync.

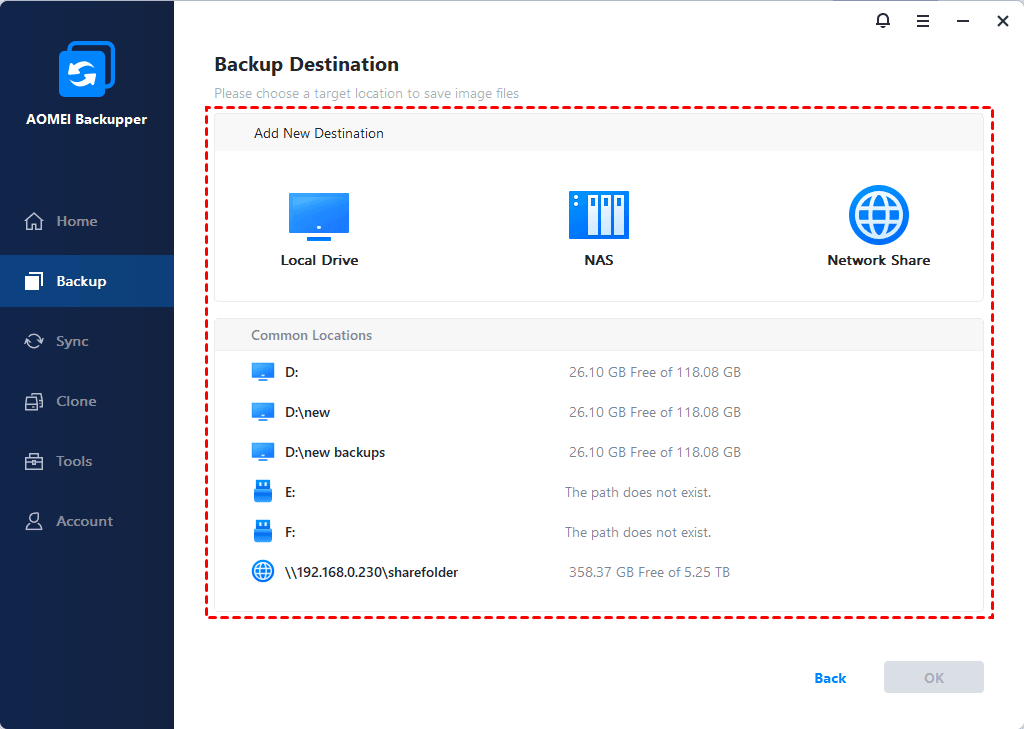
Step 2. You can see an interface in the following screenshot. You can choose a destination to save Windows Server 2008 system state backup.
✍Tip: You can choose backup your system image to local and external drives, Share and NAS Devices, and Networks, etc.
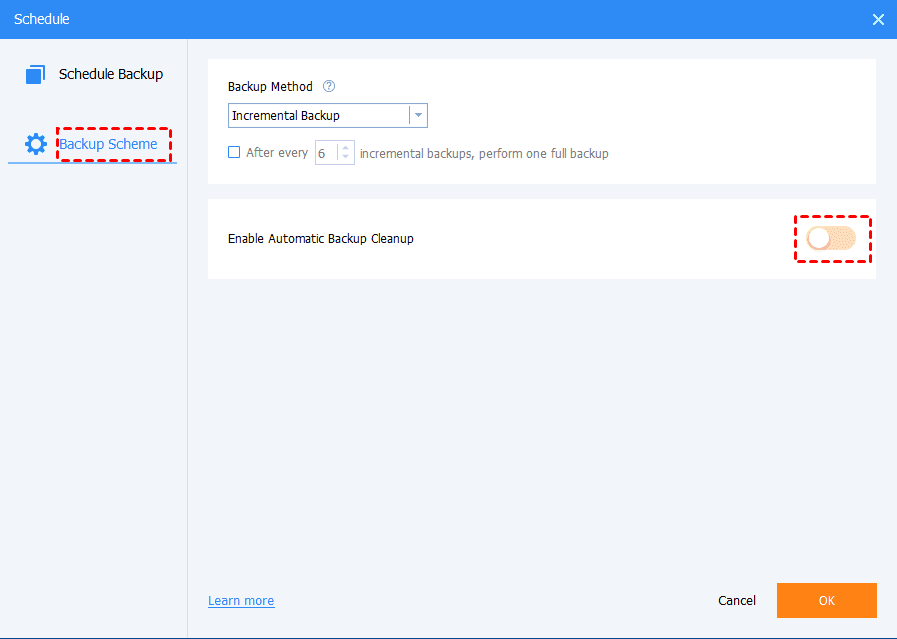
Step 3. (Optional) Configure backup schedule and scheme based on your needs.
▶ Click Schedule Backup to specify a time to run the system backup task, such as daily, weekly, or monthly.

▶ Click Backup Scheme to set backup method (Full Backup, Incremental Backup and Differential Backup ) and enable automatic backup cleanup (By quality, By time, By daily/weekly/monthly) to delete obsolete backups.
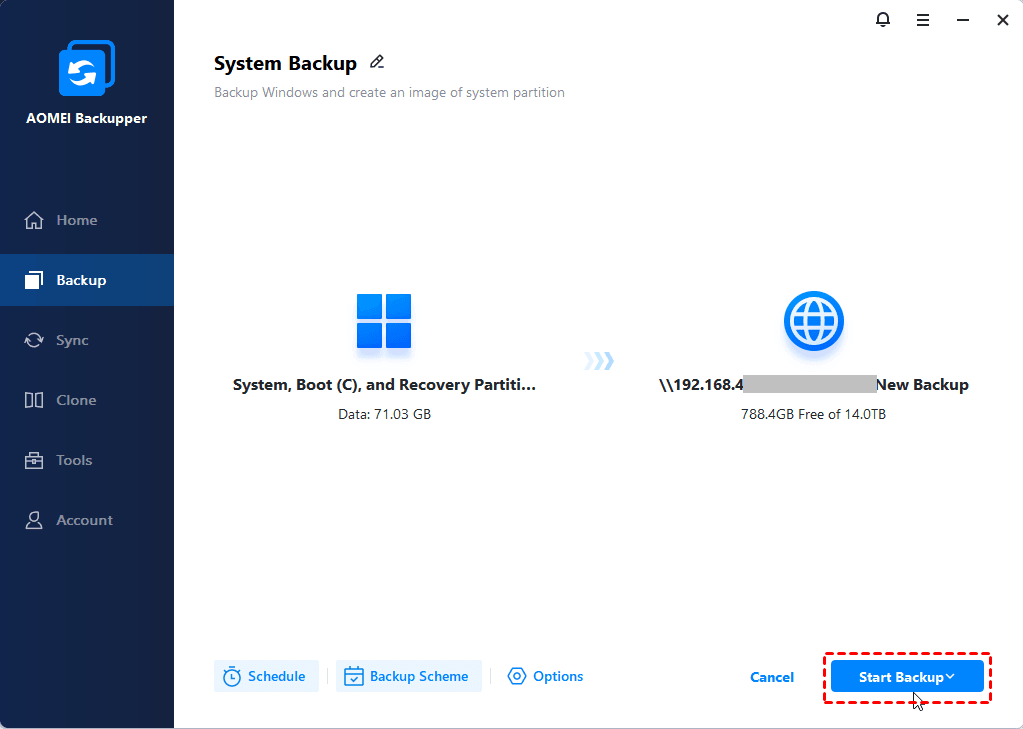
Step 4. After all the settings, click Start Backup to prompt the process. It will take a few minutes, and it depends on the size of the system partition. When it reaches 100%, click Finish, and you already backup system state for Server 2008.
Restore System Backup Windows Server 2008 via AOMEI Backupper
When your computer runs into issues, you may want to restore system state backup in Windows Server 2008 (R2). All steps are the same, you can take the following steps as a reference.
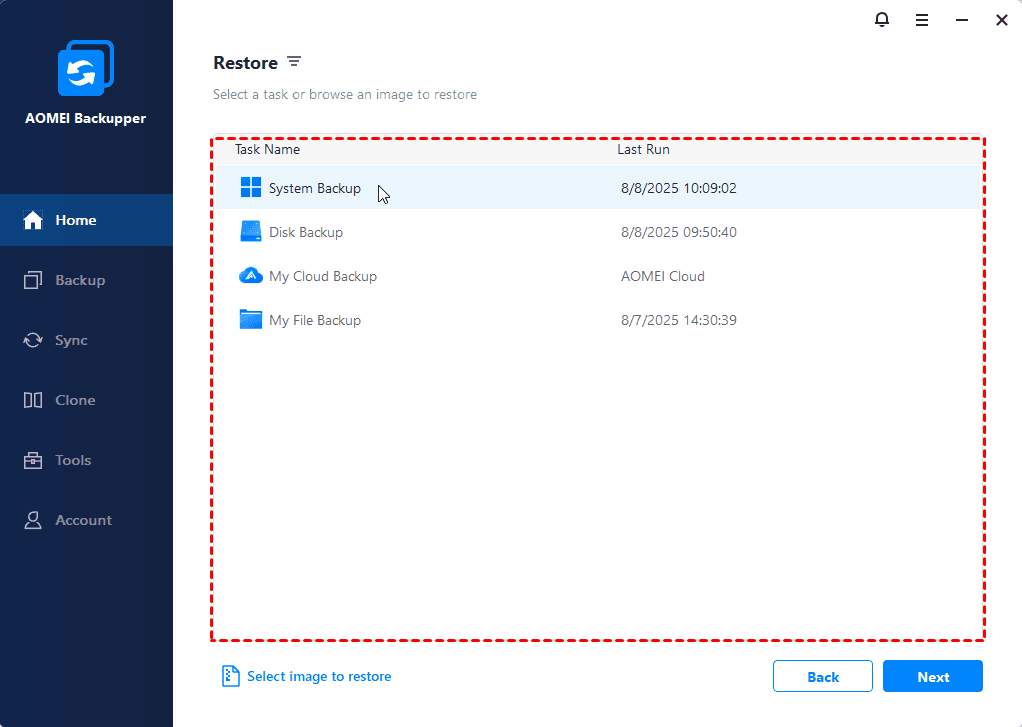
Step 1. Launch this software, click Restore and Select Task to find the image file.
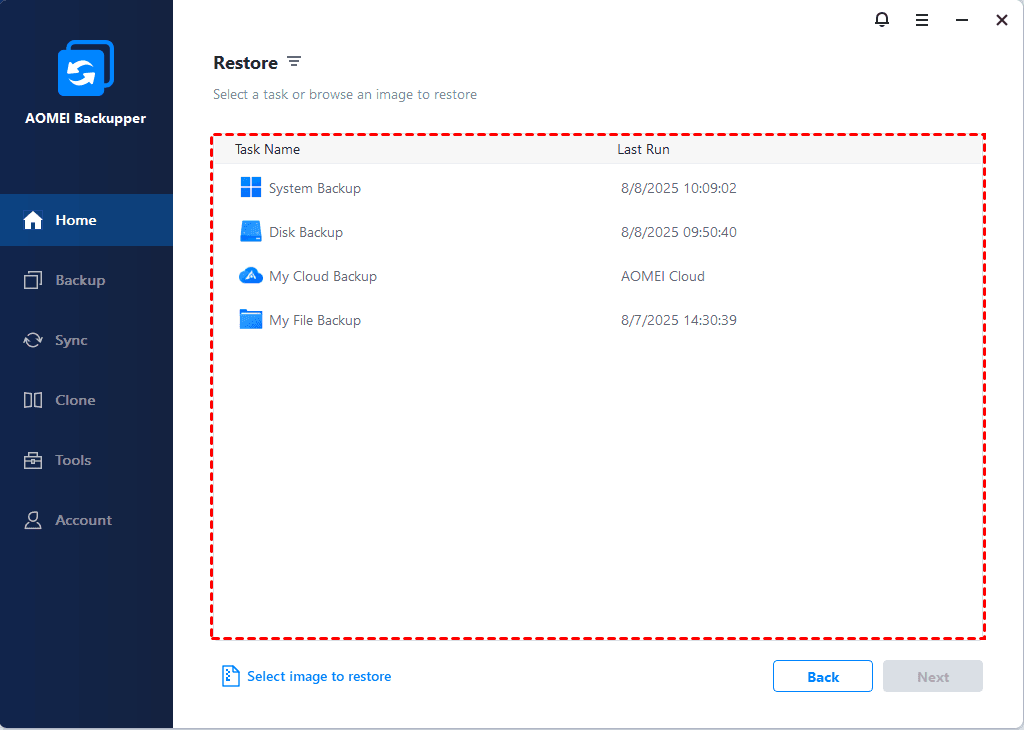
Step 2. Select the backup image you want to restore and click Next. If you cannot see any backup in the following window, go back and click Select Image File to manually choose the backup image.
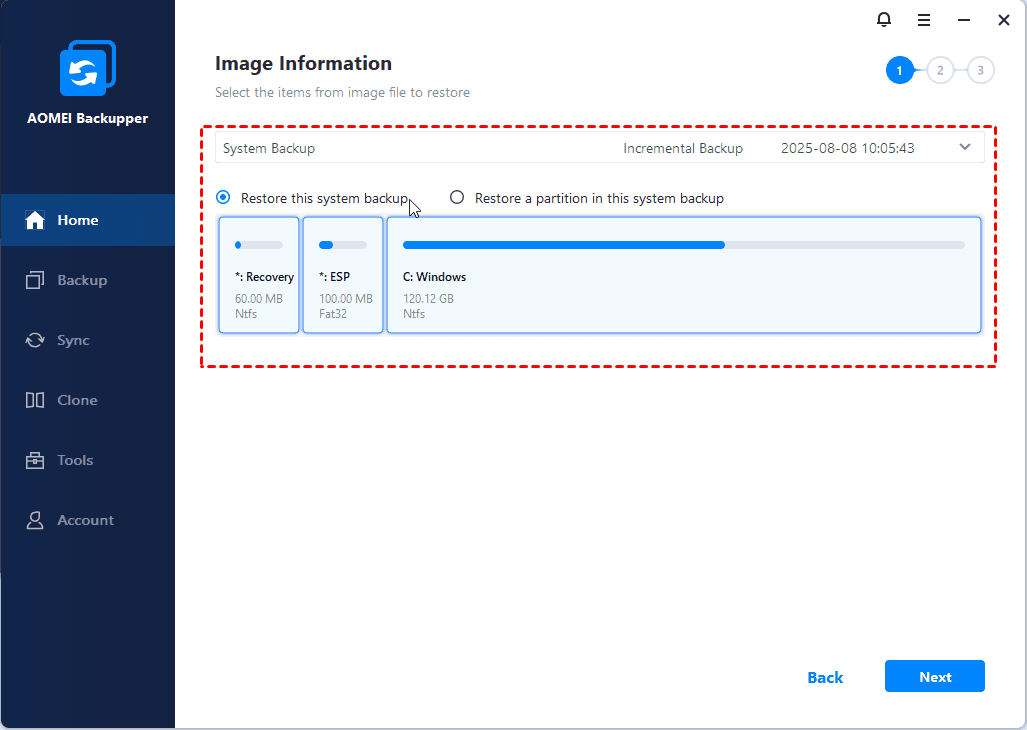
Step 3. Select to restore the entire system and click Next.
Tip✍: If you want to restore a system image to a new hard drive, you need to tick "Restore system to other location" and then select a partition on the new disk.
Step 4. Confirm the operation summary and click Start Restore.
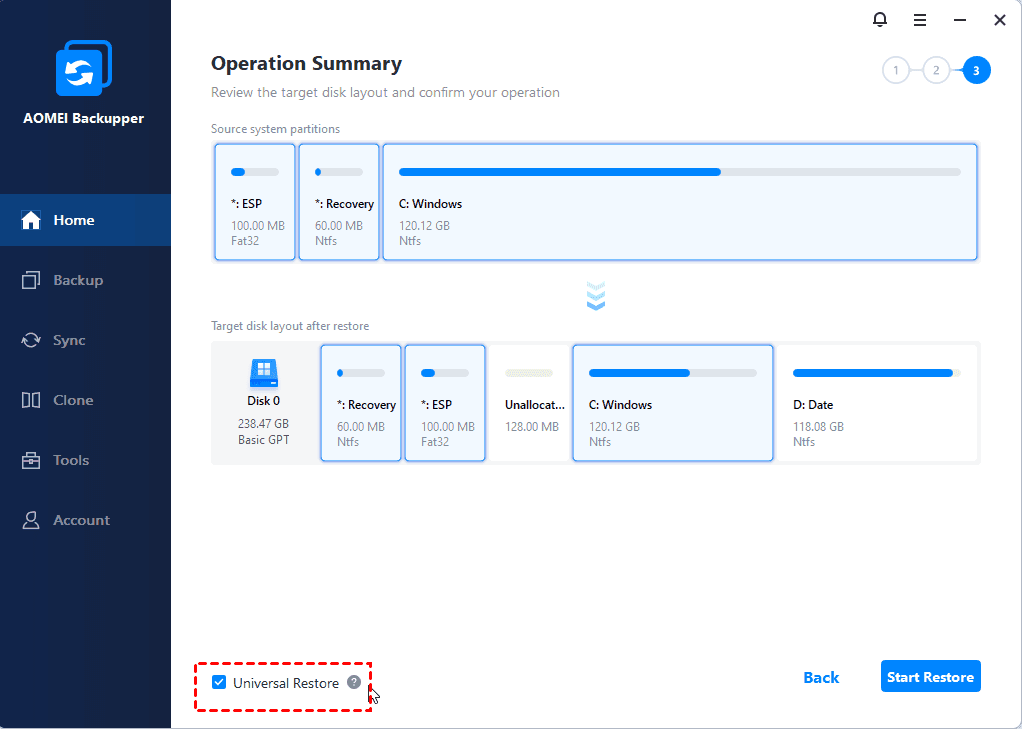
Tip✍: If you are restoring system image to a computer with different hardware, it’s suggested to tick "Universal Restore". This feature will install all the necessary drivers required to start a computer.
#2. Create System State Backup and Restore in Windows Server 2008 with Built-in Tool
Windows Server 2003 has a backup tool called NTbackup for system state backup. With the development of Microsoft and its Operating System, the NTbackup has been upgraded and replaced by Windows Server Backup in Windows Server 2008 or 2008 R2. The backup tool in Windows Server 2008 isn’t existing by default. If you want to use it, you must add the "Windows Server Backup" utility manually.
Backup Windows Server 2008
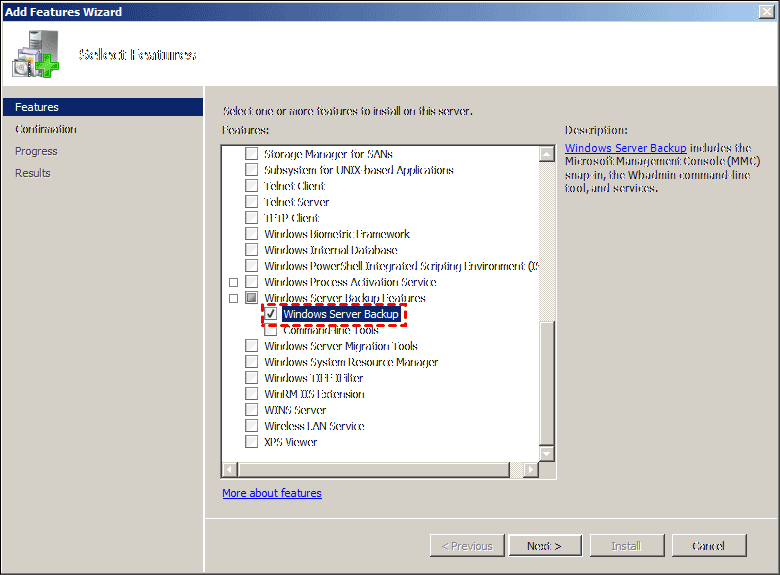
- Open the Server Manager in Administrative Tools, click Features. Then click Add Features to open the Select Features interface, select Windows Sever Backup Features and install it.
- Then, go to Windows Server Backup and take system state backup in Server 2008. You can create a one-time backup of the system state or a scheduled backup of the system state. Click Start -> Administrative Tools -> Windows Server Backup to open it.
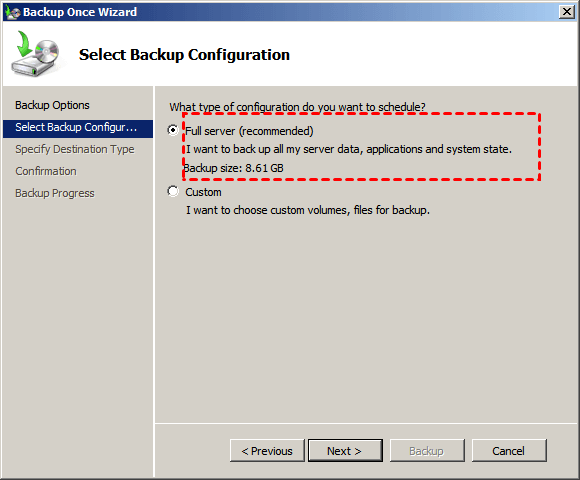
- Then, select Backup Once Wizard or Backup Schedule Wizard on the right side as you want. Then, choose Different options and Full server to include system state. For detailed steps, please refer to: create system restore point in Windows Server 2008 (R2).
Restore Windows Server 2008
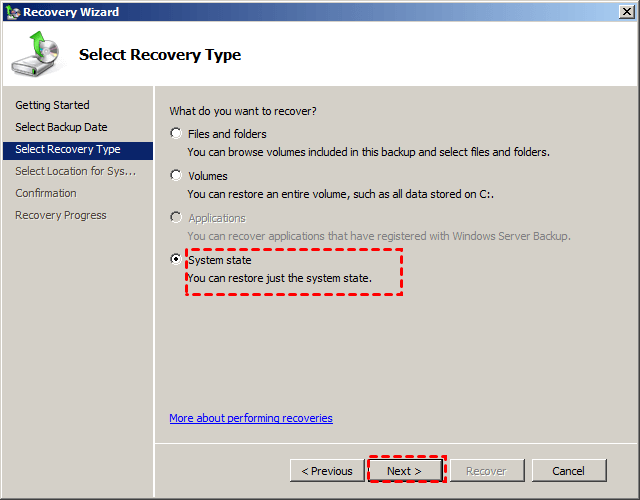
After creating a system state backup, you can choose to restore it when you start your computer but lost system files or registry. Open Windows Server Backup again, click Recover on the right side. Then, tick This server if your backup is saved at local disk, select the backup image you want to restore and system state in it.
For steps with picture, you can refer to: restore Windows Server 2008 (R2) to previous date.
Although Windows Server 2008 added a snapshot tool to improve NTbackup, it takes a long time to backup and restore. Besides, it has many other shortages:
✧ It could not restore the backup created by NTbackup.exe.
✧ It needs a separate disk to run the scheduled backup.
✧ It can only backup local NTFS volume.
For these reasons, it won’t be easy for users. Thus, Windows server 2008 backup software is very popular around the world. Considering the security and the price, here we recommend you AOMEI Backupper Server introduced in Method 1.
#3. Create Windows Server 2008 System State Backup and Restore via Command Line
Except for Windows Server Backup, server 2008 also has a command line utility called Wbadmin that can help you create system state backup. And it allows you to schedule backup server 2008 via -schedule switch. Then, let's see the detailed steps to backup system state in Windows 2008.
Create Windows Server 2008 System State Backup
- Click Start Menu and type “cmd” in the search box, then Run command prompt as administrator.
- Type a command based on the following syntax and press Enter to execute system state backup.
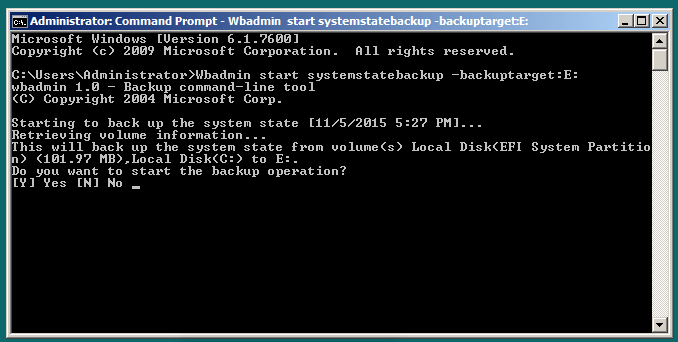
▶ wbadmin start systemstatebackup -backuptarget:X: -quiet
Tips✍:
¤ X: refers to the drive letter of the partition you want to save your backup. Note that the source volume (containing files you want to backup) cannot be used as target volume. Otherwise, you will receive the backup error:The location for backup is a critical volume, or twice the amount of space is necessary for volume shadow process andbackup.
¤ If you insist on using source volume as target volume to store the backup image, you can add the following registry key and set it value to 1. In this case, you can create system state backups inany volume are enabled. To revert to the default behavior, set the value to 0. ▶ HKEY_LOCAL_MACHINE\SYSTEM\CurrentControlSet\Services\wbengine\SystemStateBackup\
¤ -quiet parameter can undo the prompt before you start backup. That's to say, if you do not type-quiet parameter, you will receive a prompt “Do you want to start the backup operation?” and you need to type Y to ensure that you want to perform this operation.
Now, you may get a system state backup of the server created on a directory named WindowsImageBackup. And The average system state backup size is around 11 GB.
Perform Windows Server 2008 System State Recovery
You may not want to do any recovery, but you should know how to recover just in case. Below are the steps.
- Restart your server and press F8 repeatedly to access the Advanced Boot Options window.
- In the Advanced Boot Options window, choose Directory Services Restore Mode. Then, log in to your server with the DSRM password you created during Active Directory installation.
- Then, in the DSRM safe mode, click Start, type cmd and select it.
- Type wbadmin get versions to get the backup version you have. Remember to execute it by hitting Enter.
- Type wbadmin start systemstate recovery -version: version identifier to perform a restore. Please replace the version identifier with the one you got in the previous step.
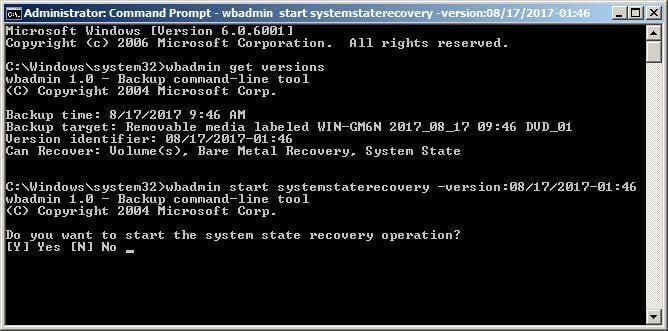
- Type y and press Enter to start this restore if you are asked to confirm this operation. Then, just go and grab a couple of coffee to let this process done itself.
Conclusion
That’s all for how to take system state backup and restore in Windows 2008 (R2). Compared to the Windows Server Backup utility or the command line, AOMEI Backupper Server is the optimal choice for Windows Server 2008 system state backup and restore because it offers more powerful functions. On top of that, it is fully compatible with all Windows operating systems, so you can use it to create system state backup in server 2012/2016/2019/2022 per your needs, both 32 bit and 64 bit.
And if you want to protect unlimited PCs and servers within your company, you may choose AOMEI Backupper Technician Plus. It offers unlimited billable technical services to clients. It also enables you to copy the installation directory for portable version creation.

