Top 3 Disk Imaging Software for Windows Server 2016
Want to create disk image for Windows Server 2016? You can make it with the built-in tool Windows Server Backup or the best server imaging software AOMEI Backupper Server and AOMEI Cyber Backup.
By Lily Updated on September 9, 2025
Why Create Disk Image for Windows Server 2016?
Disk images are backup files of partitions or volumes, or the whole data storage device like hard disk drive (HDD), solid-state drive (SSD) or USB flash drive, etc. Creating a disk image means copying all the contents and structure of the source disk.
Disk images are meaningful for users, whether Windows PC or Windows Server users. They can protect PC or server data safety from system crashes, hard drive failure, or other accidents. You can restore corrupted system and data with the disk image files. In a word, disk images are important for disaster recovery. So you come to this page to find a way to image your Server 2016.
What Is the Best Server Disk Imaging Software?
Here I'll introduce the best 3 Windows Server 2016 disk imaging tools to you, namely Windows Server Backup, AOMEI Backupper Server and AOMEI Cyber Backup.
1. Windows Server Backup
Windows Server 2016 has a backup tool called Windows Server Backup. It allows you to do a local backup for your data. Following are some of its key features:
- Full System Backup: This feature allows administrators to create complete backups of the entire server, including system files, applications, and configurations.
- Incremental Backup: After the initial full backup, Windows Server Backup performs incremental backups, which only save changes made since the last backup.
- Bare Metal Recovery: This feature enables the restoration of the entire server, including the operating system, to the same or different hardware.
2. AOMEI Backupper Server
AOMEI Backupper Server is designed specifically for Windows Server systems. It is powerful far beyond creating a disk image.
- Backup Types: It enables you to create system image or disk image for Windows Server. You can also backup specific files as necessary.
- Backup Configurations: It supports incremental and differential backup to save both your time and storage space. It also lets you set daily/weekly/monthly scheduled backups.
- Supported OS: It supports Windows Server 2012, 2016, 2019, 2022, 2025 (including R2), SBS 2008, 2011 and Windows PC systems.
This disk imaging software has an easy-to-use interface. You can use it to create disk image with a few simple clicks. Download and install the tool first.
Best Windows Server backup software.
3. AOMEI Cyber Backup
The best enterprise backup software - AOMEI Cyber Backup provides a convenient and reliable solution for centralized backup management of all Windows operating systems.
- Backup Solutions: It enables you to create system/disk/partition backup for a bunch of Windows PCs and Servers, supporting Windows 11/10/8.1/8/7 and Windows Server 2022/2019/2016/2012 (R2)/2008 (R2).
- Backup Destinations: You are allowed to save backup images on a local disk, external hard drive, network share or NAS device, etc.
- Backup Schedule: You can schedule a backup task to run daily/weekly/monthly using the full/incremental/differential backup method.
Download AOMEI Cyber Backup now!
How to Create Disk Image in Windows Server 2016
In this part, I’ll show you the detailed steps of creating a disk image in Windows Server 2016. You can first read and then choose the suitable one to follow based on your needs.
👉 Part 1. Server 2016 Create Disk Image with Windows Server Backup
👉 Part 2. Best Server Imaging Software for All Server Systems🔥
👉 Part 3. Best Centralized Windows Server Imaging Tool👍
Part 1. Server 2016 Create Disk Image with Windows Server Backup
Please note Windows Server Backup isn’t installed by default, so you need to install it before using it. FYI, using Windows Server Backup to create disk image in Windows Server 2016 will take a lot of time and occupy a lot of storage space. And it only allows you to set one scheduled backup task.
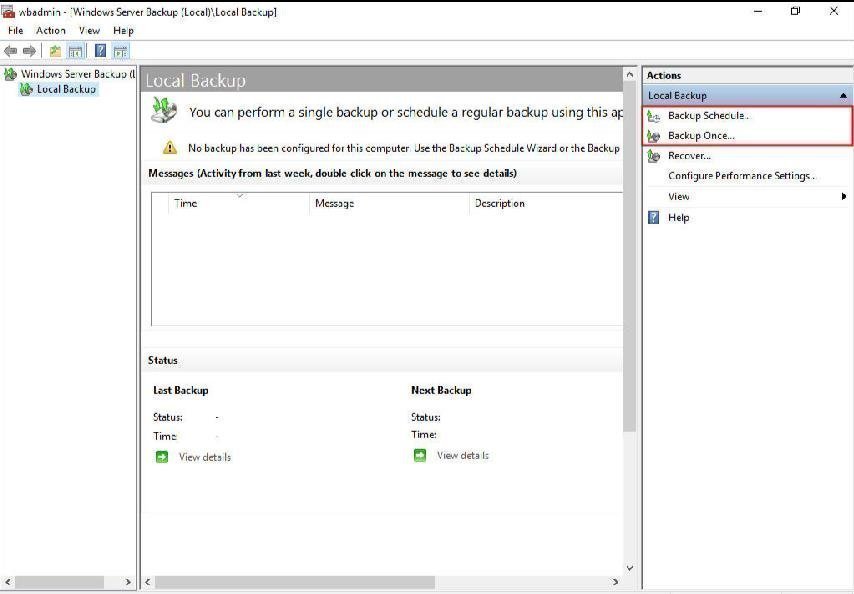
Step 1. Click Start menu, select Server Manager, and then click Windows Server Backup at the bottom of Tools.
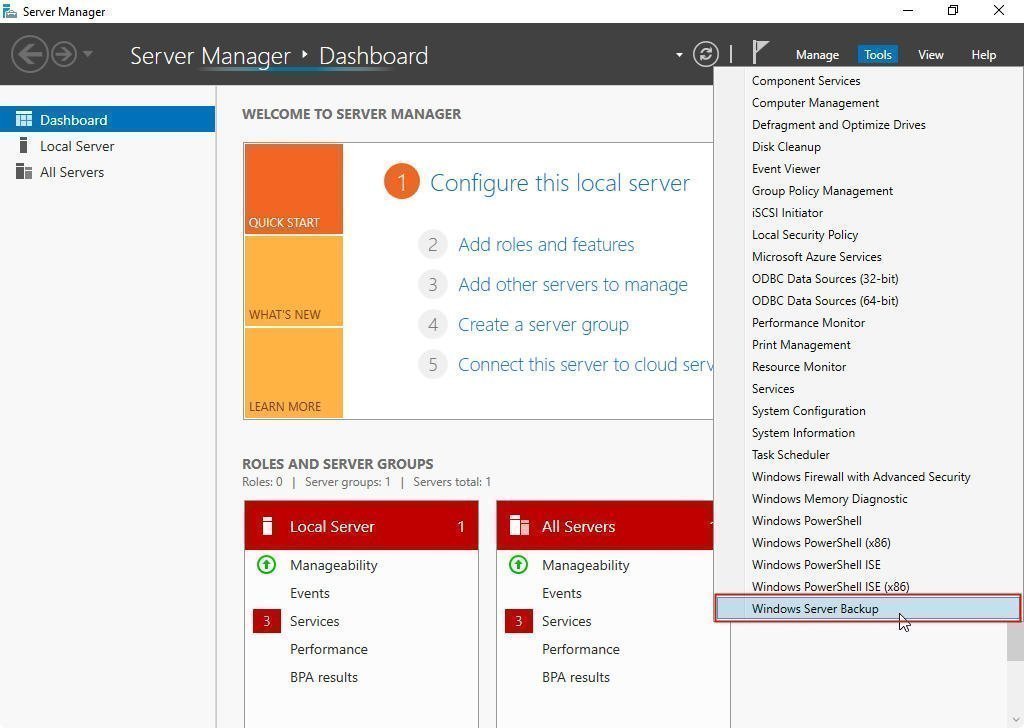
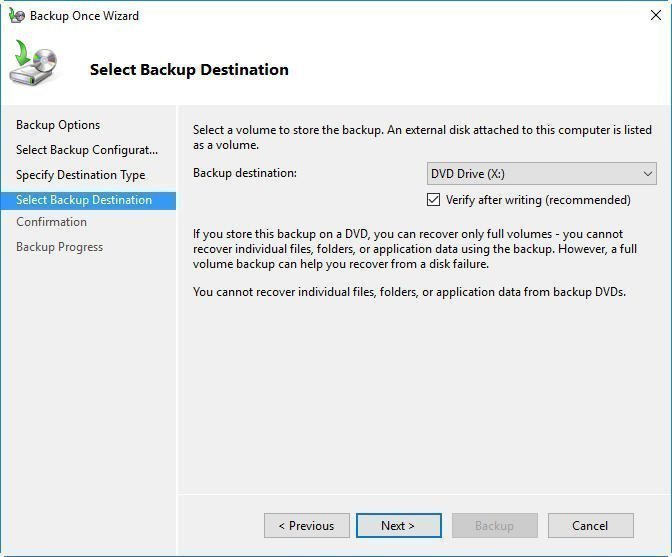
Step 2. Choose “Backup schedule...”, or “Backup Once...” at the Actions pane according to your requirements.
Step 3. Follow the wizard to back up step by step.
Part 2. Best Server Imaging Software for All Server Systems
Follow the steps below to create disk image for Server 2016 with AOMEI Backupper Server.
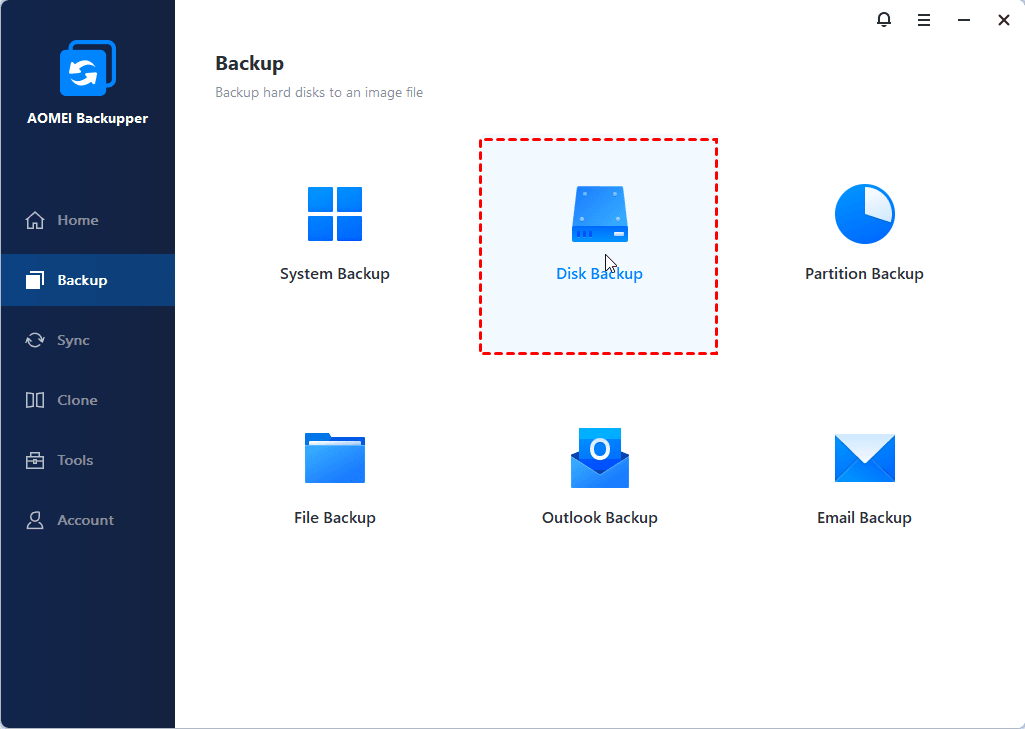
Step 1. When you launch the software, you can see its dark blue interface. Click Disk Backup under the Backup tab.
Step 2. Click Select Source to choose the disk which you want to create an image for. Then, select another place as the destination path to store the disk imaging file. You can backup Windows Server 2016 to external hard drive, USB flash drive or even network share.
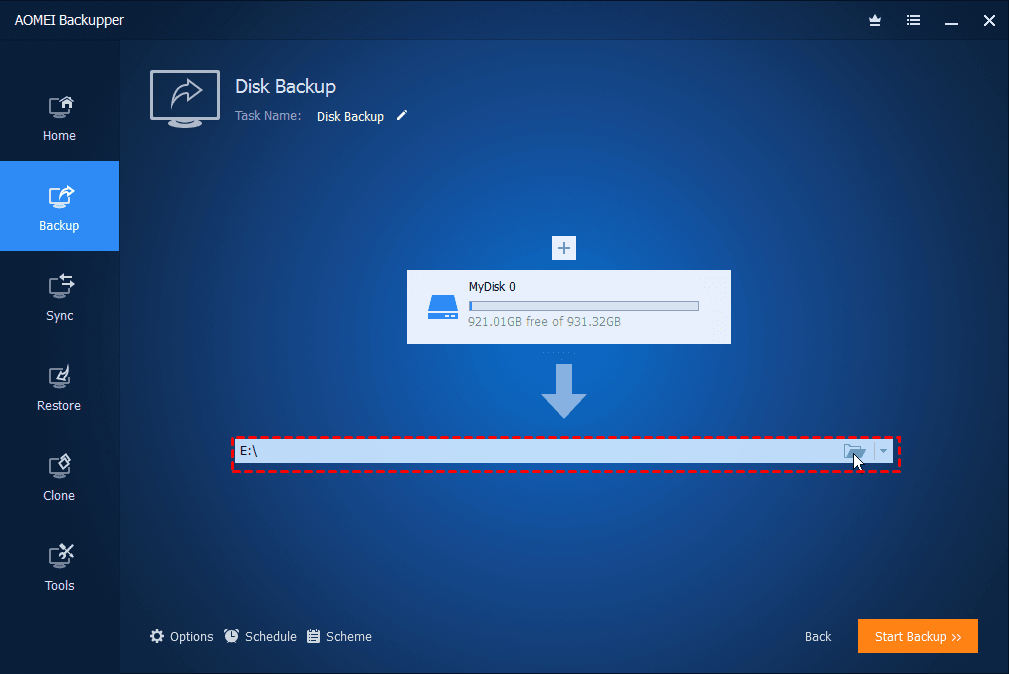
Step 3. Confirm the operations. If there is no problem, click Start Backup. It will start creating a disk image for you. Just wait till the progress ends.
★ Advanced backup settings you may need:
👉 Options: You can set up comment, encryption, compression, and enable email notification, etc.
👉 Schedule: Multiple options are available.
-
Daily/Weekly/Monthly: You can schedule automatic backup in Windows Server 2016 with daily, weekly, monthly instead of backing up manually.
-
Event Triggers: You could trigger the backup event to perform the backup based on User logon, User logoff, System startup, System shutdown or USB plug in (run the backup once the source or destination USB device is plugged in).

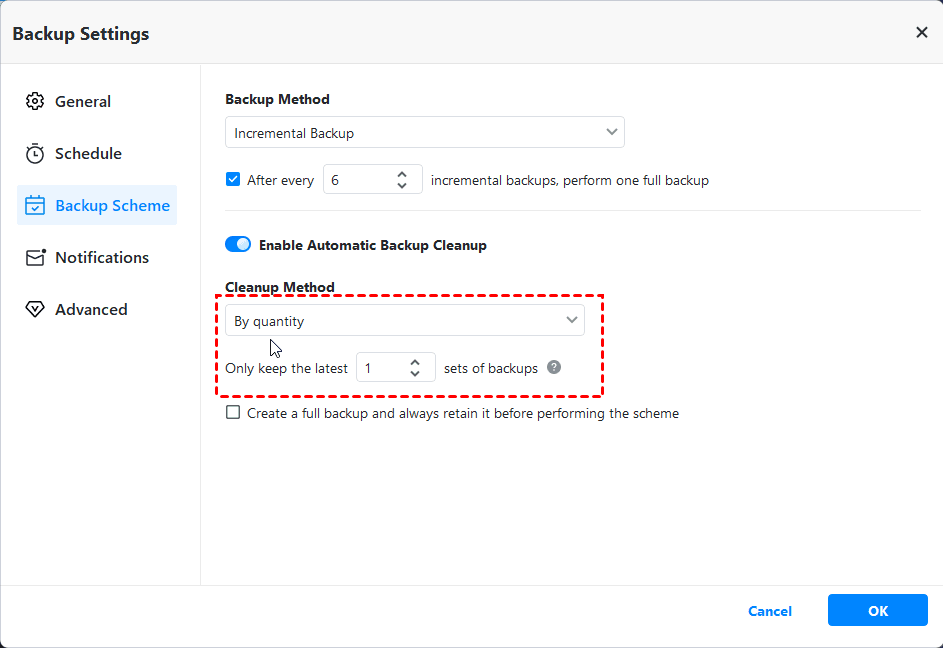
👉 Backup Scheme: You are able to customize the retention policy. There are 4 schemes to help you delete old backup images to free up space: By quantity, By time, By daily/weekly/monthly and By space.
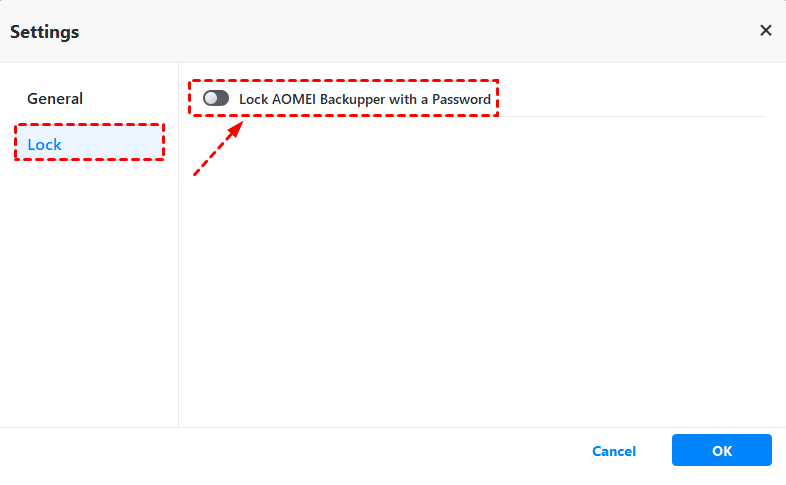
👉 Lock: To prevent unauthorized access to your backed up data, you can lock AOMEI Backupper with a password. To do this, please click the three-line icon at the top-right corner, then choose Settings > Lock.
Part 3. Best Centralized Windows Server Imaging Tool
Follow the instructions below to backup hard drives in Windows Server 2016 via AOMEI Cyber Backup.
Step 1. Install and run AOMEI Cyber Backup. The default username and password for AOMEI Cyber Backup are both "admin". Enter them and click Log in.
Step 2. Click Source Device > Windows > Add Windows Device to add the Windows Server 2016 device that you want to backup. You need to enter the IP address, username and password of it.
Step 3. Create a disk backup task.
- Click Backup Task on the left menu bar and select Backup Task > Create New Task.
- Choose Disk Backup as the Backup Type.
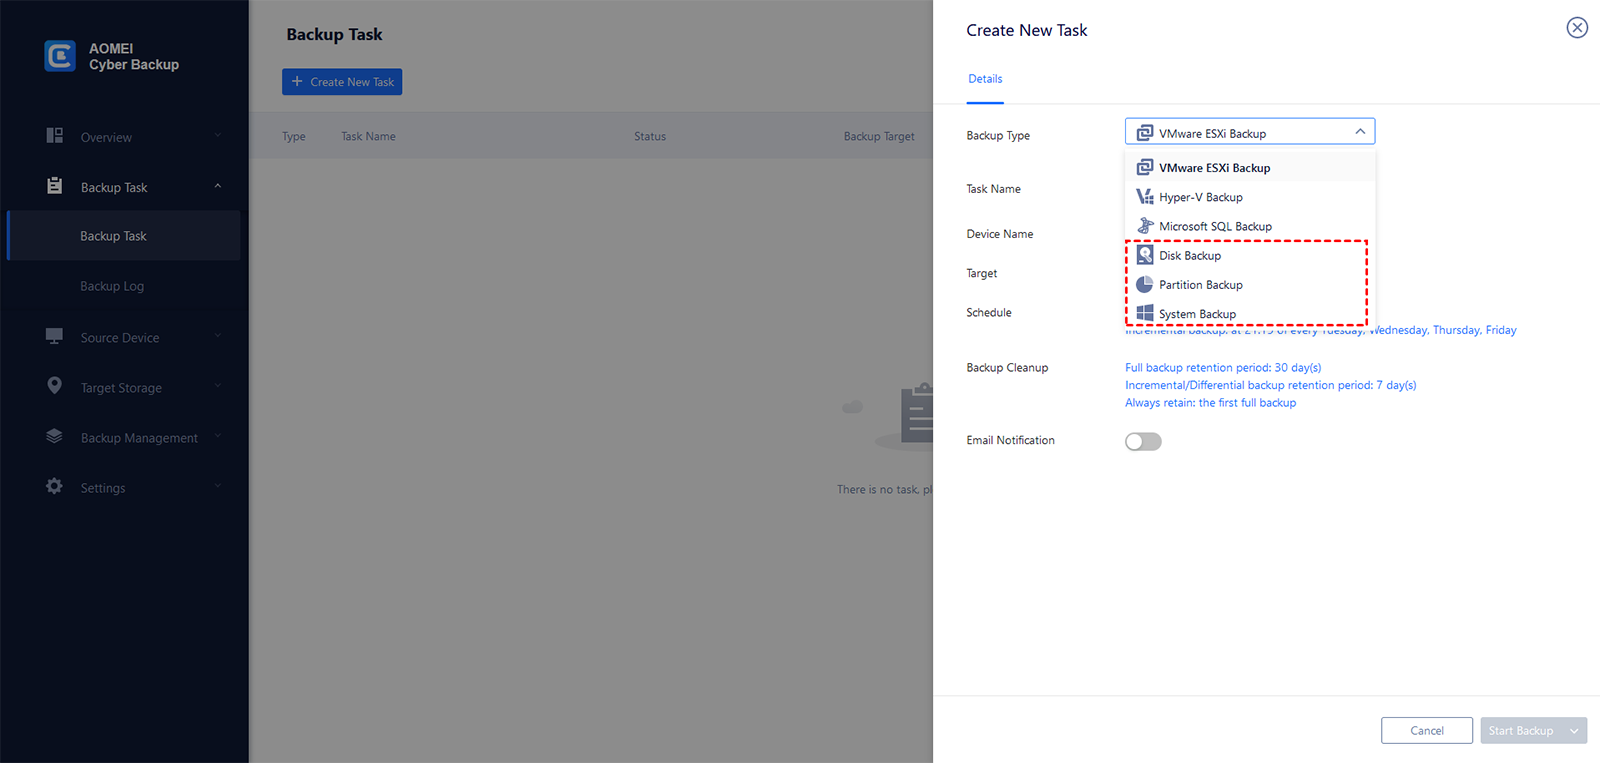
- Edit Task Name based on your need.
- In the Device Name field, click Select + to select the device you just added.
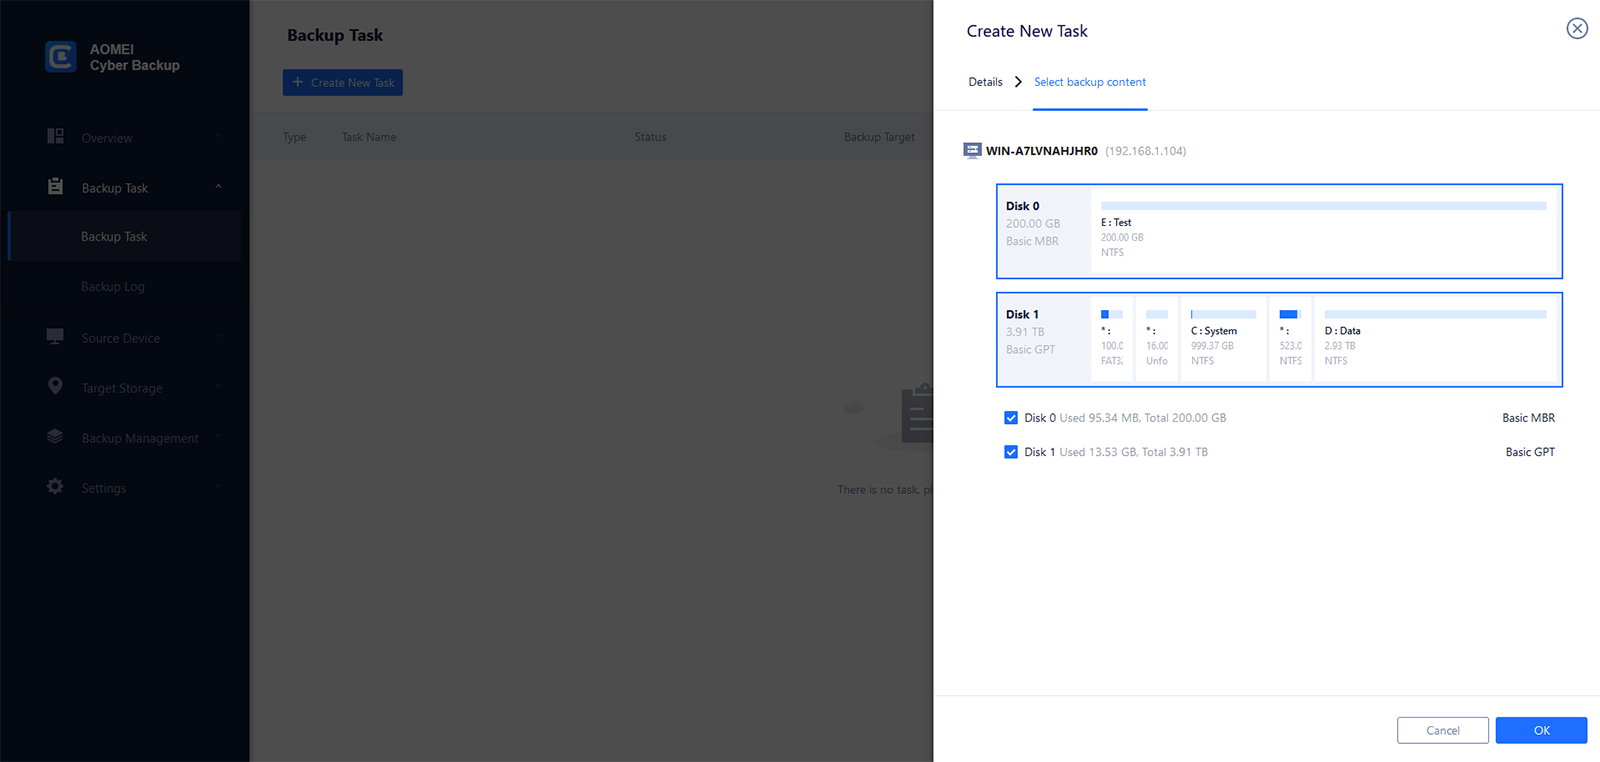
- In the Backup content field, click Select + to select one or multiple disks for backup.
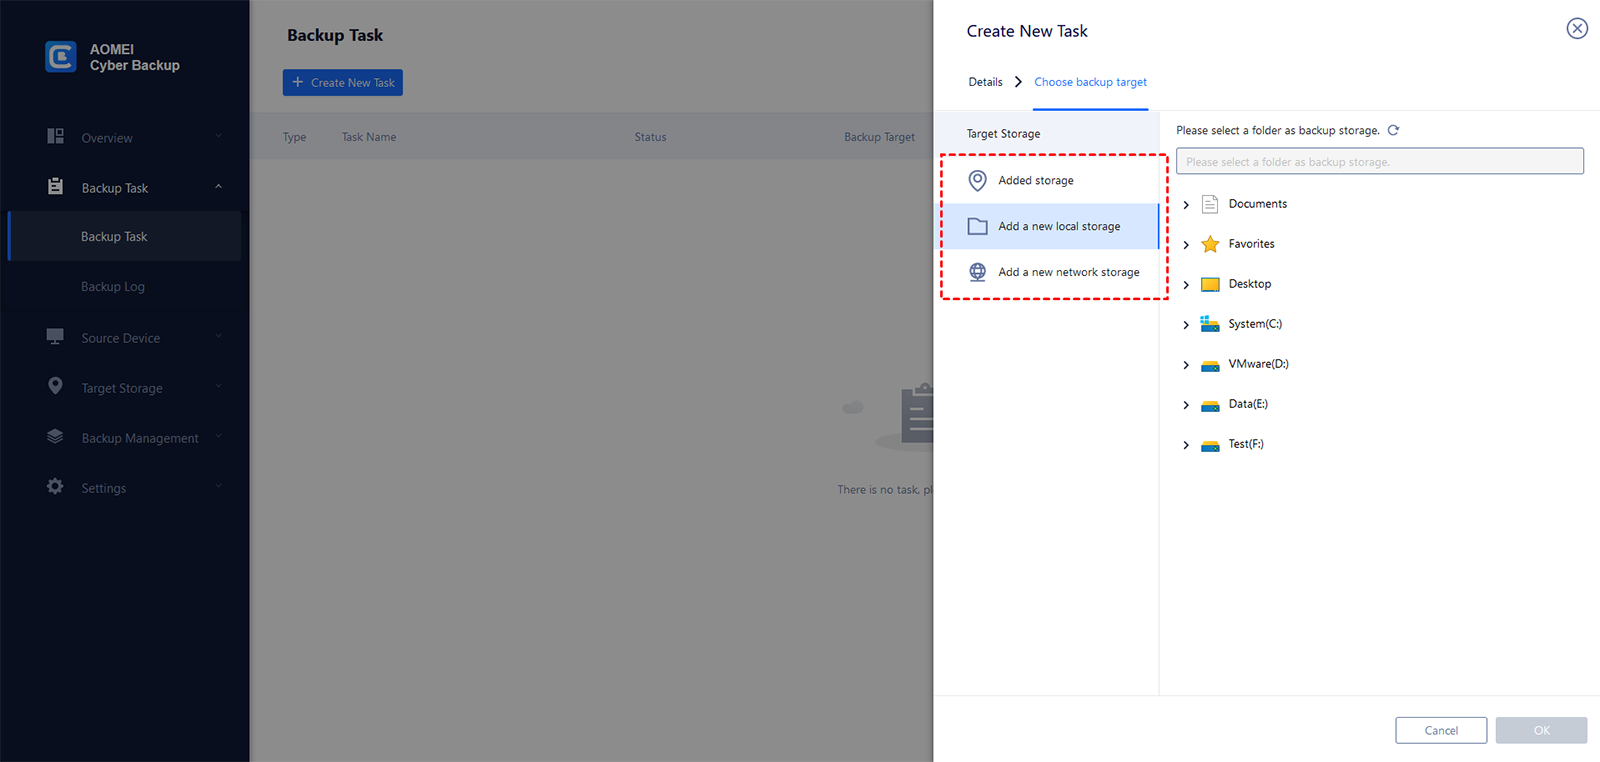
- In the Target field, click Select + to add a local or network storage.
- Change the default schedule settings in the Schedule field.
- Click Start Backup > Add the schedule and start backup now to begin creating disk image.
Conclusion
There are 3 pieces of Windows Server imaging software to help you create disk image for Server 2016. You may pick Windows Server Backup, AOMEI Backupper Server or AOMEI Cyber Backup according to your situation. It’s worth mentioning that AOMEI Backupper provides more powerful functions like multiple scheduled backups and bootable media creation.
What's more, if you want to protect unlimited PCs and servers within your company, you may choose AOMEI Backupper Technician Plus. You can use it to offer unlimited billable technical services to clients. It also enables you to copy installation directory for portable version creation.
FAQs about Windows Server 2016 Creating Disk Image
1. How do I check disk health in Windows Server 2016?
Disk Management provides a simple way to check the status of your drives:
- Right-click the Start button and choose Disk Management.
- View the status of your drives in the bottom pane. Look for any drives marked with errors, like “Unhealthy” or “Failed.”
2. How do I clean up disk files in Windows Server 2016?
The Disk Cleanup tool clears unnecessary files in a Windows Server environment. This tool is available by default on Windows Server 2019 and Windows Server 2016, but you might have to take a few manual steps to enable it on earlier versions of Windows Server.
To start the Disk Cleanup tool, either run the Cleanmgr.exe file, or select Start > Windows Administrative Tools > Disk Cleanup.
3. Does imaging software support virtual machines?
Yes. Windows Server Backup, AOMEI Backupper Server and AOMEI Cyber Backup all support Hyper-V backup while AOMEI Cyber Backup does the best job.

