How to Backup Windows Server 2019 Files (Top 3 Ways)
Wanna backup files in Windows Server 2019 to prevent data from losing? Scroll down to get 3 professional Windows Server backup tools to help you.
By Lily Updated on May 28, 2026
Losing important business files on a server can lead to downtime, security risks, and costly recovery efforts. That’s why creating regular file backups on Windows Server 2019 is essential for protecting shared folders, user data, databases, and critical business documents. In this guide, you’ll learn several effective ways to back up files in Windows Server 2019.
🌟 To check more scenarios about backing up Windows Server, please refer to this complete guide: Backup Windows Server.
Overview of Windows Server 2019
Windows Server 2019 is the ninth version of the server operating system released by Microsoft. Built on the strong foundation of Windows Server 2016, it brings plenty of innovations on four key themes: Hybrid Cloud, Security, Application Platform, and Hyper-Converged Infrastructure (HCI).
There are several new features added to Windows Server 2019, including:
-
System Insights: brings local predictive analytics capabilities natively to Windows Server, thus helping you reduce the operational expenses associated with reactively managing your Windows Server instances.
-
Storage Migration Service: provides a graphical tool to inventory data on servers and makes it easier to migrate to new servers.
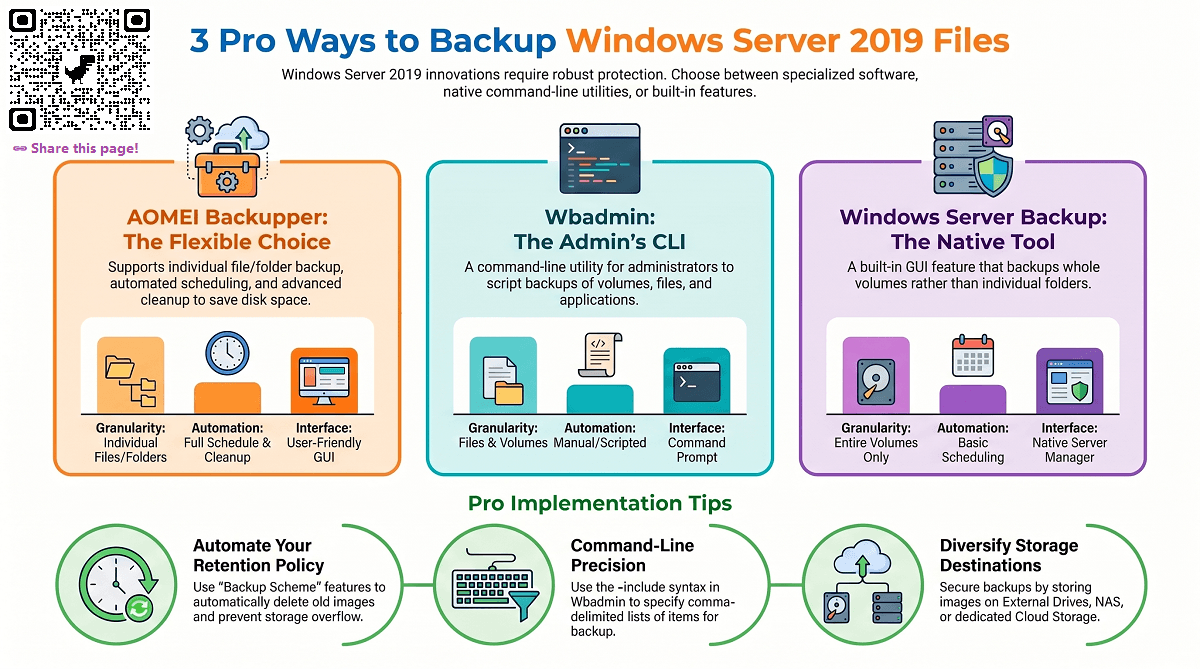
If you want to figure out how to backup Windows Server 2019 files to avoid data loss, please read on.
|
✅Way 1: Using server backup software |
Download, install and run Windows Server 2019 backup software…Full steps |
|
✅Way 2: Using Wbadmin |
Hover your mouse pointer over the bottom left corner of your desktop to show the Start menu…Full steps |
|
✅Way 3: Using Windows Server Backup |
Open Server Manager, click Tools in the upper-right column and select Windows Server Backup…Full steps |
Way 1: Backup files via powerful server backup software
AOMEI Backupper Server, specialized backup software for server, can help you with file backup in Windows Server 2019. Also, you can use it to backup files in Windows 11/10/8.1/8/7 and Windows Server 2025/2022/2016/2012 (R2). The following are its main features:

-
Offer various backup types: System/Disk/Partition/File Backup. Thus, you can not only backup files in Windows Server 2019, but also create Windows Server 2019 system image backup, etc.
-
Schedule automatic backup with daily, weekly, or monthly mode; backup only changed files with Incremental or Differential Backup; delete old backup image with different cleanup methods.
-
Enable you to backup to various locations, such as local disks, external hard drives, USB flash drives, NAS devices, and network location.
-
Provide other useful tools like Create Bootable Media and AOMEI PXE Boot Tool (booting multiple computers from network).
★ How to schedule automatic backups in Windows Server 2019
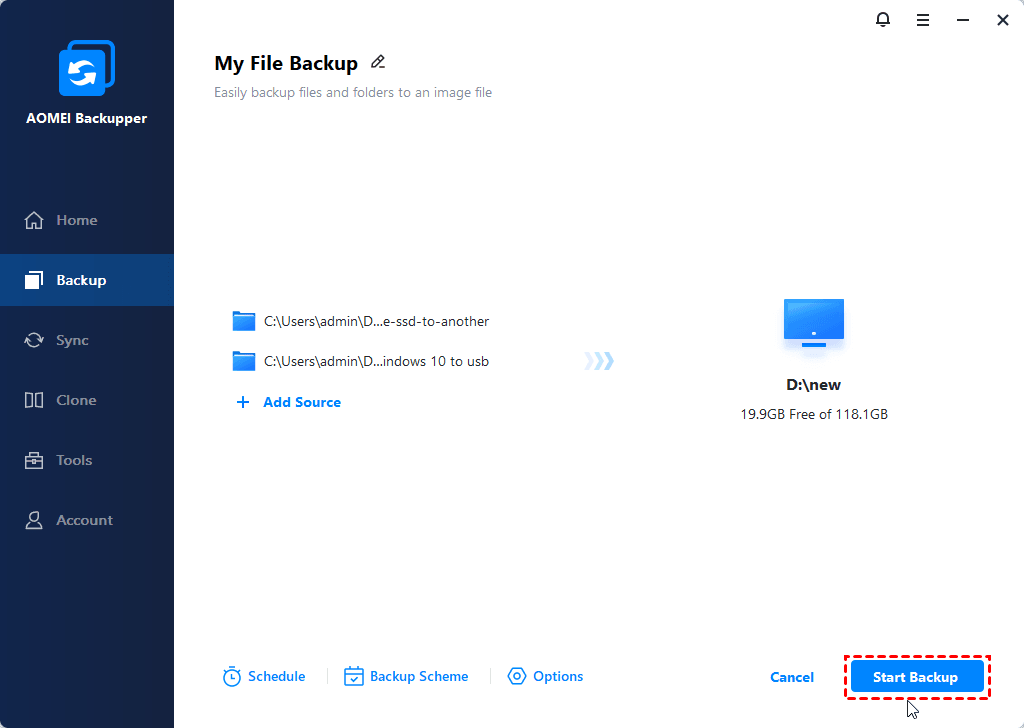
Step 1. Download, install and run Windows Server 2019 backup software. Click on “Backup” and select “File Backup”.
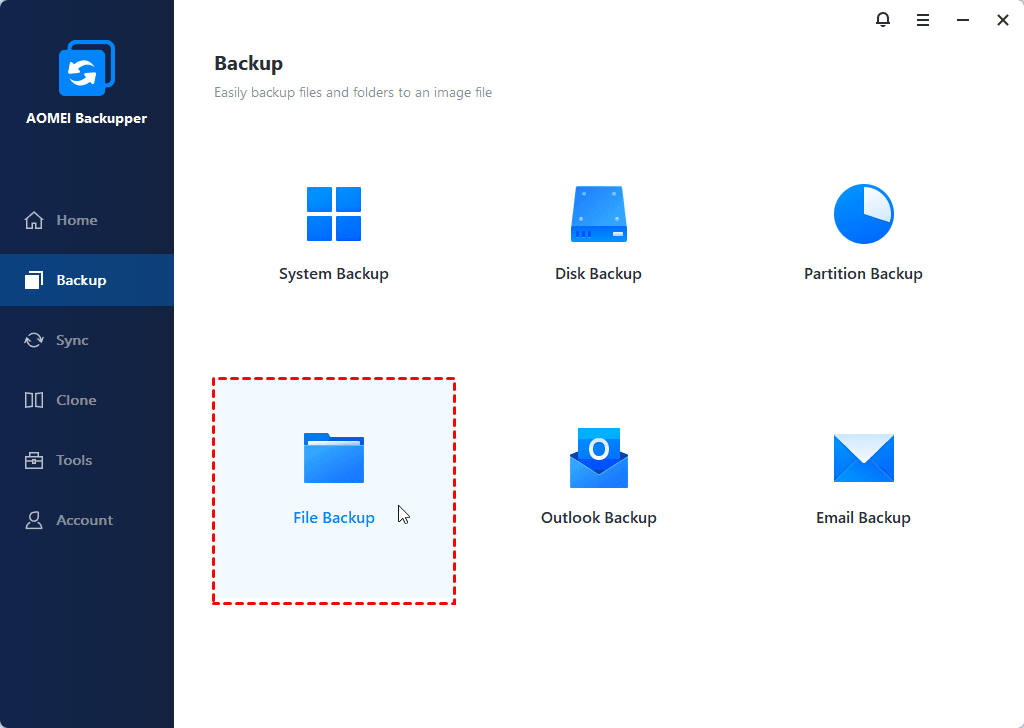
💡 Note: To backup Active Directory Windows Server 2019, choose "System Backup" here.
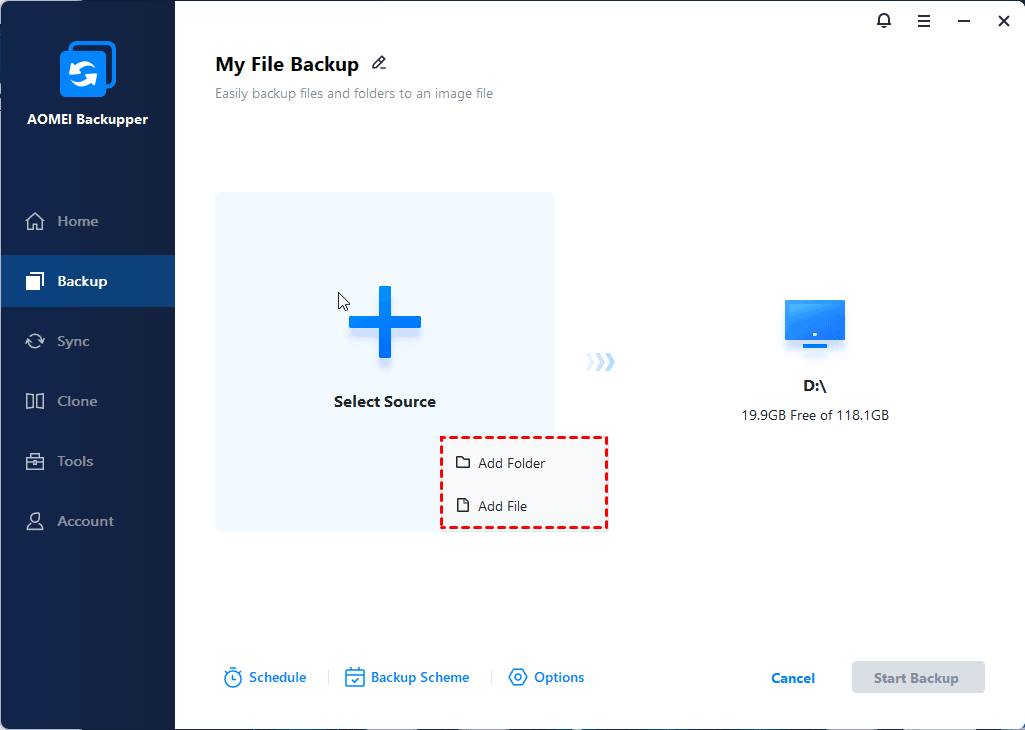
Step 2. Name the task so that you can distinguish it from other backup tasks. Click “Select Source” to select the files/folders you want to backup.
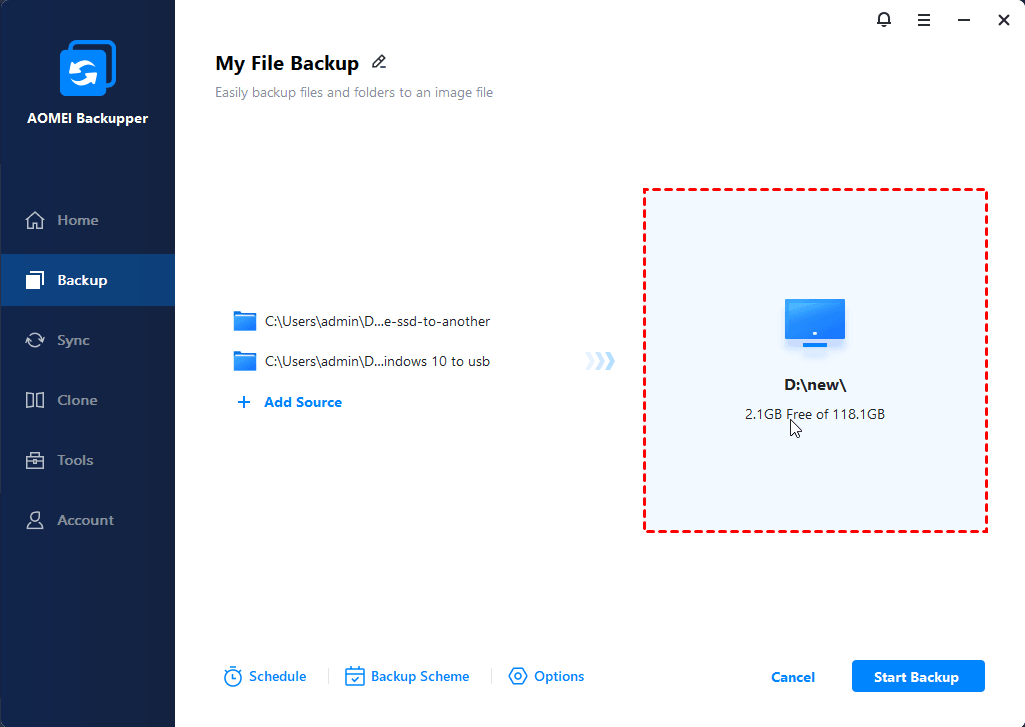
Step 3. Select a destination location to store the image file. You can backup files to external hard drive, USB flash drive, network drive, NAS, etc.
Step 4. To schedule automatic backups in Windows Server 2019, please click "Schedule" and choose your preferred schedule modes. There are multiple options available: “Daily”, “Weekly”, “Monthly”, and “Event triggers”.

Step 5. Confirm the operation and click “Start Backup” > "Add the schedule and start backup now" to begin backing up files in Server 2019.
★ How to clean old backups in Server 2019
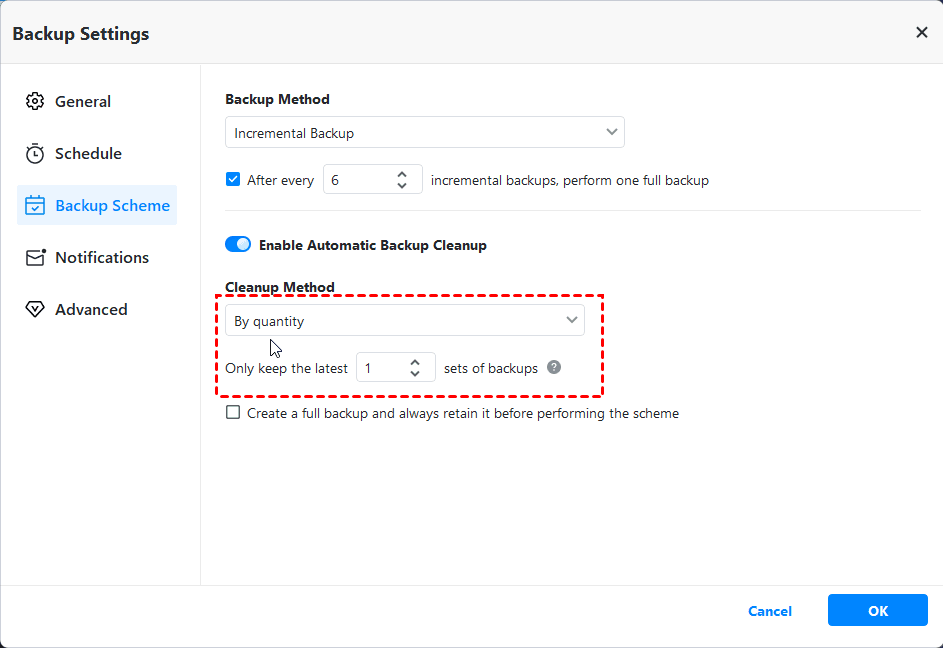
To clean old backups in Windows Server 2019, you can make use of the Backup Scheme feature.
>> Backup Method: You can use the default backup method - incremental backup or change it to differential backup.
>> Enable Automatic Backup Cleanup: You can delete old image files automatically to free up disk space for new backups. There are four inbuilt cleanup rules: "By quantity", "By time", "By daily/weekly/monthly", and "By space".
★ Further backup needs
👉 Options: you can set email notification, encrypt, compress, and split your backups based on your needs.
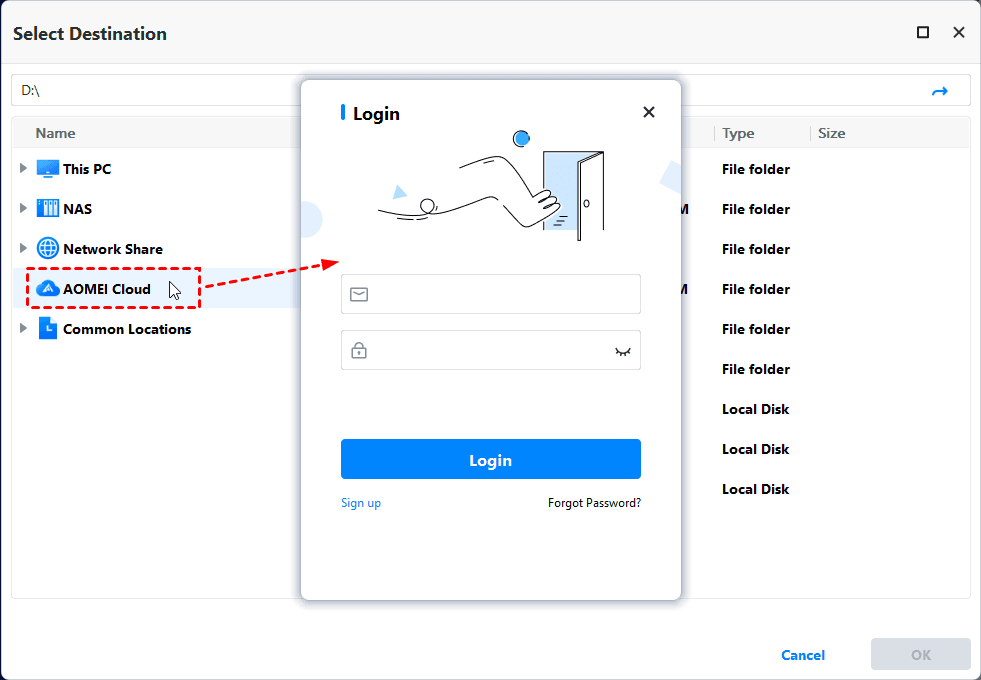
👉 There is a growing trend to backup files to cloud storage. AOMEI offers users its own cloud - AOMEI Cloud. After you sign up for an AOMEI account, you can use 1TB storage for free within 15 days.
Way 2: Backup files in Server 2019 using Wbadmin
Wbadmin (wbadmin.exe) is a command line utility which enables you to back up and restore your operating system, volumes, files, folders, and applications from a command prompt. To use it, you should be a member of the Administrators/Backup Operators group or you must have been delegated the appropriate permissions.
Here’s how to backup files in Server 2019 using Wbadmin:
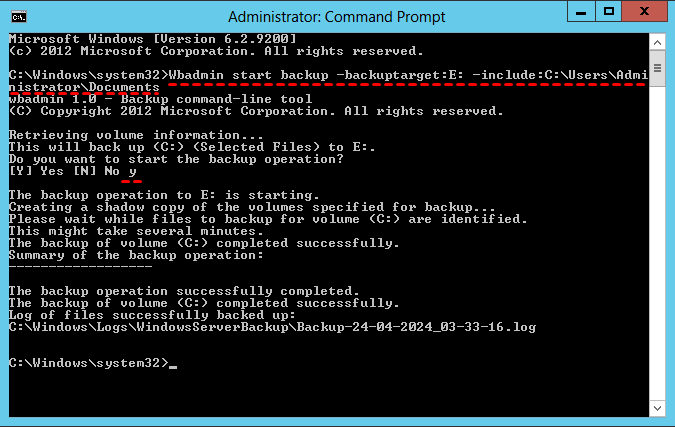
Step 1. Hover your mouse pointer over the bottom left corner of your desktop to show the Start menu launcher. Right-click the Start menu launcher and select Command Prompt (Admin).
Step 2. Type Wbadmin start backup -backuptarget:E: -include:C:\Users\Administrator\Documents and press Enter to backup the Documents folder to E: drive.
💡 Notes:
- -backuptarget: Specifies the storage location for this backup.
- -include: Specifies the comma-delimited list of items to include in the backup. You can include multiple files, folders, or volumes.
Step 3. Type y and press Enter to start the backup operation.
Step 4. Exit Command Prompt when the backup operation is complete.
Way 3: Backup files with Windows Server Backup 2019
Windows Server Backup 2019 is essentially the same as Windows Server Backup 2016, but you can only backup the whole volume instead of individual folders. If you intend to use Windows Server Backup, you have to first install it as a Windows Feature using Server Manager or PowerShell. After it is installed, you can follow the instructions below:
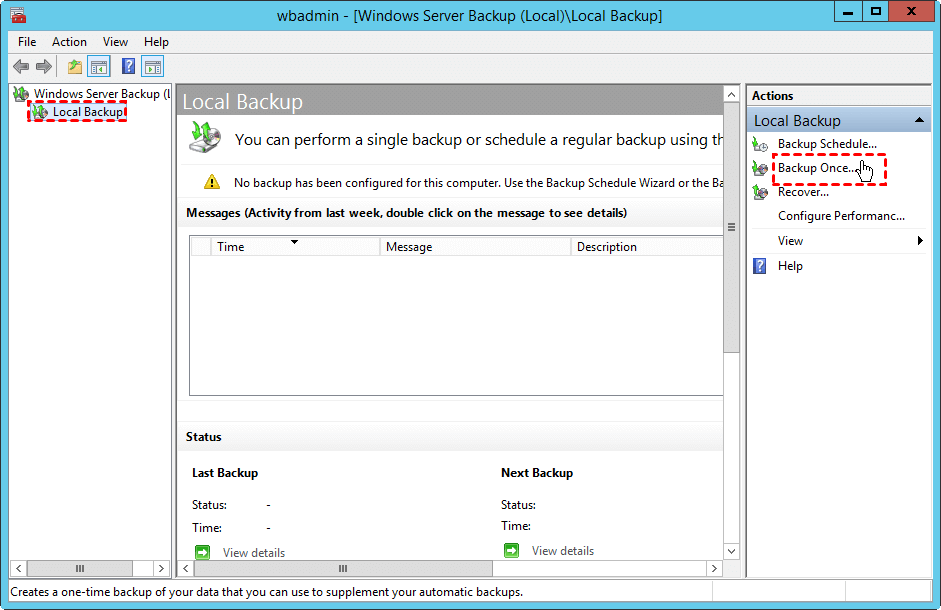
Step 1. Open Server Manager, click Tools in the upper-right column and select Windows Server Backup.
Step 2. Click Local Backup. On the Action menu, click Backup once.
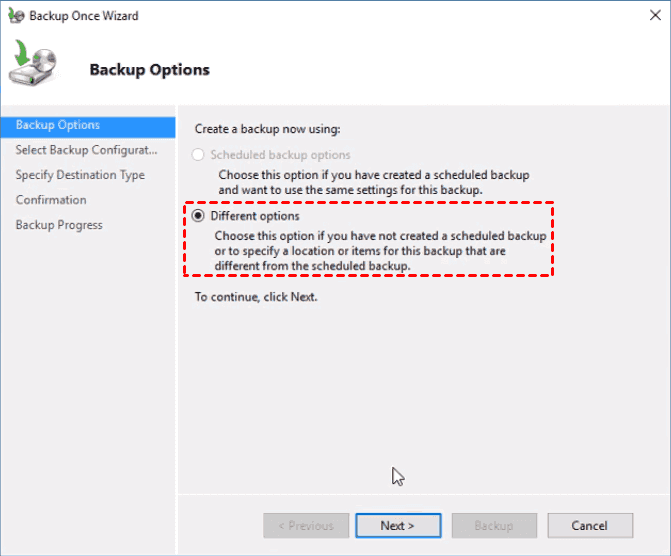
Step 3. In the Backup Once Wizard, on the Backup options page, click Different options, and then click Next.
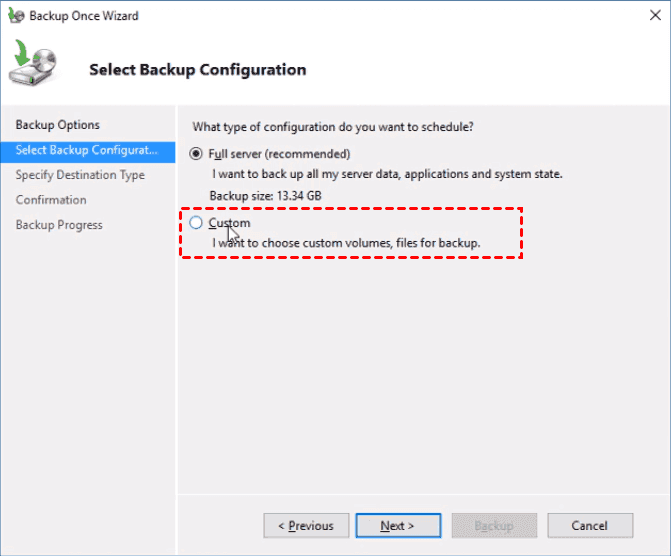
Step 4. On the Select backup configuration page, click Custom, and then click Next.
Step 5. On the Select Items for Backup page, click Add Items to select the volume(s) to be backed up, and then click Next.
💡 Note: Choose volumes and not individual folders. The only way to perform an application-level backup or restore is to select an entire volume.
Step 6. On the Specify destination type page, click Local drives or Remote shared folder, and then click Next.
-
If you choose Local drives, the Select Backup Destination page appears. Select an option from the Backup destination dropdown, and then click Next.
-
If you choose Remote shared folder, the Specify remote folder page appears. Specify a UNC path for the backup files, configure access control settings.
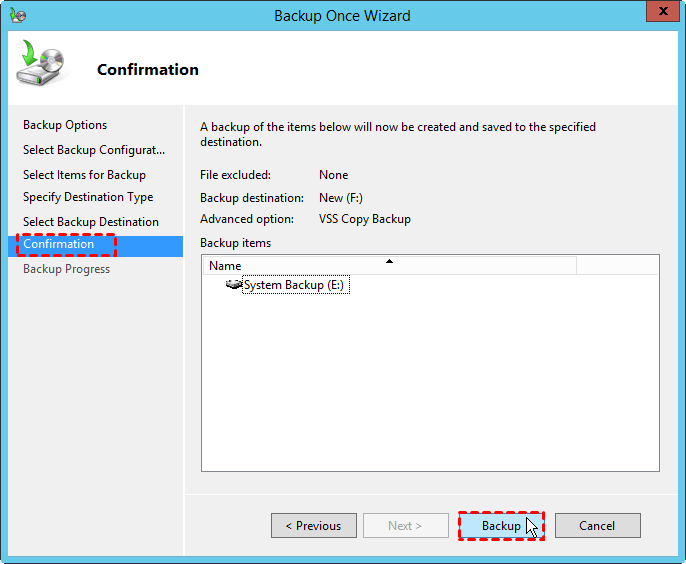
Step 7. On the Confirmation screen, click Backup. Once this has completed, click Close to exit the Backup Once Wizard.
Step 8. Close Windows Server Backup.
Except for not backing up individual files, there are other Windows Server Backup limitations you should know. If you want a more powerful server backup software, please go to way 1.
FAQs about creating Windows Server file backup
🔍 1. What is the best way to back up files on Windows Server?
The best method depends on your needs. Windows Server Backup works well for basic local backups, while AOMEI Backupper provides flexible scheduling, backup cleanup, cloud storage support, and easier recovery management for businesses.
🔍2. What is the best enterprise data backup solution?
If you are an enterprise user who has multiple Windows Server devices that need to be backed up, you can try the best enterprise backup software - AOMEI Cyber Backup. It offers you all-around enterprise data backup solutions:
- It enables you to create system/disk/partition/file backup for a bunch of Windows PCs and Servers, supporting Windows 11/10/8.1/8/7 and Windows Server 2022/2019/2016/2012 (R2)/2008 (R2).
- You are allowed to save backup images on a local disk, external hard drive, network share or NAS device, etc.
- You can schedule a backup task to run every day/week/month using the full/incremental/differential backup method.
🔍 3. How often should I back up server files?
For important business data, daily backups are recommended. Critical environments may require more frequent backups, such as hourly incremental backups, to minimize data loss.
🔍 4. Can open or occupied files be backed up?
Yes, open or occupied files can be backed up using AOMEI Backupper and built-in server backup tools. They support Volume Shadow Copy Service (VSS), allowing consistent backups of active files such as databases, virtual machines, and shared documents without interrupting server operations.
🔍5. How do I recover files using Windows Server Backup?
To recover files from a backup created by Windows Server Backup, you can:
- Open Windows Server Backup, and click "Recover" in the Actions pane.
- Choose the backup location (local or remote), select the backup date and time, and choose "Files and folders" as the recovery type.
- Browse and select the files and folders to recover.
- Specify whether to restore them to their original location or an alternate location.
- Confirm the recovery options and click “Recover” to initiate the recovery process.
To sum up
This page has offered you top three ways to backup files in Windows Server 2019. AOMEI Backupper is recommended due to its easy operation and rich features. It enables you to schedule automatic backups and delete old backups with backup scheme, etc. Thus, there is no Windows Server Backup not deleting old backups issue.
If you want to protect unlimited PCs and servers within your company, you may choose AOMEI Backupper Technician Plus. You will be surprised to find that it enables you to copy the installation directory for portable version creation. Download the free trial of AOMEI Backupper at once!

