Clone Windows Server 2011 Hard Drive to HDD/SSD Effortlessly
This article will introduce you the best server cloning software – AOMEI Backupper Server and how to easily clone entire hard drive in Windows Server 2011 to another HDD or SSD.
By Ivy Updated on October 20, 2022
What is server cloning?
Server cloning is to make an exact copy of your original hard drive on a server-based machine, including the operating system, boot-related partition(s), system drivers & settings, installed programs, personal data etc. This method is simple and easy to use, you can directly replace hard drive with the cloned one in the event of a disaster without first restoring the image.
Why clone hard drive in Windows Server 2011?
Windows Small Business Server 2011 is often used by enterprises to store important data of a company, customers’ info or work profiles, for example. While for Windows Home Server 2011 users, there may be many precious family photos, favorite music, videos, etc. To protect these data, cloning Windows Server 2011 hard drive will be a great choice.
Also, you may find your computer runs slower and slower, the programs, web pages and games take longer to load, etc. At this time, it’s wise to clone Windows Server 2011 hard drive to larger HDD or SSD to get rid of insufficient disk space and enjoy better performance.
In addition, a duplicate copy of Windows Server 2011 hard drive can help you perform a fast recovery in the event of a disaster, such as, system crash, hard disk collapse, registry error, virus attack (ie: ransomware attack in 2017), natural disaster like fire, etc.
Best server cloning software - AOMEI Backupper Server
It’s disappointed that Windows Server 2011 does not provide a cloning software. But there are many server cloning software online, AOMEI Backupper Server is one of the best software among them. It supports disk clone, system clone and partition clone, the previous two options can be used to clone Windows Server 2011. The disk clone feature clone entire hard drive while the system clone feature only migrates OS.
By default, this software only clones the used sectors of a hard drive, but you can enable “Sector by sector clone” to clone all sectors whether it’s used or not. Its “SSD Alignment” feature makes use of 4k technology to achieve the best performance of a SSD disk. Its “Edit Partitions” feature allows you to add unused space to all partitions or manually adjust the partition size to make full use of disk space.
In addition, it supports all the Windows-based operating system, including Windows Server 2003/2008(R2)/2012(R2)/2016(R2)/2019/2022 and Windows XP/Vista/7/8/8.1/10/11.
Step by step guide: clone hard drive in Windows Server 2011 to HDD/SSD
Make preparations to clone Windows Server 2011:
-
Prepare a target disk, either HDD or SSD. If it’s not initialized, please initialize the disk in the disk management.
-
If the destination disk is a dynamic disk, you should convert dynamic disk to basic disk first.
-
Download the best server cloning software – AOMEI Backupper Server, and install it on your computer. Then, activate it using license key.
Things you need to know before Windows Server 2011 clone hard drive:
-
All data on the destination disk will be overwritten finally, so please backup important files in advance.
-
You can clone large HDD to smaller SSD as long as there is enough space to hold everything on the original hard drive.
-
You can clone MBR disk to GPT disk without converting partition style, and vice version. The premise is that the target disk is blank.
Well then, without further ado, let’s get started to clone hard drive in Windows Server 2011 easily and quickly. Please follow the detailed steps below.
Step 1. Launch AOMEI Backupper Server and you will see its deep-blue interface. Click Clone -> Disk Clone subsequently. To clone C drive only, click “System Clone”.

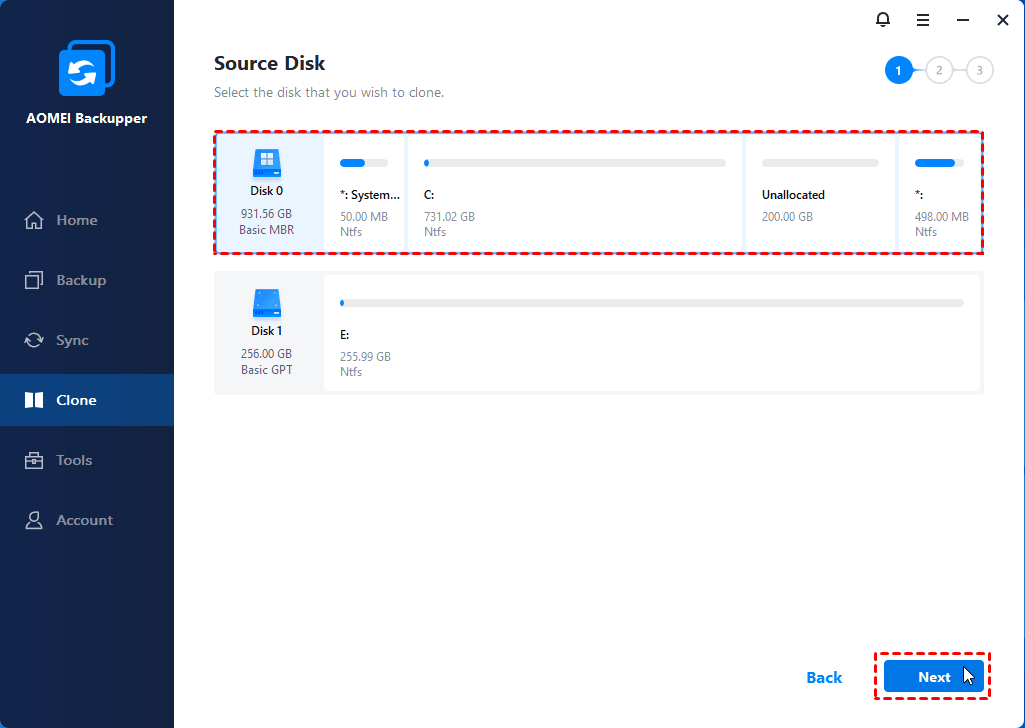
Step 2. Select the current hard drive in Windows Server 2011 as source disk, and click Next.
Step 3. Select the new HDD or SSD as destination disk, and click Next.

Step 4. Click SSD Alignment to accelerate the reading and writing speed of a SSD disk. Then, click Start Clone to clone Windows Server 2011 hard drive.
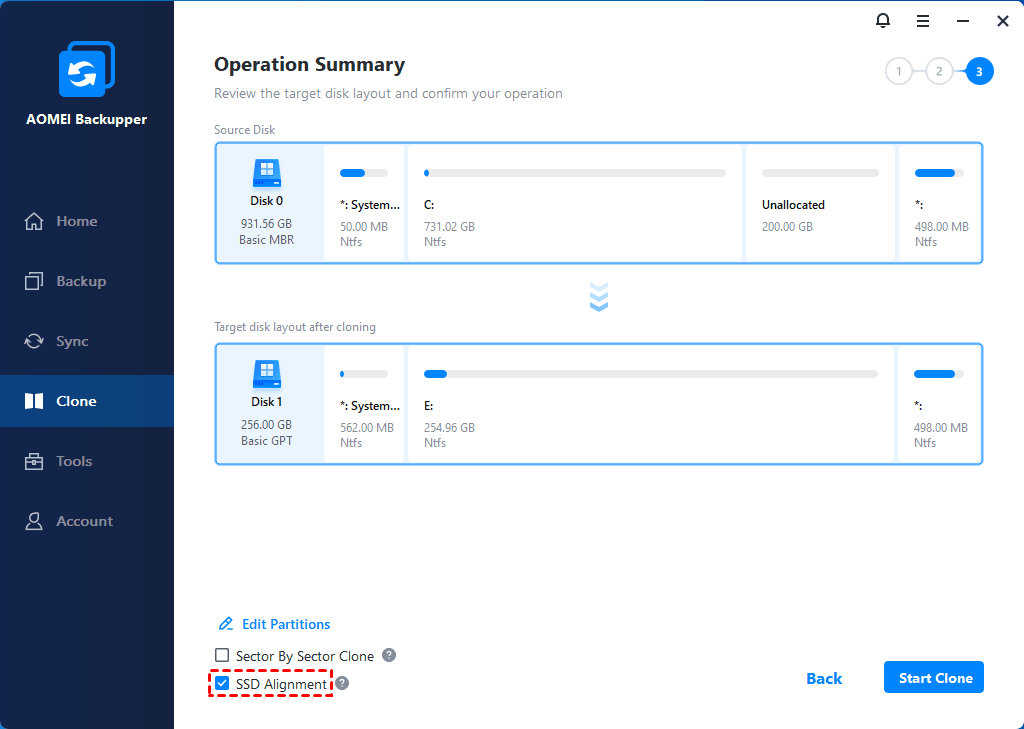
There are two more options at the lower location, namely “Sector by sector clone” and “Edit Partitions”. They are all suitable for cloning disk to larger disk, but you cannot use them at the same time. In other words, you need to choose between the two, clone all sectors or resize the partition size of destination disk.
However, in most cases, it’s not necessary to clone all sectors, so I suggest you use “Edit Partitions” as your first choice if possible.
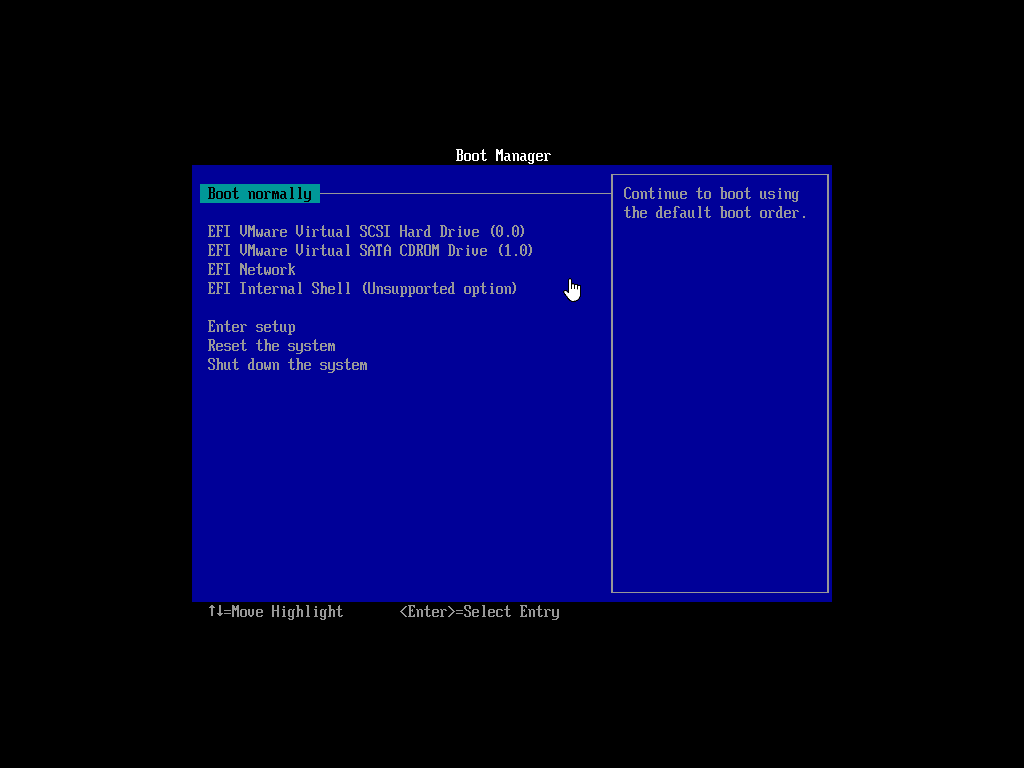
Step 5. Things are half done, but it’s not over, you still need to check if the cloned hard drive can boot successfully. Swap hard drive and your server computer will try to boot the cloned drive automatically. If not, please change the boot order and reboot again.
It’s your turn
The whole process of cloning hard drive in Windows Server 2011 to HDD/SSD is very easy with help of server cloning software AOMEI Backupper Server. Its clean interface and user-friendly design makes users understand this software in a very short time. And it resolves the potential cloning problems for users by its powerful features, such as, “Sector by sector clone”, “Edit Partitions”, “SSD Alignment”.
If you want to clone Windows 2011 hard drive without any obstacle, you could download AOMEI Backupper Server to have a try right now. Also, it can be used to clone HDD to SSD in Windows Server 2012, clone hard drive in Windows Server 2016, clone hard drive in Windows Server 2003 etc. For IT technicians, you could consider using “AOMEI Backupper TechPlus”.

