Windows 11 SSD Slow? Top 3 Ways to Fix It Now!
If your SSD runs slow on Windows 11, it is advisable to go through the whole article carefully and you will get two easy and valid ways to deal with this problem.
By Clytze Updated on April 3, 2023
Scenario
What to do with Windows 11 SSD slow?
I have a Force MP600 SSD running on a Ryzen 5 5600x. In Windows 10 I had a benchmark of over 8000 points, in Windows 11 just 5500 points.
The 4k-64Thrd write accesses in particular differ massively.
In Windows 10: 3206 MB / s, in Windows 11: 755 MB / s.
The other write and read accesses are roughly the same.
What can that be? Is there anything I can do with it?
- Question from tom’s HARDWARE
According to many Windows 11 users, there are some technical problems after upgrading to Windows 11, such as blue screen on Windows 11, Taskbar’s classic functionality are gone, new operating system greatly affects the speed of some types of SSD, etc. The actual performance is slow file or software opening speed, slow boot speed, or will cause Windows 11 100% disk usage, etc.
Encountered with such a problem, you may be eager to seek help to improve SSD performance on Windows 11. Here you will no longer suffer from such an issue, the next section will introduce you the two most direct and effective ways to solve the Windows 11 SSD slow read/write task. Read on to get the graphic steps.
Top 3 ways to fix Windows 11 SSD slow
In this part, top 3 fixes to fix Windows 11 SSD issue will be listed below. Wish each of the approaches can meet your actual needs.
Fix 1: Downloading and installing the KB5007262 patch
The good news is that Microsoft has refined a solution to fix this problem - the KB5007262 fix patch. The KB5007262 update states that it “addresses an issue that affects the Windows performance on all disk types (NVMe, HDD, SSD). Unfortunately, the update is currently available as a preview patch, which means it will not be downloaded automatically. In order to get the KB5007262 patch that fixes the issue, you will need to download the patch manually via Windows Update or seek it out in the Microsoft Update Catalog.
Update it in Settings:
1. Press Windows + I to launch Settings, and navigate to Windows Update on the left pane, then and click it.
2. Click on Check for Updates, you’ll find the KB5007262 update there if it is available. Then click Download now.

3. Once the installation process is complete, click on Restart now for the changes to take effect.
Tips:
☄ If you find it is not available in Windows Update, optionally, download it manually from Microsoft’s official update catalog.
☄ If you’re told that the update does not apply to your computer, it means it is already installed.
Fix 2: Delete USN journal
Another possibility is that the update to Windows 11 caused the NTFS partition of the hard drive (HDD, SSD) to dramatically slow down in read/write speed. The reason for this is actually a USN journal that is not clear to anyone. The idea of the solution is actually to delete this USN journal. Here are the steps for how you can improve SSD performance on Windows 11 by doing so.
1. Type Command Prompt in the Windows search box, then choose Run as administrator.
2. Input fsutil usn and press Enter to query commands related to USN journal.
3. Type in deleteJournal and click Enter to complete this operation.
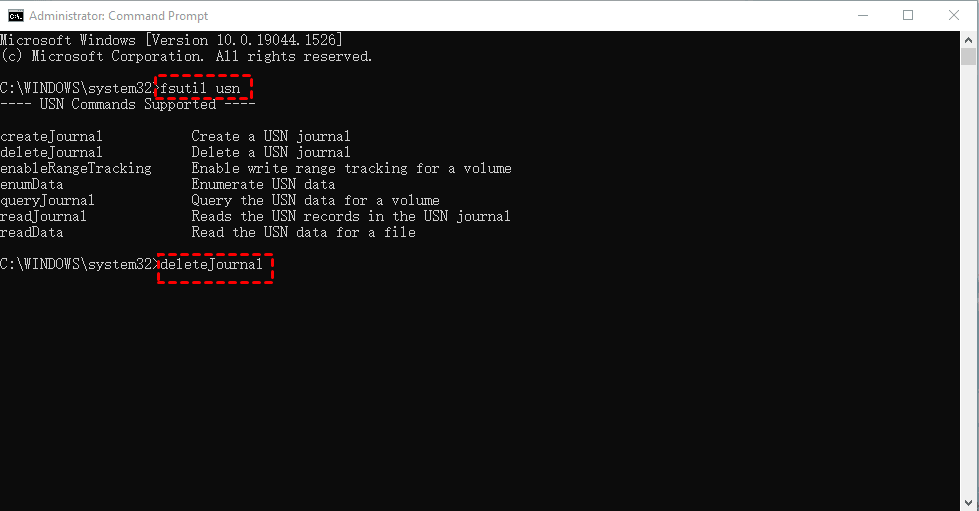
4. Reboot your computer and test the read speed again with HD Tune, you will see that the SSD speed is back to normal.
Fix 3: Enable SSD TRIM command
TRIM is an advanced feature of SSDs that requires SSD hardware and operating system support. This feature is specifically designed for SSD performance and operational speed. Most SSDs now have the TRIM feature enabled by default. If you want to check if your SSD has the TRIM feature enabled, you can follow the steps to check it manually.
1. Type cmd in the start menu, select Command Prompt from the list, and choose Run as Administrator.
2. When the command window pop up, type “fsutil behavior query disabledeleteNotify” and hit Enter.
3. If TRIM is enabled, it will display “DisableDeleteNotify=0”. Else if the value “DisableDeleteNotify=1” is displayed that indicates the TRIM is disabled.
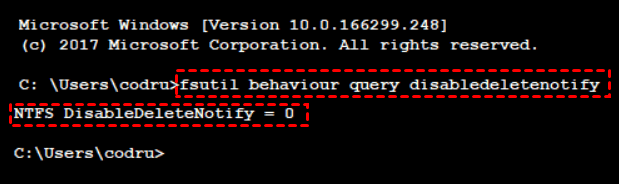
4. To enable the TRIM feature, you can manually reach it by running the following command in an Administrator Command Prompt window: fsutil behavior set DisableDeleteNotify 0.
Bonus tip: Migrate Windows 11 to a faster SSD
Now you may have already tackled Windows 11 slow boot SSD, and your SSD may boot faster on your computer again. Furthermore, for the purpose of settling Windows 11 slow performance, you can try the provided bonus tip—clone your operating system to an NVMe SSD to avoid slow boot on Windows 11 with AOMEI Backupper. It is the best cloning software with comprehensive features that can be listed below:
▷ Clone methods. The software offers three paths for you to perform disk clone, partition clone and system clone according to your different needs.
▷ Clone different hard drives. With its help, you can clone HDDs, SATA SSDs, NVMe M.2 SSDs, USB flash drives, and SD cards, etc.
▷ Intelligent Clone. In default mode, it only clones used sectors, so you can easily clone a larger drive to a smaller drive and boot successfully from the cloned one.
▷ Sector by sector clone. It can clone all sectors, whether they are used or not.
First, download this software on your computer to have a try.
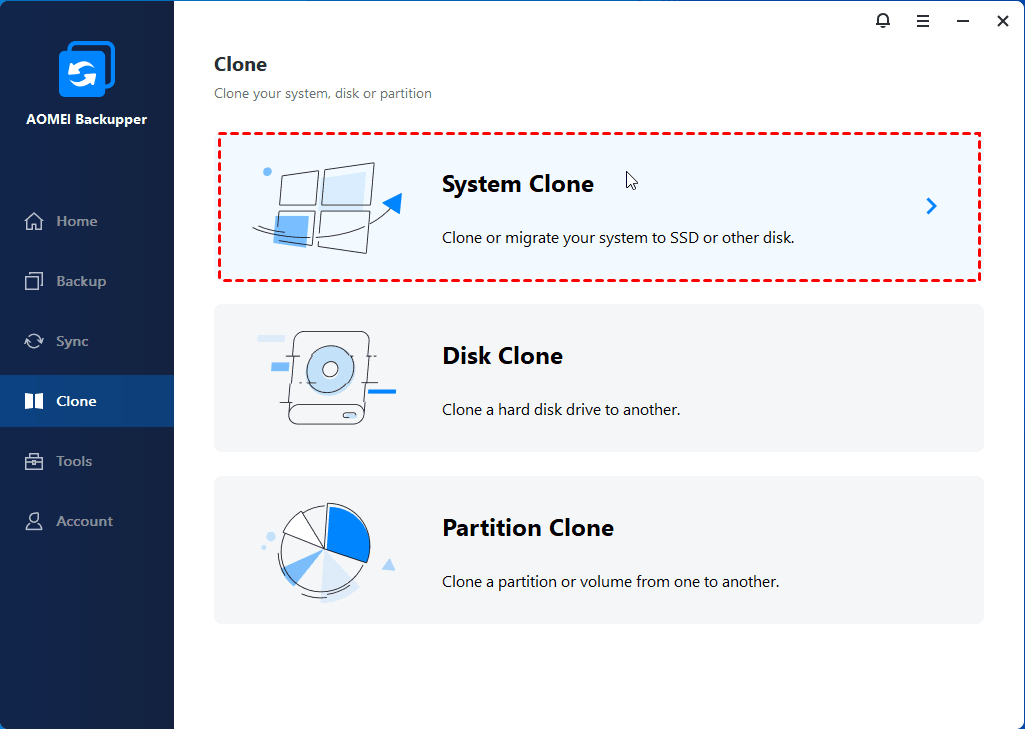
Step 1. Launch AOMEI Backupper, click Clone from the left side panel, and choose System Clone in the right side.
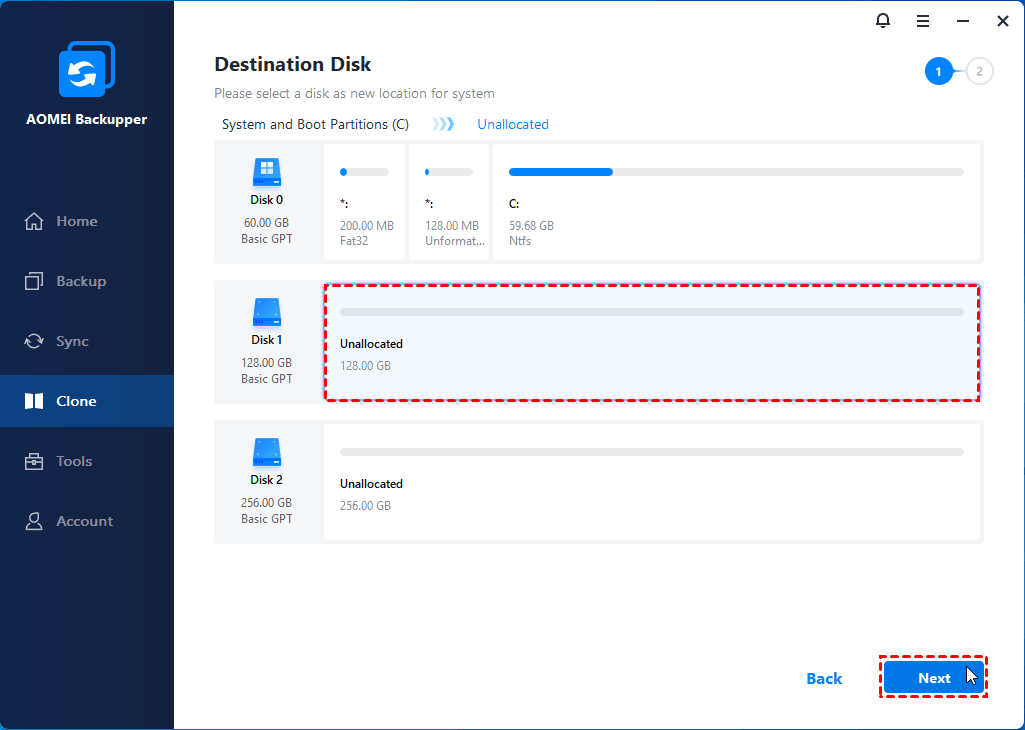
Step 2. It will automatically select the system related partitions by default. Select the SSD you wish to clone to as the destination disk and click Next to continue.
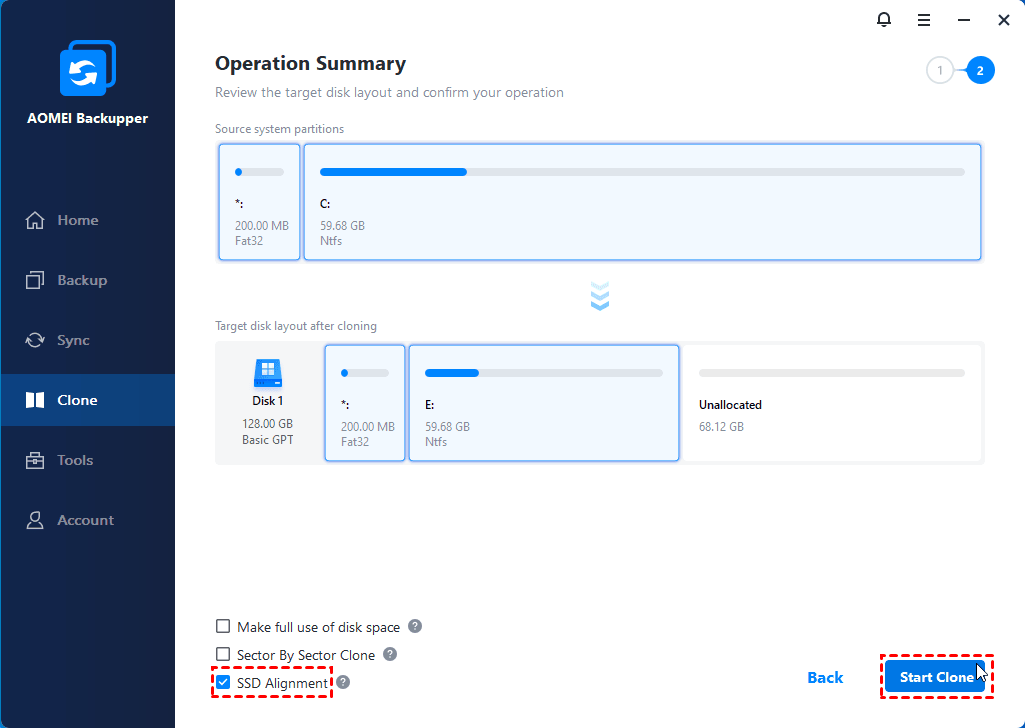
Step 3. Select SSD Alignment to accelerate the reading and writing speed of the SSD disk, confirm all the settings and then click Start Clone.
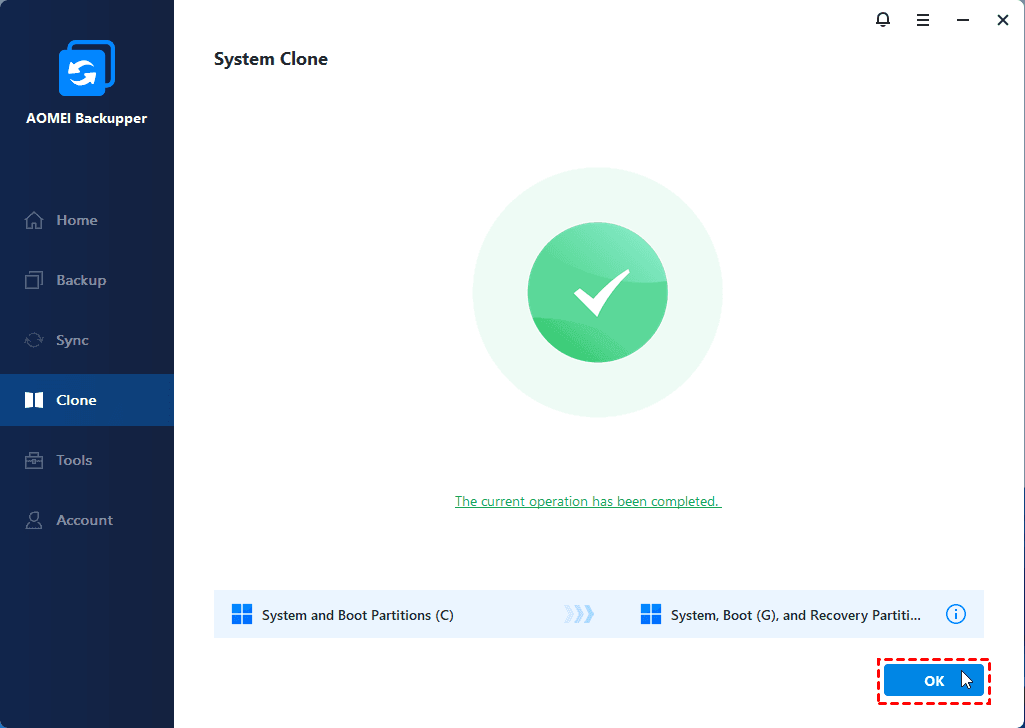
Step 4. When the process is complete, click Finish.
Now you can follow the steps to boot from the cloned SSD on Windows 11 to improve Windows 11 performance.
1. Reboot your computer and press F2/F10/Del (according to your computer manufacturer) to enter the BIOS.
2. Go to the boot menu and in the boot priority section, set the new hard drive as the first boot option in BIOS.
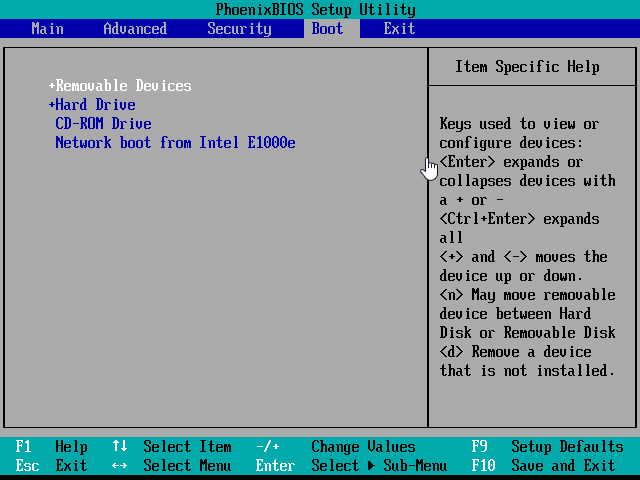
3. Press F10 to save all the changes and restart the computer.
Final words
That’s all about the two ways on how to deal with the task of Windows 11 SSD slow. Whether updating the Windows 11 KB5007262 patch or deleting the USN Journal, you can get your PC back to normal state. Additionally, there is a bonus tip that you can migrate your Windows 11 operating system to a faster SSD like NVMe SSD to speed it up with the best cloning software—AOMEI Backupper.
Besides that, if you have the need to wipe an external hard drive on Windows 11, AOMEI Backupper Professional can provide you with the Disk Wipe function, so that you can free up the storage or eliminate the viruses. And it’s also the best sync software, with its help, you can automatically sync local folders to external hard drives, USB flash drives, NAS devices, or cloud drives and vice versa.
There are many other powerful functions waiting for you to discover, so don’t be hesitate and try it now!