Complete Guide to Windows 11 NVMe Installation - Without Any Boot Problems
Want to find the complete guide to Window 11 NVMe installation? Then you've come to the right place. The software mentioned in the article will help you easily install Windows 11 on your NVMe SSD without any boot problems. Read on for details!
By Yuka Updated on September 1, 2025
What Is NVMe?
NVMe (Non-Volatile Memory Express) is a new protocol for accessing high-speed storage media that brings many advantages compared to legacy protocols. NVMe is commonly used for solid-state storage, main memory, cache memory or backup memory. The main advantages of NVMe-based PCIe SSDs over other storage types are reduced latency and higher input/output operations per second (IOPS).
NVMe is designed for high-performance non-volatile storage media like SSDs and is ideal for demanding, compute-intensive setups. For example, NVMe can handle enterprise workloads while leaving a smaller infrastructure footprint and consuming less power.
Requirements for Using NVMe SSD as Boot Drives
If you want to install the Windows 11 operating system onto and securely boot from an NVMe SSD, you need to make sure your computer meets the following requirements:
🍇 Newer computer hardware. While NVMe is compatible with older computers, it works better with Skylake chipsets or later.
🍏 One M.2 PCI-E x4 slot. If your motherboard was introduced a long time ago and doesn't qualify, you may need a PCIe x4 adapter.
🍉 UEFI boot mode. If your computer starts in Legacy Boot Mode, change Legacy to UEFI Mode in the BIOS after installing Windows 11 to the NVMe drive.
🍒 UEFI firmware. Booting from an NVMe SSD is only supported on UEFI-enabled systems.
How to Install Windows 11 on NVMe SSD
As mentioned before, installing Windows 11 to an NVMe SSD gives you faster speeds and better performance. Windows 11 is able to showcase its boot speed and smoothness perfectly on a high-performance SSD. Whether you're playing games, programming your computer, editing audio and video, or engineering graphics, Windows 11 and NVMe SSD work together to make your work and play life more comfortable and enjoyable!
You can refer to the following method to complete the Windows 11 NVMe installation. There are three parts in total: installing and initializing the NVMe SSD, cloning Windows 11 to the NVMe SSD, and booting from the cloned SSD. Continue reading to see the specific steps.
Part 1. Install and Initialize A New NVMe SSD
- Install the NVMe SSD onto your computer.
🖥️ For desktop PC installation: First confirm the available PCI Express slots on your motherboard. Then insert the NVMe SSD into the slot and secure it with screws. Then connect the SATA cable from the SSD to an available SATA port on the motherboard.
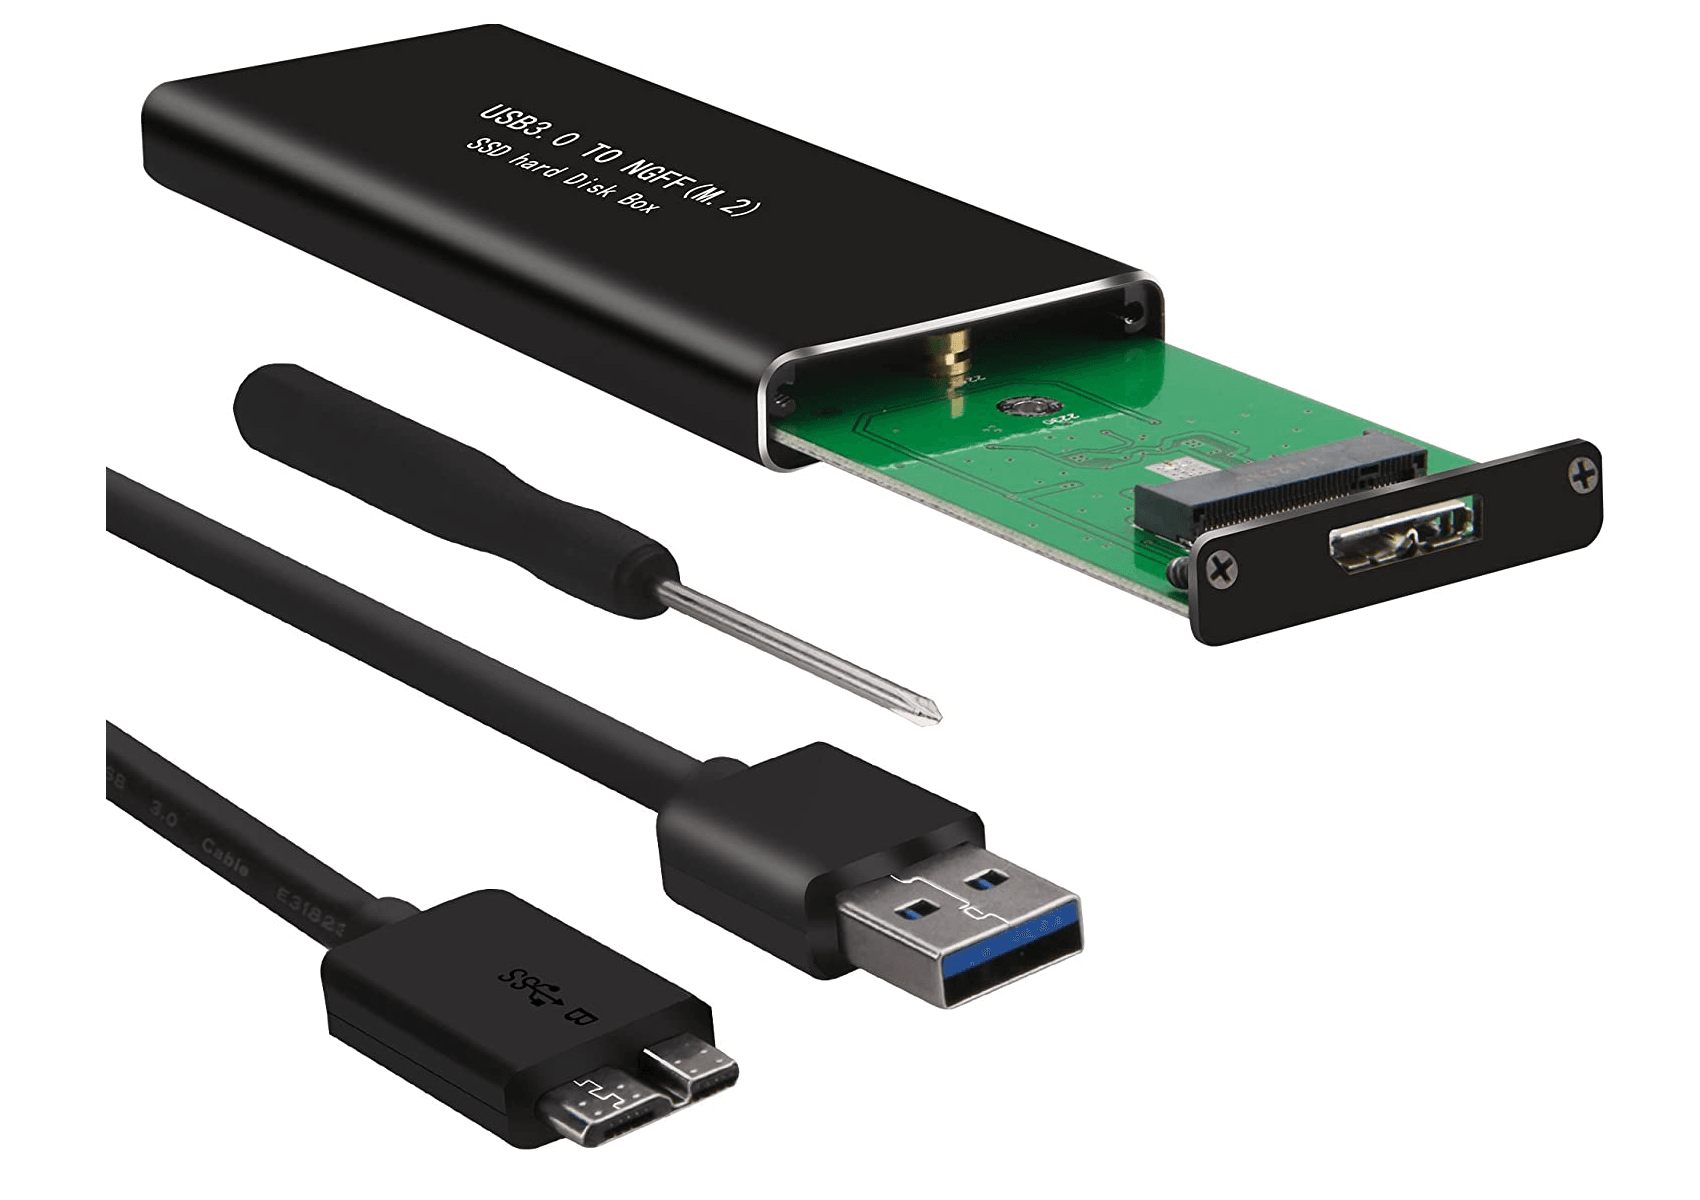
💻 For laptop installation: Most commonly, the NVMe SSD is connected to your laptop via the USB port. You will need to prepare a USB to NVMe SSD adapter. Insert the NVMe SSD into the adapter, connect the USB cable, and then plug the other end of the computer into the laptop.
- Next, restart your computer. Press Win + R to open the Run dialog box, type diskmgmt.msc and click OK to open Disk Management.

- Right-click on the new NVMe SSD and select Initialize Disk. Set the partition style the same as the source disk (MBR or GPT) and click OK to confirm.
📚 Note: In order to have better compatibility with Windows11, it is recommended to choose GPT.

Part 2. Migrate Windows 11 to NVMe SSD without Any Boot Issues
When you want to migrate Windows 11 to a new NVMe SSD to improve the overall performance of your computer, you can use the most reliable disk cloning software - AOMEI Backupper to help you do this. With its help, you don't have to reinstall your system, which saves you a lot of time and effort.
AOMEI Backupper offers a wide range of features to ensure the safety of your data. You can use it not only to migrate your system, but also to transfer data on the whole disk, synchronize folders to different locations, backup the whole disk, etc.
Its Intelligent Clone feature allows you to clone a larger drive to a smaller drive. It also allows you to clone system disks from MBR to MBR, GPT to GPT, MBR to GPT or GPT to MBR. With its help, you can clone HDDs, SATA SSDs, NVMe M.2 SSDs, USB flash drives, and SD cards, etc.
Please follow the illustrated tutorial for details on installing Windows 11 to an NVMe SSD.
📚 Note: The data on the target location will be overwritten after cloning process. If you plan to clone Windows 11 to a used SSD and there are some important data on it, please backup files in advance.
- Download and install AOMEI Backupper on your computer.
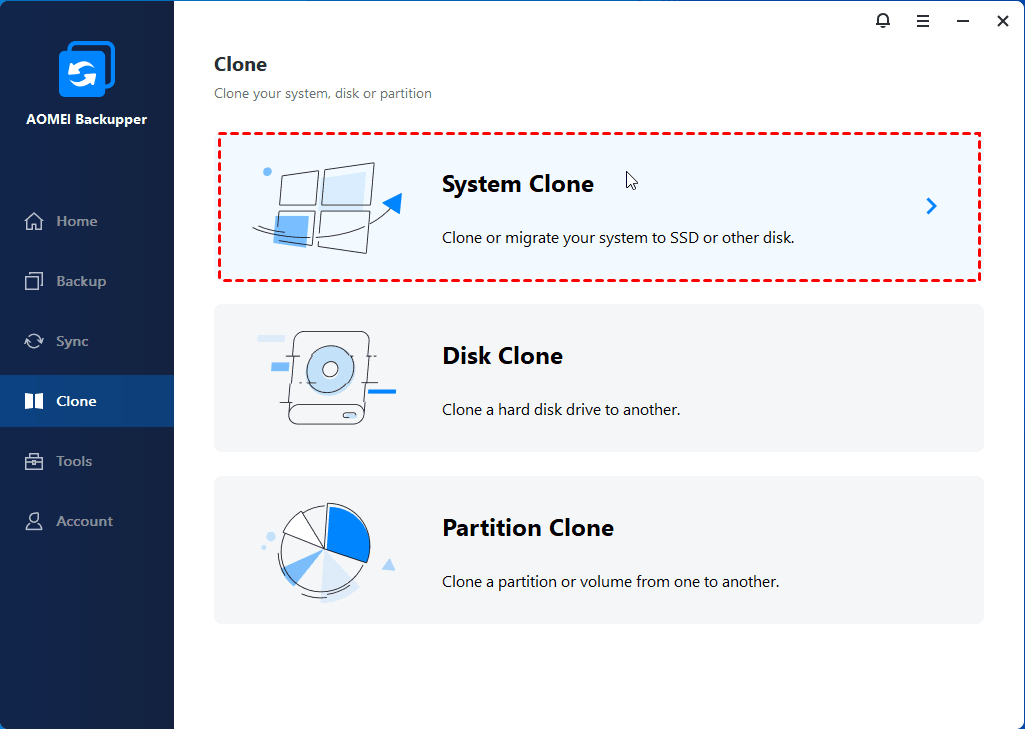
- Launch this software and you will see a dark blue interface. Click Clone -> System Clone to perform Windows 11 NVMe installation.
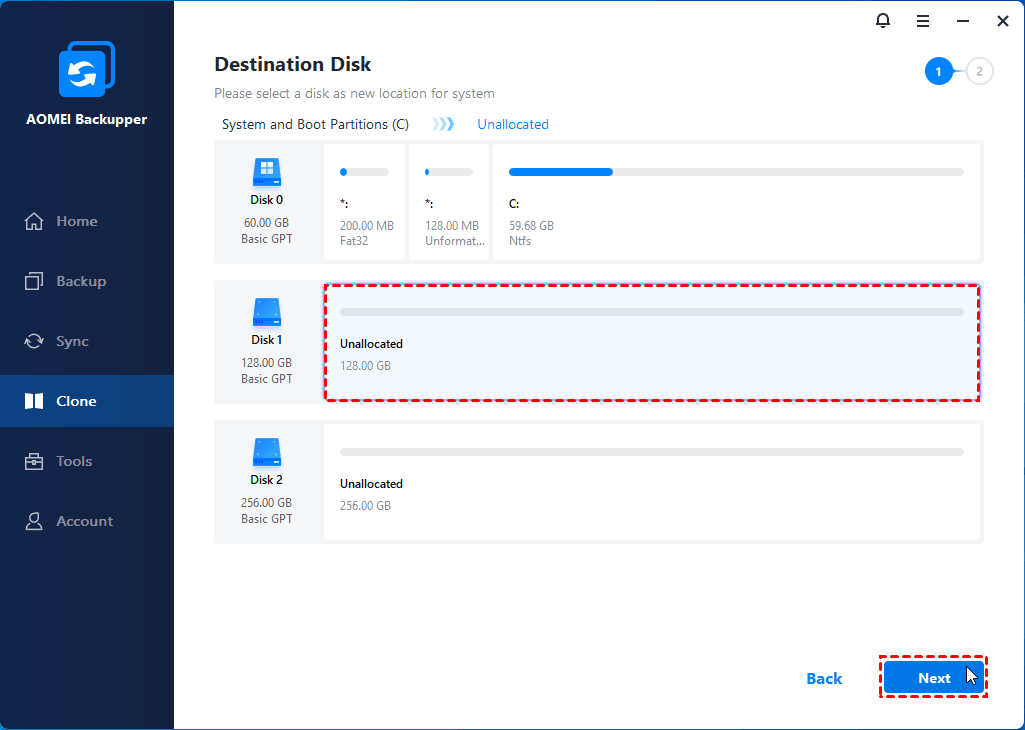
- It will automatically select the System drive and related drives by default. Select the target NVMe SSD as the destination disk and click Next to continue.
- Confirm all your settings. Check SSD Alignment to improve the reading and writing speed of the target SSD. Then, click Start Clone to perform this operation.
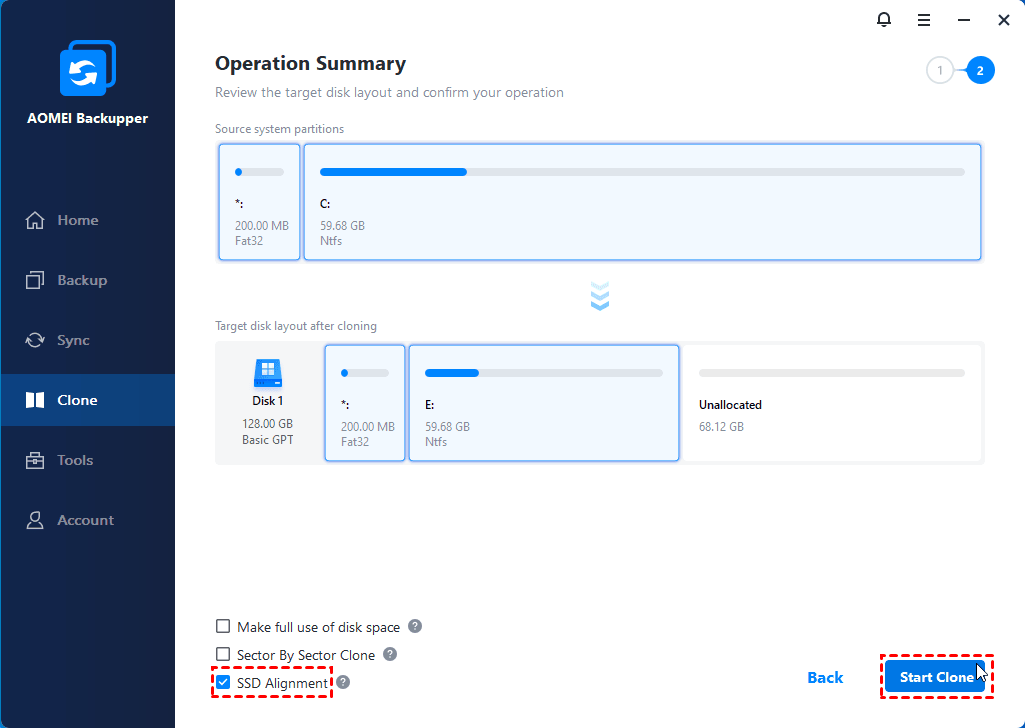
✨ Tip: Sector-by-sector clone clones all sectors on the source disk to the target hard disk (HDD/SSD), even if the sector is blank or logically bad, you will get an exact copy of the source disk/partition with the same properties.
Part 3. Boot from the Cloned NVMe SSD with Windows 11
If the original drive contains your operating system - Windows 11 - you will need to follow the steps here to make the newly cloned NVMe SSD bootable.
- Restart the computer and press F2/F10/Del key to enter BIOS.
- Go to the Boot Menu, at the boot priority section, set the new NVMe SSD as the boot drive.
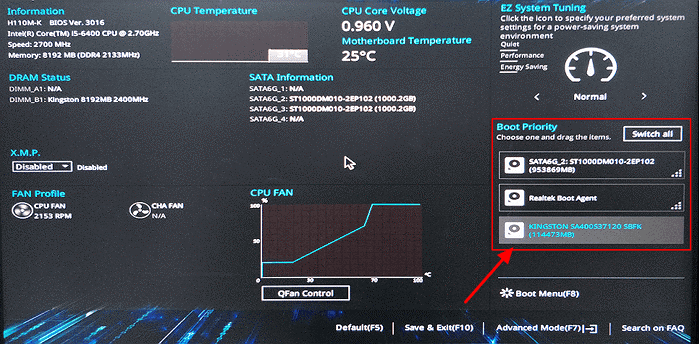
- Press F10 to save all the changes and restart the computer.
Wrapping Up
This article gives you a complete guide to Windows 11 NVMe installation. You can follow the illustrated tutorial step by step. With the help of AOEMI Backupper, you will not encounter any data loss issues and boot problems.
What's more, this software provides all-around protection for your computer. As long as you create a system backup with it in advance, you can quickly restore your computer to a working state when you encounter any blue screen of death problem in the future.

