How to Upgrade to Windows 11 and Keep Files (4 Ways)
You can learn the answer to the question of whether upgrading to Windows 11 will result in data loss and 4 ways for upgrading to Windows 11 and keeping files. Keep reading to learn detailed information.
By Jonna Updated on August 28, 2025
Will I Lose Data When Upgrading to Windows 11?
As the latest operating system from Microsoft, Windows 11 has attracted a lot of attention since its release, and many users want to upgrade to the latest system to experience the new features and operating interface. However, many users also want to know what happens to my files when I upgrade to Windows 11 and whether files will be lost after the update.
If I upgrade to Windows 11, do I have to reinstall everything? It is not an absolute answer. Whether it will lead to file loss after upgrading the system depends on how you install Windows 11 on your computer. For how to install Windows 11 and keep files, there are 4 ways available for you.
👉 Method 1. Using Windows Settings
👉 Method 2. Using Windows 11 Installation Assistant
👉 Method 3. Mount Windows 11 ISO file to Install Windows 11
👉 Method 4. Clean Install Windows 11 with a Bootable USB Drive
Backup Important Files Before Upgrading to Windows 11
To avoid file loss from upgrading your system to Windows 11, it is recommended that you backup your important files before upgrading your system. This can protect your data to the maximum extent. The free file backup software AOMEI Backupper Standard can help you achieve the goal easily.
- Scheduled backup: It supports scheduled backup, you can choose daily, weekly or monthly frequency to backup your files regularly.
- Incremental backup: It provides an Incremental Backup method to perform your scheduled backup task which can help you improve backup efficiency and save target disk space as well as keep your file backups up-to-date.
- Multiple backup paths: It supports backing up files to multiple storage devices, such as USB, HDD, SSD, NAS, cloud drive, network location, etc.
- Support different systems: It has good compatibility with operating systems (Windows 7, 8, 8.1, 10, 11, etc.)
Then you can follow the graphic tutorial below to backup files in just a few clicks.
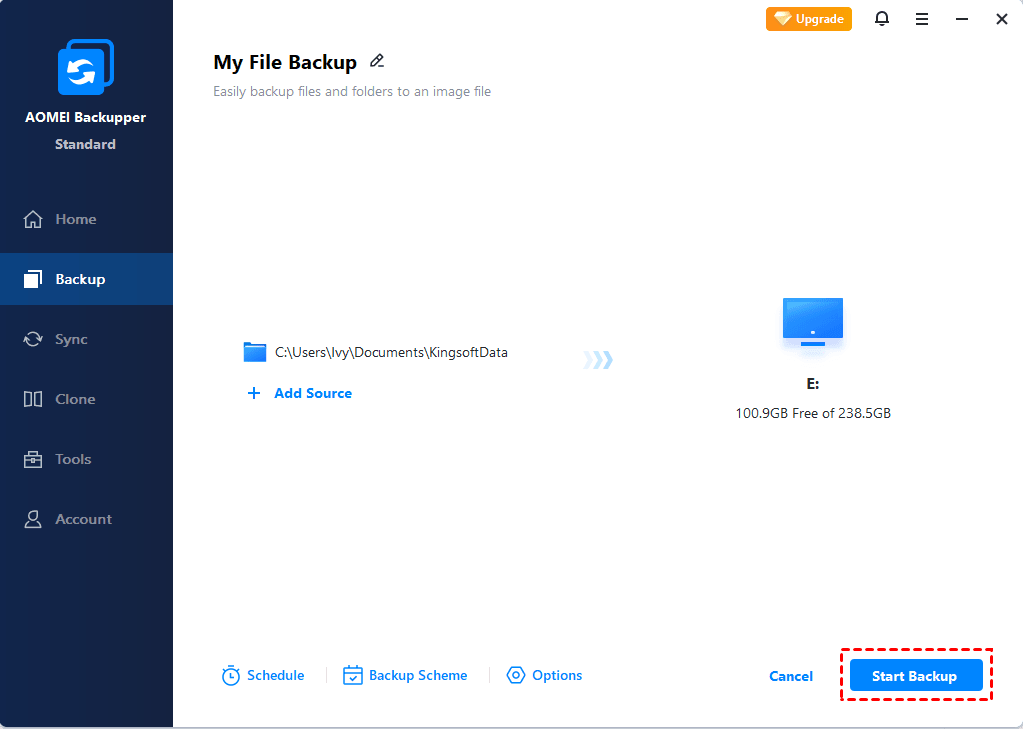
Step 1. Download AOMEI Backupper Standard, install and launch the software. Select Backup > File Backup.

Step 2. Click Select Source and Add File or Add Folder, then select the files or folders to be backed up.

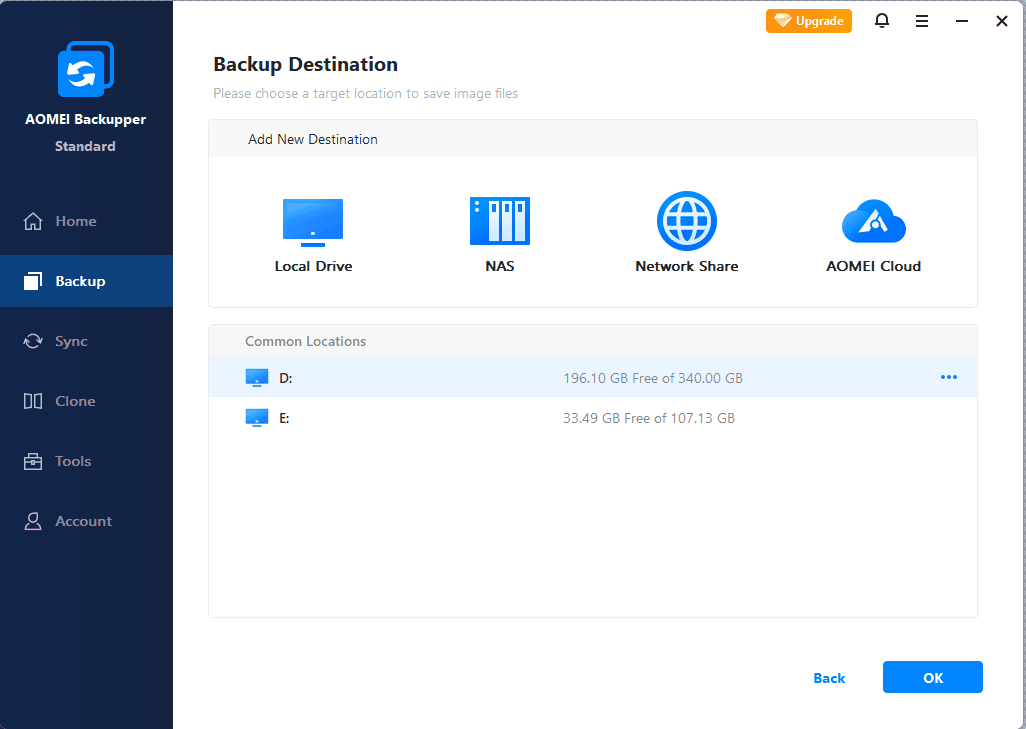
Step 3. Click on the destination box to choose the destination for your file backup.
Step 4. Click Start Backup to backup your important files before upgrading and installing Windows and keep files.
- Notes:✎...
- Schedule: It supports setting a backup task to run automatically at fixed intervals, such as Daily (By Interval), Daily, Weekly, Monthly (By Week), Monthly (By Date), One Time, and Event triggers.
- Scheme: You can choose different backup methods. To help you save disk space by auto deleting older backups, you can enable the automatic backup cleanup feature by upgrading now to the Professional or higher version.
- Options: It allows you to compress or split an image file and enables email notification.
How to Upgrade to Windows 11 and Keep Files
Next, this article will introduce the 4 methods mentioned above in turn. If your computer meets the device specifications of Windows 11, you can go to the first three methods and they won't cause data loss. To use Installation Assistant, your computer should also meet the conditions below:
- Your PC is running Windows 10 version 2004 or higher.
- You have a license for Windows 10.
- The PC should have 9 GB of free disk space to download Windows 11.
If your computer is an unsupported device, you can try method 4. The clean installation process will cause data loss, but you can retrieve your files from the backup you made before.
Method 1. Upgrade to Windows 11 from Windows 10 without Losing Data
If you already have a valid version of Windows 10 installed, you can upgrade to Windows 11 from the Windows Update feature in Settings. This is probably the easiest and most popular way to upgrade to Windows 11 and keep files. Here is how to upgrade to Windows 11 from Windows 10:
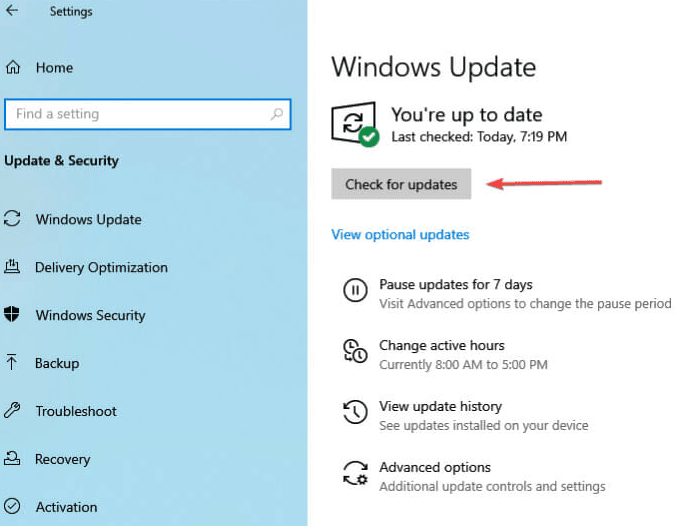
Step 1. Open the Settings app on your Windows 10 computer, select Update & Security and then Windows Update.
Step 2. Click on Check for updates to look for updates to Windows 11, then tap on Download and install to install Windows 11 update.
Method 2. Upgrade to Windows 11 and Keep Files using Installation Assistant
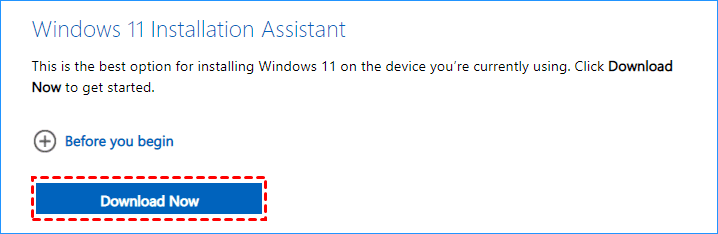
Step 1. Go to Windows 11 Download page and click Download now from the Windows 11 Installation Assistant section.
Step 2. Launch Windows 11 Installation Assistant on your Windows 10 PC. When getting the User Account Control interface, click Yes to continue.
Step 3. If this tool confirms your PC hardware is compatible, you need to accept the license terms by clicking the Accept and Install button.
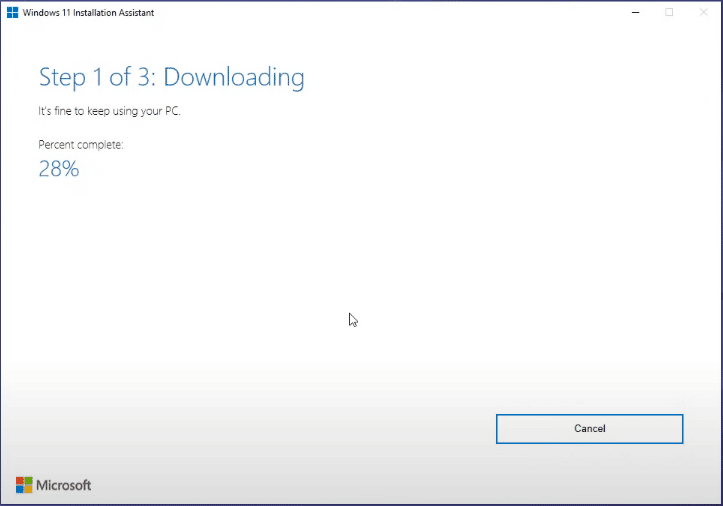
Step 4. Windows 11 Installation Assistant will start downloading and installing this new operating system on your PC. This can last for some time. During the process, you can keep using your Windows 10 computer as normal.
Step 5. After everything is ready, click the Restart now button. The PC can restart several times to finish the installation process. So, wait patiently.
When you log in to the new operating system, you can find all your previous files and applications on your computer.
Method 3. Upgrade to Windows 11 by Mounting Windows 11 ISO
Part 1. Mount ISO
Step 1. Go to Windows 11 download page, choose Windows 11, click Download, select a language, and click Confirm > 64-bit Download to get the ISO file. This downloading process can take some time.
Step 2. Right-click on the Windows 11 ISO file and choose Mount to get a folder.
Part 2. Use the ISO File to Install Windows 11 Without Losing Data
Step 1. Open the folder you get and double-click the setup.exe file.
Step 2. Windows is preparing 100%.
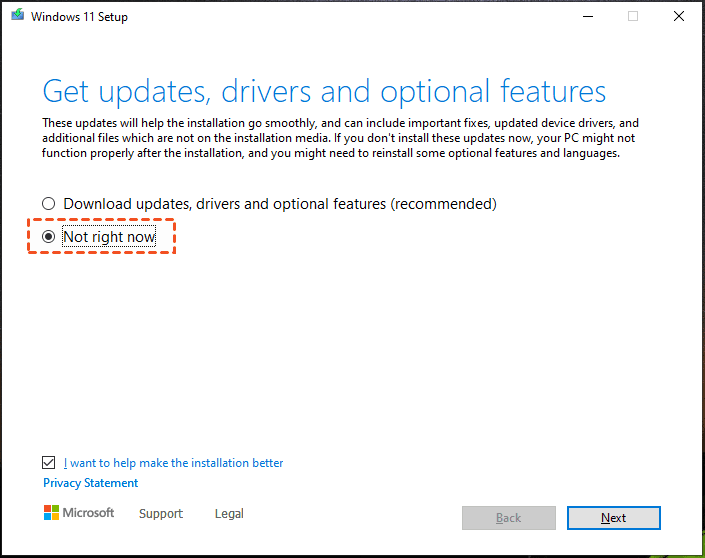
Step 3. After that, click Change how Setup downloads updates and choose Not right now.
Step 4. Click Next and accept applicable notices and license terms.
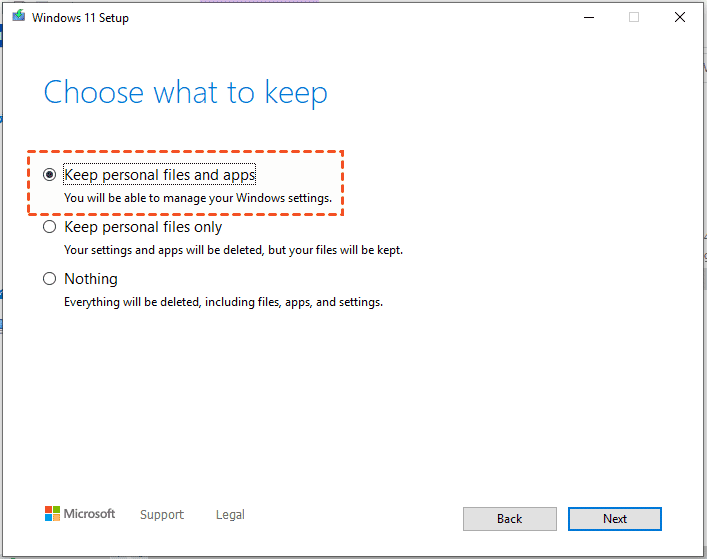
Step 5. You will be told what version of Windows 11 will be installed and what data you will keep. Click Keep personal files and apps.
- Notes:✎...
- If you want to make some changes, click the Choose what to keep link to get the following interface and select one according to your needs.
- To install Windows 11 without losing data, the first two options are recommended. Of course, you can choose Nothing if you want to perform a completely fresh install after creating a backup for your important files.
This tool is installing Windows 11. This can take several minutes and wait patiently.
Method 4. Clean Install of Windows 11 with a Bootable USB Drive
You can also upgrade to Windows 11 by performing a clean install using a bootable USB drive. After backing up important files, you won’t worry about data loss.
Step 1. Go to Windows 11 download page, download Windows 11 Media Creation Tool to create a bootable USB drive.
Step 2. Boot the PC to BIOS and change the boot order to run the PC from this USB drive.
Step 3. After selecting a language, keyboard method, and time format, click Install now to continue.
![]()
Step 4. Choose I don’t have a product key, accept terms and click Custom: Install Windows only (advanced).
Step 5. Select the original system partition (Windows 10 is included) as the target path of Windows 11. Then, start installing the new OS to that drive for a clean install.
Bonus: Why Upgrade from Windows 10 to Windows 11?
Upgrading from Windows 10 to Windows 11 can bring several benefits. Here are some main reasons why people consider upgrading:
- Modern User Interface: Windows 11 features a redesigned, cleaner interface with a centered taskbar and updated Start Menu, offering a more modern and streamlined experience.
- Improved Performance: The OS is optimized for speed and efficiency, with faster wake-from-sleep times and better memory management, especially on newer hardware.
- Enhanced Multitasking: Snap Layouts and Snap Groups make multitasking easier by letting you quickly organize open windows in preset layouts.
- Virtual Desktop Support: Windows 11 allows for easier creation and customization of virtual desktops for work, school, or gaming.
- Integrated Microsoft Teams: Microsoft Teams is built into the taskbar for quicker access to chats and calls, promoting better communication.
- Future Support and Updates: Windows 10 will reach its official end of support on October 14, 2025. After this date, Microsoft will discontinue technical assistance, security updates, and feature upgrades for Windows 10. Although your PC will continue to work, the lack of updates may expose it to increased security risks.
Summary
This article explains 4 methods to upgrade to Windows 11 and keep files. The first three methods will not cause any file loss, but they have some requirements for your computer. Clean installation from a bootable USB can also help you upgrade to Windows 11, but you need to backup files in advance to avoid data loss.
The free and professional file backup software AOMEI Backupper Standard can help you back up your files quickly and easily to keep them safe. It also supports scheduled backup and incremental backup methods in Windows 11, 10, 8, 7, etc.
In addition, it provides System Backup, Disk Backup, and Partition Backup to meet your different backup needs. You can download this software to discover more useful features.

