Can Windows 10 Task Scheduler Copy Files to Network Drive?
Do you want to know how Windows 10 Task Scheduler copies files to network drive? This article will give you detailed steps and provide you with an easier way to copy files to a network drive.
By Yuka Updated on October 22, 2024
Need to Copy Files to Network Drive using Task Scheduler
In our daily work life, we may need to copy folders to a network drive in order to share files with others. If the number of files is relatively small, you can just copy and paste them. But what should you do if there are more files and they are frequently modified and you want to keep the latest copy?
Usually, you can first create a batch file using the command line and then use the Windows Task Scheduler to periodically copy the file to a network drive. Next, I'll give you details on how to use Task Scheduler to automatically copy files from one folder to another on Windows 10.
Auto Copy Files to Network Drive with Task Scheduler
If you want to set up an automatic task to copy files to network drive using Task Scheduler, you need to first create a batch file using the command line.
#1. Create Scheduled Task to Copy Files to Network Drive
First, the most common command lines for copying files and folders are Xcopy and Robocopy. I will use Robocopy here because it is a more powerful alternative to Xcopy.
- Now you need to create a .bat file using a text editor (e.g. Notepad). You can do this by right-clicking on the desktop and selecting New -> Text Document.
- Open the text document and enter the command. You can fill in the source and destination directories as needed.
- robocopy C:\test \\Bf-202106171848\d:\test
Note📝: In addition, you can add some switches to customize file copying. Here is the complete list of robocopy parameters you can refer to. Choose and combine them properly and you can accomplish a lot of wonderful things. Here I list a few parameters for you.
/s to copy subdirectories and exclude empty directories
/xo to exclude old files
/mov to move files to another folder while removing them from the source folder
More importantly, if you want to receive a message after you finish copying a file and press any key to exit, you can use the echo and pause commands. For example:
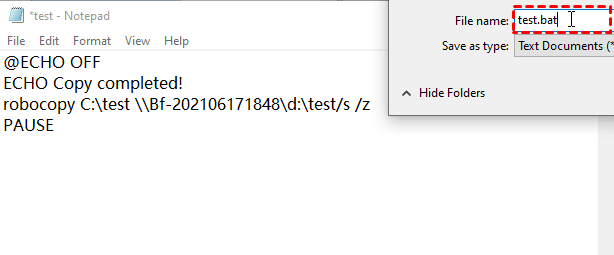
@ECHO OFF
ECHO Copy completed!
robocopy C:\test \\Bf-202106171848\d:\test/s /z
PAUSE
🌟Tip: With this script, after the file has been copied to the target directory, the message "Copy Complete" will be displayed and the Command Prompt window will pause until I press any key to continue.
- Click File -> Save As… and give the file a name, then change the extension from .txt into .bat and Save it. This will create a batch file that you can double-click to run the command.
#2. Copy Files to Network Drive Automatically with Task Scheduler
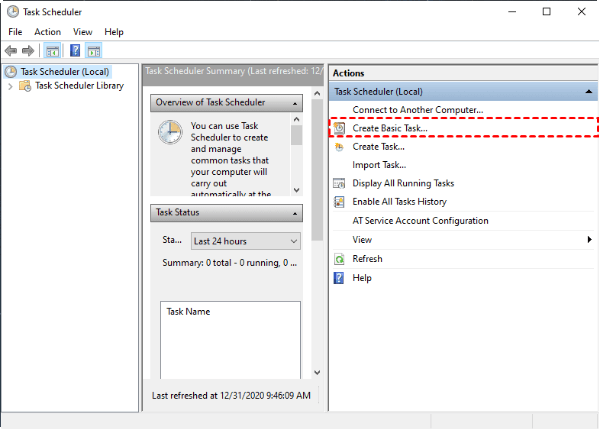
- Press Windows + S to open the search box, then type Task Scheduler and open this program.
- On the main screen, select Create Basic Task... and then follow the wizard to make your selection.
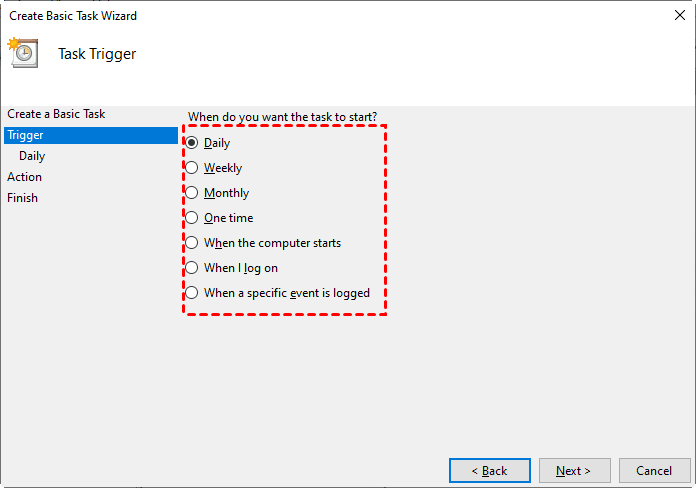
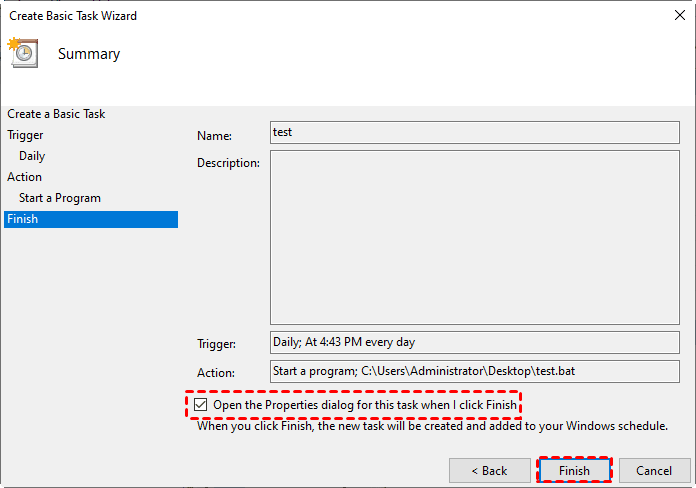
- You can enter a task name and description and choose how to trigger the task. If you want to create a scheduled task to copy files to a network drive every day, simply select Daily and set a specific time point on the next page.
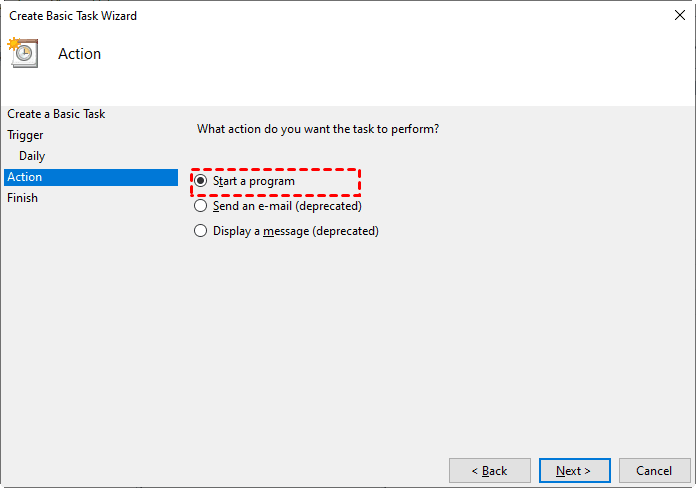
- Select how you want the task to be performed. Here, select Start a program to browse for the .bat file you just created.
- Then check the Open the Properties dialog box for this task when I click Finish checkbox. After confirming all your settings, click Finish.
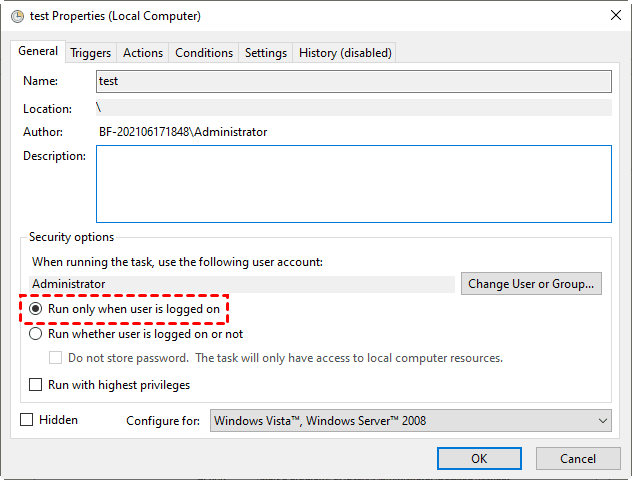
- The Task Scheduler can only access the mapped network drive if the "Run only when user is logged on" option is enabled. If you want to automatically copy files to a network drive, confirm that you switch to this option when the Properties window opens.
Easier Option: Automatically Copy Files to Network Drive with Free Software
The combination of Robocopy and Task Scheduler gives you the flexibility to achieve many purposes, but it also requires some computer knowledge and is slightly more cumbersome to operate. If you want a more intuitive solution with the same powerful data protection features, try AOMEI Backupper Standard.
This free software works with Windows 11/10/8.1/8/7. It allows you to copy files between internal/external disks, flash drives, network locations and cloud drives. This way, you can easily copy local folders to the network, copy network folders to cloud services such as Google Drive, OneDrive, etc., and even synchronize folders between computers.
The software enables you to create a scheduled task in 4 steps to automatically copy files to a network drive. If you want any changed files to be synchronized instantly without a schedule, you can upgrade to the Pro version to enjoy real-time synchronization.
Next, I will show you how to use this software to copy files to a network drive on Windows 10. First of all, please download and install this software on your computer first.
- Open this freeware, click Sync on the left panel and select Basic Sync on the right panel to copy files to a network drive.
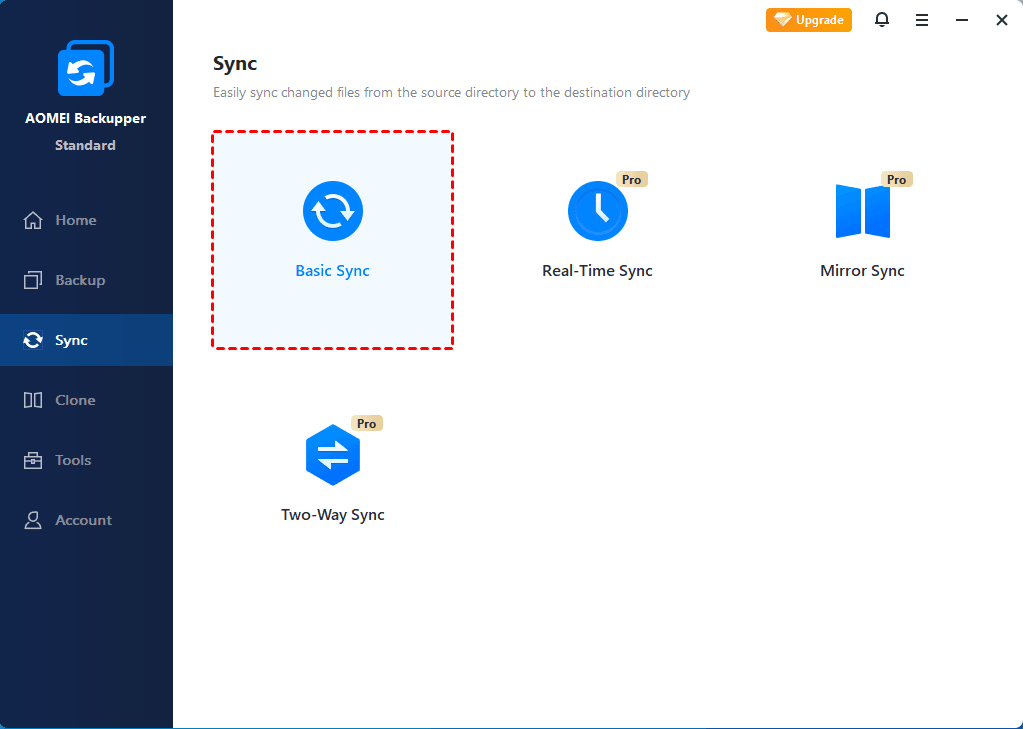
🌟Tips: Other sync modes (available in Pro or higher editions):
- Real-Time Sync: Sync changed files from the source folder to the target folder in real time.
- Mirror Sync: Keep the files in target folder exactly the same as in source folder.
- Two-Way Sync: Sync changed files in source folder and target folder to the other side mutually.
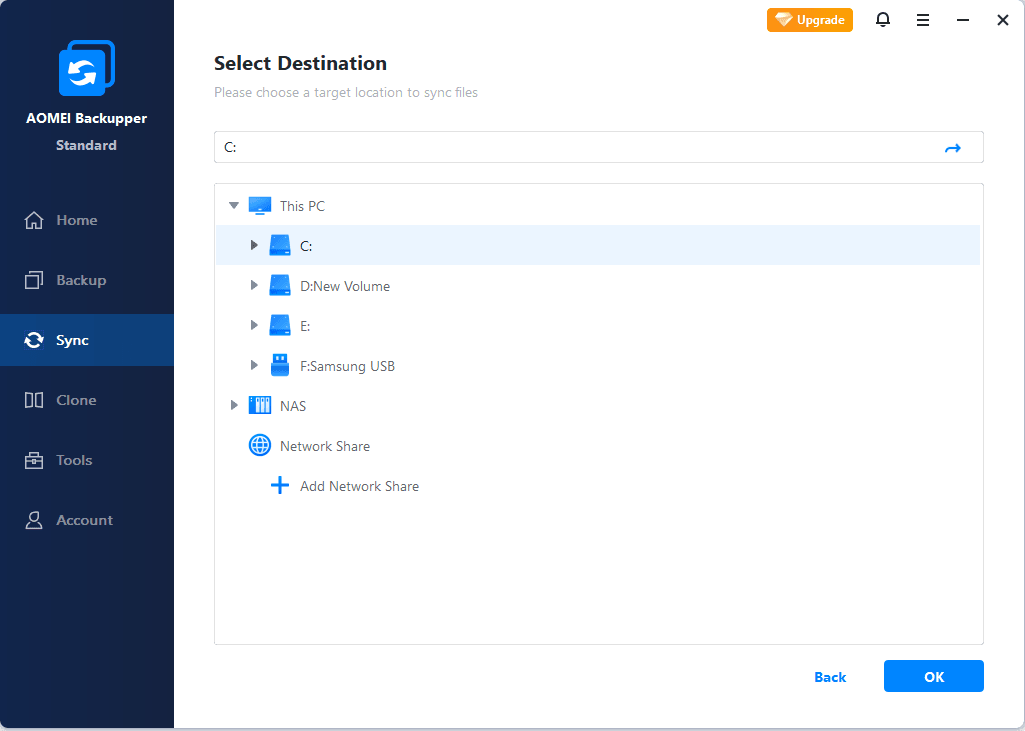
- Click Add Folder to select the folder you want to copy to the network drive.

- Then click the inverted triangle button below to select the destination path, click Select a network location to add your network drive path.
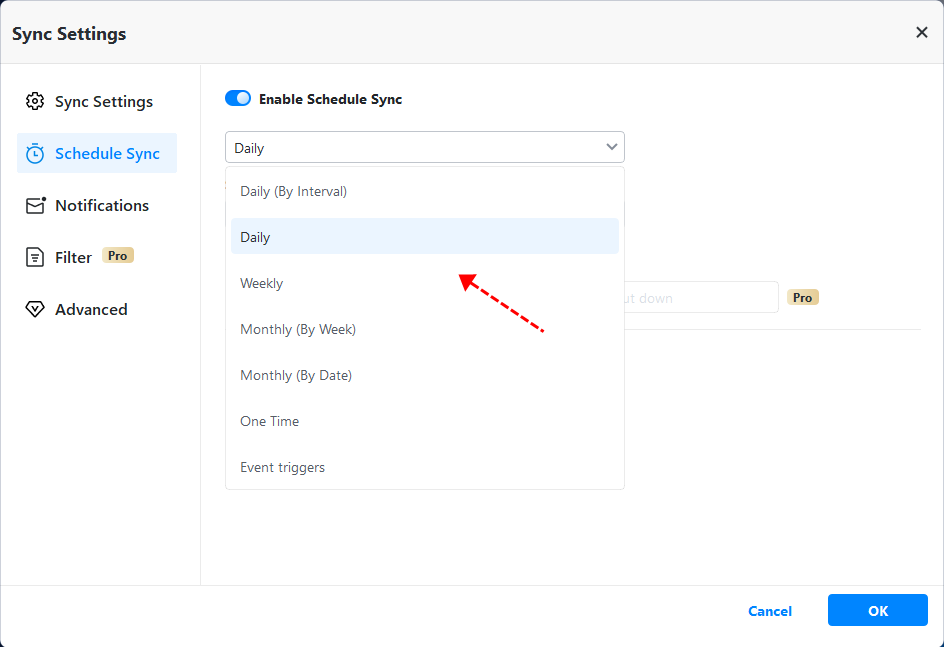
- Next, click Schedule Sync to set up automatic file copying. You can choose daily, weekly, monthly, event triggers, or USB plug in.
- After you have determined all the settings, click Start Sync.
★ How to backup files to AOMEI Cloud
There is a growing trend to backup files to cloud storage. You can backup files to AOMEI Cloud if you have an AOMEI account. You'll get 1TB free storage for 15 days after you sign up for an AOMEI account.

Final Words
After reading this article, you can learn how to use the Robocopy command and the Windows 10 Task Scheduler to copy files to a network drive. But using these two tools to create automatic file copying tasks is slightly cumbersome. Here, I recommend you use the free backup software - AOMEI Backupper to help you create this task. The operation is easy to understand, even for users who don't know much about computers.
AOMEI Backkuper not only helps you transfer files to different locations faster, you can also use it to perform disk or system cloning. This feature will be very useful when you want to upgrade your computer's hard drive. If you clone a disk with a system, it will ensure that you can boot successfully from the cloned disk without any problems and without any data loss.

