How to Delete Shadow Copies in Windows 10 [4 Solutions]
4 ways provided in this article to delete shadow copies in Windows 10 easily. Just follow the steps to delete shadow copies here.
By Ivy Updated on March 19, 2024
Why delete shadow copies, is it safe to delete them?
You might need to delete shadow copies (named restore point) to free up space in your Windows-based Computer, because these copies will take up a lot of storage space, and cause the low disk space error.
Besides, Volume Shadow Copies may also pose some security risks. For example, the update of Windows 10 build 1809 permits unprivileged users to read the SAM file. If a shadow copy exists, then the attacker could locate the SAM file in the shadow copy, and read the user password hashes or even use them to log onto remote servers.

In such cases, deleting shadow copies can be a more reliable solution than using Windows 10 antivirus software. But is it really safe to delete these shadow copies?
Well, If you're sure your computer is running well and you don't necessarily have to keep these backups, then feel free to delete them, and create system image backups, file backups or disk backups when you need them. Here are several methods to delete shadow copies in Windows 10 securely:
👉Method 1. Easier way to auto-delete shadow copies securely
👉Method 2. Delete older shadow copies via Disk Cleanup in Windows 10
👉Method 3. Delete all restore point (shadow copies) with System Properties
👉Method 4. Delete shadow copies with CMD in Windows 10
Method 1. The easiest way to auto-delete shadow copies securely
The professional Windows backup software – AOMEI Backupper Professional will help you out. If you backup data with AOMEI Backupper, you could configure how many backups to retain. First of all, please download AOMEI Backupper Professional.

- Intelligent backup settings: It offers ways to auto-delete old backups to save more storage space.
- Full backup solutions: You can choose System backup/Disk backup/Partition backup and File/Folder backup per your needs.
- Customized backup scheme: You can create full backup for the first time and enable incremental/differential backup to boot efficiency. Also you can delete old backups by enable automatic backup cleanup.
- Automatic backup modes: It offers schedule backup in daily/weekly/monthly/event-trigger and USB plug-in mode.
Then follow the steps, here is how to configure (take disk backup for example):
Step 1. Create a new disk backup
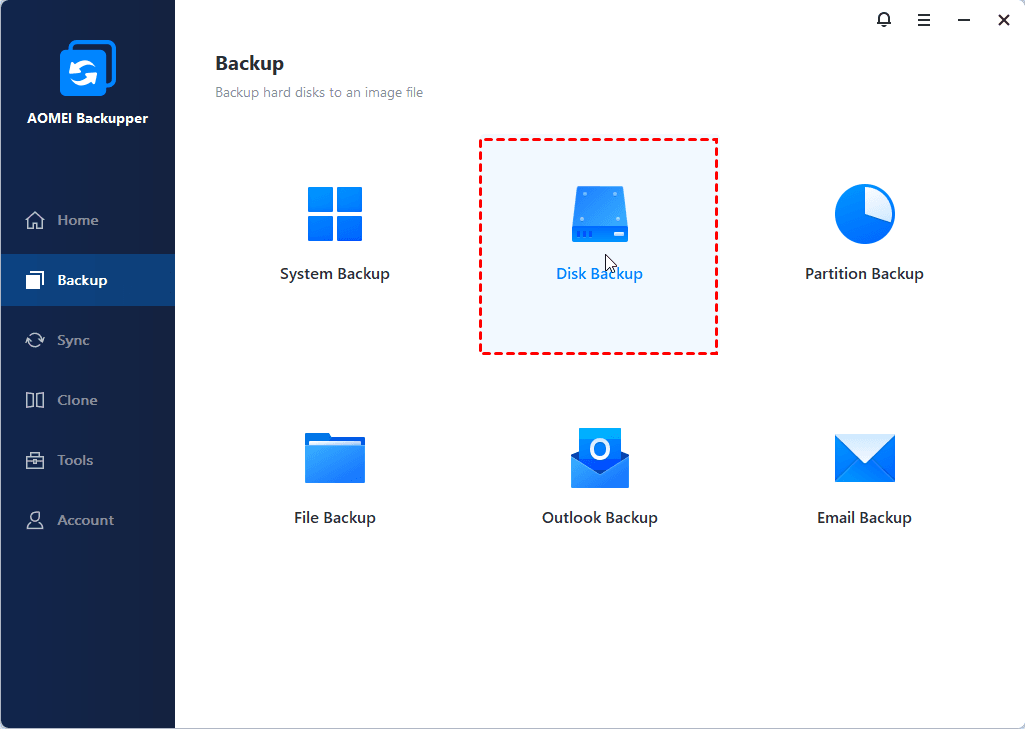
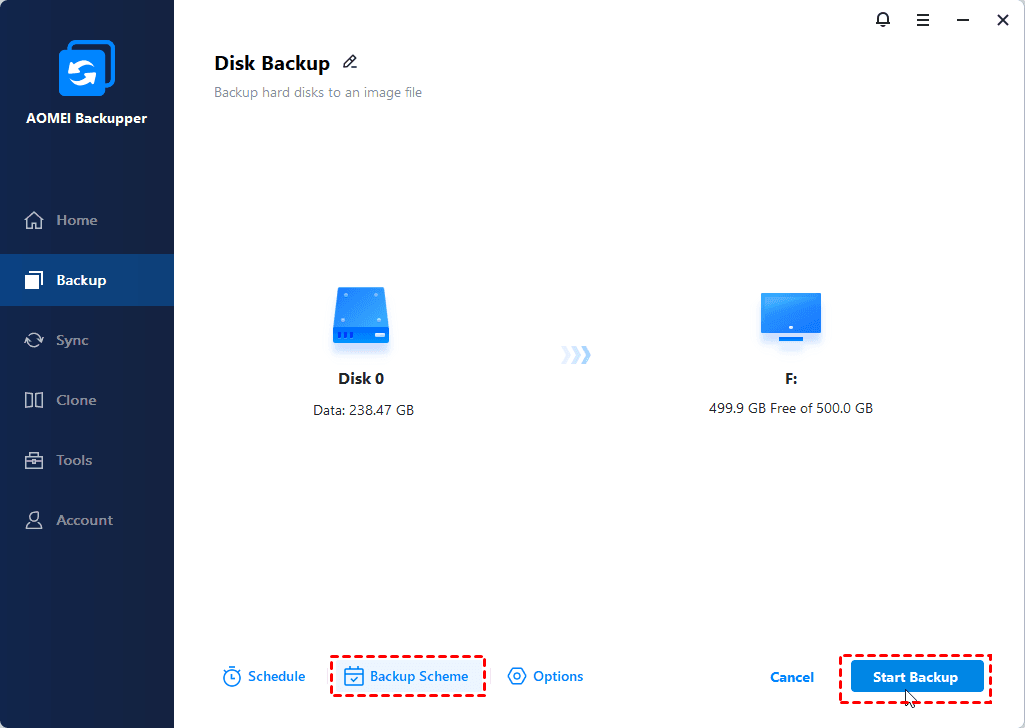
1. Open AOMEI Backupper Professional, select Backup -> Disk Backup.
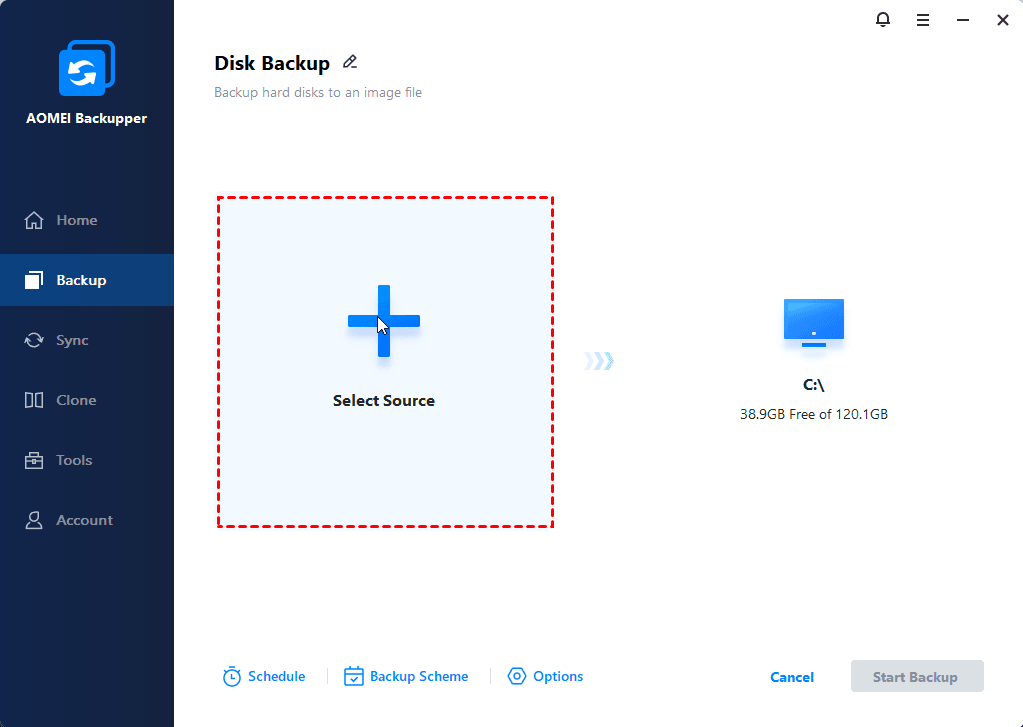
2. Rename the Task Name if needed, and then click Add Disk button to choose the hard drive you want to backup.
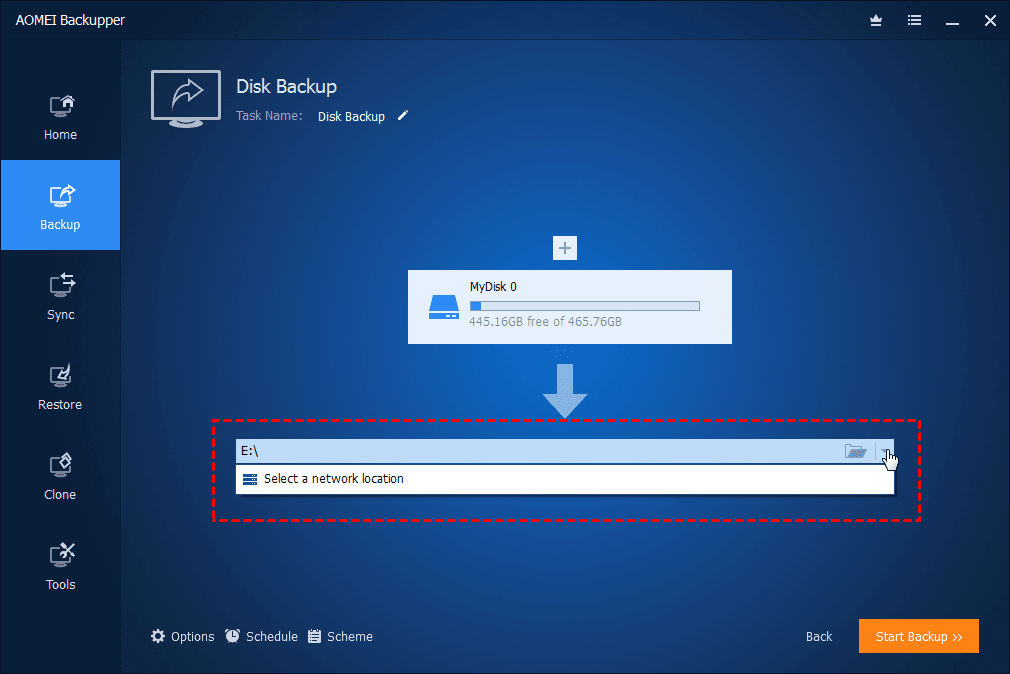
Step 2. Specify disk backup destination
Choose a destination to save the disk backup image file.
Step 3. Choose backup mode
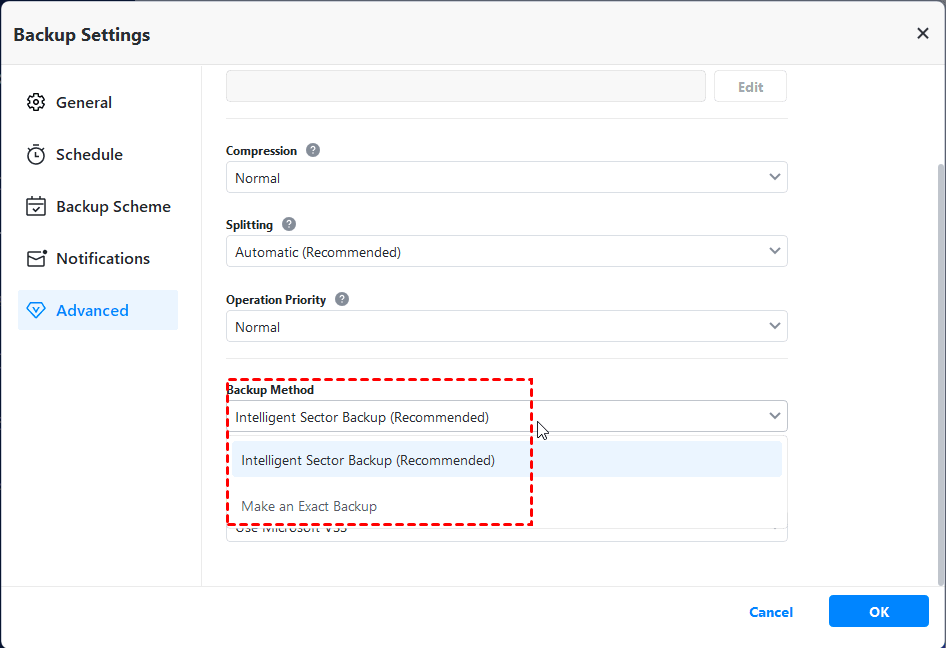
Click Options > Backup Mode, and then choose Use Microsoft VSS in Backup Service, and click OK.
Step 4. Select shadow copy auto deletion method and start backup
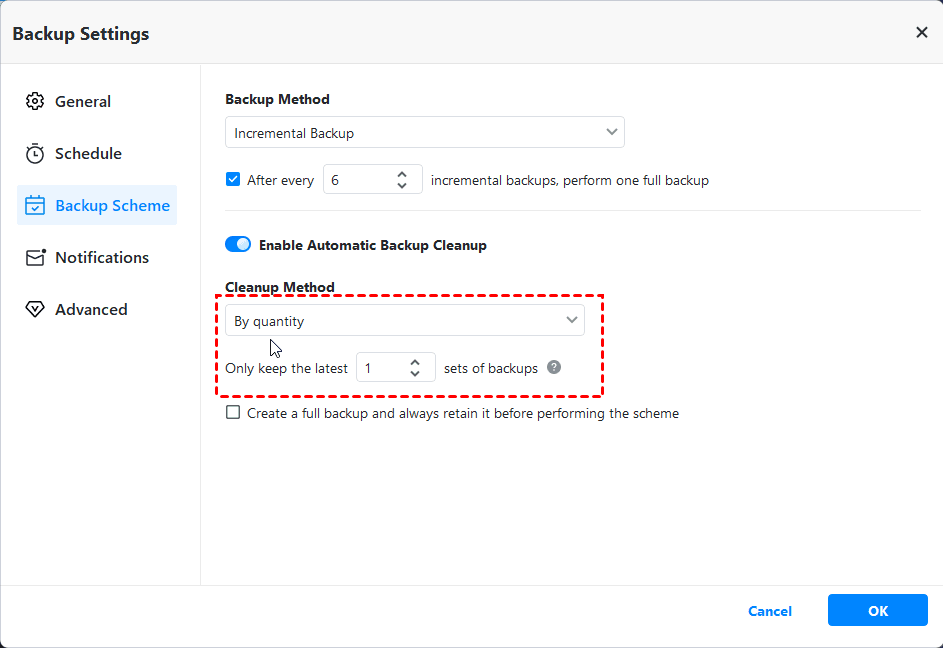
1. Tick Backup Scheme at the bottom of the interface, turn on Enable Backup Scheme, and choose one cleanup method among By quantity, By time, By daily/weekly/monthly.
★ Tips:
✿ Apart from Differential Backup Scheme, there are four options provided: Full Backup Scheme, Incremental Backup Scheme, Space Management Scheme, and Other Backup Scheme.
✿ Options: It allows you comment, split, compress the backup task, enable encryption for backups, and even enable the email notification after completed, choose backup mode, etc.
✿ Schedule: you could set up a backup task via daily, weekly, monthly, event trigger, USB plug in.
2. Press Start Backup to create Windows 10 disk backup using Shadow Copy (VSS).
Wait for a moment, the cost time of creating disk image depends on the data size on your hard drive. If you create a scheduled backup for a while, you will get several backups for this task, when the number of backups exceed the retain number, the oldest backup will be automatically deleted to free up space for your current computer.
Method 2. Delete older shadow copies via Disk Cleanup in Windows 10
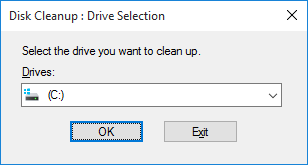
1. Input Disk Cleanup in the Search box on taskbar, and hit enter to select Disk Cleanup.
2. Choose the drive or partition that you want to delete shadow copies, and hit OK.
3. Click Clean up system files button, choose the partition again and press OK.
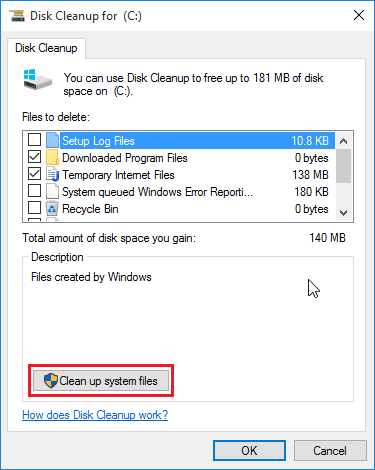
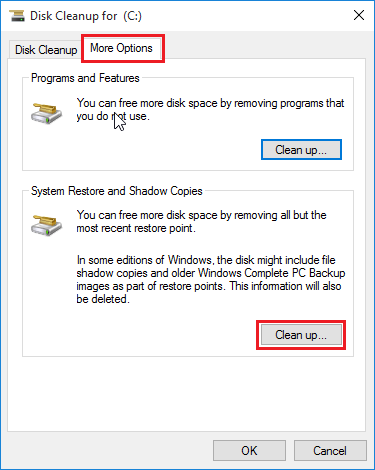
4. Select More Options tab, hit Clean up… in the System Restore and Shadow Copies section.
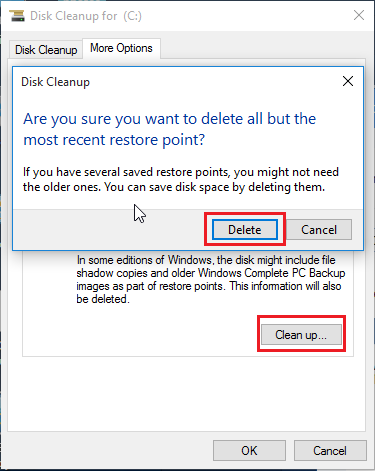
5. Press Delete to delete all shadow copies but the most recent ones.
Method 3. Delete all restore point (shadow copies) with System Properties
1. Click Win + R key combination to open Run dialog.
2. Input SystemPropertiesProtection and hit enter.
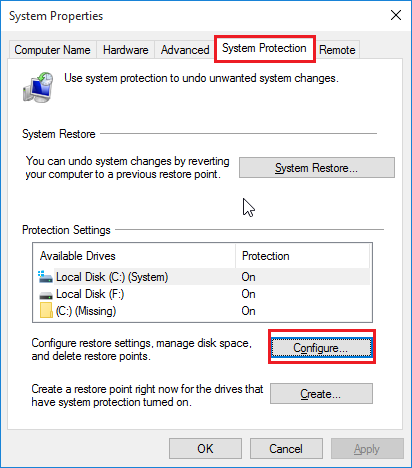
3. Select a drive or partition you would like to delete all these shadow copies from, and then choose Configure.
4. Press Delete to delete all restore points from this drive or partition, and click Apply.
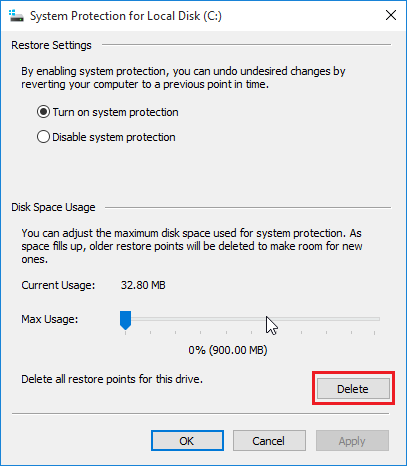
Or just Disable system protection in Restore Settings section (Not recommend), it will delete all existing restore points for you. Please note you could not perform system restore after disabling Shadow Copy. (If you want to enable shadow copy, select Turn on system protection.)
Method 4. Delete shadow copies with CMD in Windows 10
Delete shadow Copies Use VssAdmin
As a part of Powershell, you could use VssAdmin to delete Shadow copies to free up space, here is the syntax:
vssadmin delete shadows /for= [/oldest | /all | /shadow=] [/quiet]
-
ForVolumeSpec: specify which volume’s shadow copy will be deleted.
-
/oldest: Delete the oldest shadow copy.
-
/all: Delete all of the specified volume’s shadow copies.
-
ShadowID: Delete the shadow copy by ShadowID (run vssadmin list shadows to get ShadowID).
-
/quiet: Specify no messages return after finishing the command.
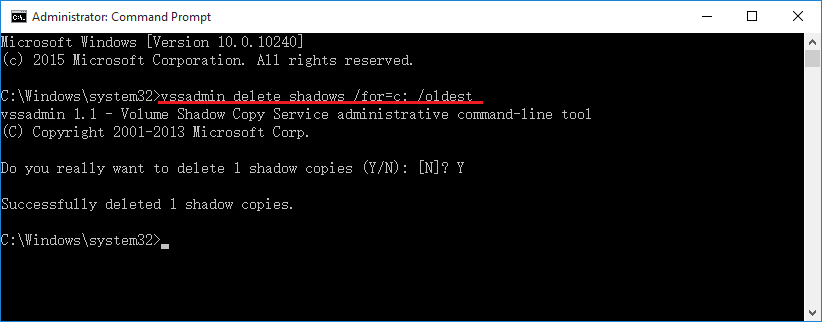
For example: vssadmin delete shadows /for=c: /oldest
Resize Shadow Storage to Delete
Warning: This operation will delete all your restore points (shadow copies) on the specified volume.
VssAdmin will help you to modify the size of the shadow copy storage space, here is the Syntax:
vssadmin resize shadowstorage /for= /on= [/maxsize=]
-
ForVolumeSpec: Specifies the volume for which the maximum amount of storage space is to be resized.
-
OnVolumeSpec: Specifies the volume storage.
-
Maxsize: Should be 1MB or greater and accepts the following suffixes: KB, MB, GB, TB, PB and FB. Or you could use percentage with “%” to define. If a suffix is not supplied, then is in bytes.
There is how to run this command:
1. Input cmd in Search box.
2. Right click the Command Prompt and choose Run as Administrator.
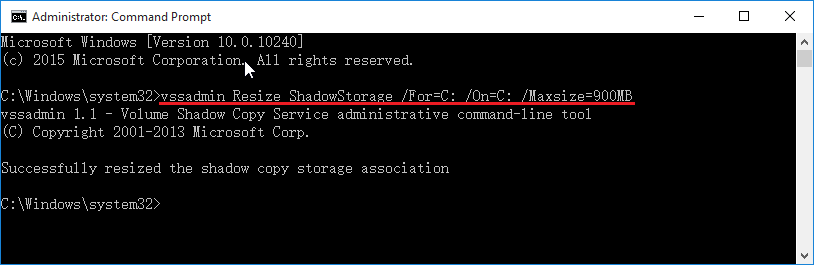
3. Then input the command for example:
vssadmin Resize ShadowStorage /For=C: /On=C: /Maxsize=900MB
FAQs on deleting/disable Shadow Copies or Volume
1. What is Shadow Copy?
Shadow Copy (known as VSS or Volume Snapshot Service) can create backup copies or snapshots of computer files & volumes even when they are in use. It's included in Windows 10/8.1/8/7/XP/Vista, Windows Server 2019/2016/2012(R2)/2008 (R2)/2003, and there are 2 tools for shadow copy -DiskShadow, VssAdmin.
Your shadow copies are generally located in C:/ partition and stored in System Volume Information folder (hidden by default). You could run vssadmin list shadowstorage in CMD to find the exact location of them.
2. What are the consequences of deleting or disabling Shadow Copy or Volume?
Explore the potential implications of deleting or disabling Shadow Copy or Volume, such as losing the ability to restore previous versions of files, reducing data recovery options, or impacting system stability.
3. Can I selectively delete or disable Shadow Copy for specific files or volumes
Learn about the options for selectively managing Shadow Copy or Volume, including deleting specific shadow copies, disabling the feature for particular volumes, or adjusting settings to customize its behavior.
4. Where are the shadow copies stored in Windows 10?
In Windows 10, shadow copies are stored in a hidden system folder named "System Volume Information" on each volume where the Volume Shadow Copy Service (VSS) is enabled. This folder is typically located at the root of the volume, and access to it is restricted by default to ensure system integrity and security.
5. What command line deletes shadow copies?
👉In Windows, you can delete shadow copies using the `vssadmin` command-line tool. Here's the command to delete shadow copies:
vssadmin delete shadows /all
👉This command will delete all existing shadow copies on the system. You can also specify specific shadow copies to delete by providing their shadow copy IDs. For example:
vssadmin delete shadows /shadow=
Replace''with the actual shadow copy ID you want to delete.
Conclusion
How to delete shadow copies in Windows 10/8/7? It's quite easy with the 4 solutions. And if you would like to create backup tasks and delete backups automatically, AOMEI Backupper is the best solution. After creating backup tasks, you could restore backup to dissimilar hardware computer if required, or restore selective files, and AOMEI Backupper provides other advanced tools for you, like creating bootable media, AOMEI PXE boot tool, etc. For IT technicians, you could try AOMEI Backupper Technician (For PCs) or Technician Plus (for PCs & Servers).

