How to Convert Physical PC to Virtual Machine in Windows
Physical PC to virtual machine migration is very helpful for users to do operations that may do harm to physical computer. AOMEI Backupper is a good software to convert physical PC to virtual machine.
By Lily Updated on October 25, 2024
Why migrate physical PC to virtual machine?
Most Windows users know that there are many potential safety hazards in some operations. Sometimes, an incorrect operation may let your system crash or even worse. To avoid these kinds of problems, operating it on a virtual machine is a wise choice.
Virtual machine such as VirtualBox, VMware, Hyper-V, and Windows Virtual PC provides the function of running multiple OSes in a virtual environment. You can do nearly all the things you want to do in virtual machine if you are worried about the physical PC’s safety.
To convert physical computer to virtual machine, moving the physical OS to virtual machine is the most effective way. Then, how to do it?
Best PC to VM converter you need
AOMEI Backupper, designed by AOMEI TECH, is a powerful backup software that you can use to migrate OS to virtual machine.
- It offers System Backup, Disk Backup, Partition Backup and File Backup to meet your different needs.
- You can restore your computer to an earlier date and even restore system to a different computer whenever the need arises.
- With its easy-to-use interface, you can operate it without any help.
Windows PC OS and Server OS are supported in different versions of AOMEI Backupper. For PC users, we highly recommend the Professional version. Now download AOMEI Backupper and install it on your Windows 11/10/8.1/8/7 PC.
How to convert computer to virtual machine
Here are the specific steps of migrating physical PC to virtual machine. Before you do, there are some preparations:
- You need to install virtual machine software. If you'd like to convert physical PC to VMware virtual machine, install VMware Workstation first.
- Prepare a USB flash drive to store WinPE ISO file and the system image of the physical computer.
Operations on physical computer
Step 1. Connect the USB drive to your computer. Install and launch AOMEI Backupper.
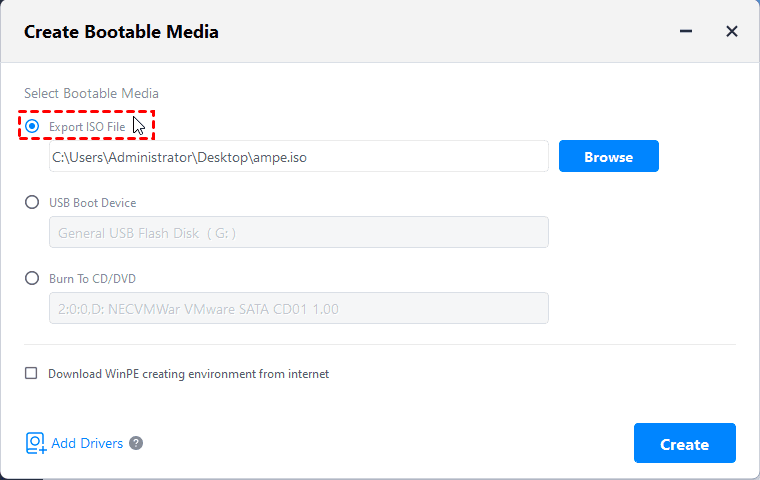
Step 2. Click Tools > Create Bootable Media to create a bootable ISO file on the USB disk.
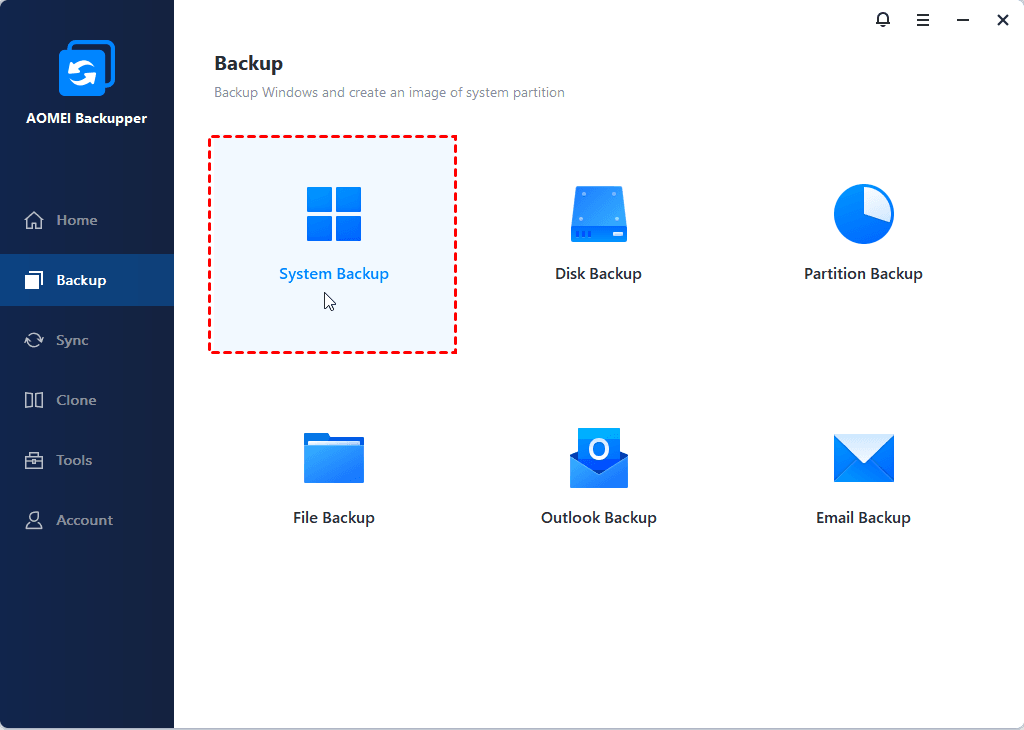
Step 3. Select Backup > System Backup to create a system backup image and save it on the USB stick as well.
Operations on virtual machine
Note: This method is only applicable to a VM using BIOS. If your virtual machine uses EFI firmware, you can create a bootable USB drive and use the USB drive as physical hard drive to boot from it.
Step 1. Mount the ISO file in the CD/DVD section of the VM console. Select Power On to Firmware to boot VM into BIOS and set CD-ROM Drive as the first boot option.
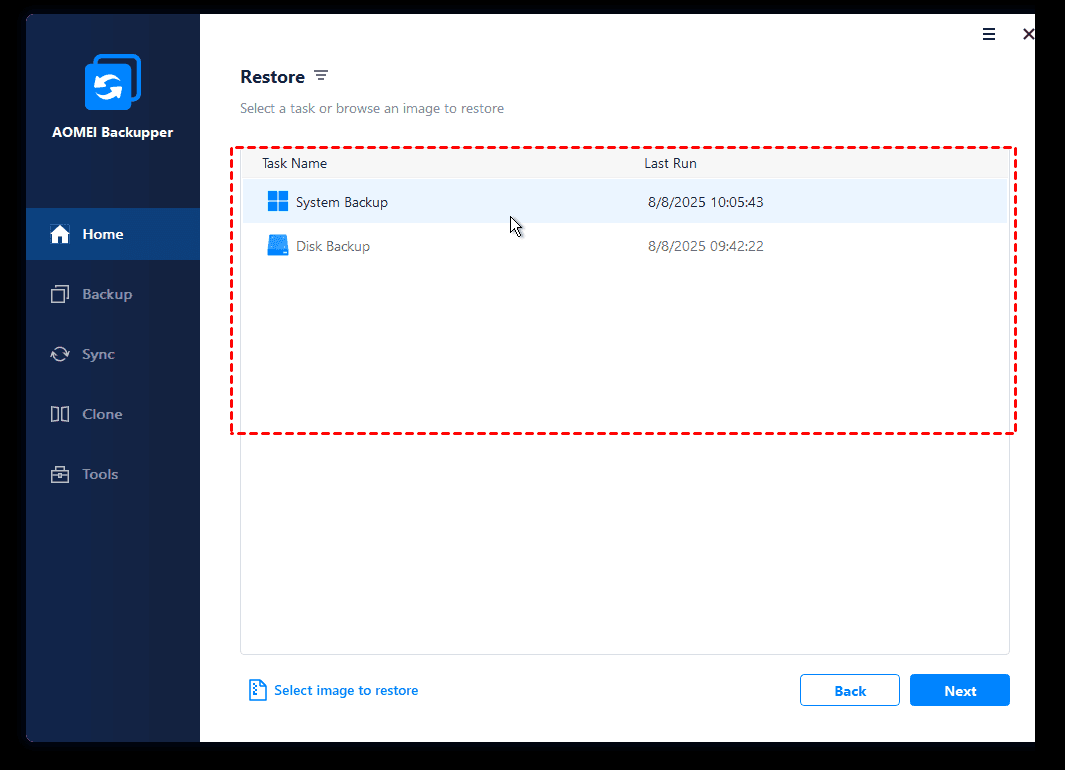
Step 2. You’ll see loaded AOMEI Backupper once login. Select Restore and then Select Task.
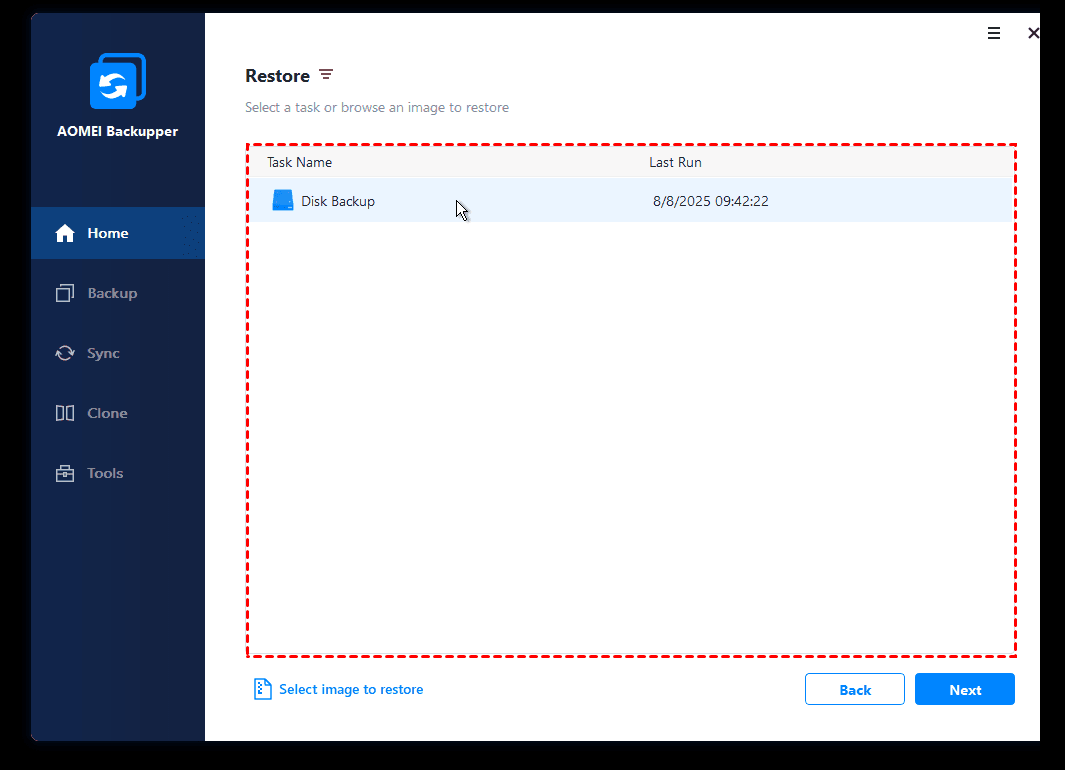
Step 3. Select the system backup task to restore and click Next.
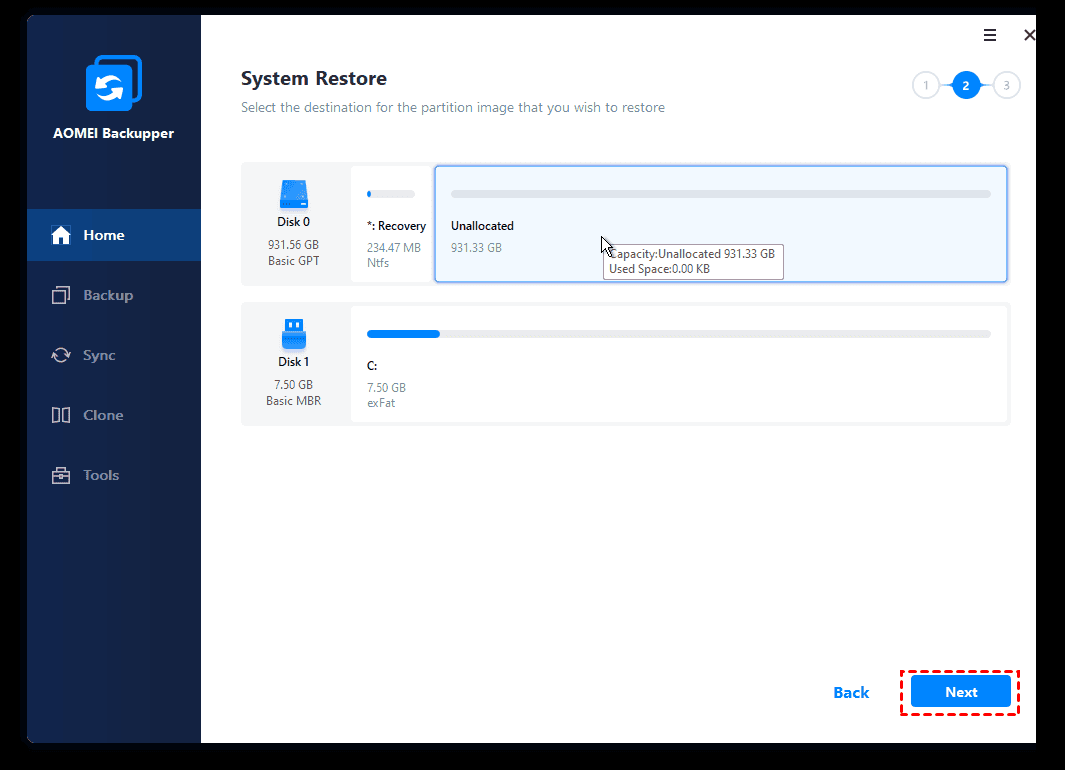
Step 4. Select Restore this system backup and tick Restore system to other location. Then, click Next.

Step 5. Select the hard drive on the VM as the destination path and click Next.
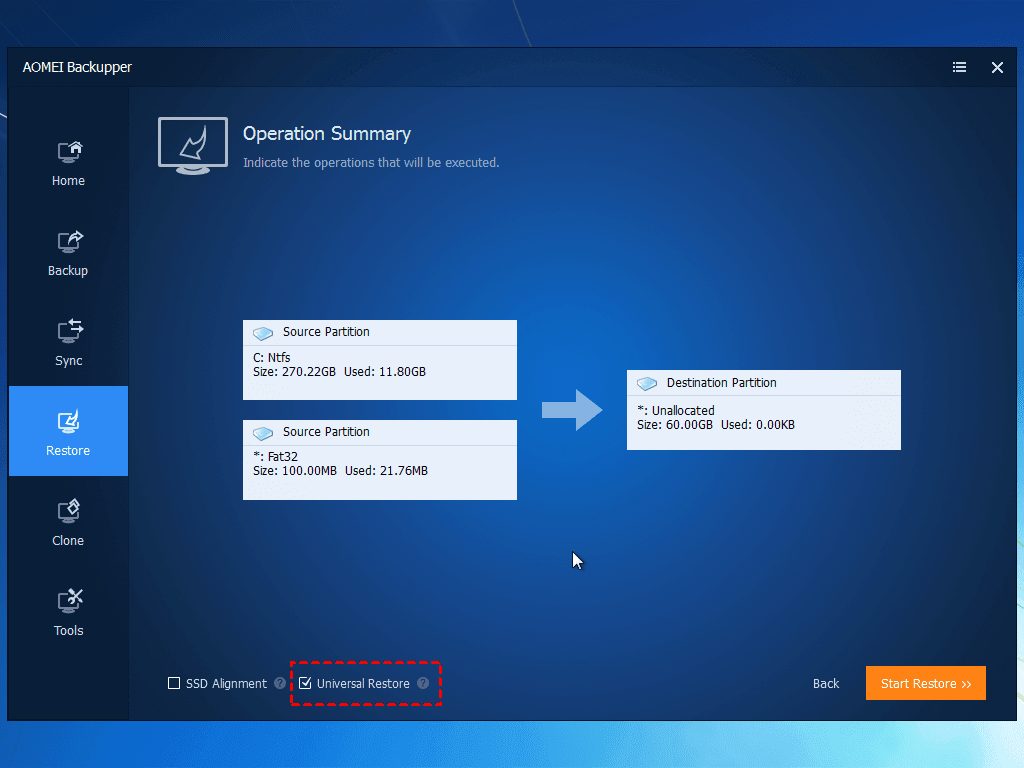
Step 6. Confirm operations on the “Operation Summary” page and click on Start Restore button. The Universal Restore option will be checked automatically if the physical PC and virtual machine have different hardware.
This method is very simple compared with other software. You can also use the PXE Boot Tool to replace the bootable ISO file. Besides migrating physical computer to virtual machine, AOMEI Backupper supports to convert virtual machine to physical (V2P) and even migrate virtual machine to virtual machine (V2V).
If you want to protect unlimited computers within your company, you can pick AOMEI Backupper Technician. With the inbuilt AOMEI Image Deploy tool, you are also allowed to deploy/restore system image file on server-side computer to multiple client-side computers over network.
Bonus tip: Best way to backup your virtual machine
After converting PC to VM, you’d better backup your VM in case of data or service loss. AOMEI Cyber Backup offers you the best virtual machine backup solutions.
- It enables you to create complete and independent image-level backup for VMware ESXi and Hyper-V VMs from a central console.
- You are allowed to save backup images on a local drive, NAS or network share.
- You can create backup schedules to automate backups daily, weekly, or monthly.
- It allows one administrator to create sub-accounts with limited privileges.
Download this powerful virtual machine backup software now!
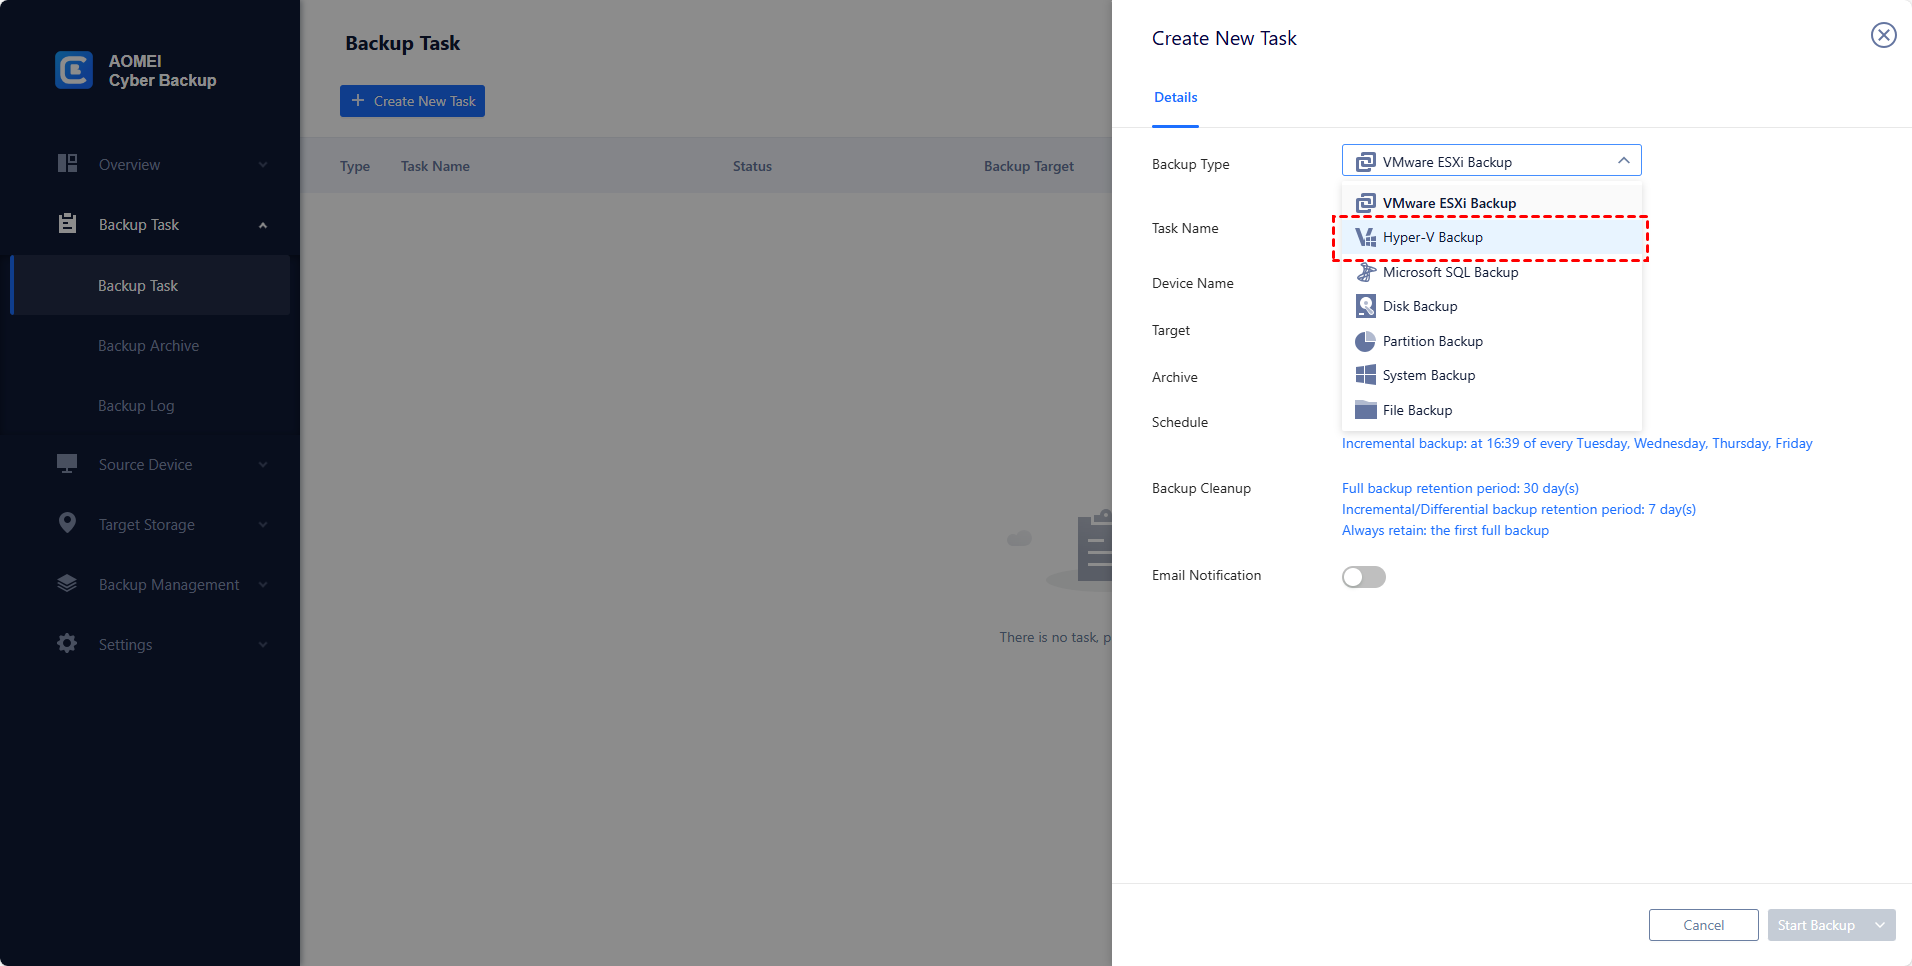
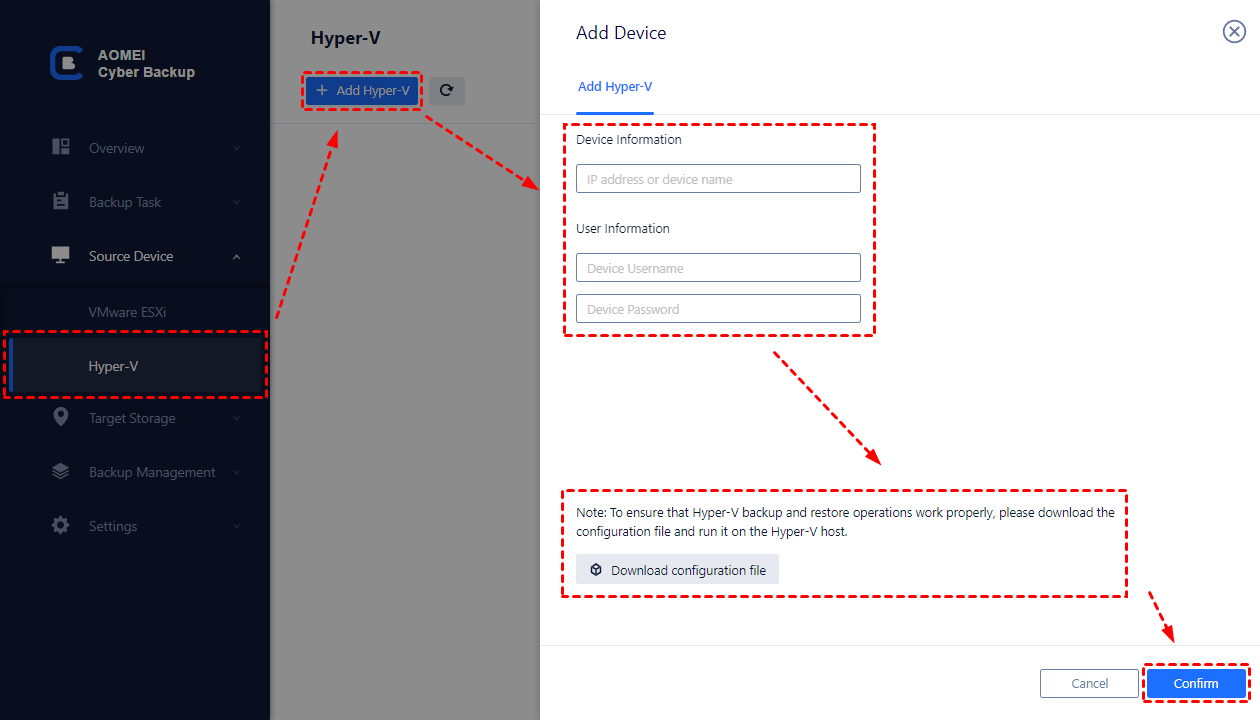
Take Hyper-V as an example. Learn how to backup a Hyper-V virtual machine as follows:
Step 1. Log in AOMEI Cyber Backup, and add the Hyper-V host with VMs you want to backup.
Step 2. Click Backup Task on the left menu bar and select Backup Task > Create New Task.
Step 3. Choose Hyper-V Backup as the Backup Type and finish the rest settings.