3 Best Practices for P2V (Physical to Virtual) Migration
Need to migrate Windows system from physical to virtual machine? Learn 3 best practices for P2V migration from this page.
By Lily Updated on September 27, 2024
Why do you need P2V migration?
In daily usage, you may want to migrate from physical to virtual machine for the following reasons:
● A VM provides a safe test environment. The operations you perform on a VM won’t do harm to your physical machine.
● It requires less hardware, physical space, power consumption and repairs to run a VM than run a physical machine.
● A VM can run on multiple platforms, making P2V a popular way for Mac users to run Windows applications.
● Multiple VMs can run on a single physical machine so that you have different test environments on one computer.
Since P2V migration is advantageous, what are P2V best practices?
How to migrate from physical to virtual machine efficiently?
There are 3 best practices for P2V migration which can be realized by using three wonderful P2V tools. The first one is AOMEI Backuper Professional, the second one is Microsoft Systinternals Disk2vhd, and the last one is System Center Virtual Machine Manager (SCVMM). I’ll show you how to use them one by one:
👉 Method 1: P2V via AOMEI Backupper Professional🔥
👉 Method 2: P2V with Microsoft Systinternals Disk2vhd
👉 Method 3: P2V by System Center Virtual Machine Manager (SCVMM)
Method 1: P2V via AOMEI Backupper Professional
AOMEI Backupper Professional provides you with P2V migration best migration method. With the Universal Restore feature, you can migrate Windows 11, 10, 8.1, 8, and 7 from physical to virtual machine simply, and you won’t worry about boot issues caused by dissimilar hardware after migration.
Before you can restore Windows system image to virtual machine, you should do following things on your physical computer:
1. Create a bootable ISO file on a USB drive to start up the VM. If you are going to restore system image to multiple VMs, please try PXE boot tool to start up all the VMs without repetitively connecting and disconnecting the bootable drive.
2. Create a system image using AOMEI Backupper and save it on the same USB.
Now follow the steps below to migrate Windows system from physical to virtual machine:
Step 1. Mount the ISO file in the CD/DVD section of the VM console. Select "Power On to Firmware" to boot VM into BIOS and set "CD-ROM Drive" as the first boot option.
Step 2. You’ll see loaded AOMEI Backupper once login. Select “Restore” on the left pane and click “Select image file”.
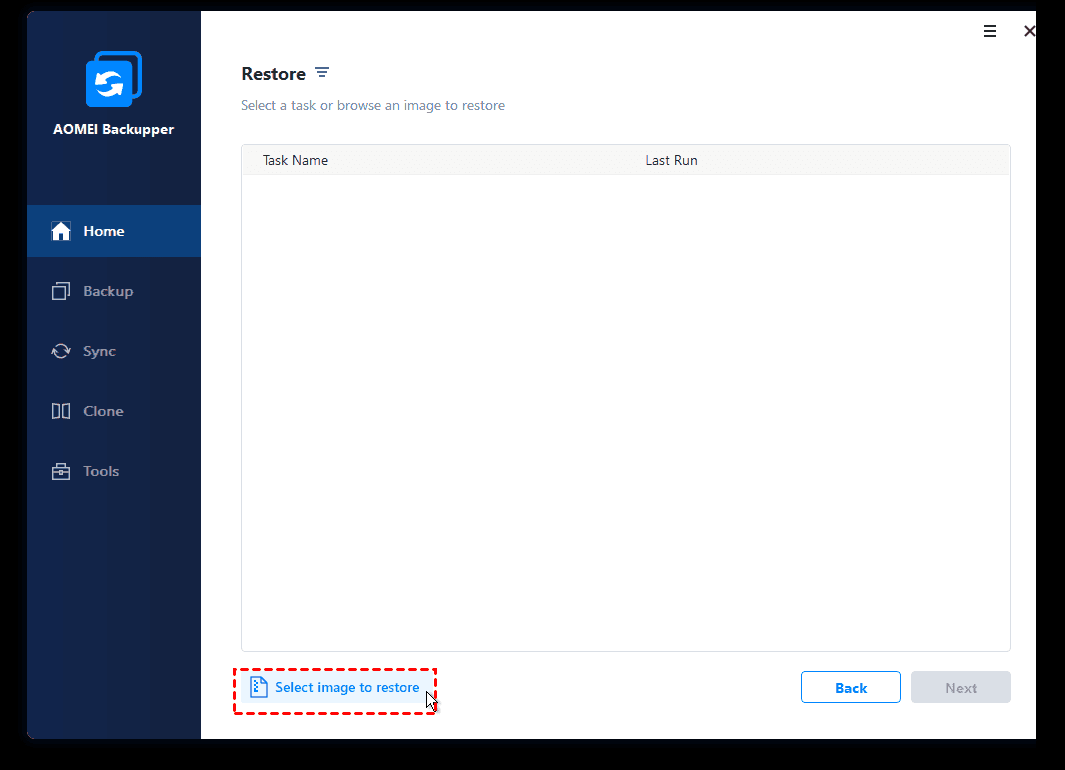
Step 3. Locate the system image file on the USB stick and click “Next”.
Step 4. Select “Restore this system backup” and tick “Restore system to other location”. Then, click “Next”.

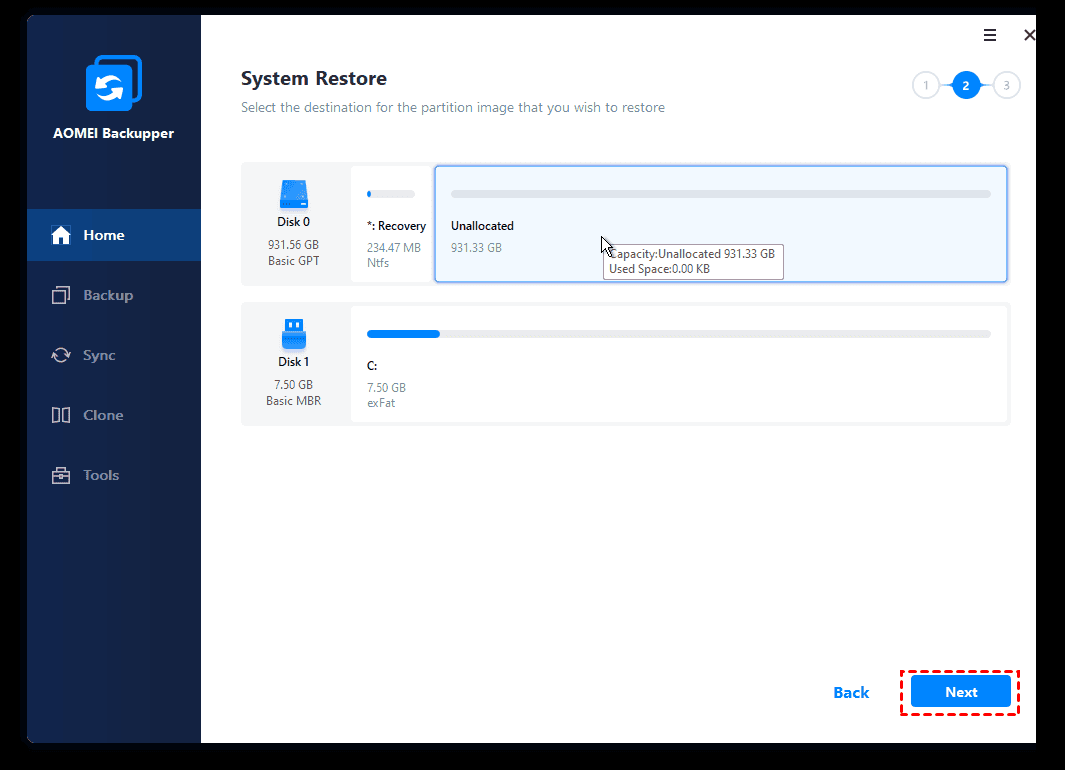
Step 5. Select the hard drive on the VM as the destination path and click “Next”.
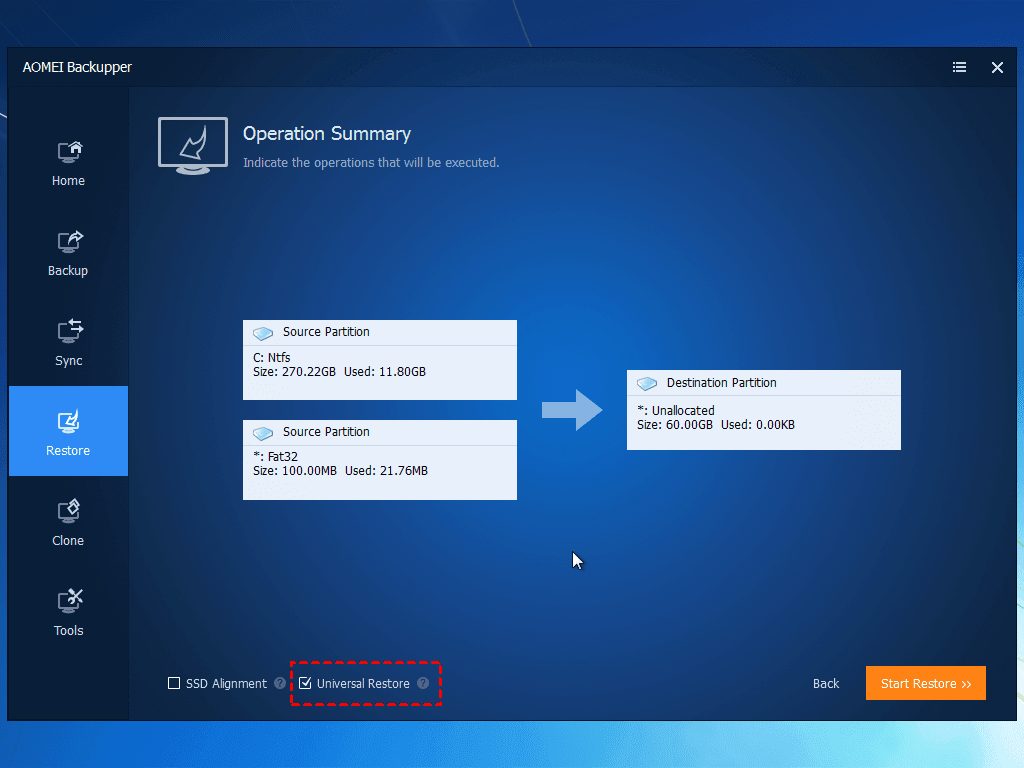
Step 6. In the Operation Summary page, tick “Universal Restore” to ensure the system is bootable after restoration. Click “Start Restore” to start P2V migration.
✍ Tips: To migrate Windows Server from physical to virtual machine, please turn to AOMEI Backupper Server.
Method 2: P2V with Microsoft Systinternals Disk2vhd
Disk2vhd is a utility that creates VHD (Virtual Hard Disk) versions of physical disks for use in Microsoft Virtual PC or Microsoft Hyper-V virtual machines. It can only convert physical drives to virtual disks. It will not build a VM, nor will it create any configuration. Follow the instructions below to perform P2V migration with Disk2vhd:
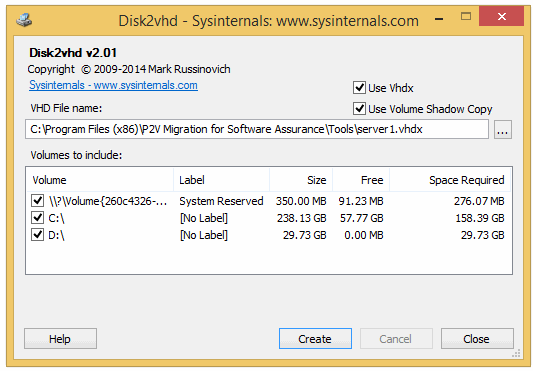
1. Run Disk2vhd on your physical computer.
2. Select the volumes you’d like to be included in the VHD. Tick the option “Use Vhdx” and “Use Volume Shadow Copy” based on your needs. Then, click “Create” to create a VHD.
3. Create a VM with the desired characteristics and add the VHD to the VM’s configuration as IDE disk.
Method 3: P2V by System Center Virtual Machine Manager (SCVMM)
System Center Virtual Machine Manager (SCVMM) is part of the System Center suite. It is Microsoft’s virtual machine support center for Windows-based systems, which aims at helping administrators combine several physical servers within a central virtualized environment. Follow the guidance below to convert a physical machine to virtual machine using SCVMM:
1. Run the SCVMM server and configure it to manage the Hyper-V host which will be hosting your migrated VM.
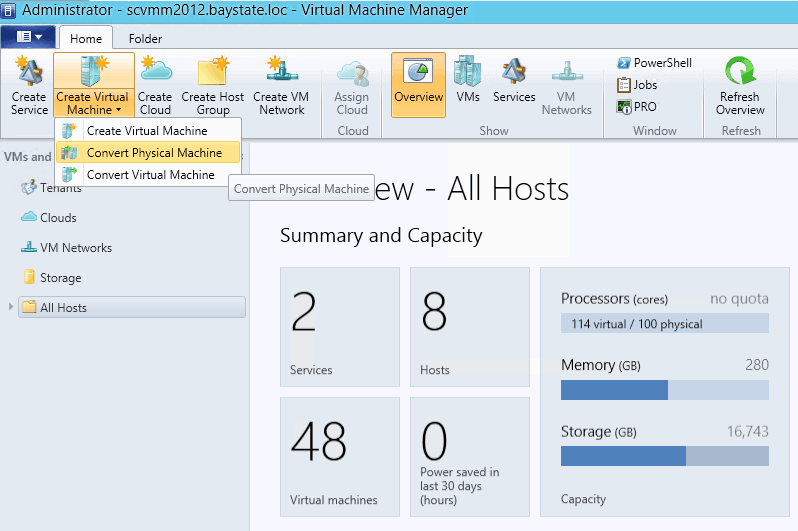
2. Click “VMs and Services” on the left panel.
3. On the ribbon, click the drop-down for “Create Virtual Machine” and select “Convert Physical Machine”. Then, follow the wizard to convert a physical computer to a VM.
Note: After the P2V migration process is finished, a migrated VM should exist on the Hyper-V host you chose during the P2V migration wizard. You should now disconnect the physical server from your network to prevent accidentally running it while the VM version is running.
Further reading
What is P2V migration?
P2V (Physical to Virtual) migration is the process of converting and migrating a physical computer image into a virtual machine (VM). It is performed by purpose-built conversion and migration software. The whole process is like this:
1. P2V tools save the physical machine’s state and data as a VM snapshot or image instance.
2. The VM manager or hypervisor tool allocates the required resources (including computing, memory, storage and networking) to the VM.
3. The VM snapshot is reinstalled by the hypervisor on VM’s allocated storage space.
After migration, the VM will have the same state, stored data, applications and required system configuration and resources as the physical machine.
🔥Hot: Protection for virtual machines after migration
Now you know how to migrate physical machines to virtual machines. For enterprises, virtual machine data is very important. After the migration, it is necessary to backup all your VMs to protect your data from all cyber threats.
To easily backup virtual machines, you can turn to a powerful VMware backup solution - AOMEI Cyber Backup. It comes with an easy-to-use console enabling users to backup VMware and Hyper-V virtual machines.
And it has many features and advantages making it the best choice for VM protection, such as
• It supports agentless image backup. You can create independent and image-based backup for VMware and Hyper-V VMs.
• It runs multiple VM backups automatically ensuring backup efficiency and convenience.
• It offers instant recovery. Always quickly restore virtual machine backup to a usable stable to minimize downtime.
Just click the button below to download and install this software. Then we will walk you through how to backup VMware ESXi and Hyper-V virtual machines.
Step 1. Install AOMEI Cyber Backup and run and login. The default username and password and both "admin".
Step 2. Click "Source Device" > "Vmware" > "Add Vmware Device" to add your VM host. And all virtual machines will be added. Just enter the IP address, username, and password.
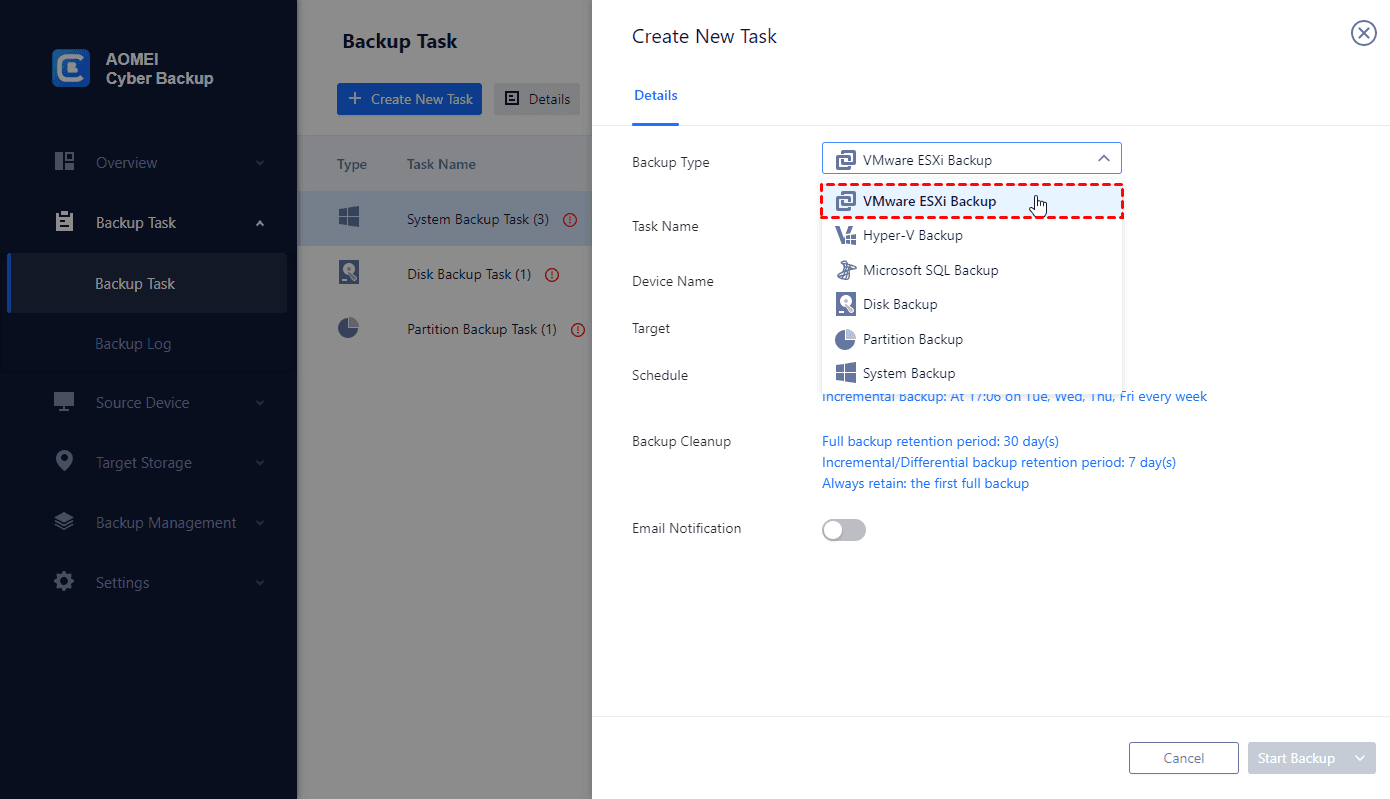
Step 3. Now you can create a new backup task. Click Backup Task on the left menu bar and select Backup Task > Create New Task.

Step 4. Choose "VMware ESXi Backup" or "Hyper V Backup" as the back type.
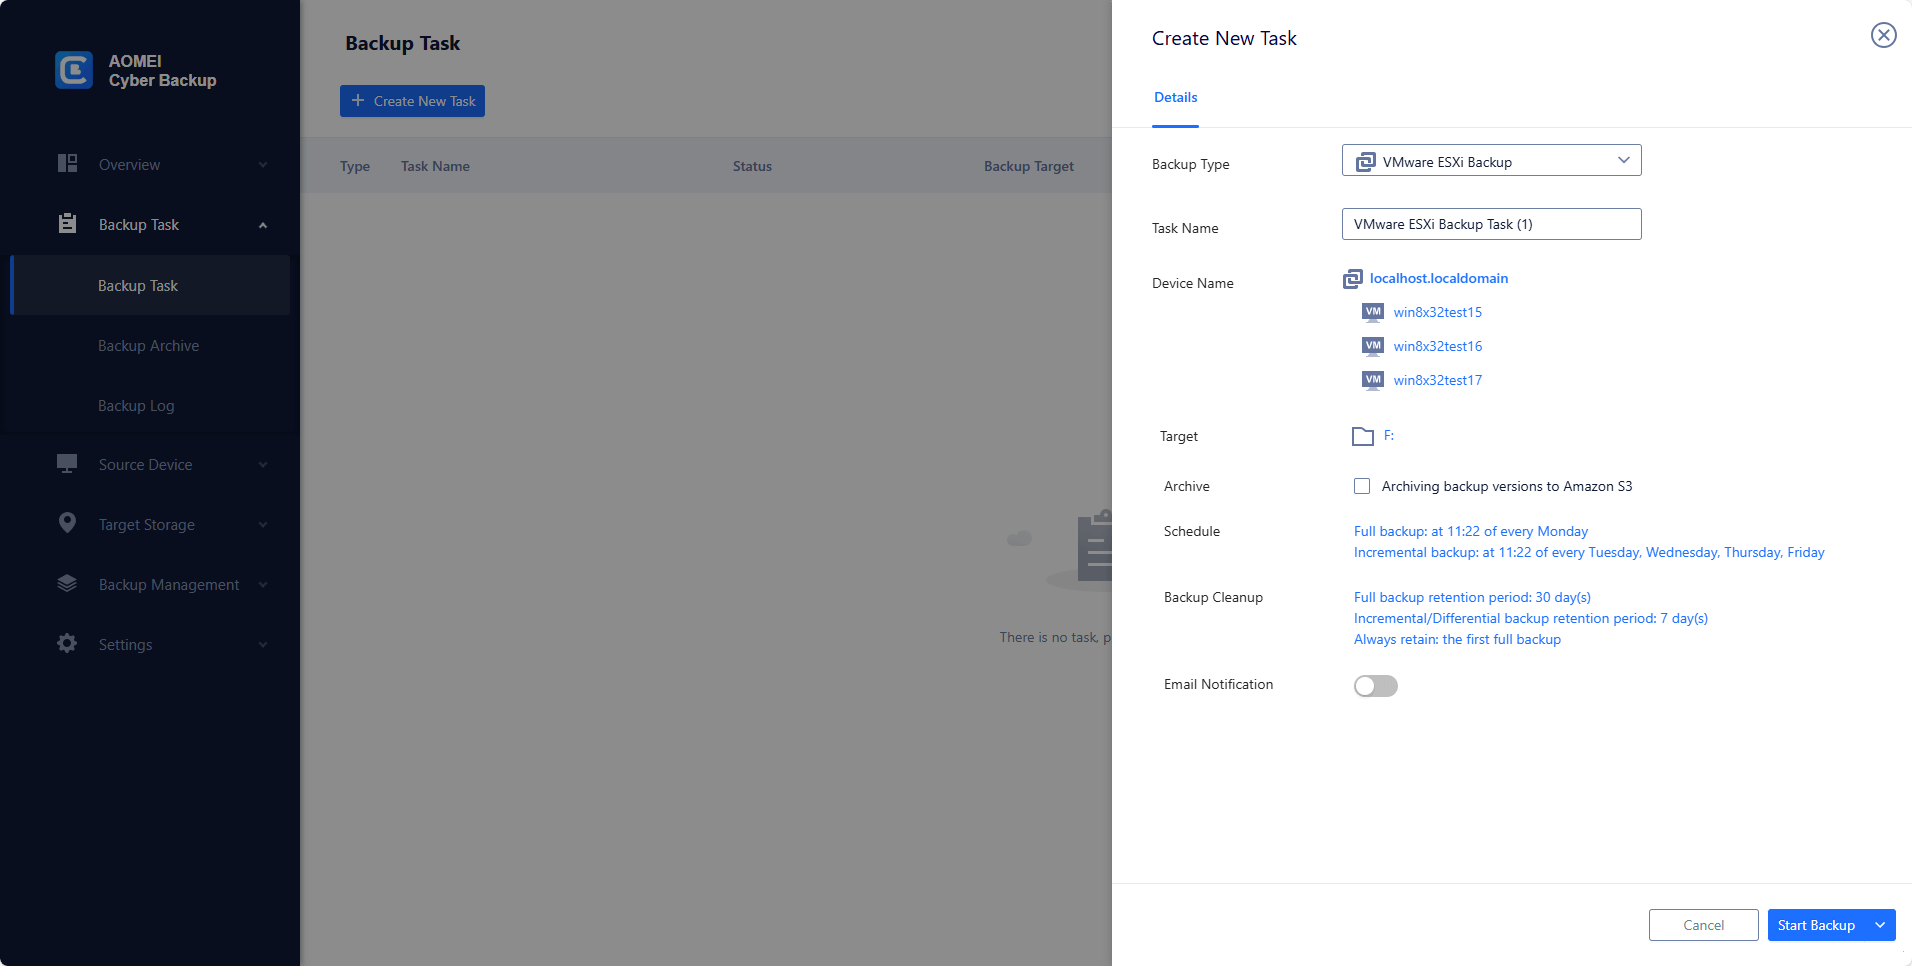
Step 5. Setup task name, Device Name, Target, Schedule, and other settings. Then click "Start Backup" to execute.
To sum up
Three best practices for P2V migration in Windows are shown above. If you want to migrate the operating system to VM without boot issues, you may pick AOMEI Backupper; if you want to create a virtual disk to be used in a VM, you may try Disk2vhd; if you want to combine several physical servers within a central virtualized environment, SCVMM can be the ideal choice.
Actually, AOMEI Backupper is not only a great P2V tool, but also powerful disk cloning software. You may use it as PNY SSD cloning software if you own a PNY SSD. Other common SSD brands are also supported. Don’t hesitate to give it a try!

