Complete Guide: Synology Drive Sync Multiple Folders
You can still sync multiple folders with Synology Drive, even if it says you can't, plus an easier way to sync files or folders.
By Jonna Updated on September 15, 2023
About Synology Drive
Synology Drive helps you transform your Synology NAS into your own private cloud. It allows you to access and share files wherever you are, whether from the Synology Drive mobile app, desktop client, web browser, or another Synology NAS. It can ensure that you can share your documents safely and protect them with granular permission settings and SSL encryption.
It can work across computers in continuity using the desktop app - Synology Drive Client. You can use it to create a sync task with multiple folders. Any changes you make to files on your computer will be automatically synchronized when Synology NAS is connected. Meanwhile, you can also protect your data from ransomware attacks or accidental deletion with a real-time or scheduled backup of important folders.
Unable to Select Multiple Folders to Sync
New to Cloud Station Server and DS Cloud.mirUsing DSM 6.0 and current version of DS Cloud. The Help states that you can select multiple folders from the server when you create a sync task but I don't seem able to do so. I can put a checkmark next to one folder but when I click on another, the first one gets deselected. I've tried a long-press to see if that enables a multi-select but nothing happens. Am I missing a technique?
In fact, for many users, this is an annoying problem. Synology Drive says it is able to sync multiple folders, but you cannot unless to create multiple sync tasks and sync a different folder in each one.
It's a great workaround if you don't know other methods. In addition, this article also provides you with an easier solution. With it, you can sync multiple folders with Synology Drive simultaneously. And I'll introduce you to both ways in detail. Please continue to see below.
How to Sync Multiple Folders Using Synology Drive
How does Synology Drive sync multiple folders? First, you must install the Synology Drive Server package on your Synology NAS. After installation, your NAS will have strong productivity and collaboration capabilities. Then you can download the Synology Drive Client for Windows to help you sync two or more folders to Synology. Let's take a look at the detailed steps.
#1. Set Up a Synology Drive Server on the NAS
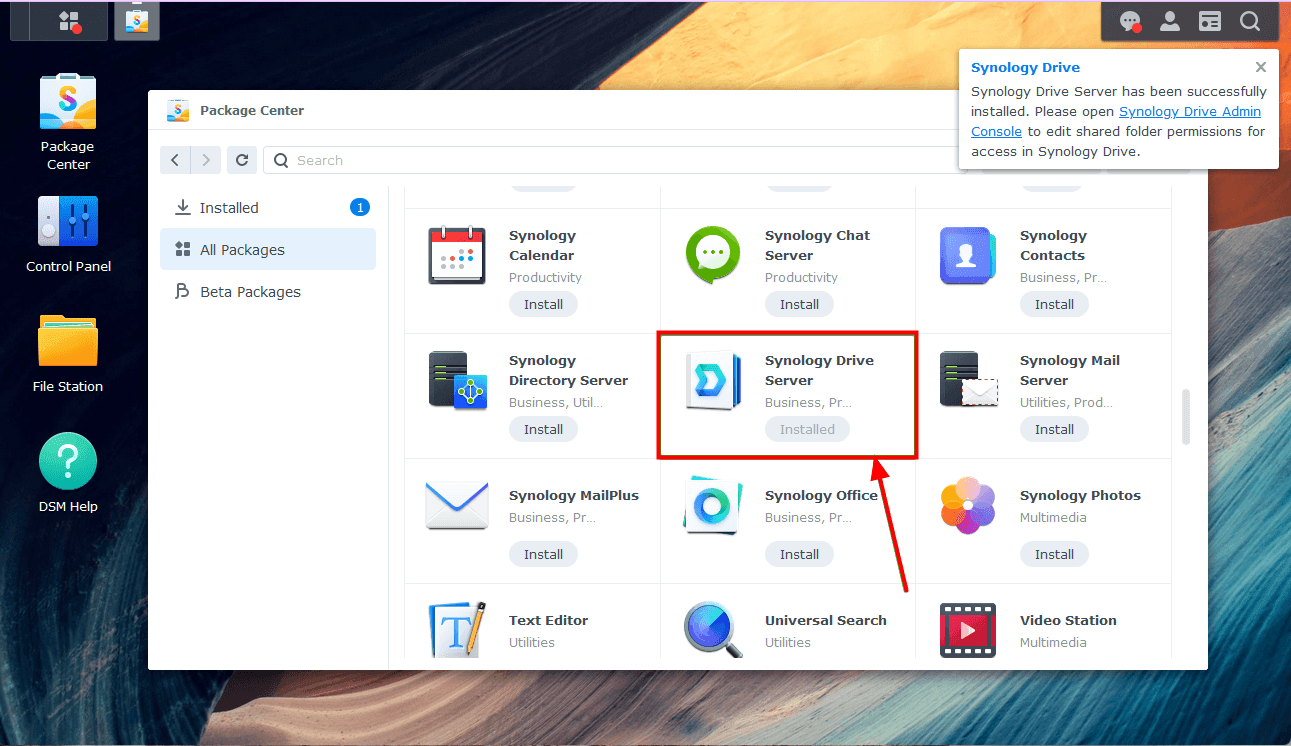
- To use Synology Drive, install the Synology Drive Server package on the NAS from the Package Center app.

- The Synology Drive Server package, along with all the dependencies, should be downloaded from the Internet and installed on the NAS one by one. It may take a while to complete.
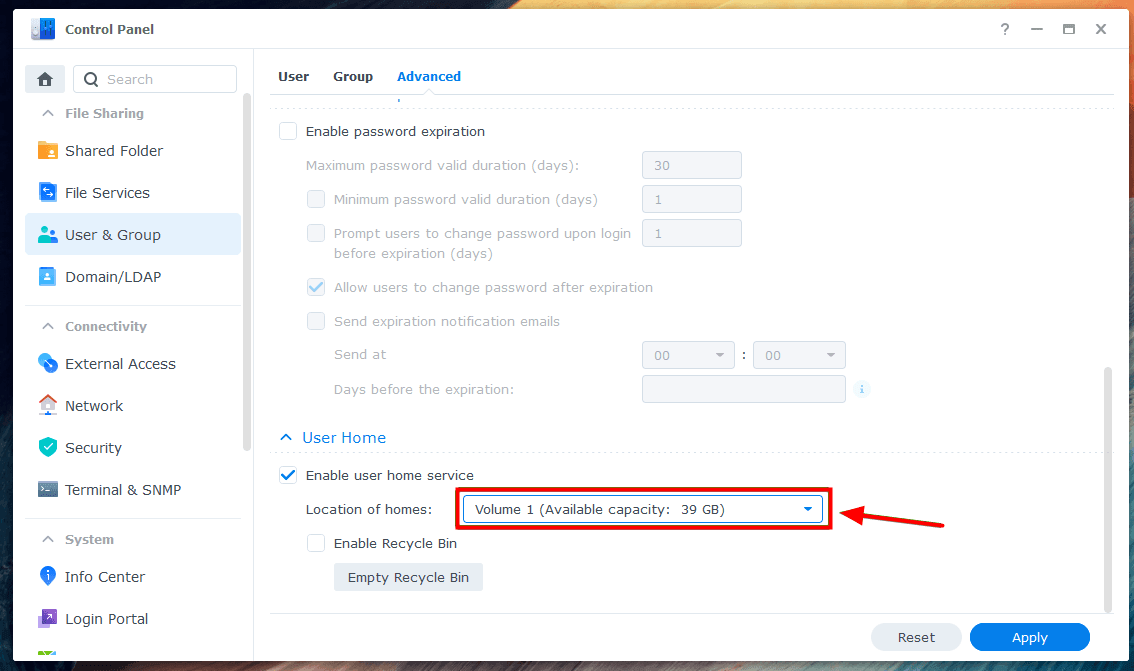
- For each NAS user who wants to store files and access their home directories on Synology Drive, you must enable the user home service on the Synology NAS. To enable the user home service, navigate to Control Panel -> User & Group.

- From the User Home section of the Advanced tab, check the Enable user home service checkbox.

- Then, you can select the volume you want to store the Synology Drive user files from the Location of homes drop-down menu. Once you’re done, click on Apply.
#2. Download Synology Drive Client for Windows
Once Synology Drive Server is installed on the NAS and user home service is enabled, you can access Synology Drive from your favorite web browser. To sync multiple folders between your computer and Synology Drive or back up files from your computer to Synology Drive, you need to install the Synology Drive Client app on your computer.
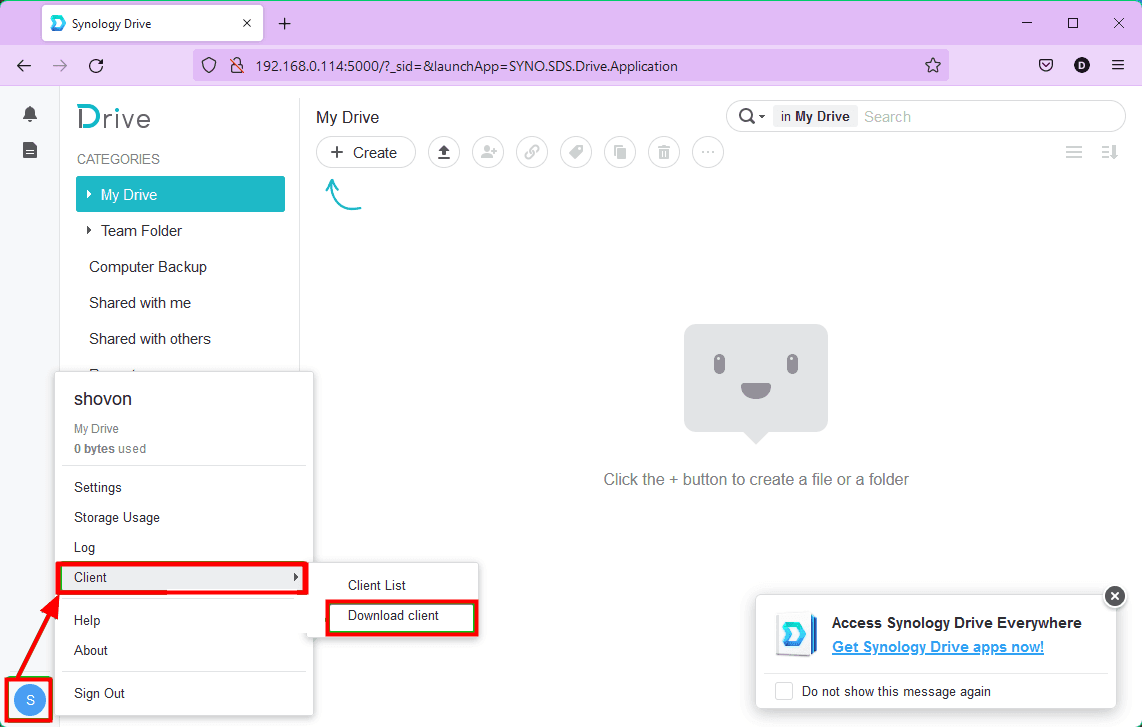
- Click on the Synology Drive app from the DSM web interface. Synology Drive web app should be opened in a new browser tab.

- Then log in to your Synology Drive web application and click on Client -> Download client from the user menu. Then download the Synology Drive Client installer according to the prompt
#3. Sync Multiple Folders Via Synology Drive Client
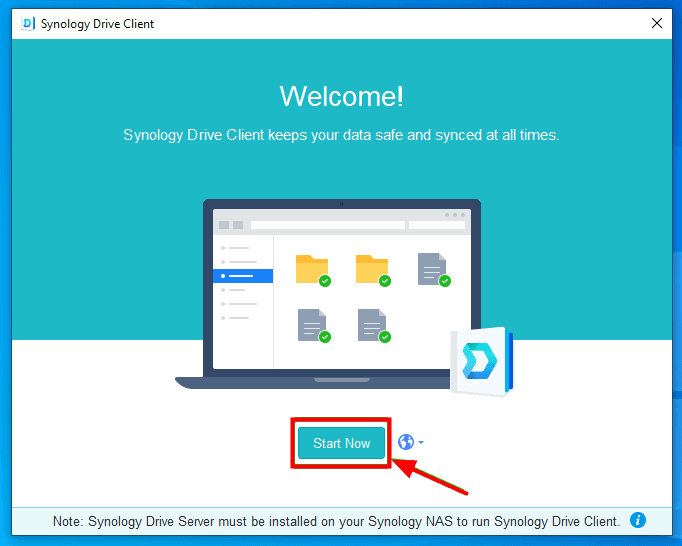
- After the installation is complete, open Synology Drive Client and click Start Now.
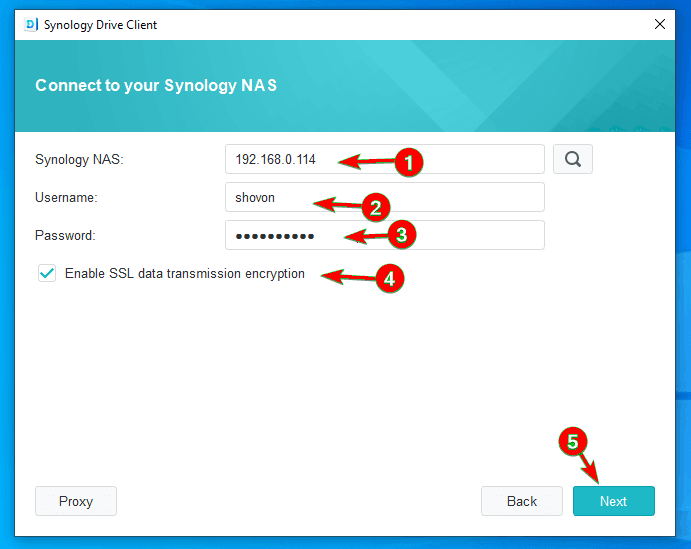
- Type in Synology NAS, Username and Password. To use SSL encryption, make sure to check the Enable SSL data transmission encryption. Once you’re done, click on Next.
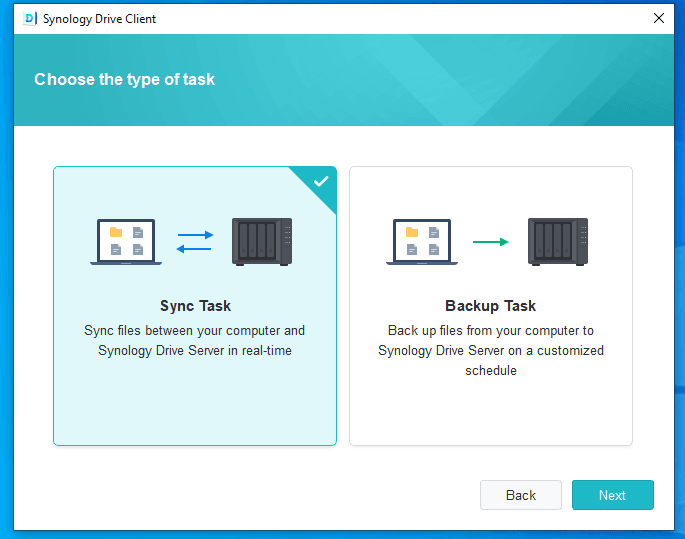
- Then, Synology Drive Client will ask you whether you want to set up a Sync Task or a Backup Task. We choose Sync Task to sync multiple folders to Synology.
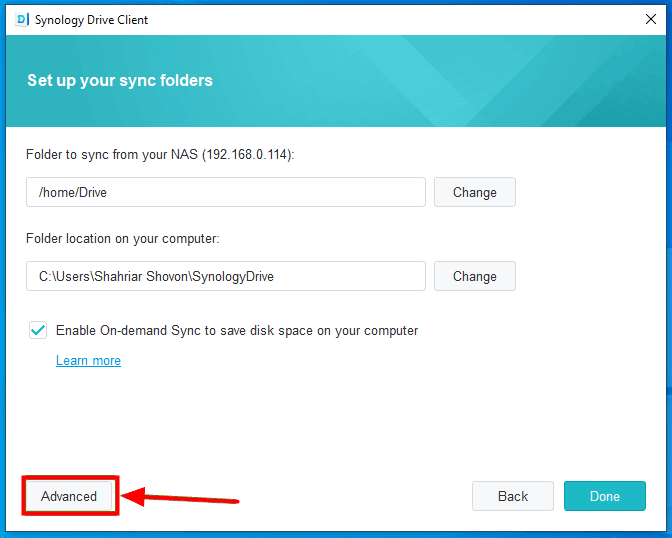
- Then you can set up your sync folders. By default, the /home/Drive folder of your Synology Drive will be synced with the folder C:\Users\\SynologyDrive of your computer. To change the sync folder of the Synology Drive, click on the Change button. You can also change the folder on your computer that will be synced with your Synology Drive folder.
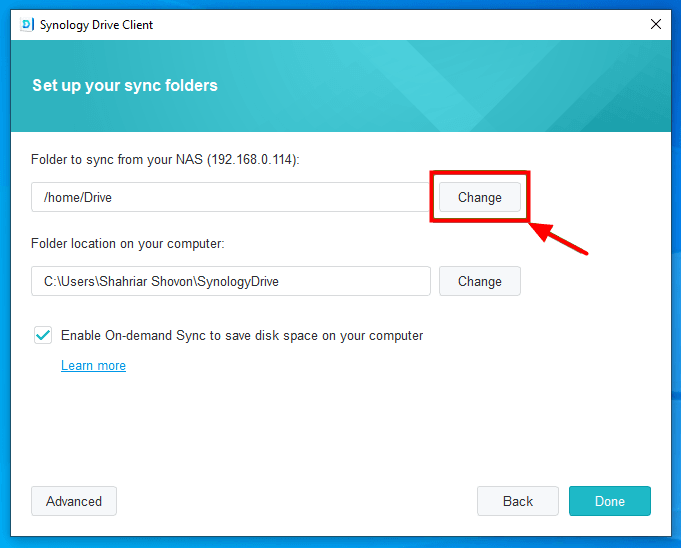
- All the available folders of your Synology Drive or on your computer should be listed. You can select a folder to sync from here. If you want to create a new folder in your Synology Drive, click on the new folder icon.

Tip✍: When you select the folder location on computer, a new empty folder SynologyDrive will be created in the selected folder of your computer, and the Synology Drive files will be synced with this folder. If you don’t want Synology Drive Client to create a SynologyDrive folder in your selected folder, then sync the folder you have selected with Synology Drive, uncheck the Create an empty “SynologyDrive” folder checkbox.
- After selecting the folder to be synchronized, you can check or uncheck the Enable On-demand Sync to save disk space on your computer checkbox to enable or disable on-demand sync.

Tip✍: On-demand sync will not download files from the Synology Drive Server that you have not accessed from your computer to save disk space. Files will be downloaded from the Synology Drive Server to your computer only when you access them.
- Next, you can click on Advanced in the lower left corner of this program to configure advanced sync settings.
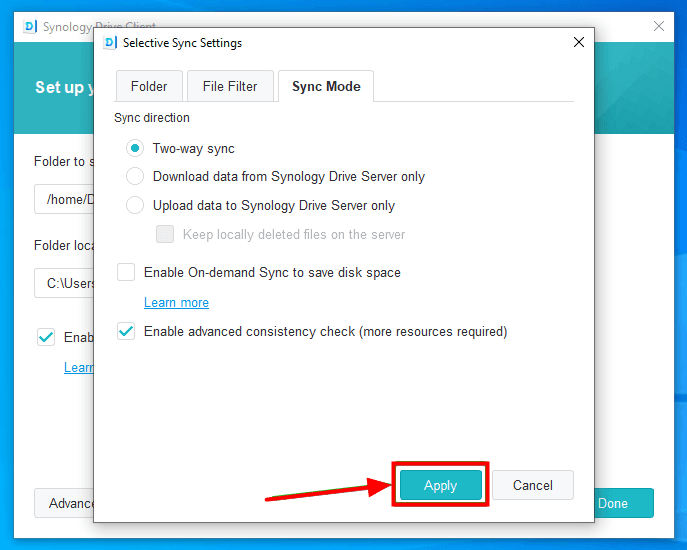
- There are 3 tabs provided: Folder, File Filter, Sync Mode. You can customize the sync settings according to your needs. After confirming all the settings, click on Apply.
Tips✍: Sync Modes
✡ Two-way sync: Synology bidirectional sync, it means new files from your computer will be synced with Synology Drive. New files from your Synology Drive will be synced with your computer.
✡ Download data from Synology Drive Server only: Only the files from your Synology Drive will be synced with your computer. New files from your computer will not be synced with Synology Drive.
✡ Upload data to Synology Drive Server only: Only the files from your computer will be synced with Synology Drive. Files from your Synology Drive will not be synced with your computer.
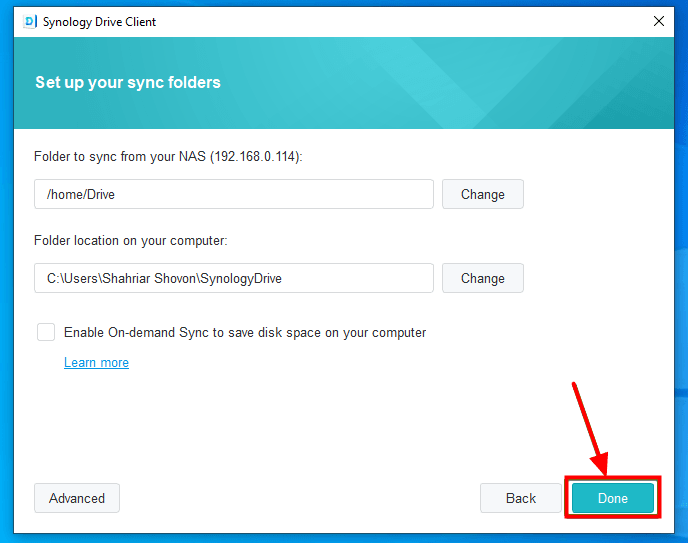
- Once you’re done configuring the Sync Task, click on Done to begin sync folders on Synology.
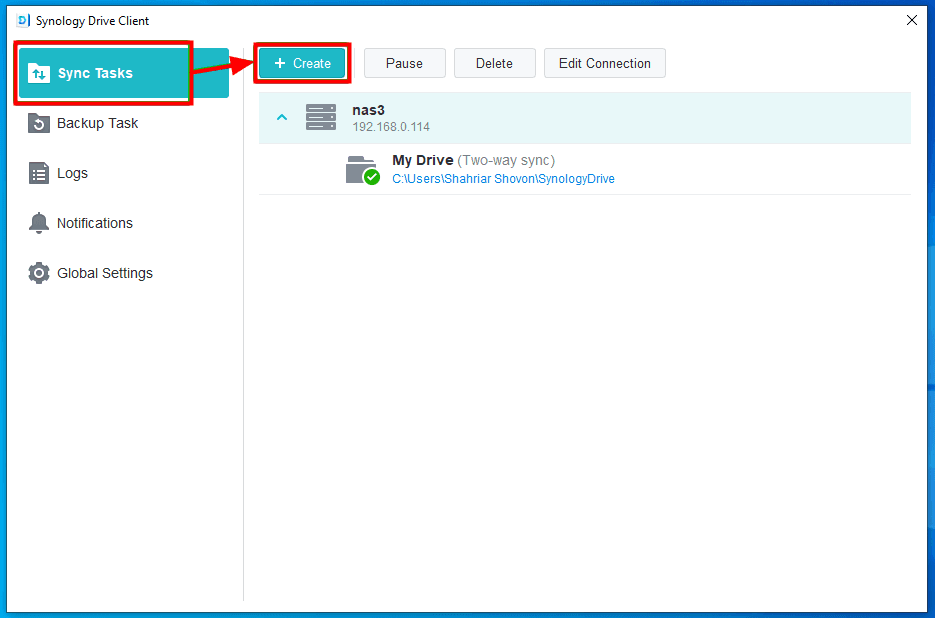
- Then a new Sync Task should be created. You can click on Create from the Sync Tasks section on Synology Drive to sync multiple folders.
It's not a bad way to sync multiple folders with Synology NAS by creating two or more tasks. But there are problems you don't want:
- The creation of a sync task requires you to do it manually, which will undoubtedly cost you more time and energy.
- You cannot create nor select a (new) folder on the NAS because the "add folder" button is greyed out.
Thus, to get rid of these sync problems, you could consider using another powerful software below to sync multiple folders simultaneously and automatically.
Easier Way to Sync Multiple Folders to Synology NAS at Once
AOMEI Backupper Professional is a powerful and reliable file sync software, which allows you to sync multiple folders simultaneously and make it run automatically. All the steps can be completed within just a few clicks, and it's easy to understand, thanks to the intuitive GUI.
◑ It supports you to add multiple folders at once for synchronization to save time and energy.
◑ It is able to sync files with different sync methods to meet users' different needs. You have 4 options, including Basic Sync, Real-Time Sync, Mirror Sync and Two-Way Sync.
◑ It not only allows you to sync folders to Synology NAS, but also other NAS, such as Buffalo, QNAP, Netgear, etc. In addition to NAS, you can also use it to sync files to external hard drives, flash drives, cloud storage, network drives, etc.
◑ It offers NAS to NAS sync ability, which allows you to sync folders between Synology NAS with ease.
◑ It’s designed for all Windows PCs, such as Windows 7/8/8.1/10/11, including 32-bit and 64-bit.
Next, I will show you how to use it to sync two folders to Synology NAS with Real-Time Sync. You have a chance to try 30 day free trial of the AOMEI Backupper Professional, please download and install it on your computer.
(PS: The backup and sync feature in this software can only be used within 30 days. To perform continuous data protection or quick disk upgrade, please upgrade to the official version. And now you can enjoy a 10% discount.)
Step 1. Launch AOMEI Backupper. On the left panel of this program, click Sync and then select Real-Time Sync.
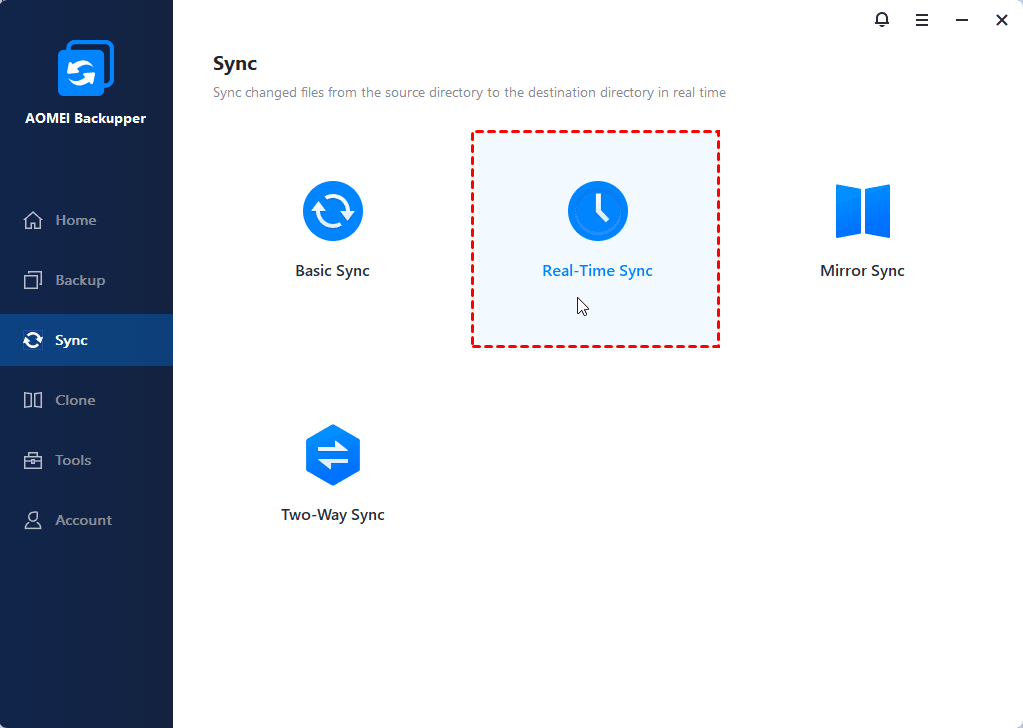
Tip: You can also select other sync methods if you want to sync files on a regular basis, avoid any unwanted changes in the destination directory, or sync changes on both sides.
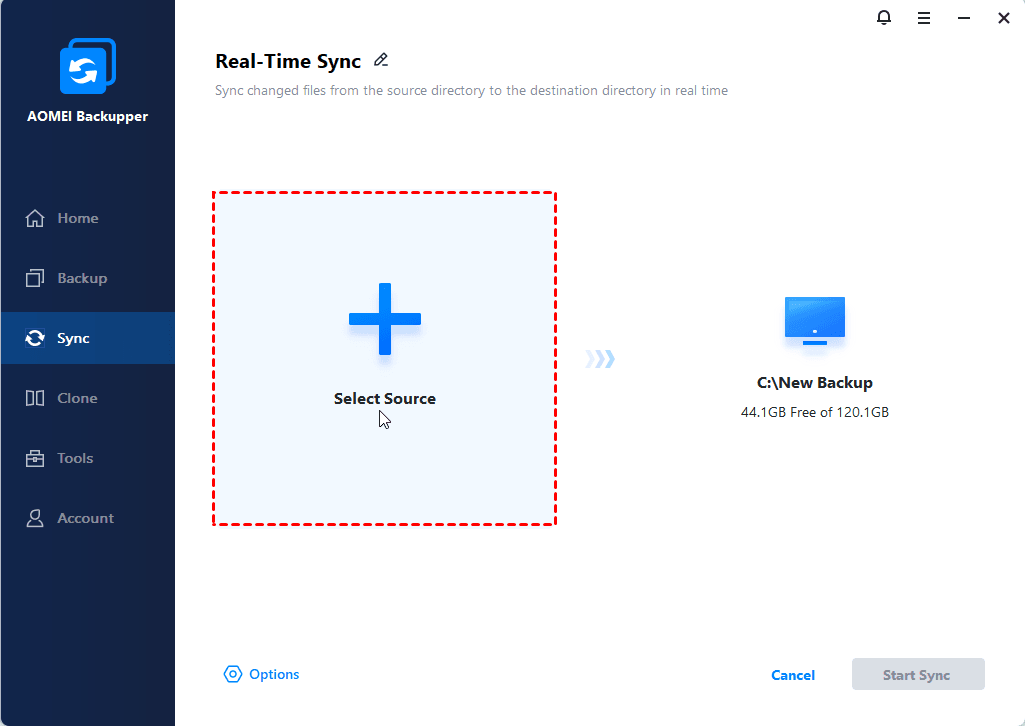
Step 2. Type the Task Name to distinguish this task from other tasks. Then click + Add Folder to select the folder you want to sync.
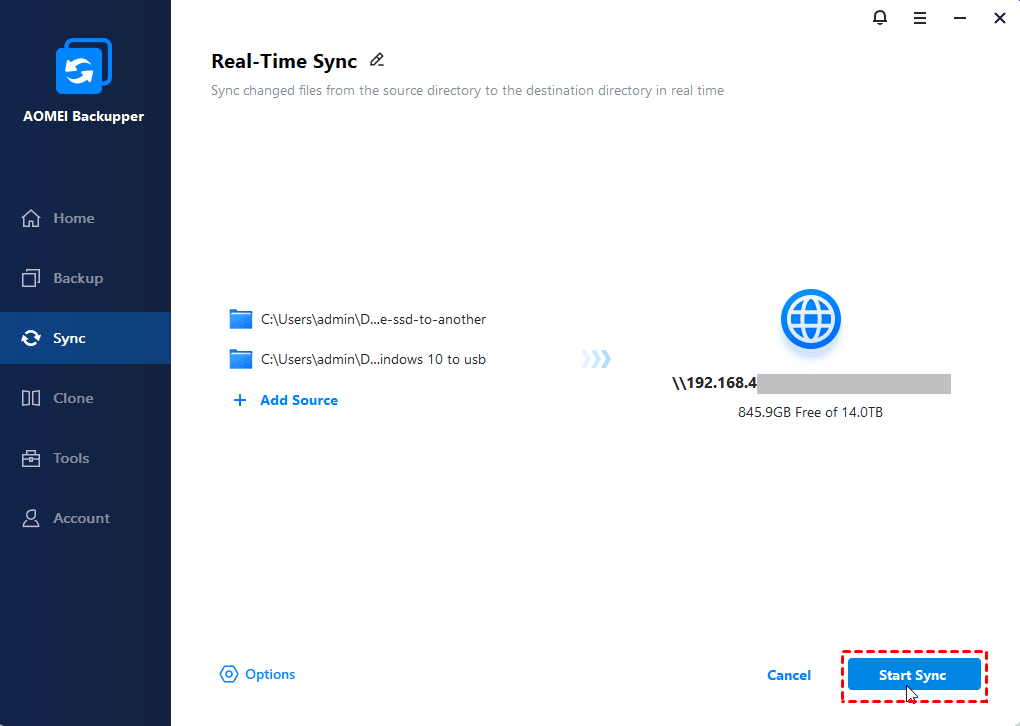
Step 3. After adding the first folder, you still can add one or more folders by clicking the "+" button above. Then, click the inverted triangle symbol in the second box to select Synology NAS. Click Add Share or NAS Device, type the network path, and select shared folder to store all the folders you want to sync.

Step 4. Then click Options in the lower left corner to decide if you want to sync deletions or verify the integrity of files in the destination directory, etc.

Step 5. Press Start Sync button to automatically sync two folders to Synology NAS once the change occurred to the source folder.
When performing real-time file sync for the first time, the program will synchronize all files and folders to the Synology NAS, and then immediately sync the changed part to the destination after the change occurs.
✨ Helpful features you may need
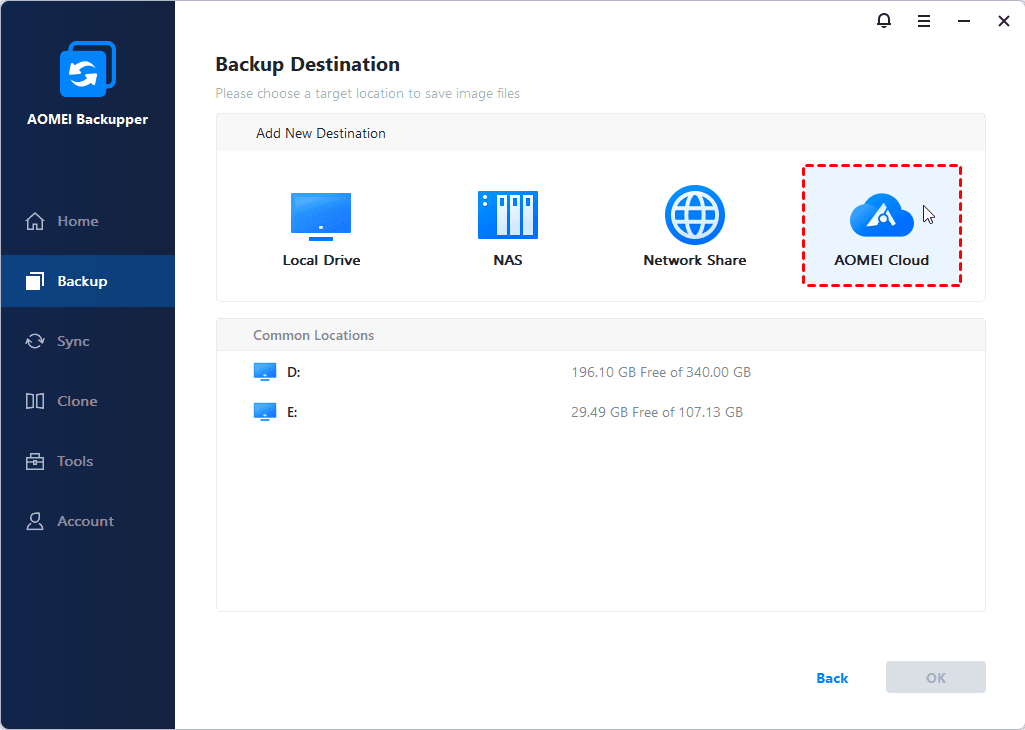
👉 If you create an AOMEI account, you can backup files to AOMEI Cloud. It offers you 1TB free storage for 15 days after you sign up for an AOMEI account.
👉 To copy data from one hard drive to another one, you could consider trying its Disk Clone feature. It not only clone personal data in the disk, but also the operating system, system files, installed programs, etc.
To Sum Up
This is how Synology Drive syncs multiple folders on your computer. You can use it to perform two-way sync or one-way sync. Regardless of the type, only one folder can be added to a sync task. After comparing the operation steps, AOMEI's real-time sync function is easier to operate. With it, you can select multiple folders at once for a real-time sync or schedule sync.
It also enables you to perform basic sync, mirror sync, and two-way folder synchronization with just a few clicks. If you are a Synology NAS user, AOMEI Backupper will be your best choice to protect and transfer files. Try it now!

