2 Easy Ways to Run Synology Bidirectional Sync in Windows
If you are looking for easy ways to perform Synology 2-way folder sync between Synology NAS and Google Drive, OneDrive, etc., read this article patiently.
By Lily Updated on March 25, 2026
Need Synology bidirectional folder sync
Nowadays, more and more people would like to store their files on a NAS device or cloud drive for data protection or file sharing. And it is wise to have important files saved on both NAS and cloud to strengthen data security. How to have a folder with same files on the two places?
Two-way sync between your NAS and the cloud service is the answer. One user asked about Synology 2-way folder sync in the forum:
“Hi, I want to sync my Google photos online with my Synology. My Google photos online are within Google Drive, in a folder called ‘Google photos’. Currently I have partial photos in Google Drive (online). And partial photos on my Synology in a folder called ‘Google photos’.
If I select bidirectional, will it combine all the photos, local and online (that's what I want)? I do not want to duplicate and I do not want to delete anything.”
In this page, I’ll dwell on two efficient ways to do Synology 2-way sync. Method 2 can not only help you run two-way sync between Synology NAS and cloud storage but also between Synology NAS and your PC.
-
Method 1. Use Synology Cloud Sync for bidirectional folder sync
-
Method 2. Run Synology bidirectional sync via a professional sync tool
Method 1. Use Synology Cloud Sync for bidirectional folder sync
To help to sync files between Synology NAS and public cloud services, Synology provides users with an application called Cloud Sync. It supports various cloud services, like Amazon Drive, Dropbox, and OneDrive. Take Dropbox as an example. Follow the steps below to run Synology two-way sync with Dropbox:
1. Install Cloud Sync from the Package Center and open it.
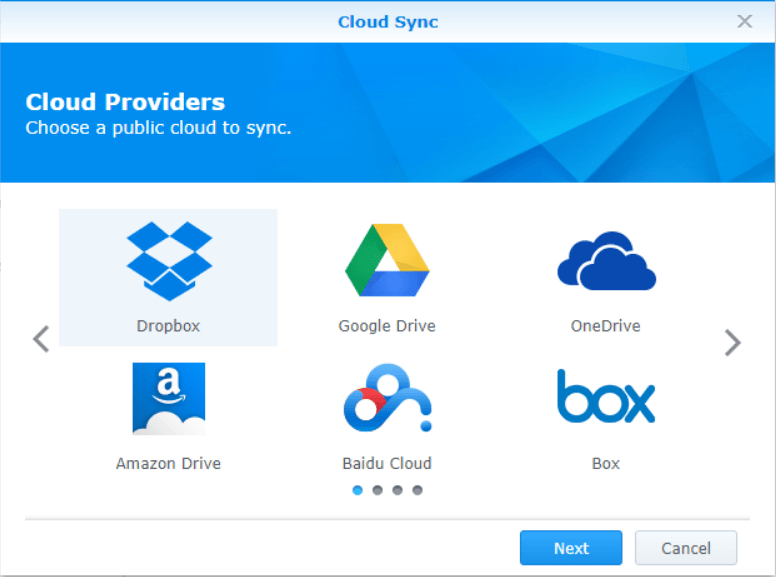
2. Choose a cloud provider.
-
Click the “+” button in the lower-left corner. In the pop-up window, choose Dropbox and click “Next”.
-
Choose online account to connect to in the API window. Click “Agree” after you have logged into your cloud account.
3. Create a two-way sync task.
-
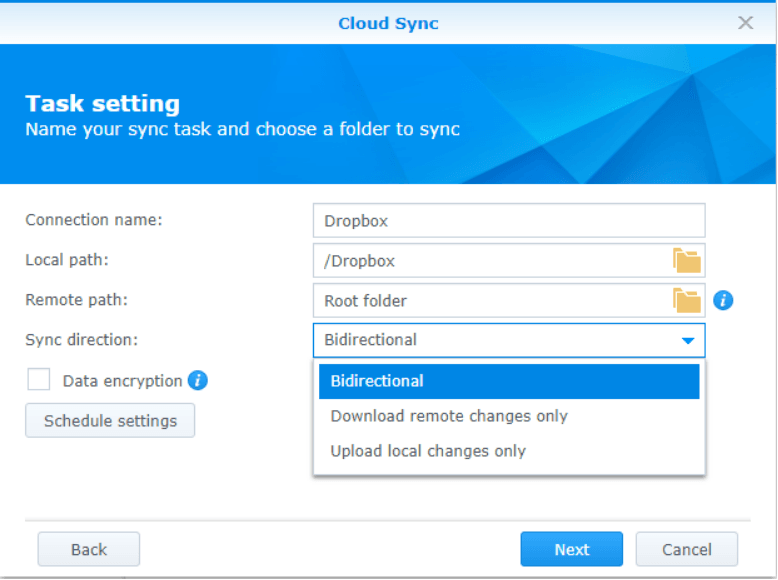
Click on the folder icon in “Local path” to create a folder to sync the data to or choose an existing folder in your Synology NAS.
-
Click on the folder icon in “Remote path” to choose a folder in Dropbox to sync your NAS files with. It chooses “Root folder” by default which means to sync all folder structures of your online account.
-
Choose “Bidirectional” in “Sync direction”. This option will sync files from Synology NAS to the cloud service and vice versa.
-
Set “Data encryption” and “Schedule settings” based on your needs.
4. Confirm your settings and click “Apply” to begin the syncing process. If needed, click “Advanced settings” to prevent certain files from being synced before clicking “Apply”.
Method 2. Run Synology bidirectional sync via a professional sync tool
The operations in Synology Cloud Sync are not complicated. However, users find Synology Cloud Sync not working sometimes or Synology Cloud Sync not syncing all files. Is there a superior tool to Cloud Sync?
AOMEI Backupper Professional can be the best Synology Cloud Sync alternative. It runs smoothly on Windows 11/10/8.1/8/7. It allows you to sync files between two folders, drives, or computers. You are also allowed to sync NAS with a cloud drive, such as sync QNAP to OneDrive.
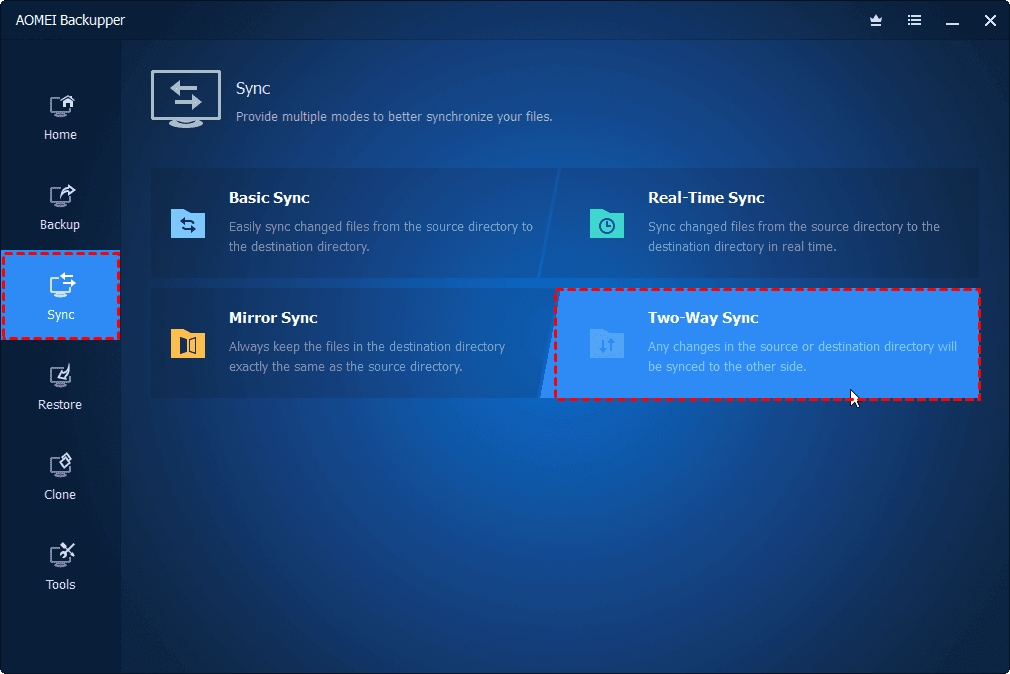
What’s more pleasing, it offers different sync modes for different needs:
★ Basic Sync: it performs one-way sync from the source directory to the destination directory.
★ Real-Time Sync: it synchronizes changed files in the source directory to the destination directory almost without delay.
★ Mirror Sync: it keeps the files in the destination directory exactly the same as the source directory. Any extra files in the destination directory will be deleted.
★ Two-Way Sync: Any changes in the source or destination directory will be synced to the other side.
Download AOMEI Backupper now to have a try.
★ Two-way sync between Synology and cloud drive
Here I take Dropbox as an example.
Step 1. Launch AOMEI Backupper. Click Sync on the left panel and select Two-Way Sync.
Step 2. Click Select Source > NAS > Add NAS to add the Synology NAS path.
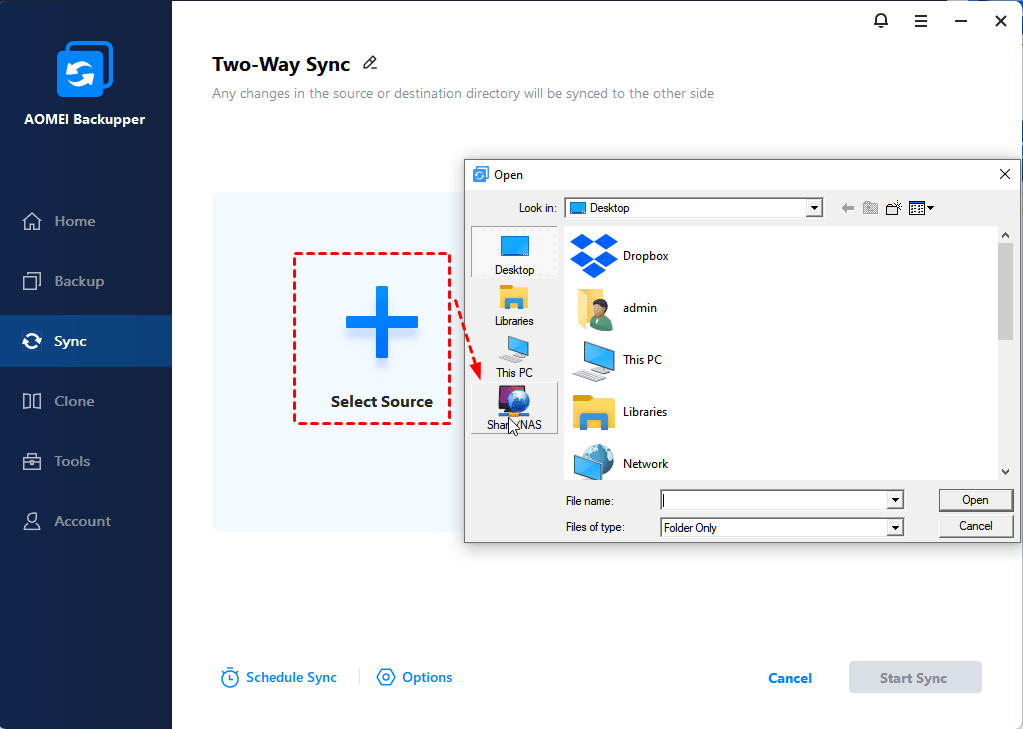
Step 3. In the Add NAS window, type the IP address of Synology NAS (type username and password if needed). After Synology NAS has been added, all the folders under it will be listed. Choose the folder you want to sync and click OK.
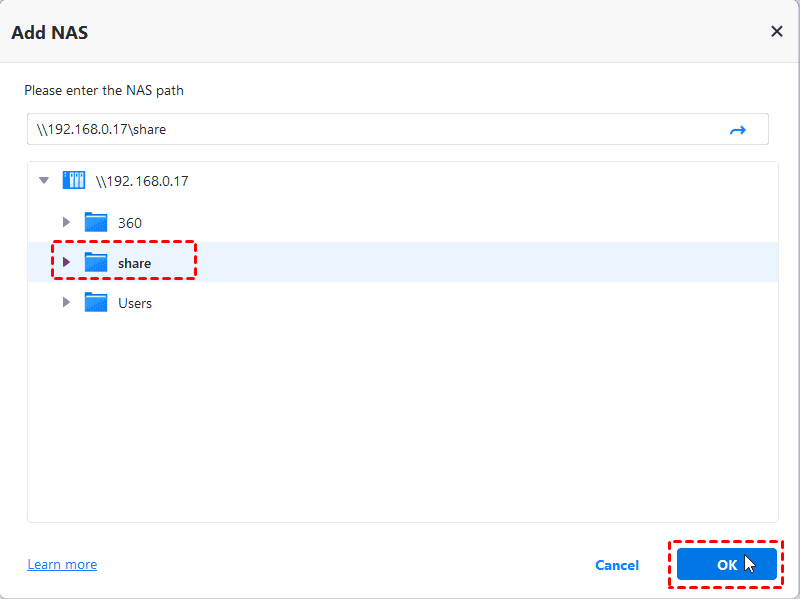
✎ Tips: You can only choose one source folder when creating a two-way sync task. If you want to set multiple folders to do two-way sync, then create different sync tasks for them and choose different destination folders.
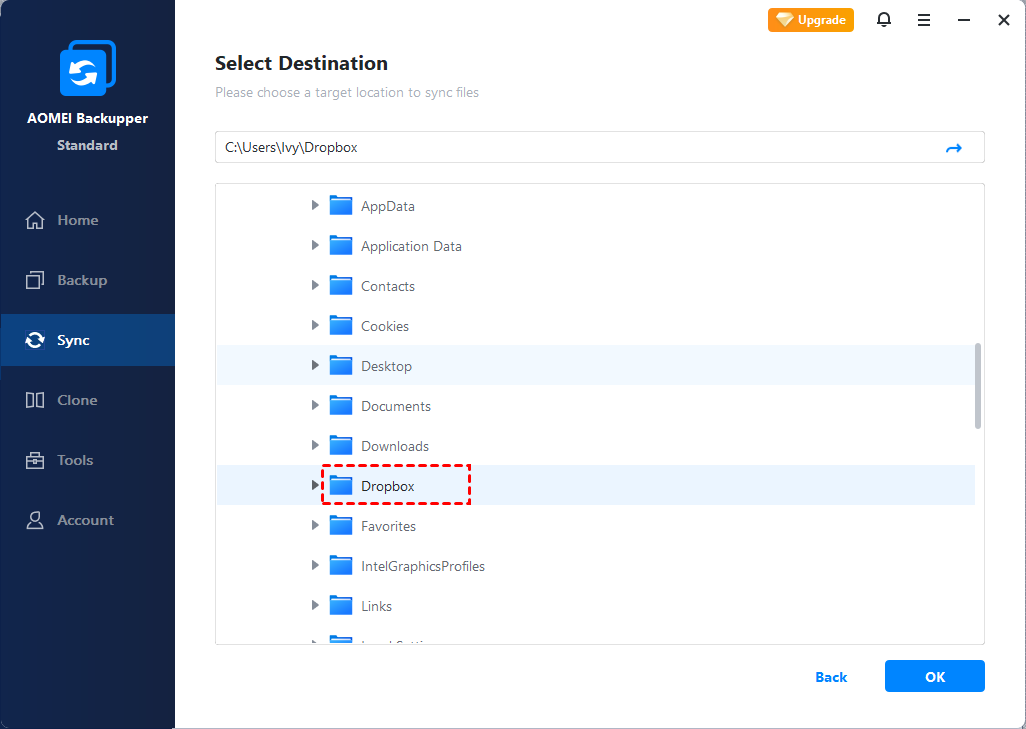
Step 4. Select the destination box > This PC. Then manually navigate to the Dropbox local folder and click OK.
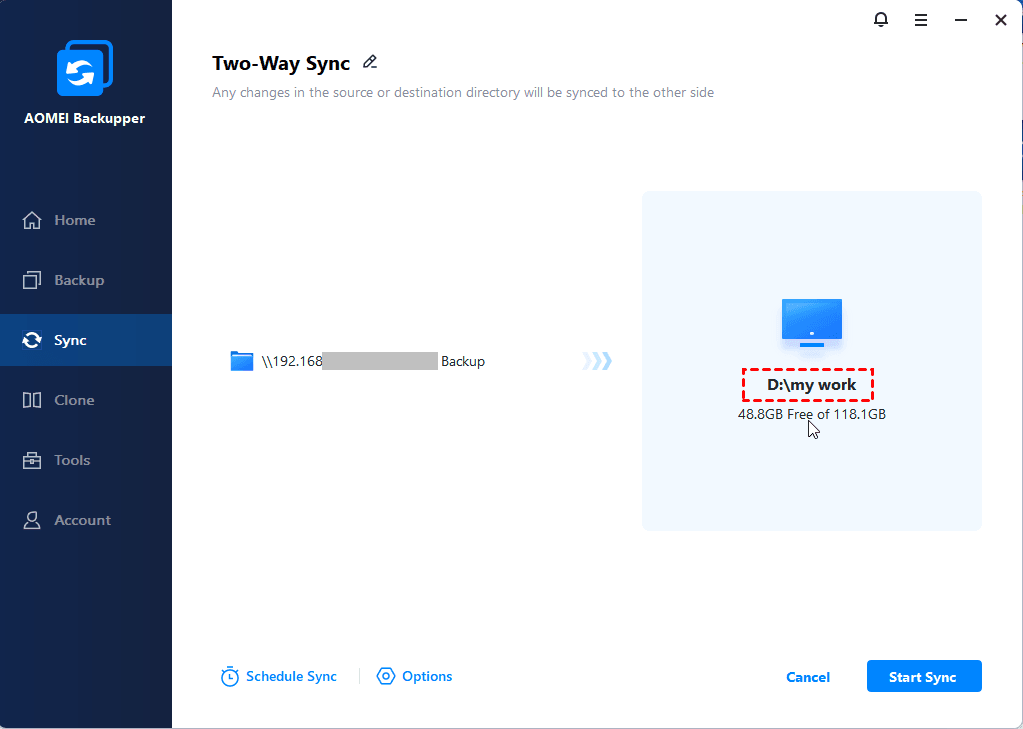
Step 5. Confirm the source and destination directory and click Start Sync.
★ Two-way sync between Synology and your PC
Follow step 1-3 mentioned above to add a folder on Synology NAS. Then, click the destination box and choose a local folder on your PC in the pop-up window. Finally, click Start Sync to begin syncing files from Synology to PC as well as from PC to Synology.
✍ Notes:
-
If you want to sync changed files between the source folder and destination folder automatically, you can use the Schedule Sync feature.
-
If you have created sync tasks for different NAS devices, you can go to Tools > Storage Management to manage your NAS storage.
Conclusion
You have learned two efficient ways to perform Synology bidirectional sync in Windows. AOMEI Backupper provides a quick workaround when Synology Cloud Sync fails. In addition to the sync feature, AOMEI Backupper is powerful cloning software that enables you to perform disk clone and system clone.
What's more, if you have an AOMEI account, you are able to backup files to AOMEI Cloud. Don’t hesitate to give it a try!

