How to Schedule SyncToy to Run Automatically in Windows 10
Wanna schedule SyncToy in Windows 10 but don’t know how to do it? Read this article to get the answer and find the best free alternative to SyncToy.
By Lily Updated on March 24, 2026
When using a Windows computer, we should usually back up the files in case of losing important data in sudden system failures. Then, are there any methods for backing up crucial data automatically and periodically?
SyncToy is a free file sync tool for Windows released by Microsoft. With a simple operation interface, it is easy to use and highly customizable. It helps users with heavy work involved in copying, moving, and synchronizing different directories. Most common operations can be performed with just a few clicks of the mouse.
Schedule SyncToy in Windows 10 with Task Scheduler
When creating sync tasks with SyncToy, you may encounter a trouble—you can’t create SyncToy auto sync tasks in the tool itself. It does not matter, you are able to run SyncToy automatically with Windows Task Scheduler in Windows 10. Just follow the guidance below:
If you want an easier way to perform automatic file sync in Windows, download the best free file sync software here.
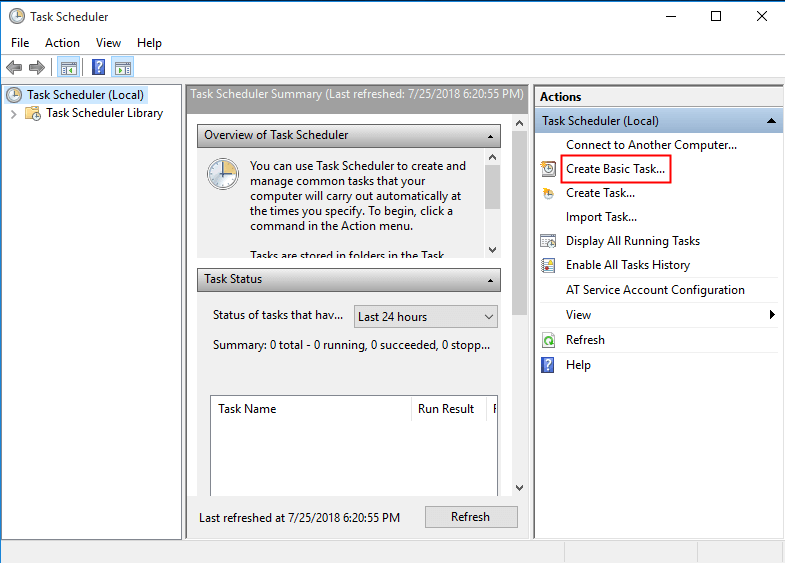
1. Tap the Search button on the taskbar and type “task scheduler” in the search box. Click on Task Scheduler to open it.
2. Click Create Basic Task in the “Actions” pane on the right.
3. In the pop-up window, enter a name and a description for your task so that you can easily recognize it.
4. Choose the frequency of the task to run.
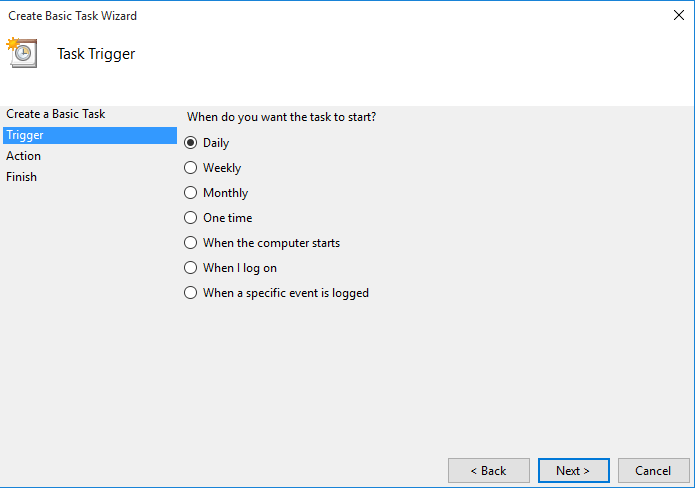
Note: You’ll be asked to add additional settings depending on the trigger you select.
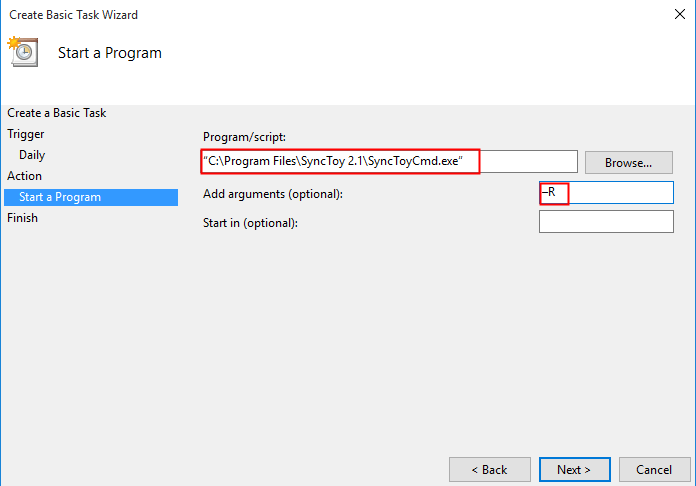
5. On the “Action” step, select Start a Program as the option for the task to perform.
6. In the “Program/script” box, enter “C:\Program Files\SyncToy 2.1\SyncToyCmd.exe” including the quotes. You can also click on “Browse” button and locate the SyncToyCmd.exe. In the “Add arguments” box, enter –R to run all of your syncs each time.
Notes:
● If you’d like to run only one of your syncs each time, enter –R “your sync name”. Make sure to enter the sync name inside quotes if it contains any spaces.
● If you leave out the quotes in the “Program/script” box, Task Scheduler will ask if you want to run C:\Program with the remainder as an argument. Click “No” to keep it like you entered, and Task Scheduler will add the quotes correctly for you.
7. Confirm the task information on the “Summary” interface and click Finish to save the changes.

As you see, Windows Task Scheduler can assist you in SyncToy Windows 10 schedule but the process is complex. In addition, some users come across SyncToy errors like “SyncToy not copying all files”, “SyncToy failed to create folder pair”, “SyncToy access denied”, etc. Is there an easier way of automatic file sync?
The answer is Yes, you can use another free file sync software. Please keep reading below to learn this software and how to use it for scheduled sync.
Easier way to perform automatic file sync in Windows 11/10/8/7
To make automatic file sync easier, you need SyncToy alternative for Windows 10/11. The best free file sync software - AOMEI Backupper Standard can be your best choice.

-
It supports syncing files (changed and newly added) from source directory to destination directory. The deleted files are not synced by default, but you can choose to sync it.
-
It enables you to sync files between different locations or different devices, such as sync local folders to OneDrive and sync two external hard drives, etc.
-
It is built-in with the "Schedule Sync" feature that can help you perform automatic sync effortlessly.
Download and install AOMEI Backupper on your Windows PC. Now I’ll show you how to create a scheduled file sync task via AOMEI Backupper in detail:
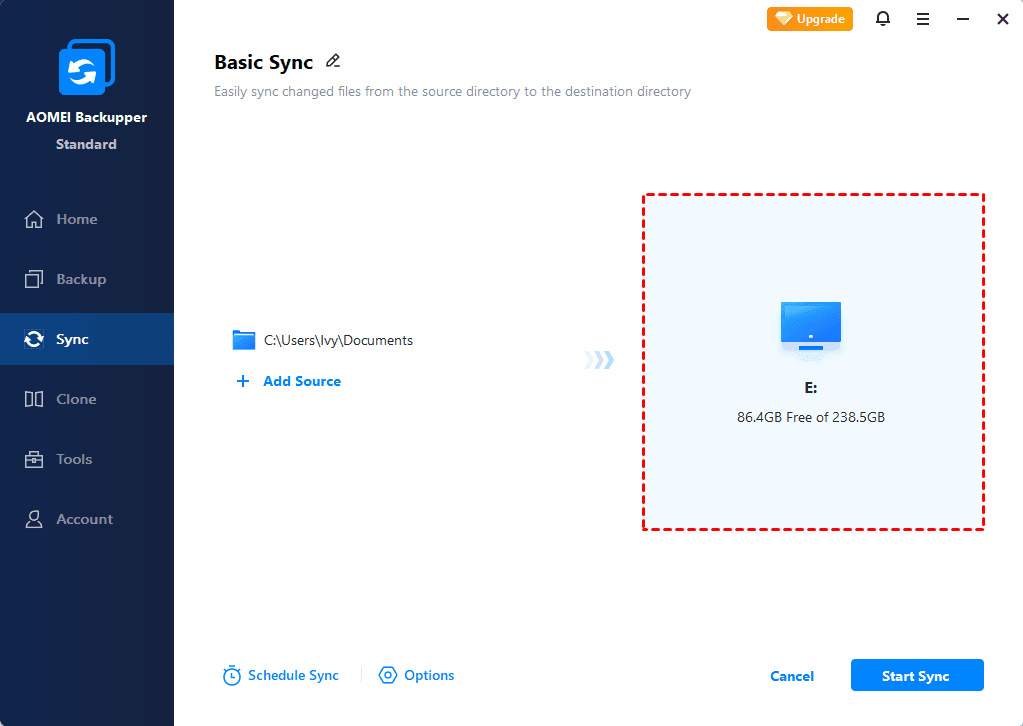
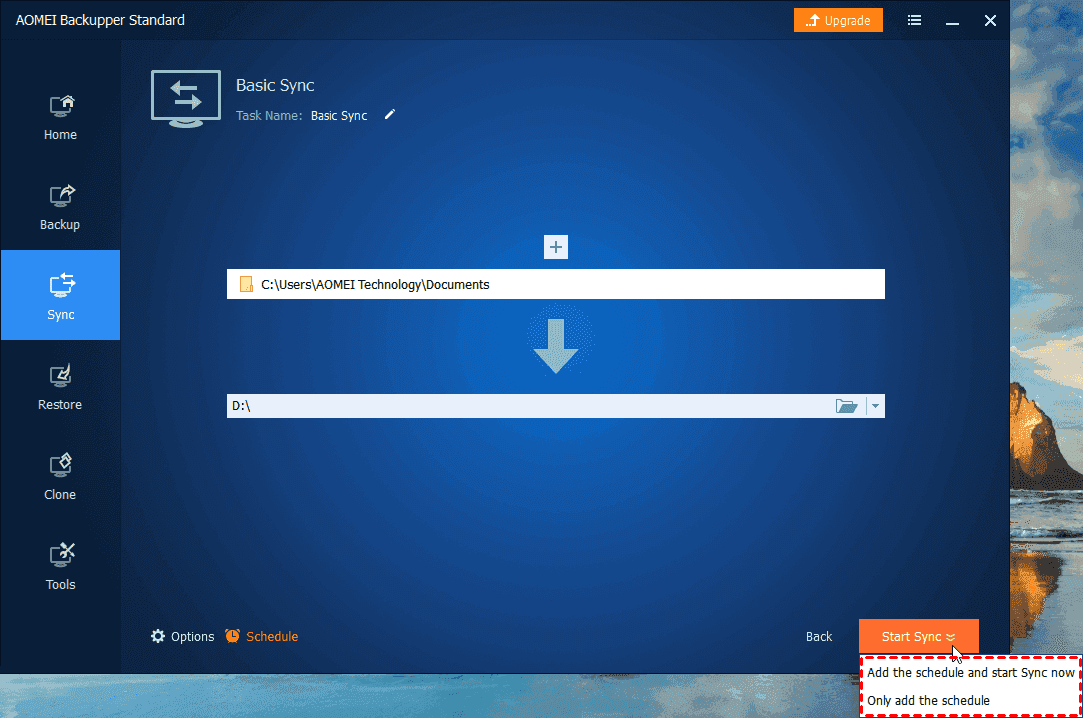
1. Start AOMEI Backupper. Click Sync on the left pane and select Basic Sync.

2. Name the task so that you can distinguish it from other sync tasks. Click Select Source to select the folder which you want to synchronize.

3. Select a destination location to store the synced folder.
Tip: If you want to sync files between two computers, please choose a network location as sync destination.
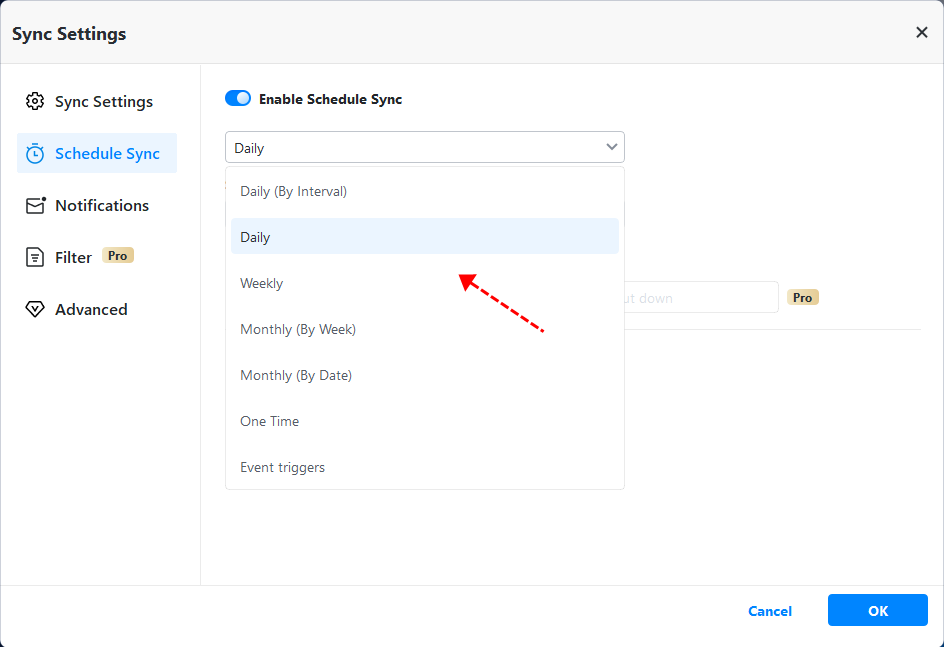
4. Click Schedule Sync > Enable Schedule Sync and choose the frequency of the task to run.
Tips:
● Tick "Wake the computer to run scheduled tasks" to wake your computer from sleep or hibernate mode 2 minutes before the scheduled task.
● Configure what your computer will do after the scheduled task. You have 4 options: Shut down, Restart, Hibernate or Sleep. Then, even during the execution of the task, you can go without worry. This feature is available in paid versions.
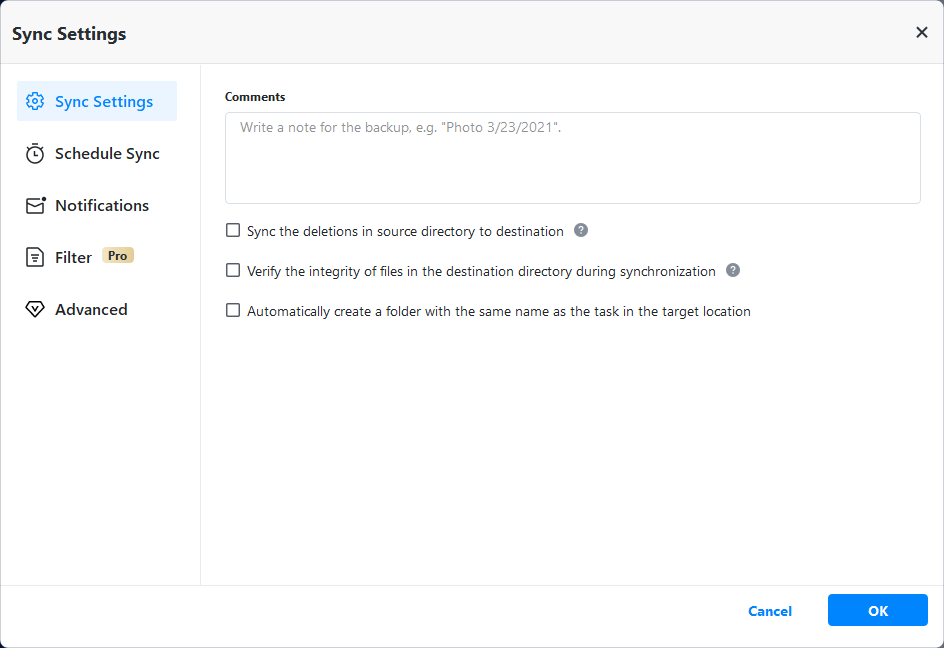
5. (Optional) By default, the program will sync only added or modified files from the source directory to the destination directory after first full sync. If you want to sync deleted files as well, click Options and tick Sync the deletions in source directory to destination in the pop-up window.
6. Click on Start Sync button and select Add the schedule and start sync now to perform the operation.
Notes:
● Don’t modify the source folder name after doing file sync, or the program cannot synchronize it anymore.
● To enjoy more advanced sync modes like Mirror Sync, Two-Way Sync and Real-time Sync, please upgrade to higher editions.
★ How to backup files to AOMEI Cloud
There is a growing trend to backup files to cloud storage. You can backup files to AOMEI Cloud if you have an AOMEI account. You'll get 1TB free storage for 15 days after you sign up for an AOMEI account.
More details about SyncToy
There are three synchronization options offered by SyncToy: Synchronize, Echo, and Contribute.
▶ Synchronize
New and updated files are copied both ways. If a file is renamed or deleted in one folder, the change is synced across to the other folder where that same file will be renamed or deleted.
▶ Echo
New and updated files are copied left to right. Unlike the two-way process in Synchronize, it is a one-way process from left to right. That is, renaming or deleting a file in the left will affect changes in the right folder, but not vice versa.
▶ Contribute
New and updated files are copied left to right, but no deletions. Just like Echo, it is a one-way process from left to right, but deletions are excluded. Renames are repeated from left to right. However, if you delete a file in the left folder, it will not be deleted in the right.
Now you have a clear idea about three synchronization options. You can choose any one depending on your situation to sync folders in Windows 10 with SyncToy.
FAQs about scheduling SyncToy in Windows 10
1. Is SyncToy still available for Windows 10?
Yes, SyncToy is still available for Windows 10, though it has been officially discontinued by Microsoft. The last version released was SyncToy 2.1, which works well on Windows 10, but there have been no updates or new versions since its discontinuation.
2. Can I set up multiple sync tasks with SyncToy in Windows 10?
Yes, you can create multiple tasks in Task Scheduler for different SyncToy folder pairs. Each task can be scheduled with its own trigger and specific folder pair to sync.
3. How do I troubleshoot SyncToy not running on schedule?
If SyncToy doesn’t run as scheduled:
- Check that the task is correctly set up in Task Scheduler (check the trigger, action, and conditions).
- Make sure that the SyncToyCmd.exe path is correct and that the arguments are properly configured.
- Ensure that the external drives or network locations are accessible when the task runs.
- Check the task’s History in Task Scheduler for error messages.
Conclusion
With Windows Task Scheduler, you can schedule SyncToy in Windows 10 to run automatically. To make auto sync easier, you should pick AOMEI Backupper. It supports syncing files with different sync frequencies (Daily, Weekly, Monthly) and you can choose to include the deletions. And you can enjoy more sync modes to meet your different needs if you pick higher editions.
Besides the sync feature, AOMEI Backupper is professional Windows backup software that can help you with system protection and data protection. Try it out by yourself!

