How to Create QNAP to Dropbox Sync | 2 Free Tools
Own a QNAP NAS and want to sync QNAP with Dropbox for data protection? This page will show you how to set up QNAP to Dropbox sync easily.
By Lily Updated on April 11, 2024
Need QNAP to Dropbox sync
QNAP NAS is popular with not only business users but also home users. People share files with colleagues or family members through QNAP NAS. They also backup Windows to QNAP NAS for system protection. NAS is indeed a good place to backup local files or computer system.
However, problems occur sometimes. You may encounter QNAP disk error, volume full error, or RAID system error, etc. To protect files on a QNAP NAS from possible errors, you need QNAP to Dropbox sync. Cloud drives like Dropbox can not only help to strengthen your data security, but also let you access your files outside your home or office.
How do I sync QNAP with Dropbox?
To sync QNAP with Dropbox, you need QNAP to Dropbox sync apps. There are two easy-to-use apps I’m going to show you.
👉 Method 1: Sync QNAP with Dropbox via QNAP Cloud Drive Sync
👉 Method 2: Sync QNAP to Dropbox using AOMEI Backupper🔥
Method 1: Sync QNAP with Dropbox via QNAP Cloud Drive Sync
Cloud Drive Sync is a sync tool offered by QNAP which enables you to sync files between a QNAP NAS and a cloud drive. It supports Google Drive, Dropbox, OneDrive, OneDrive for Business and hubiC. Learn how to sync QNAP with Dropbox via Cloud Drive Sync below:
▶ Preparations:
1. Search for “Cloud Drive Sync” in the QTS App Center. Click “Add to QTS” to download and install the Cloud Drive Sync App.
2. Open Cloud Drive Sync. Click “Cloud Account Management” > “Create Account” to create a Dropbox account in Cloud Drive Sync.
▶ Detailed steps of QNAP Cloud Drive Sync to Dropbox:
1. Click “Sync Job Management” > “Create Job”. Then, click “Next”.
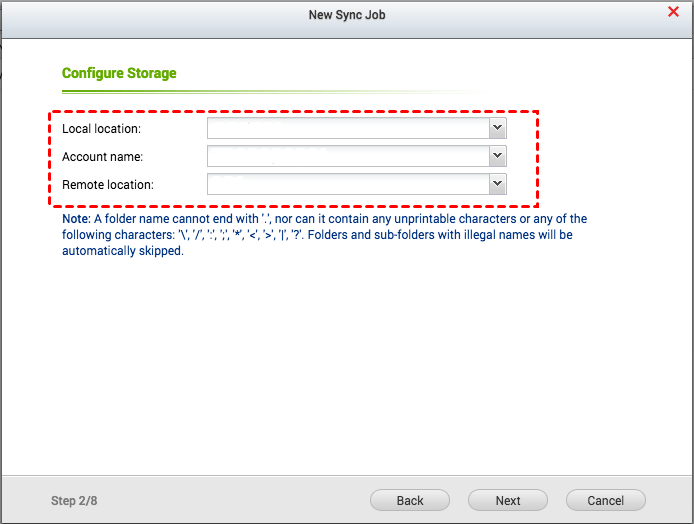
2. In the next page, select a folder on your QNAP NAS in “Local location”, choose your Dropbox account in “Account name”, and select a Dropbox folder in “Remote location” successively. Then, click “Next”.
3. Go through the wizard to set a schedule for the sync job, configure the file conflict policy, and set file filters in order.
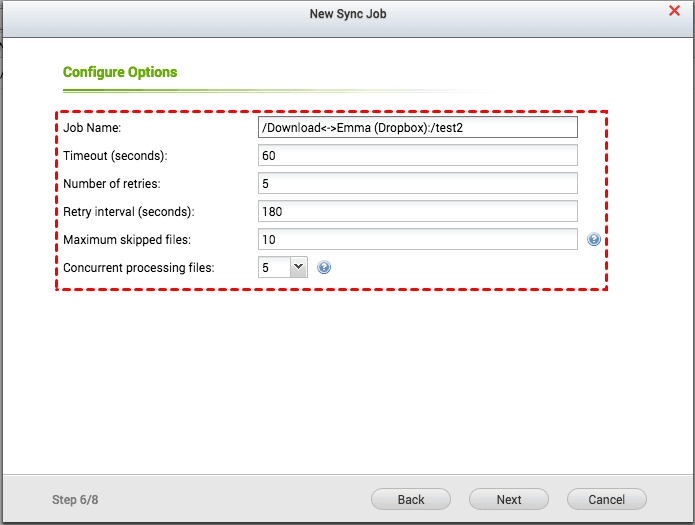
4. Set other options like “Timeout”, “Number of retries”, and “Retry interval” based on your needs and click “Next”.
5. Confirm all your settings and click “Next”. Finally, click “Finish” to exit the Wizard. Files will be synchronized between QNAP and Dropbox according to the schedule you set.
✐ Tips: Cloud Drive Sync performs two-way sync. That is to say, if you set up QNAP to Dropbox sync via Cloud Drive Sync, it can also be regarded as Dropbox to QNAP sync.
Method 2: Sync QNAP to Dropbox using AOMEI Backupper
The best free file sync tool AOMEI Backupper Standard can also help you sync files from QNAP to Dropbox. Following are its main features in regard to sync:
|
📂 Basic Sync |
It enables you to sync files from one folder/disk/computer to another folder/disk/computer. You can transfer data from one Surface Pro to another easily. |
|
⏰ Automatic Sync |
It allows you to sync changed data from the source directory to the destination directory automatically using the Schedule Sync feature. |
|
☁ Supported NAS & Cloud |
It supports different NAS devices including Synology, QNAP, and WD My Cloud. It also supports common cloud drives, Dropbox, OneDrive, Box, SugarSync, hubiC and Cloudme included. |
To run QNAP to Dropbox sync with AOMEI Backupper, you should first download and install Dropbox desktop app, and then sign in with your account. Now follow the instructions below:
Step 1. Download, install, and run AOMEI Backupper on your computer. Windows 11/10/8.1/8/7 supported.
Step 2. Click Sync and select Basic Sync.

Note: If you want to use more advanced sync modes like Mirror Sync and Real-Time Sync, you may upgrade to AOMEI Backupper Professional or higher editions.
Step 3. Name this sync task so that you can tell it from others. Then, click Add Folder > Share/NAS to add the QNAP NAS path.

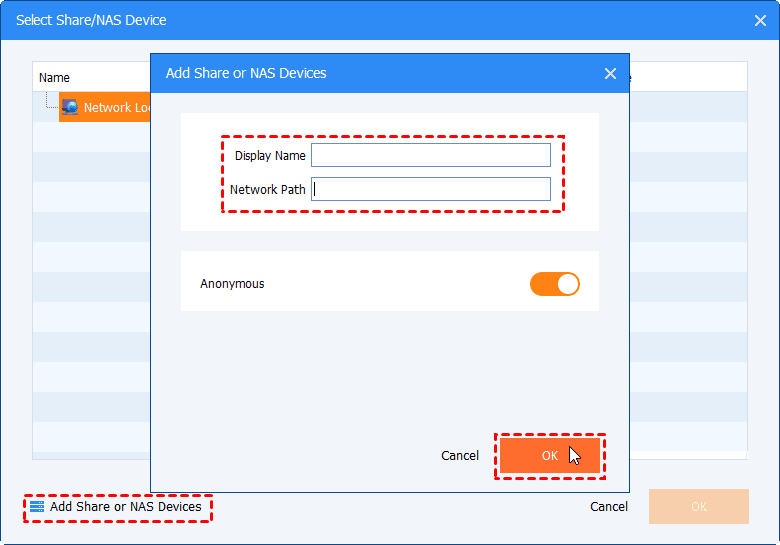
Step 4. Click Add Share or NAS Devices. In the Add Share or NAS Devices window, type the IP address of QNAP NAS and click OK. Type username and password if you are asked to.
Step 5. After QNAP NAS has been added, all the folders under it will be listed. Choose the folder you want to sync and click OK.
Tip: If you want to sync more than one QNAP folder to Dropbox, click the “+” icon after adding the first folder.
Step 6. Expand the drop-down menu of the second bar and choose Select a cloud drive.
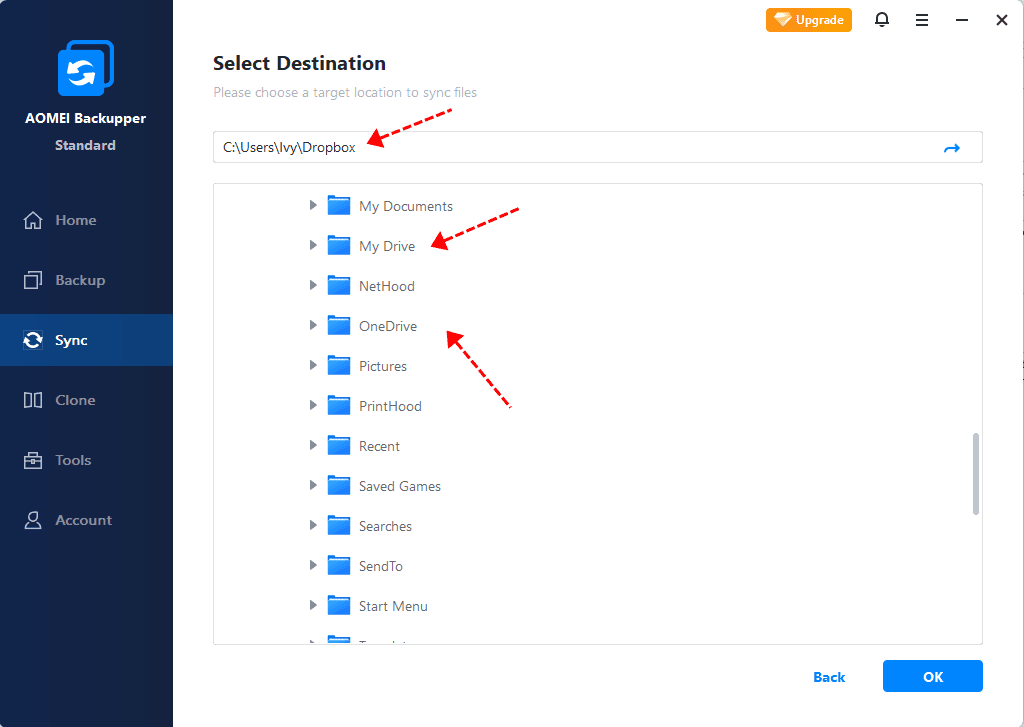
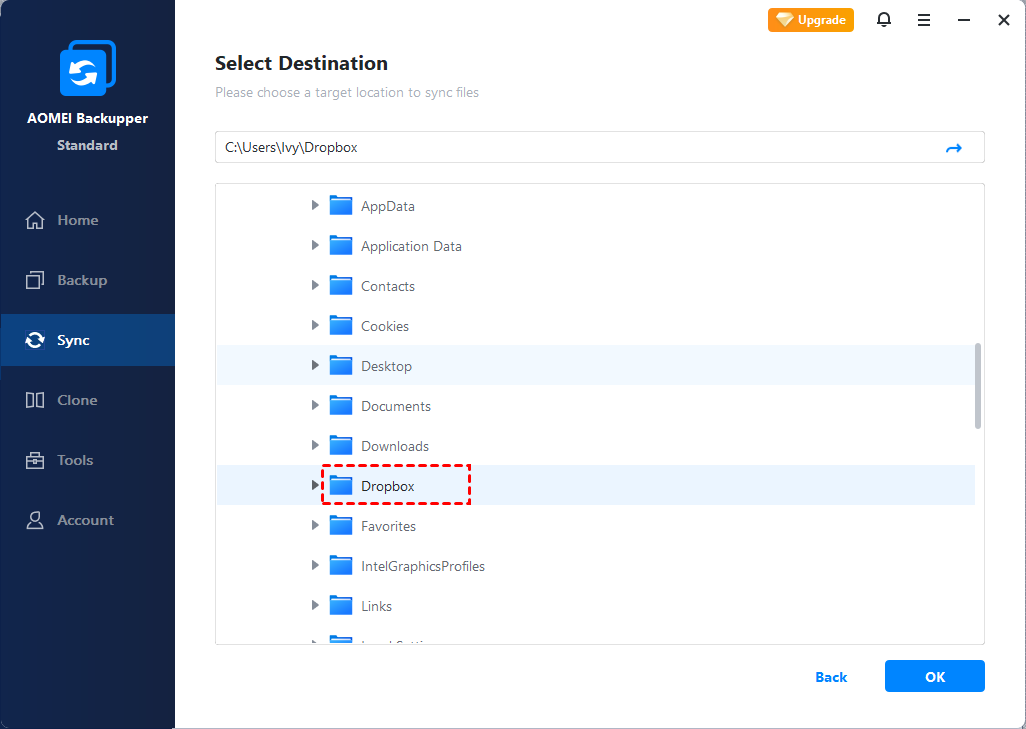
Step 7. Select Dropbox and click OK. If you cannot find Dropbox in the list, then manually navigate to the Dropbox local folder by clicking Select a local path at Step 6.
Step 8. Confirm the source and destination directory and click Start Sync.
>> Options: you can write a comment for your sync task, enable email notification, and choose to sync deletions or not.
>> Schedule Sync: you can set the sync task to run periodically. There are five modes available: Daily, Weekly, Monthly, Event triggers, and USB plug in.
Wrapping things up
If you want to run QNAP to Dropbox sync, you can pick QNAP Cloud Drive Sync or AOMEI Backupper. Compared to Cloud Drive Sync, AOMEI Backupper supports other NAS devices besides QNAP. What’s more, AOMEI Backupper can help you with Windows backup and restore. You are able to backup multiple drives in Windows 10 via AOMEI Backupper. Go for it right now!

