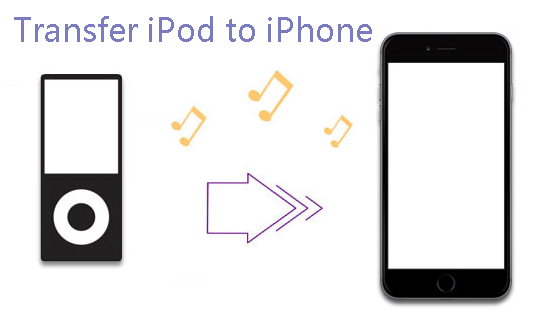
How to Transfer iPod to iPhone Without Effort
You can get some useful ways to transfer iPod to iPhone on this page. If you need to transfer data from iPod to iPhone, please read this passage to get them.
By Zoey / Updated on May 14, 2026
Can I transfer music from iPod to iPhone?
I have around 1,500 songs that aren’t all purchased on my iPod and would like to transfer them all to my phone. I’m tired of having to carry around 2 devices all the time and would just like to have all of my music in one place. Has anyone found a simple or effective way to transfer music? Can I transfer iPod to iPhone?
Many Apple users have more than one Apple device, such as an iPod and an iPhone, both of which store many of the user's data files. So Apple users will be wondering, as mentioned in the user example above, whether it is possible to transfer iPod to iPhone and whether there is an easy way to do it that works? Of course you can do it, and we prepared 4 effective methods for this. Please read on to get them.
4 ways to transfer iPod to iPhone easily
You may want to know how to transfer data from iPod to iPhone, or transfer other types of data between them, so we provide 4 different solutions to transfer from iPod to iPhone and you can make a decision to choose one after trying them.
Way 1. Transfer music from iPod to iPhone via iTunes
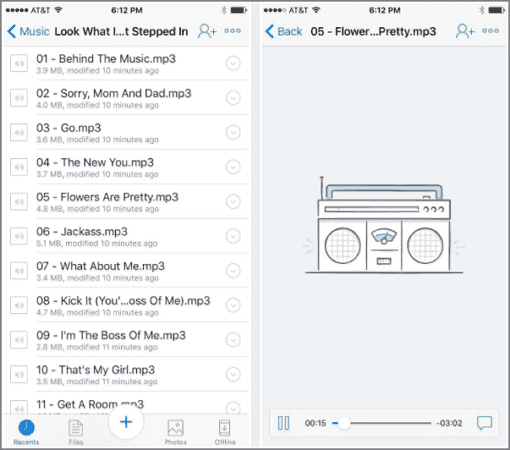
If you want to transfer music from iPod to iPhone, the first method you think of may be to use iTunes but it can only let you transfer purchased songs from iPod to iPhone. Here are the easy steps to use iTunes for transferring:
1. Download and install the latest version of iTunes on your computer first. Then connect your iPod to computer.
2. Select File > Devices > Transfer Purchase from “name of your iPod”. Then iTunes will transfer your purchased music to the iTunes library.
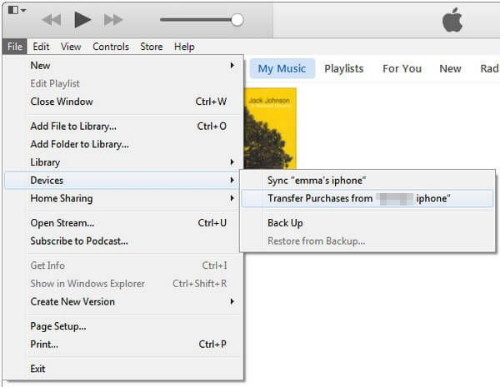
3. Disconnect your iPod and computer, then connect your iPhone to computer.
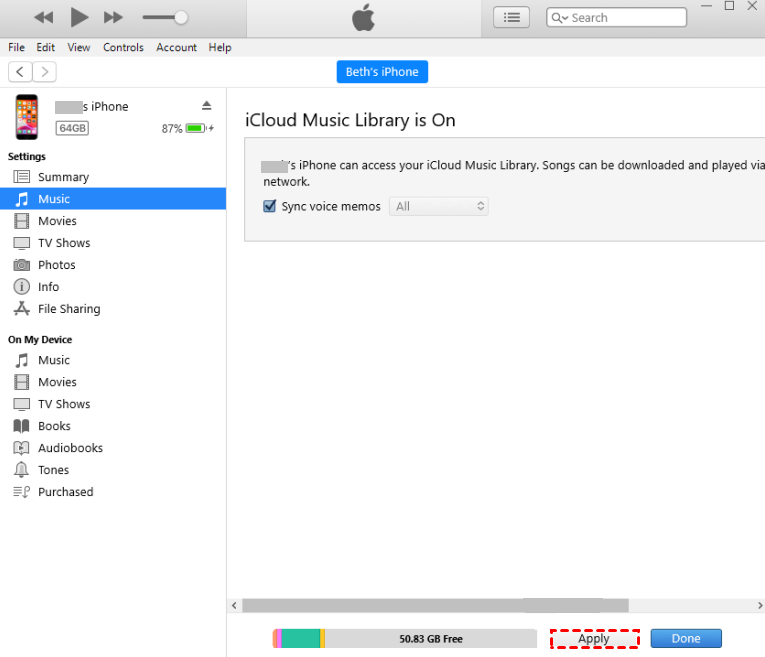
4. In the Device section, choose Music and select songs you want to transfer to iPhone, then click Apply to operate it.
Way 2. Transfer data from iPod to iPhone via iCloud
If you want to know how to transfer photos from iPod to iPhone, or transfer apps from iPod to iPhone, iCloud can help you but it may lead to data loss on your iPhone. Here is the guide to transfer data via iCloud:
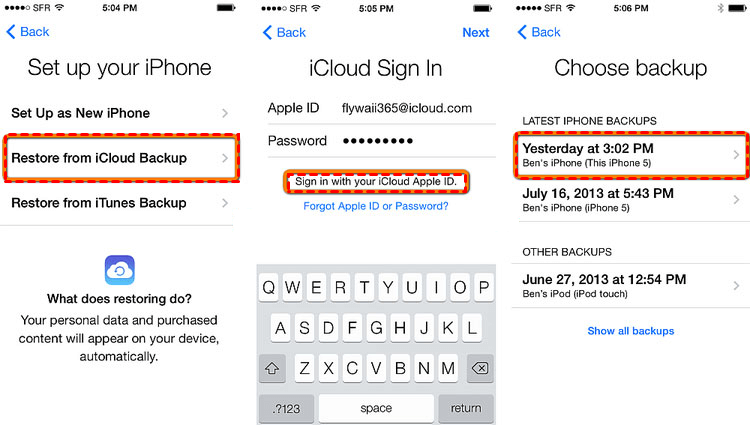
1. On your iPod, go to Settings and choose your Apple ID, then choose iCloud. Turn on the data you need to transfer to iPhone.
2. Choose your iPhone as the new device when the last backup time updates.
3. On your iPhone, sign into the same Apple ID on the Apps & Data screen. Then you can choose a backup from iCloud to restore to your iPhone.
Way 3. Transfer data from iPod to iPhone via a cloud storage service
If you want to know how to transfer iPod to iPhone without iTunes and iCloud, you can consider using a cloud storage service to help you. This method does not require a computer and you can refer to the detailed steps below to transfer playlist from iPod to iPhone:
1. Take Dropbox as an example. Download and install Dropbox on your iPod and iPhone. And sign into the same account.
2. On your iPod, run Dropbox and Add files to add songs you want to transfer to iPhone. Then select Upload to store them on Dropbox.
3. On your iPhone, open Dropbox, then you can view these songs and save them on your iPhone.
Way 4. Transfer data from iPod to iPhone without computer
If you want to transfer non-purchased songs from iPod to iPhone, iTunes cannot help you and we provide a professional data transfer tool called FoneBackup. It provides a mobile app version that can help you do this without connecting to computer.
FoneBackup is a great method of transferring music from iPod to iPhone without computer. It allows you to transfer not only music, but also photos, videos, contacts, and messages, from iOS devices for free. You can complete it on your iPod and iPhone. Let’s see how to transfer iPod to iPhone via FoneBackup. It can bring lots of highlights like:
● Select files to transfer: You do not need to transfer all files and can review files to choose files to transfer.
● High transfer speed: It can help you transfer 1000 songs in 9 minutes, faster than iTunes.
● Support all iOS devices: All your iPhone/iPad/iPod models are supported to use such a transfer app.
You can follow the easy steps to transfer iPod to iPhone via FoneBackup:
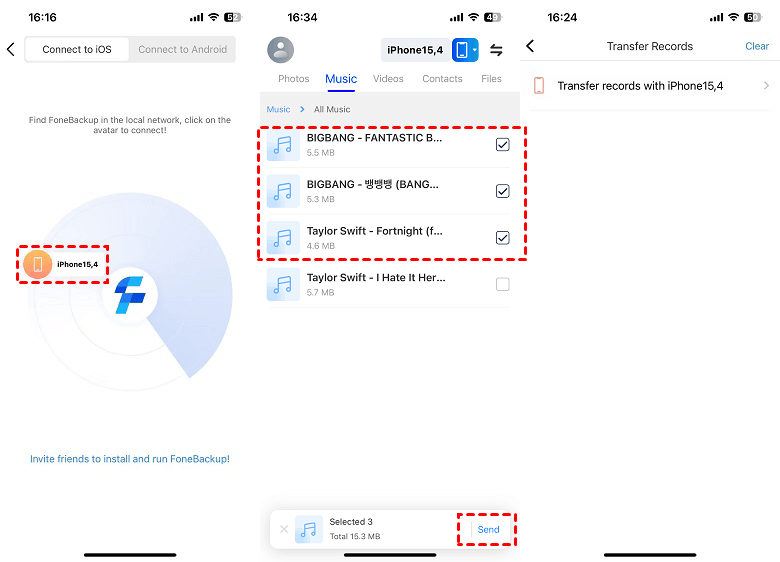
1. Scan the QR code above to download and install FoneBackup on your iPod and iPhone.

2. Open FoneBackup on your iPod, and click Connect Device at the bottom to find your iPhone.
3. Then you can choose music to transfer to your iPhone. You can also choose photos, videos, contacts, and files. After confirming, click Send, then they will be transferred to your iPhone fast.
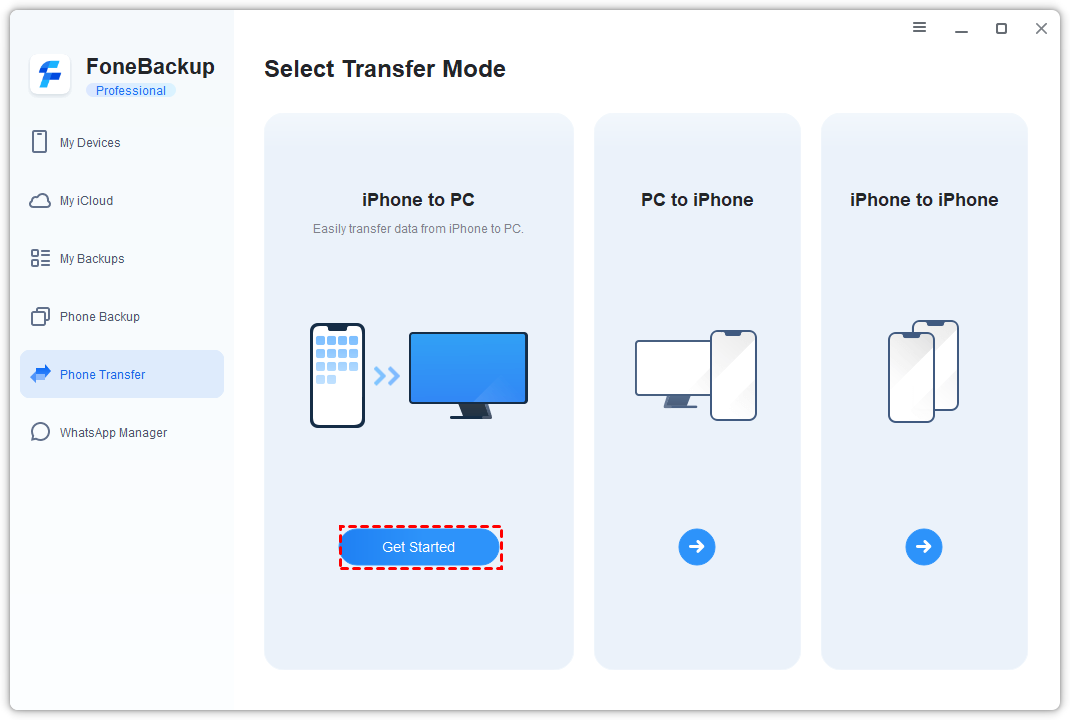
⇒ Tip: FoneBackup also provides a PC client for Windows users. You can go to download and install it on your PC. It provides many useful features like Transfer to Computer, Transfer to iPhone, Full Backup, Selective Backup, etc. With the help of it, you can transfer all kinds of data between your iPhone and PC directly.
Final words
That’s all about how to transfer iPod to iPhone. There are some different methods you can pick: iTunes, iCloud, cloud storage, or a professional transfer - FoneBackup. If you want to transfer purchased songs and non-purchased songs, FoneBackup may suit you best. It can also help you to transfer some other types of files.