Transfer Non Purchased Music from iPhone to Computer
This guide will show you how to transfer non purchased music from iPhone to computer. In addition, you will also know how to transfer non purchased music from old iPhone to new iPhone.
By Kelsey / Updated on May 14, 2026
Transfer non-purchased music between iPhones or from iPhone to computer?
Is there a way I can transfer non-purchased music easily? This sort of thing seems to have fallen to the wayside in the era of streaming music. But I need a solution very much, thanks!
- Question from Apple Community
Can You Transfer Non Purchased Music from iPhone to Computer?
You have downloaded lots of songs on your iPhone, iPod or iPad so that you can enjoy the music wherever you are. Now for some reason, you want to move them to your computer. iTunes is the default program for music management and it indeed can help sync music to computer, however, the music supported is limited to the purchased items on your device.
How to transfer music from iPhone to computer that was not purchased? Fortunately, there’s one third-party tool that can help you transfer both purchased and non-purchased music from iPhone/iPod to computer. Let’s jump right in.
How to Transfer Non Purchased Music from iPhone to Computer for Free
Since iTunes has its limitations, it can can help you transfer purchased songs to computer, you can take the assistance of one third-party tool named FoneBackup to better manage your music. It’s a professional iPhone transfer tool for Windows PCs.
- Highlights:
 Easy to use. With a clear interface and user-friendly design, you can complete the transfer in only a few clicks.
Transfer selected songs. It lets you transfer all songs in one click or only transfer the selected songs.
Fast transfer speed.1000 songs can be transferred in only 9 minutes and 13 seconds.
Widely compatible. It supports all iPhone, including the latest iPhone 16, iPod, and iPad models as well as the latest iOS 18.
Download the tool on your computer and follow the steps below to transfer non-purchased music from iPhone to computer.
Steps to Move Non Purchased Music from iPhone to Computer
Step 1. Connect your iPhone to computer via the USB cable > Enter the passcode to give your computer access to your device.
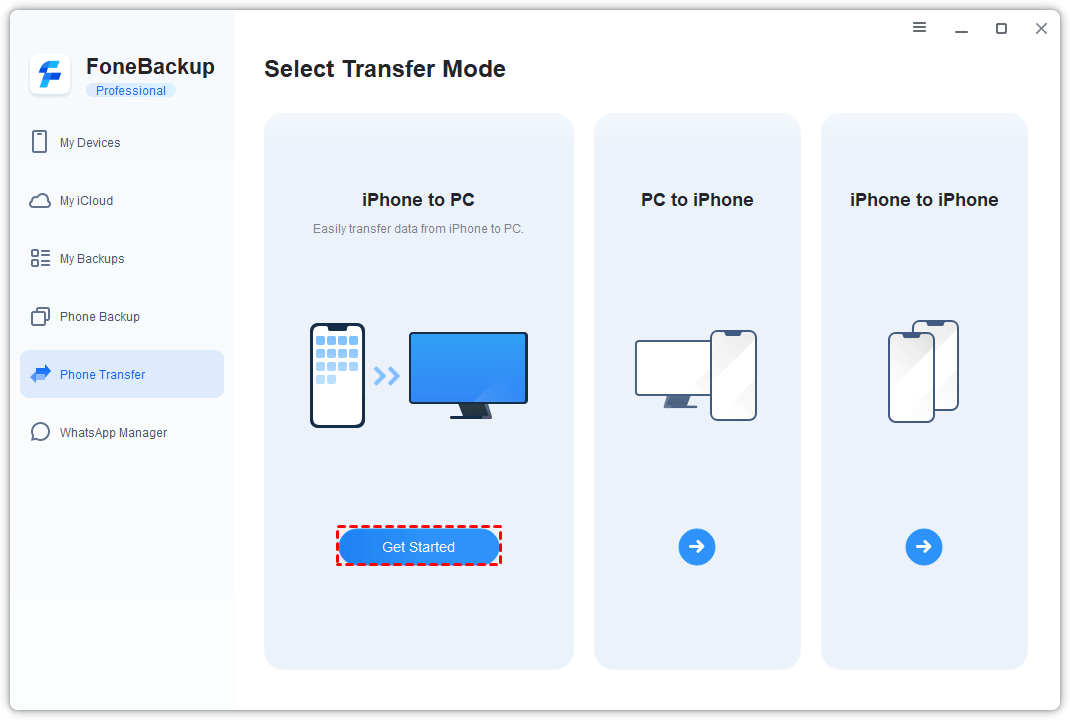
Step 2. On the Fonetool interface, choose Phone Transfer on the left pane. Move the cursor to the iPhone to PC option, and click Get Started to continue.
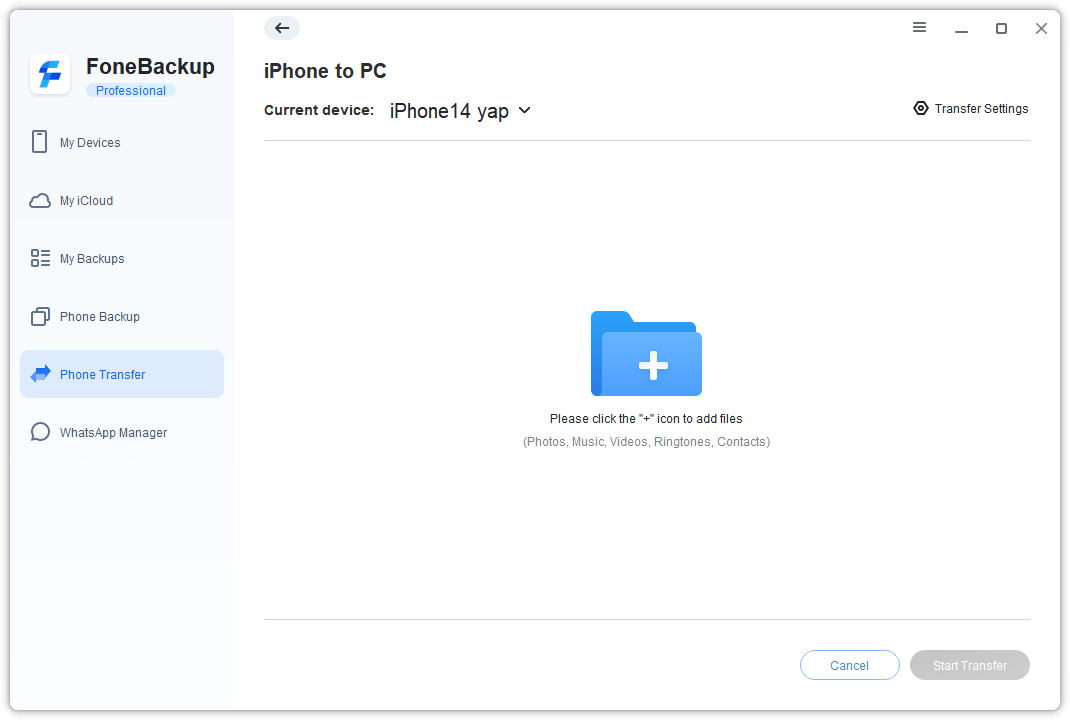
Step 3. Click "+" to choose the songs you want to transfer to computer.
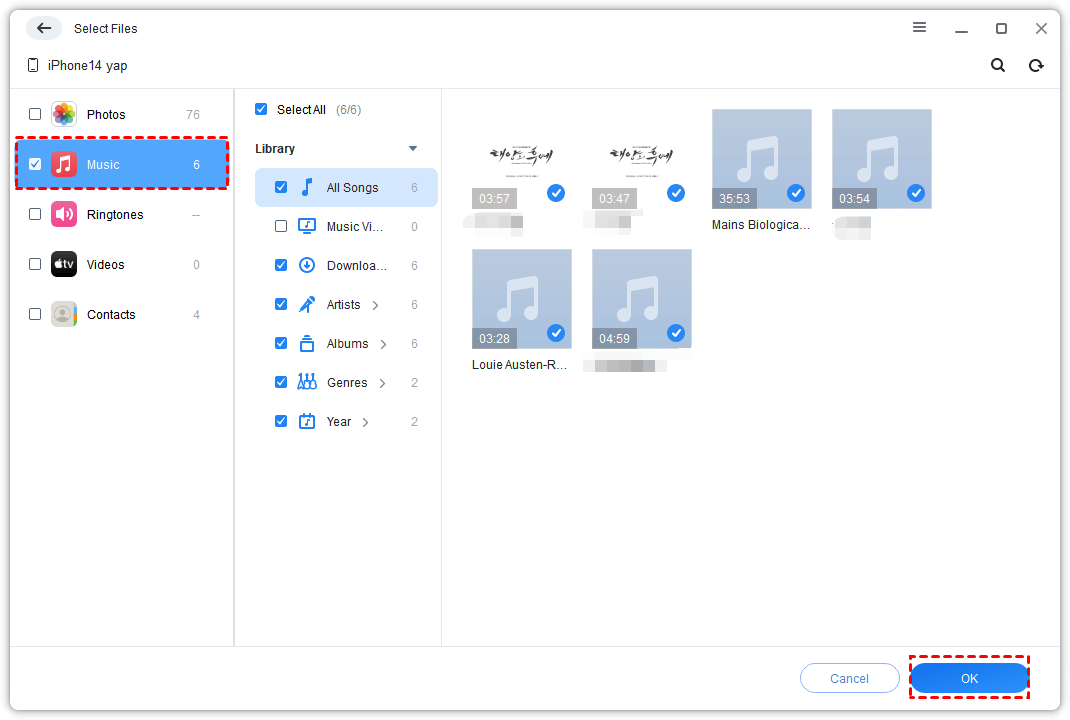
Step 4. Choose the songs you want to transfer to computer and click OK.
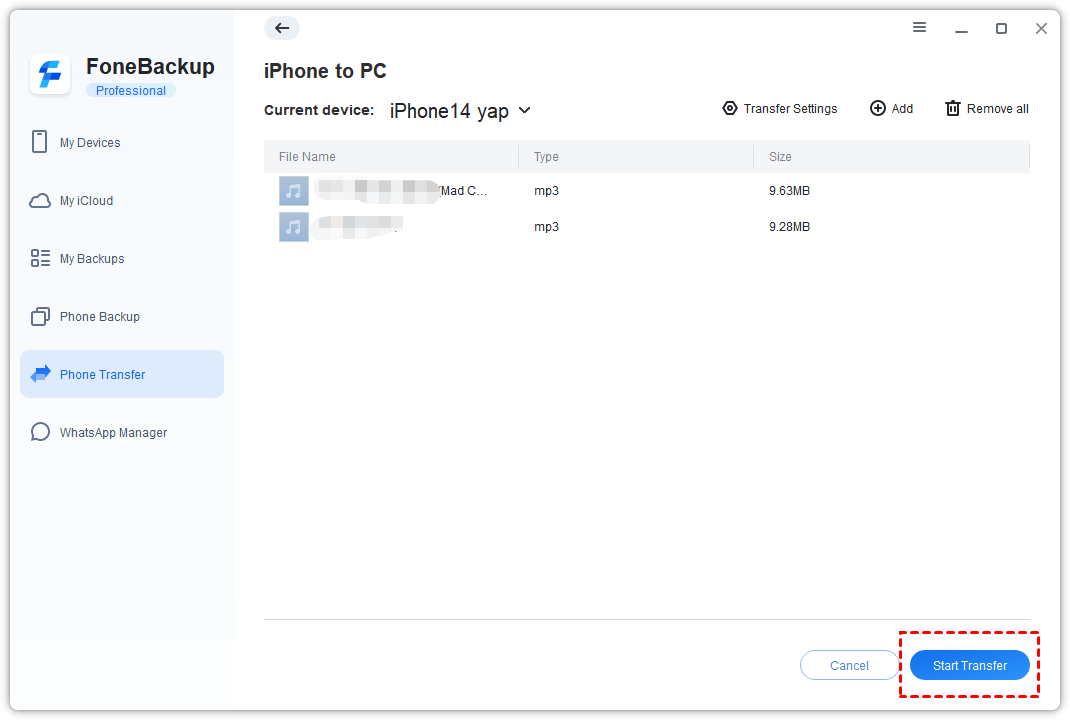
Step 5. Click the Start Transfer button > You can choose a location to save your music on the Transfer Settings > Click Transfer to transfer non-purchased music from iPhone to computer.
→ Note: FoneBackup can also help you transfer purchased and non-purchased music from computer to iPhone. You can go to this Transfer Non-Purchased Music to iPhone guide to learn more.
• First transfer non purchased music from old iPhone to computer via iPhone to PC.
• Then transfer non purchased music from computer to new iPhone via PC to iPhone.
Bonus: Transfer Non Purchased Music from iPod to Computer
There’s a way that you can have a try to transfer non purchased music from iPod to computer. This method is kind of complicated compared to the above method.
Step 1. Connect your iPod to computer via the USB cable > Open “My Computer” and your iPod will be shown up there.
Step 2. Click Tools in the menu bar of Windows explorer > Select Folder Options > View > Check Show hidden files and folders.
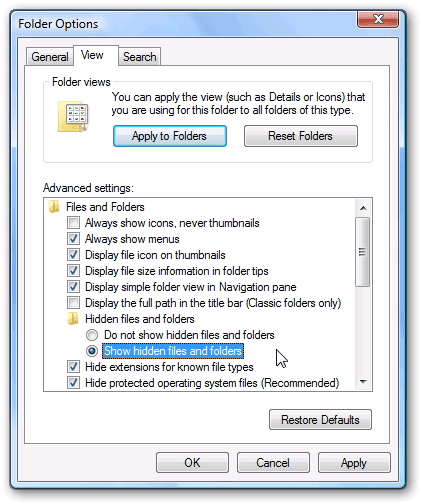
▲ The process of showing your hidden files may leave your important system folder exposed, please be careful.
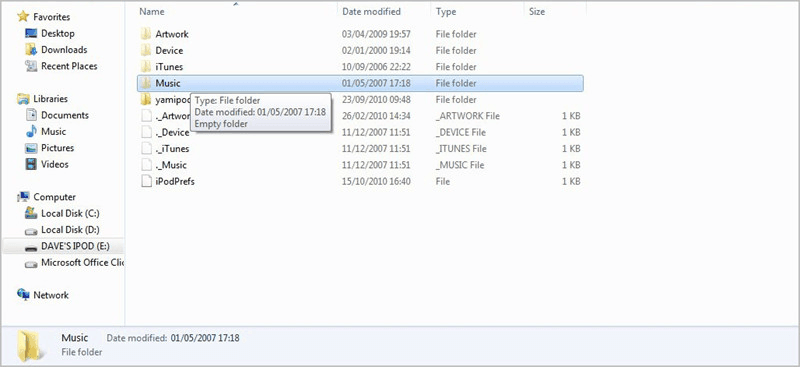
Step 3. Head back to “My Computer” and double-click your iPod > Find and open iPod_Control folder.
Step 4. Find Music folder and copy the whole folder to your computer.
Step 5. Run iTunes > Click File > Add Folder to Library... to add the music folder to your iTunes library.
Step 6. Finally, click Edit > Preferences > Advanced, and check "Keep iTunes Media Folder Organized".
You can click Recently Added in the left panel of iTunes to check the newly imported songs. If you want to download the imported songs on your computer, you can click the Download button to download it on your computer.
Conclusion
That’s all for how to transfer non-purchased music from iPhone to computer.
-
The easiest way to achieve the goal is using Fonetool, it can help you transfer both purchased and non-purchased music to computer.
-
Or if you own one iPod, you can try to it to finish the iPod music transfer. First transfer music from iPod to iTunes and then download them on your computer.
If you meet any problems, please feel free to leave a comment and we will reply to you soon.
