Fixed: ASUS Recovery Partition Not Working
Have you ever encountered “ASUS recovery partition not working”? See this article and you can learn to fix it within a few steps.
by Ivy Updated on October 19, 2022
Scenario
“Hi, I have recently upgraded my ASUS F555LP to windows 10, but it causes me trouble. so I decided to restore the laptop to "out of the box" conditions. Unfortunately, Asus recovery partition F9 not working. It seems that the system doesn't recognize the recovery partition of ASUS anymore.
I've tried some solutions but nothing happen. Is here any solution? I don't know what I have to do. Thanks in advance”
How to fix ASUS recovery partition not working
Many users report that Asus recovery partition or recovery key F9 does not work. And they do not know how to solve it. Don’t worry about it. Just move your mouse and see below.
Create a bootable media with Backtracker
Backtracker is released by Asus, which is used to backup operating system to USB drive. But it only backups the non-damaged Asus recovery partition, and only when default OS is working. Moreover, it only supports ASUS Notebook with Windows 8/ Windows 8.1.
Before start, you need to prepare a USB with 16GB at least, insert it to your computer. Then, download Backtracker and install it. After that, see detailed steps below.
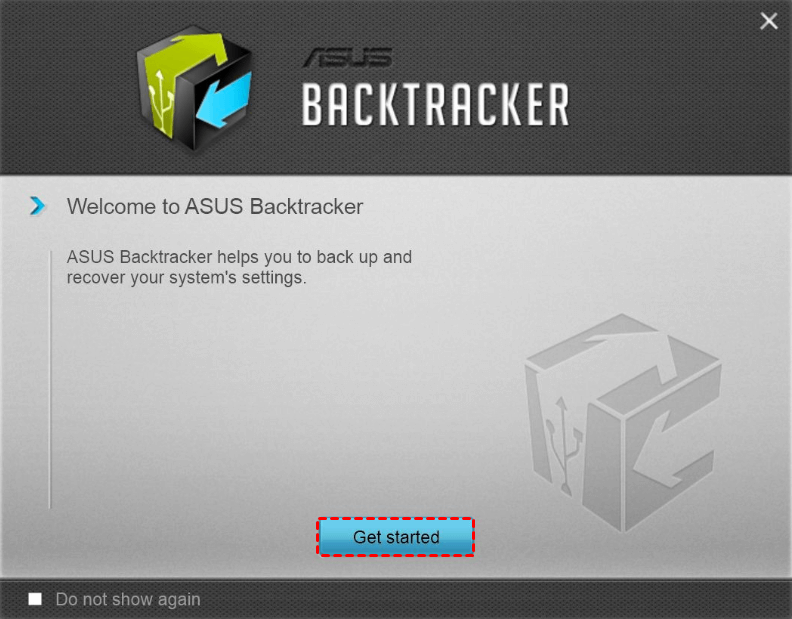
Step 1. Open Backtracker and click “Get Started”.
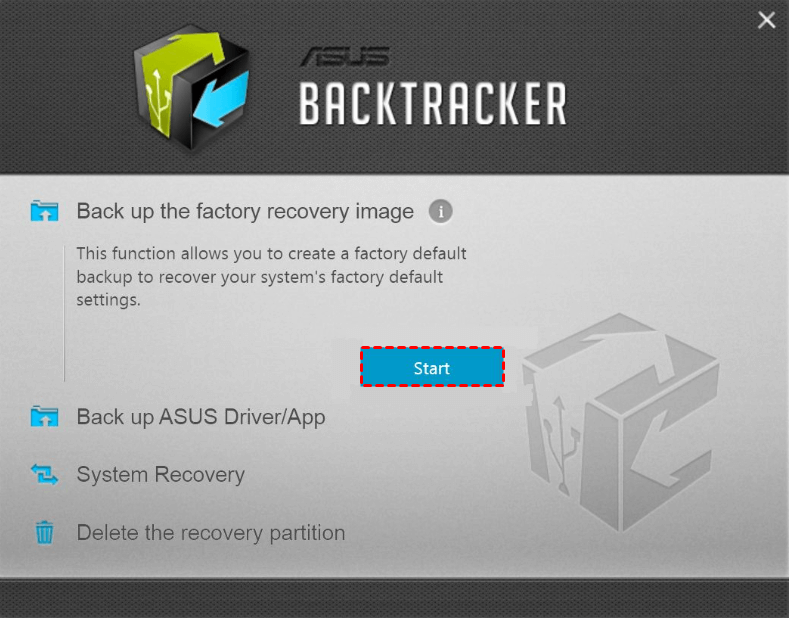
Step 2. Click Start under Back up the factory recovery image.
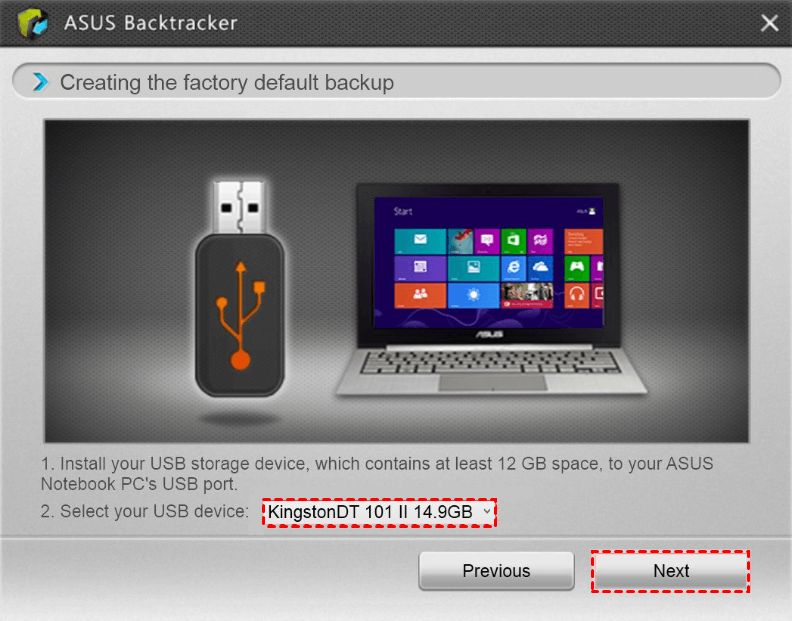
Step 3. Select your USB device from the drop-down menu and click Next.
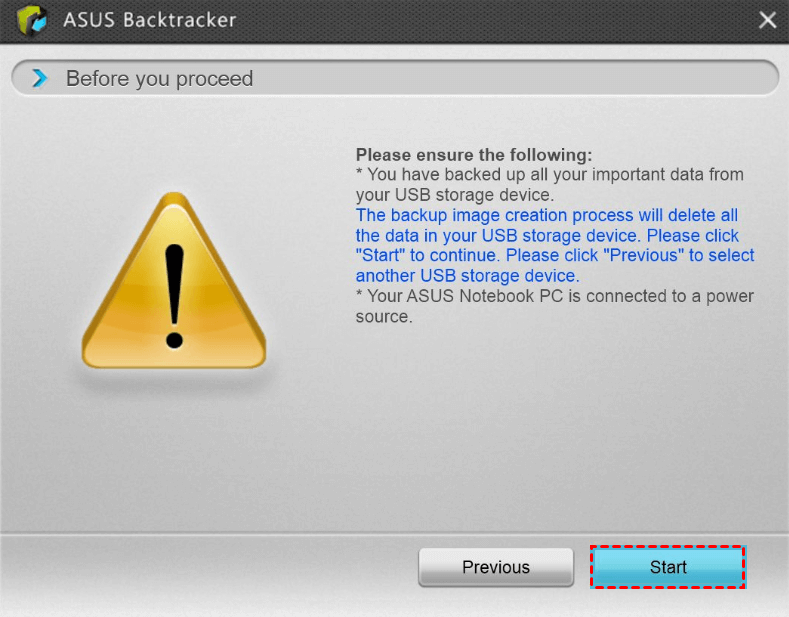
Step 4. Ensure the information below and click Start to begin the pending operation.
Step 5. Wait patiently. Do not use the computer during the operation. After creating a bootable USB recovery drive, you can use it to repair your computer.
Besides Backtracker, you still can make use of installation media to create a recovery partition manually. Details are below.
Create a recovery partition for Asus with installation media
For this method, you need an installation disk. If you still do not have, you could free download Windows repair disk ISO file for Asus recovery disk from Microsoft.
Step 1. Right-click the ISO file and select Mount to burn it to DVD drive, then go to the drive.
Step 2. Find the install.esd or install.wim file, the recovery partition for Asus, then copy and paste it to C: root. If the recovery partition is install.esd, you need to finish the rest of steps. If not, you can directly go to Step 5.
Step 3. To convert install.esd to install.wim, you need to type the following commands with admin priority to and hit Enter in order.
-
cd ..
-
cd ..
-
dism /Get-WimInfo /WimFile:install.esd
-
dism /export-image /SourceImageFile:install.esd /SourceIndex:1 /DestinationImageFile:install.wim /Compress:max /CheckIntegrity
step 4. Right-click the ESD2WIM-WIM2ESD command in the ESD2WIM-WIM2ESD-v2 folder and run as administrator. Then type the following commands to export ESD index 1 to install.wim file and hit Enter after each one.
-
c: \install.esd
-
1
Step 5. Now, go to command prompt with admin priority and type the following command to make the install.wim files recognized.
-
reagentc /setosimage /Path /Index
-
reagentc /info
-
exit
Note: the reagentc /setosimage /Path /Indexcommand is not used on Windows 10.
Through this unexpected event, you may know the importance of recovery partition. With it, you can restore your computer to factory settings or previous state. But if the Asus recovery partition missing or does not work, everything becomes very complicated.
In this article, up to now, I have already taught you two ways to fix Asus recovery partition F9 does not work. However, to be honest, both ways have limitations. The first one can only be used on Windows 8/8.1. The second one is kind of complex for common users. More so, both ways cannot be used on Windows 10.
If you want to fix Asus recovery partition F9 does not work in Windows 7/8/10/11 with an easier way, you can use AOMEI OneKey Recovery Professional.
Create a recovery partition with AOMEI OneKey Recovery
AOMEI OneKey Recovery Professional, one of the best backup and restore software, is aimed to backup the current system in recovery partition and allows you to restore system in Window PE environment. You do not need to change boot order in BIOS, because it will automatically add a boot menu to your system. If your computer run into issues, you just need press F11 or A key to access it. It supports all kinds of operating system, including Windows XP, Vista, 7, 8, 8.1, 10,11 and Windows Server 2003/2008 (R2)/2012 (R2)/2016/2019/2022, SBS 2003/2008/2011, WHS 2011 (all editions, both 32-bit and 64-bit).
To avoid that Asus recovery partition does not work in Windows 7/8/10/11, you need to create a recovery partition with the replacement tool. Detailed steps are below.
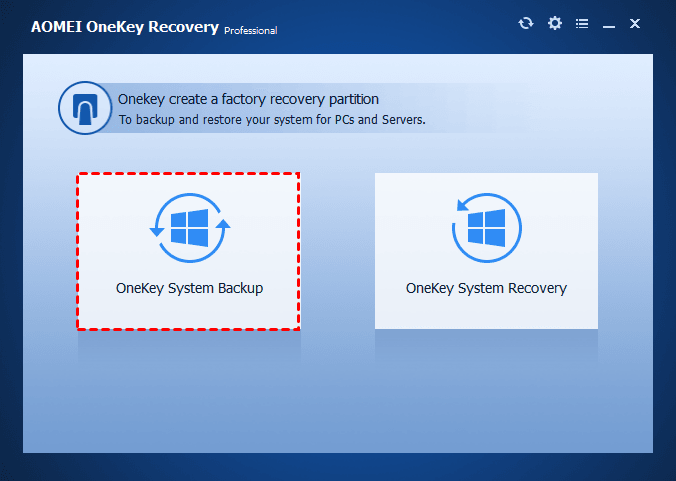
Step 1. Download AOMEI OneKey Recovery Professional, install and launch it. Then, click OneKey System Backup.
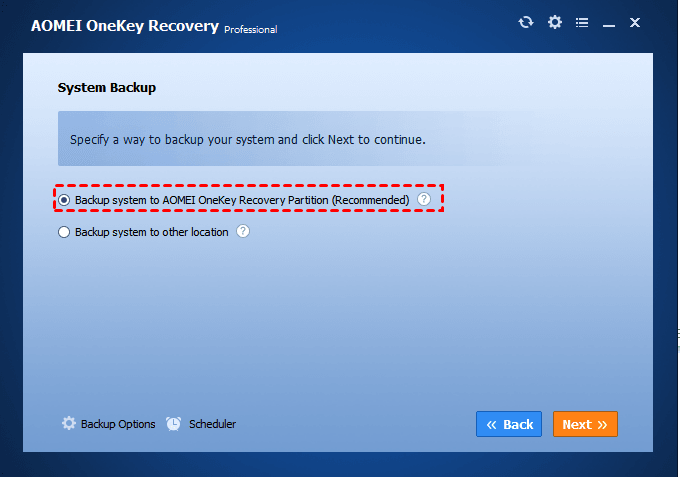
Step 2. Select a way to backup your system. The first option is recommended. You can also click Scheduler to set up an automatic backup on basis of daily, weekly or monthly.
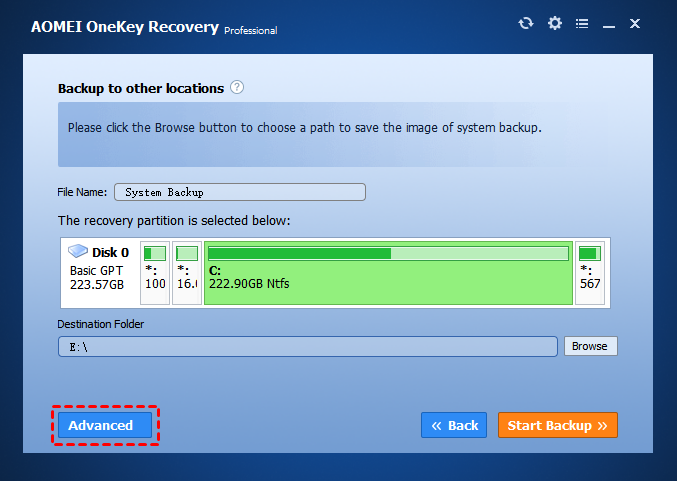
Step 3. Confirm and click Start Backup to continue. To view the details, click Advanced button.
Step 4. Wait patiently until the operation is completed. Click OK and Finish to exit.
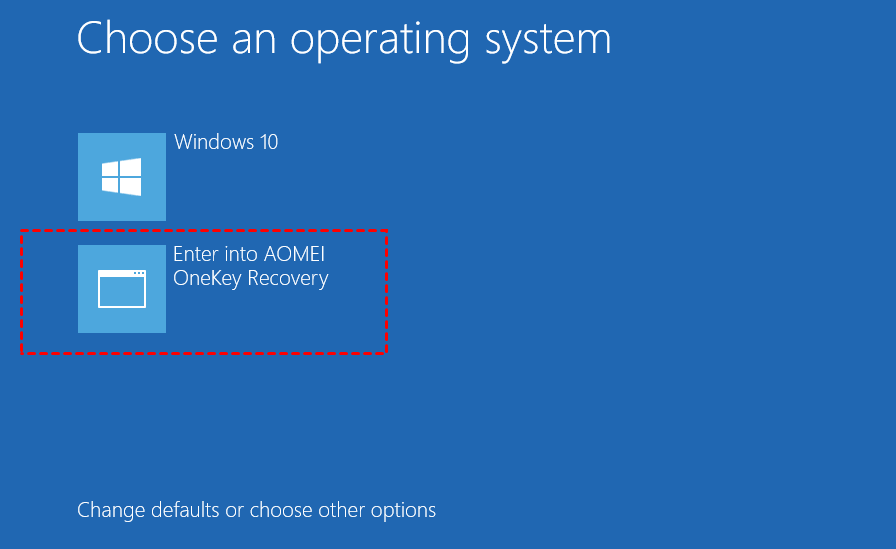
Step 5. To check if the F11 or A key working, you can restart your computer and try it, then your computer will go to the following window.
Besides AOMEI OneKey Recovery, you still can try AOMEI Backupper and create a system image backup with it. All steps are very easy. However, it will not add a boot menu to your computer, so you need to start your computer with a bootable media in some cases.
Final words
Asus recovery partition not working is something you cannot control, but you can choose how to create a recovery partition for your computer. Asus Backtracker is only available on Windows 8/8.1. Using installation media and commands to create a factory recovery partition is complicated, so a few users can do it.
Thus, you can turn to a third-party tool like AOMEI OneKey Recovery. It has a wizard-like interface that is able to guide to finish all the steps. Besides, it supports all kinds of operating system. Just download and try it for yourself.

