


How to Achieve Instant VM Recovery for VMware and Hyper-V
If you want to maintain your work continuity, instant VM recovery can be much helpful. In this article, I will introduce the easiest way to achieve instant VM recovery. That is, VM snapshot.
By Crystal / Updated on November 28, 2024
Traditional recovery vs. Instant recovery
Traditional VM recovery typically involves retrieving VM data from disk or tape and restoring it to the production environment. These methods are typically slower and have a higher risk of downtime. It is better suited for less time-sensitive workloads or long-term archival recovery.
However, businesses are now eager to experiment with more flexible IT disaster recovery strategies, such as Instant Recovery that allows them to restore VMs directly from backups in minutes using advanced technologies such as virtualization and snapshots.
This article demonstrates the efficient instant VM recovery methods to reduce enterprise downtime and save associated costs whether you're running VMware or Hyper-V host.
- Instant recovery for virtual machines from AOMEI Cyber Backup
- Restoring snapshots from backup
Free Tool: Instant VM recovery with AOMEI Cyber Backup
While creating snapshots enables instant VM recovery, relying on snapshots is a dangerous operation. It can affect VM performance, and even lead to severe data loss. Therefore, creating independent VM backups is still essential, and cannot be easily replaced by snapshots.
Here I introduce you to a free instant recovery software -- AOMEI Cyber Backup. It allows you to centrally manage VMs, create backup schedules and perform instant recovery.
Click the following button to download the freeware.
*You can choose to install this VM backup software on either Windows or Linux system.
Simple steps to restore VM rapidly from backup
Note:
* The instant restore feature is applicable to backup points of ESXi virtual machines. AOMEI Cyber Backup must be installed on Windows Server 2012 or higher versions of the operating system.
* The backup points of the virtual machine must be stored on the local disk.
Step 1. Create VMware ESXi VMs Backup and then start VM instant recovery.
Step 2. Create New Instant Recovery as following:
✔ Click "Task" > "Instant Recovery" > "New Instant Recovery". Here we take "Restore from task" for an example.

✔ Select Source and choose the virtual machine and backup version.
✔ Select the device to be restored to in "Restore to". Choose the target device.
✔ Set the hardware settings for the new virtual machine, such as CPU quantity, CPU Cores and memory size.
✔ Enter a name for the new virtual machine.
✔ Click "Start Restore" to start the instant restore.
After creating vm instant recovery, click Start Migration on details page to return backup to production environment.
Alternative: Is there any way to achieve instant VM recovery
If you want to reduce costs, there is actually a free built-in way to achieve instant VM recovery as well. That is, VM snapshot.VM snapshots can achieve quick VM recovery because they do not back up the entire VM, but change the parent disk into read-only mode, and create delta disks to store all the changes made to the VM afterwards. By restoring VM from snapshots, you are just deleting the delta disks, discarding all changes made since the snapshots was created, and then bring the VM's original disk back to read-write state, instead of restore entire VM.
Improper usage of VM snapshot can lead to VM performance degradation, so it cannot replace backup. For more details you can refer to VM Snapshot vs. Backup.
![]()
VMware ESXi: Use snapshots to achieve instant VM recovery
This part introduces how to use snapshots to perform instant VM recovery on VMware ESXi, Workstation, and Microsoft Hyper-V.
🔵Steps to take snapshots on VMware ESXi:
VMware ESXi is the most commonly used type 1 hypervisor that allows you to create and run VMs directly on bare metal.
1. Access to ESXi Web Client, go to Virtual Machines page in the left inventory. Right-click on the name of the VM you want to backup, and select Snapshots > Take Snapshot.
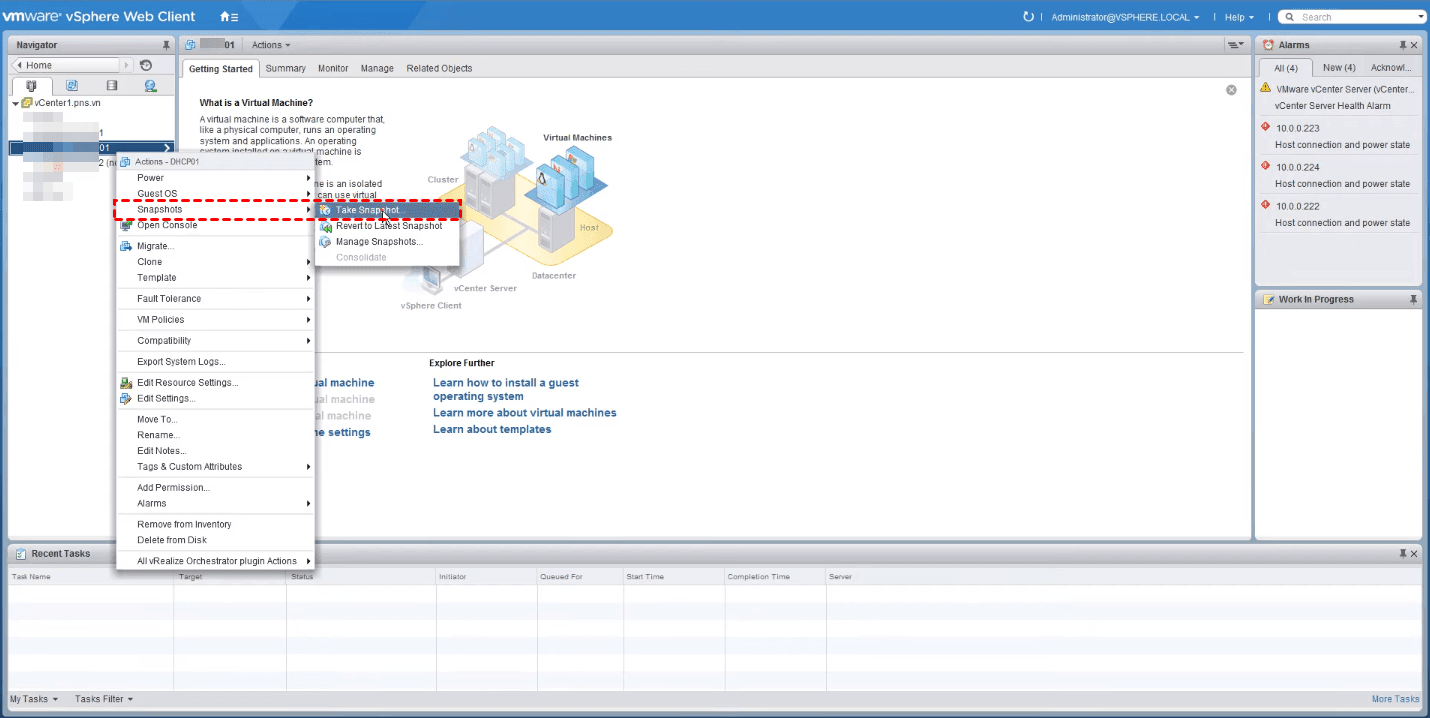
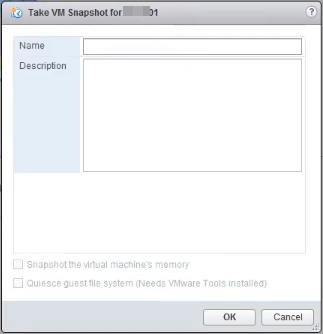
2. In the pop-up window, provide a Name and optionally a Description for the snapshot. You can Edit them later in Snapshot Manager.
3. There are 2 more options to check:
- Snapshot the virtual machine’s memory: record the VM’s memory, allowing you to roll back the VM to the exact running state when the snapshot was taken, but takes longer. If you leave this option unchecked, then the VM will be powered-off after you roll back.
- Quiesce guest file system (needs VMware tools installed): pause the state of the processes that are running, or may modify the information stored on disk when the snapshot was taken, to guarantee the consistency. Quiescing and Memory snapshots are mutually exclusive.
4. Click OK to take the snapshot. You can see the progress in Recent Tasks.
🔵Steps to revert to a snapshot on ESXi:
1. Access to ESXi Web Client, and right-click on the VM name, select the option according to your needs:
✦ If you want to revert to the latest snapshot: Select Revert to Latest Snapshot.
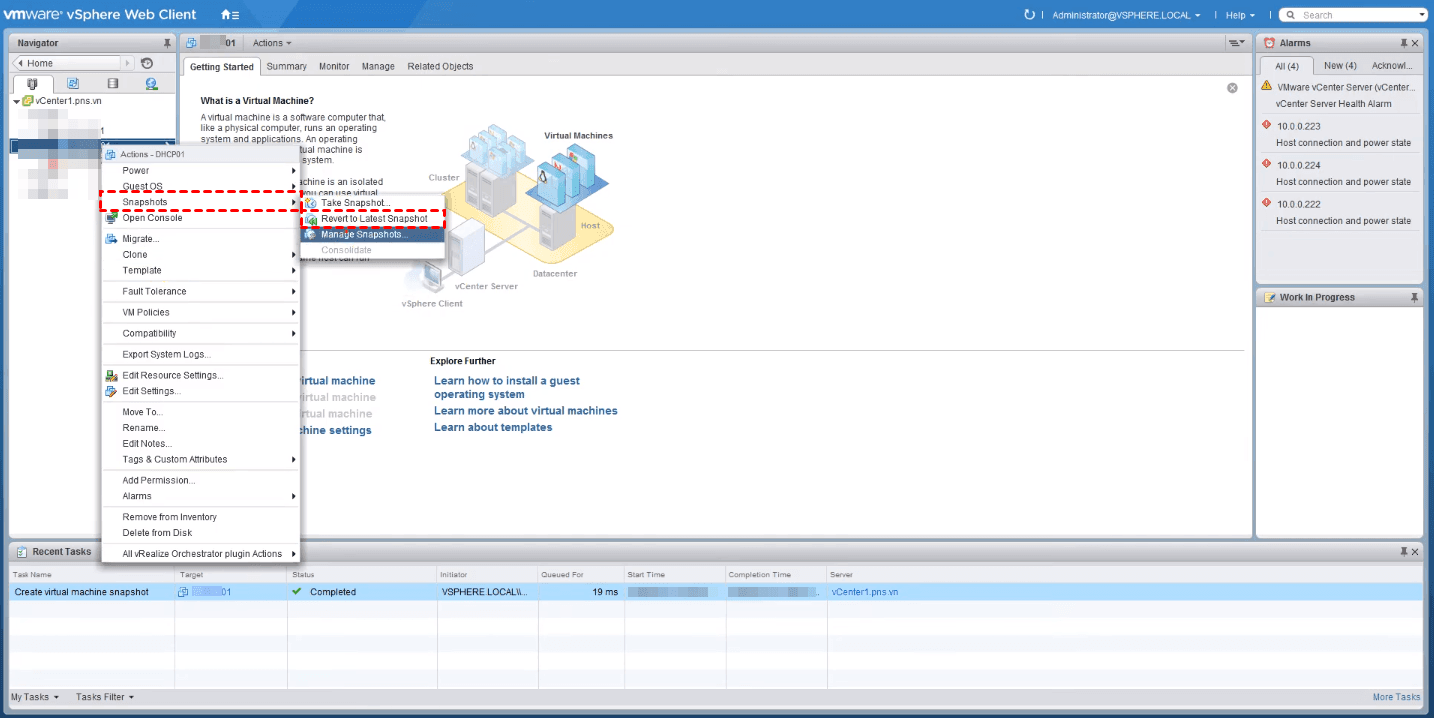
✦ If you want to revert to another previous snapshot: Select Manage Snapshots… In the pop-up Snapshot Manager, select the snapshot and click Revert to.
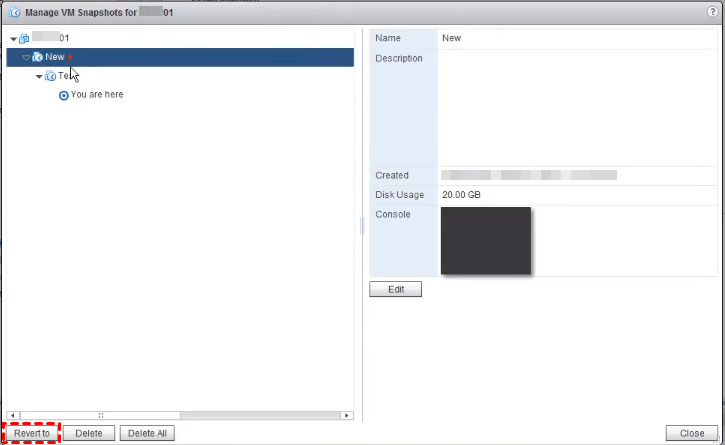
2. It will pop up a Confirm window notifying the loss of the current state.
If it is a memory snapshot, there will be one more option to suspend this VM when reverting to selected snapshot. You need to manually power on the VM later if you check this option.
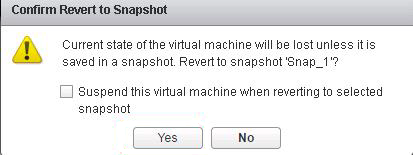
3. Click Yes to revert to the selected VM snapshot. In Snapshots Manager you can see the current state represented by You are here.
VMware Workstation: Taking snapshots for VM recovery
As one of VMware’s products, Workstation is the most popular type 2 hypervisor among end users. In this section, I will introduce the instant VM recovery steps on Workstation using snapshots.
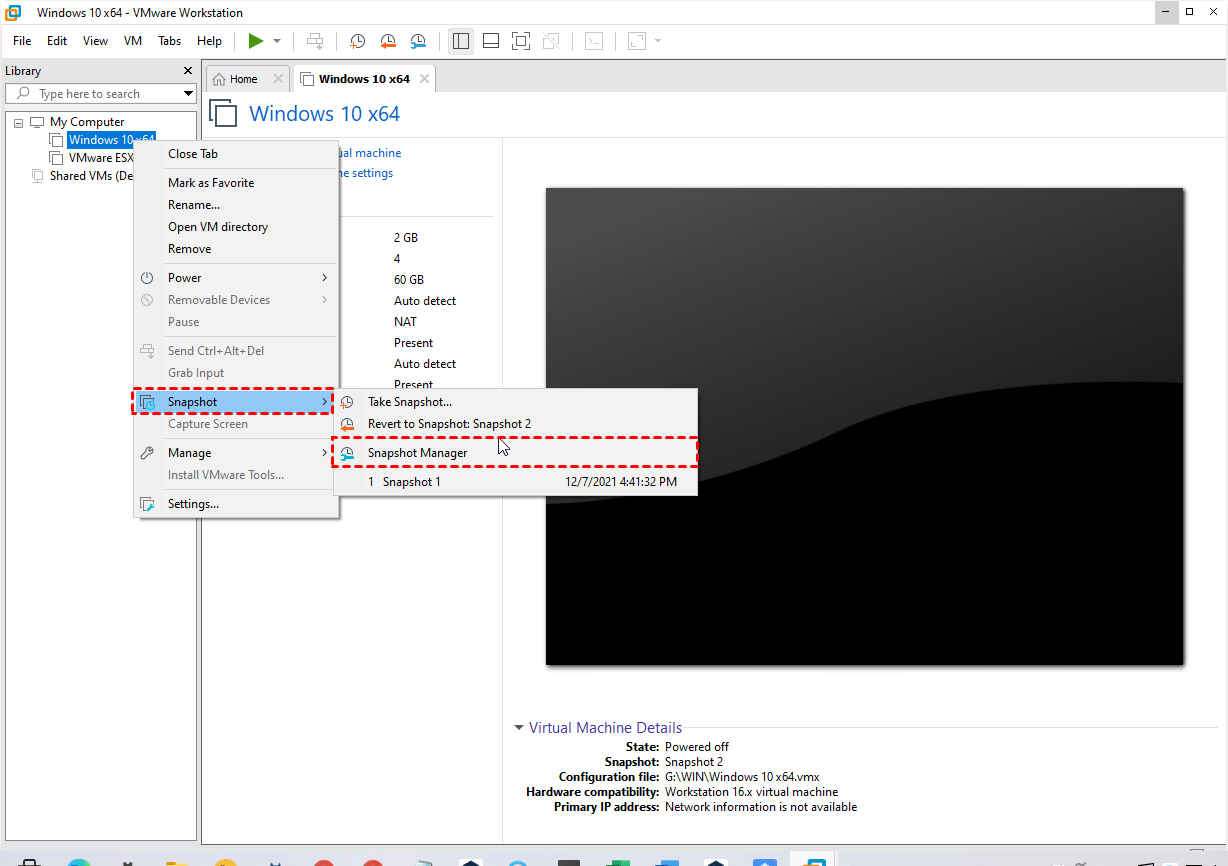
💡Take snapshots on VMware Workstation:
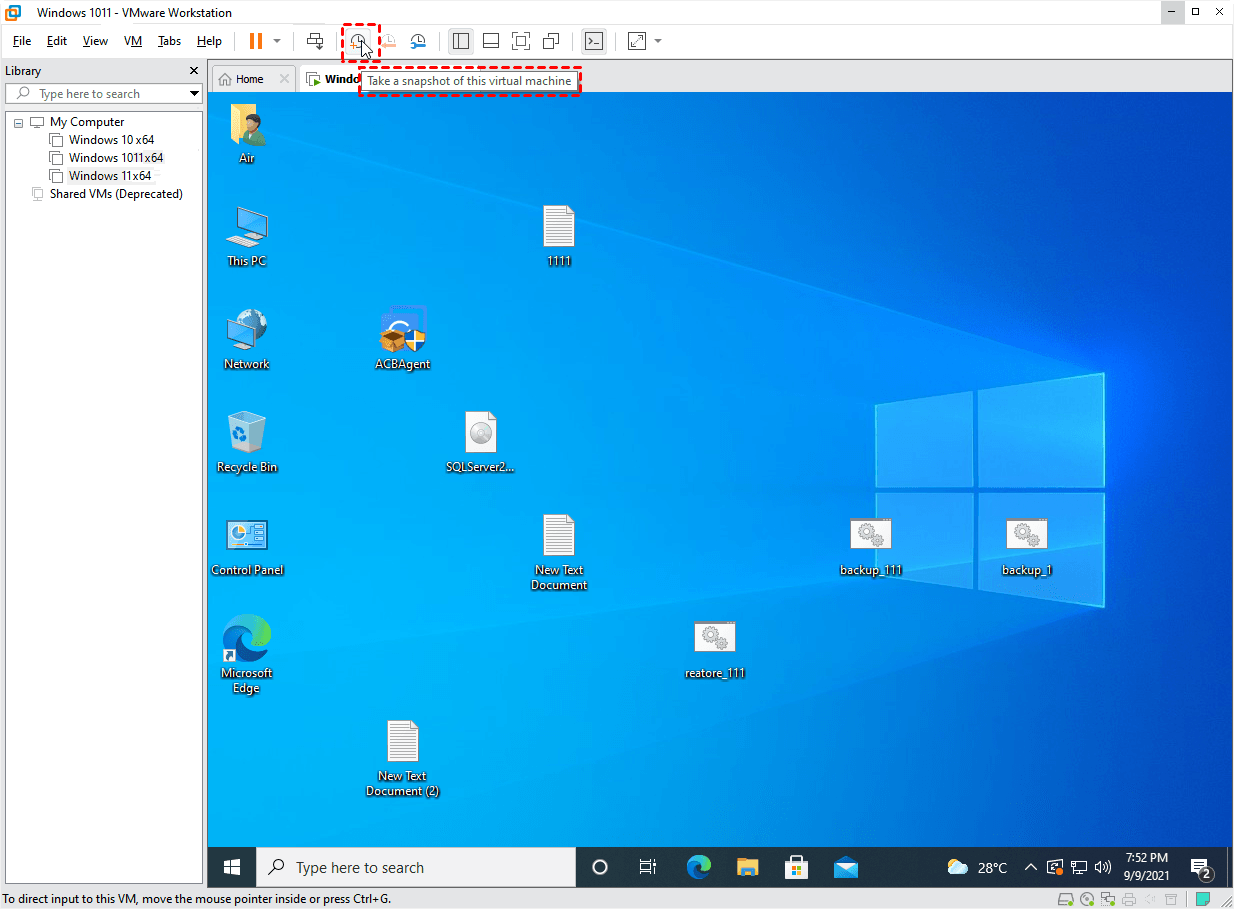
1. Launch VMware Workstation, select the VM you want to backup, and click Snapshot button on the toolbar.
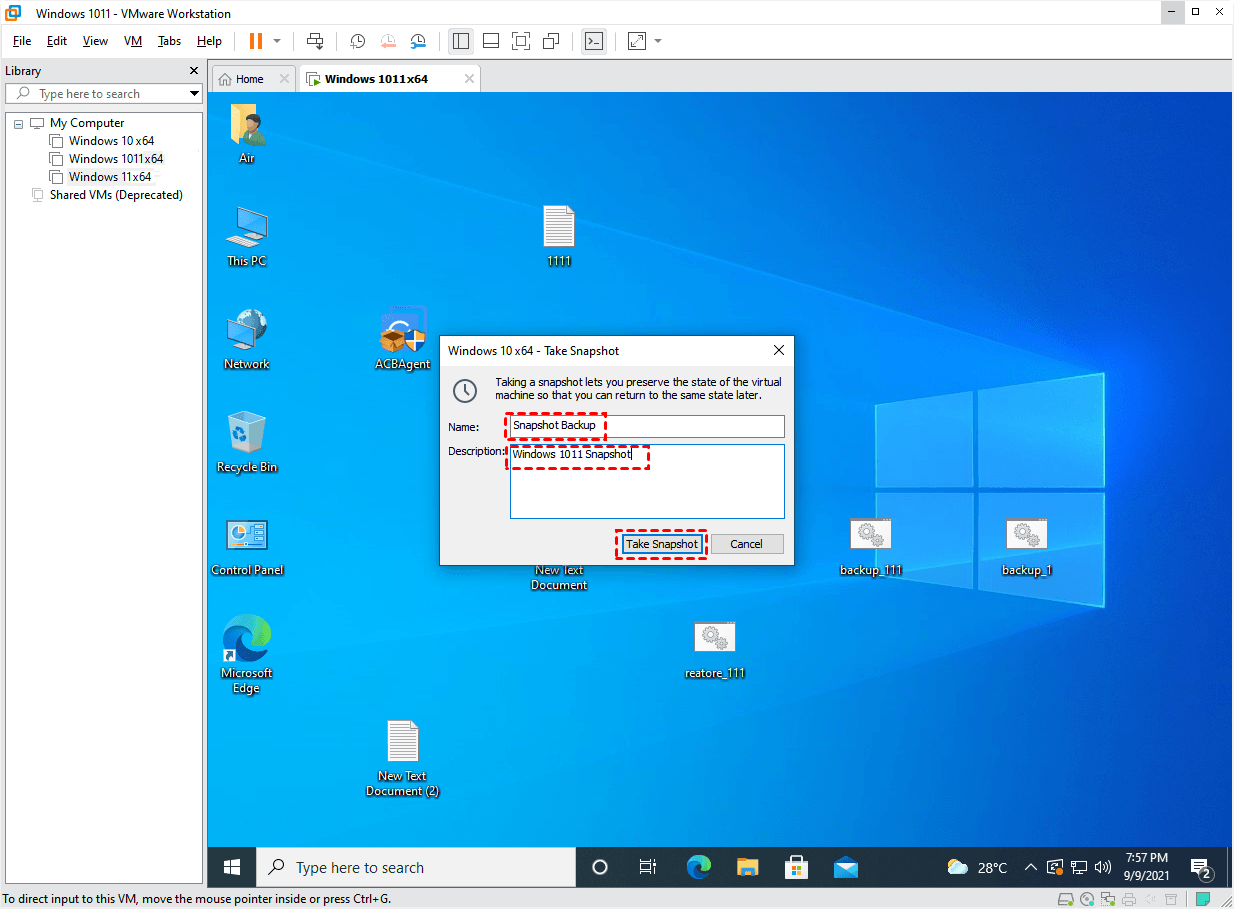
2. In the pop-up window, provide the Name and optionally a Description for this snapshot. Then click Take Snapshot.
💡Revert to a snapshot on VMware Workstation:
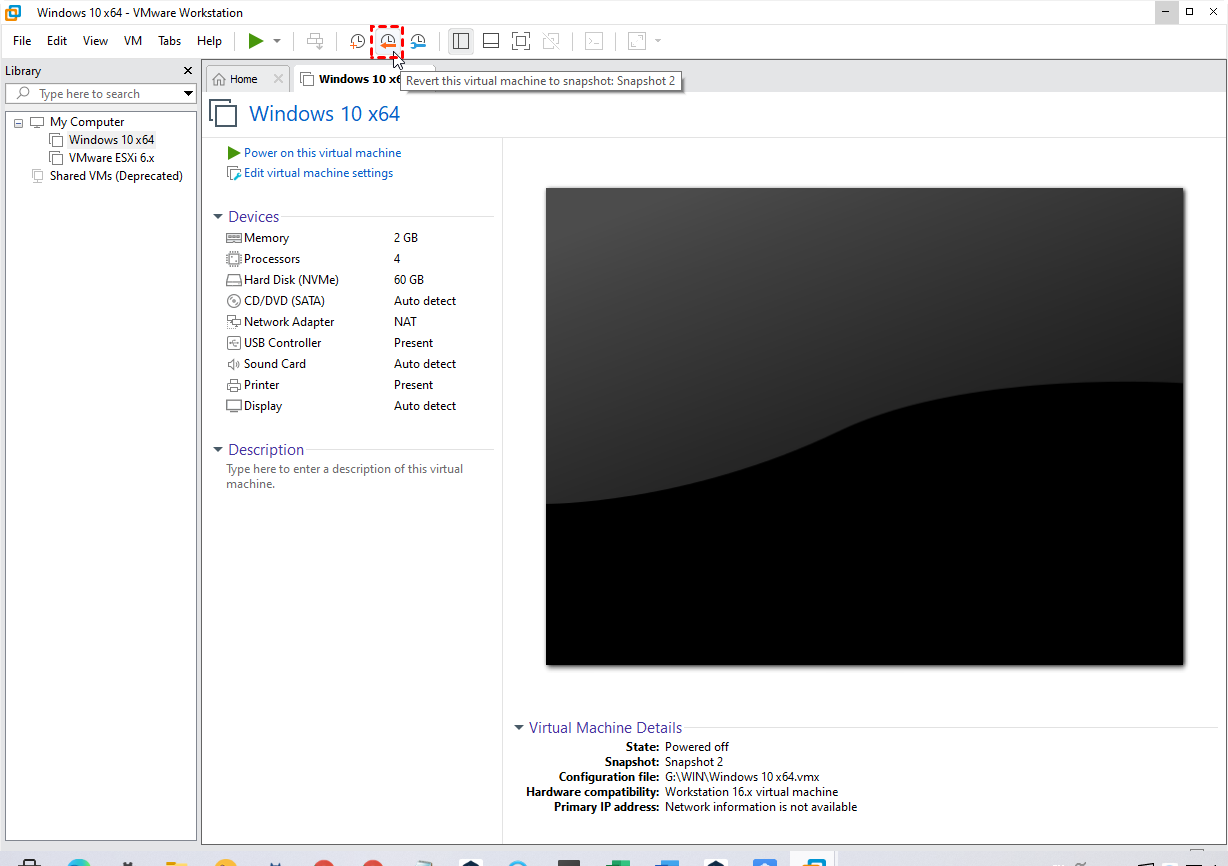
1. Launch VMware Workstation, select the VM you want to revert.
2. If you want to revert to the latest snapshot: Click Revert button on the toolbar.
If you want to revert to another previous snapshot: Right-click on the VM name and select Snapshot > Snapshot Manager. Select the specific snapshot and click Go To.
3. Click Yes in the pop-up Confirm window.
Hyper-V: Creating checkpoints for quick VM recovery
Starting from Windows Server 2012 R2, Hyper-V checkpoint was renamed from snapshot. Functionally, Hyper-V checkpoint = snapshot.
In this section, I will introduce the specific steps on how to use Hyper-V checkpoints to achieve instant VM recovery.
📢Create checkpoint on Hyper-V
1. Launch Hyper-V Manager. Right-click on the VM name and select Checkpoint.
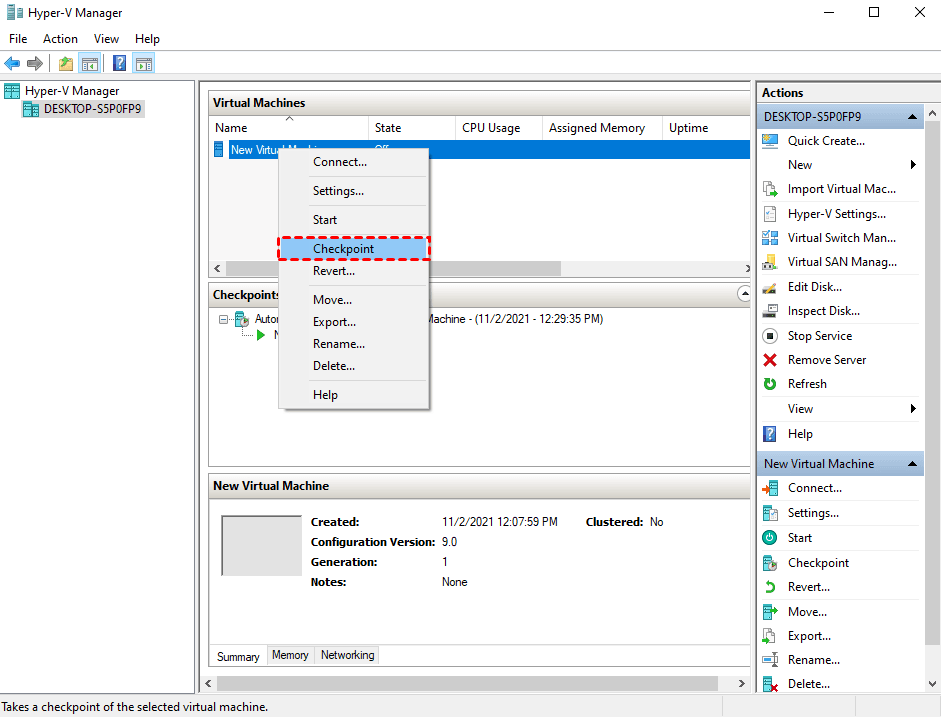
2. Wait for the checkpoint creating progress. When it’s accomplished, the checkpoints will be intuitively listed in the Checkpoints window for further manage or restore.
📢Restore Hyper-V checkpoint
1. Launch Hyper-V Manager, and select the VM you want to restore. Operations later will be different according to different needs.
2. If you want to apply the latest checkpoint: Right-click on the VM name and select Revert.
If you want to apply another previous checkpoint: Right-click the checkpoint in Checkpoints window below and select Apply.
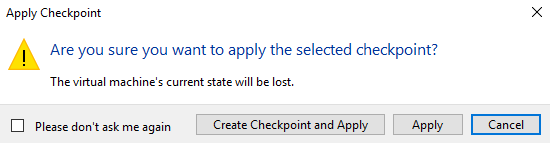
3. In the pop-up window, there are 4 options:
- Create Checkpoint and Apply: Create a new checkpoint to save the current state before apply this checkpoint. Then you can undo the application of this checkpoint if the operation fails.
- Apply: Directly apply this checkpoint to revert the VM to the previous state. You cannot undo this action.
- Cancel: Close the dialog box without doing anything.
- Please don’t ask me again: It is not recommended to check this option, because you don’t know which option will be chosen by default. If it’s Apply, it may cause you irreparable data loss.
Summary
To maintain the work continuity, instant VM recovery speed and less downtime are commonly considered by enterprises.
VM snapshot is the easiest built-in way to achieve instant VM recovery, and a convenient failsafe measure. But relying on snapshots is still dangerous and may result in data loss. Therefore, to avoid this situation, it is better to create independent VM backups.
In this article, I recommended AOMEI Cyber Backup. It allows you to auto back up multiple VMs on a VMware or Hyper-V host with simple steps, and perform instant VM recovery safeguarding your VM data.

