
How to Undo Quick Format? [2026 Full Guide]
This post provides 5 viable ways to show you how to undo quick format hard drive and recover data in a breeze.
By Teresa / Updated on March 9, 2026
Is it possible to undo the formatted hard drive?
Before using a new hard drive, it is necessary to format it and generate a File System for better use.
Also, while using the device, disk formatting is also required under many circumstances.
E.g., if the hard drive is corrupted, to recover corrupted hard drive, you need to get off the data and format it to bring it back to normal;
Not to mention, many people have accidentally performed a quick format on their devices.
Undo a quick format on a hard drive
Did a quick format on the wrong drive and now I have lost ALL my work. Is there a way to undo this?
- Question from Tom’s Hardware
Quick format Vs. Full format
| Delete files | Create a new file system | Write zeros | Check bad sectors | |
| Quick format | ✓ | ✓ | ✕ | ✕ |
| Full format | ✓ | ✓ | ✓ | ✓ |
A quick format only deletes the data on the hard drive but does not write any new data to overwrite the original data on it, which makes it feasible to recover data from the quick formatted hard drive.
Now methods of how to recover files after quick format are stated below.
How to recover data from quick formatted hard drive without a backup
Data recovery after disk formatting is not that easy to achieve without the help of professional data rescue services or backups. Among many solutions, some tested ways are prepared for you.
▶ Method 1. Undo quick format with FastRecovery
When facing file loss due to disk formatting, users will think of backups. But sometimes, accidents come all of a sudden – problems can force you to perform a quick format, not to mention that many users don’t have the habit of backing up files.
Then, in this case, how to recover files after quick format if there are no backups? Are there any easy and efficient tools that can help users recover deleted and missing files without any problems?
A professional FastRecovery will be your preferred option. It should provide an intuitive user interface, a simple use process, and a fast speed in data scan and recovery.
Among seas of tools, FastRecovery is the best choice to guide you. Designed for Windows users, it is competent, convenient, comprehensive, and also compatible.
- Competent: use advanced scanning methods and algorithms to recover the most frequently used file formats: png/jpg/mp4/mov/docx/xlsx/pdf/zip/HTML, etc.
- Convenient: Support file filtering/sorting/previewing/recovery while scanning.
- Comprehensive: Suitable for all-inclusive data loss scenarios, including disk formatting, deletion, virus, etc.
- Compatible: Available for formatted storage devices on Windows 11/10/8/7/Server.
Now learn how to undo format hard drives using FastRecovery in 3 steps.
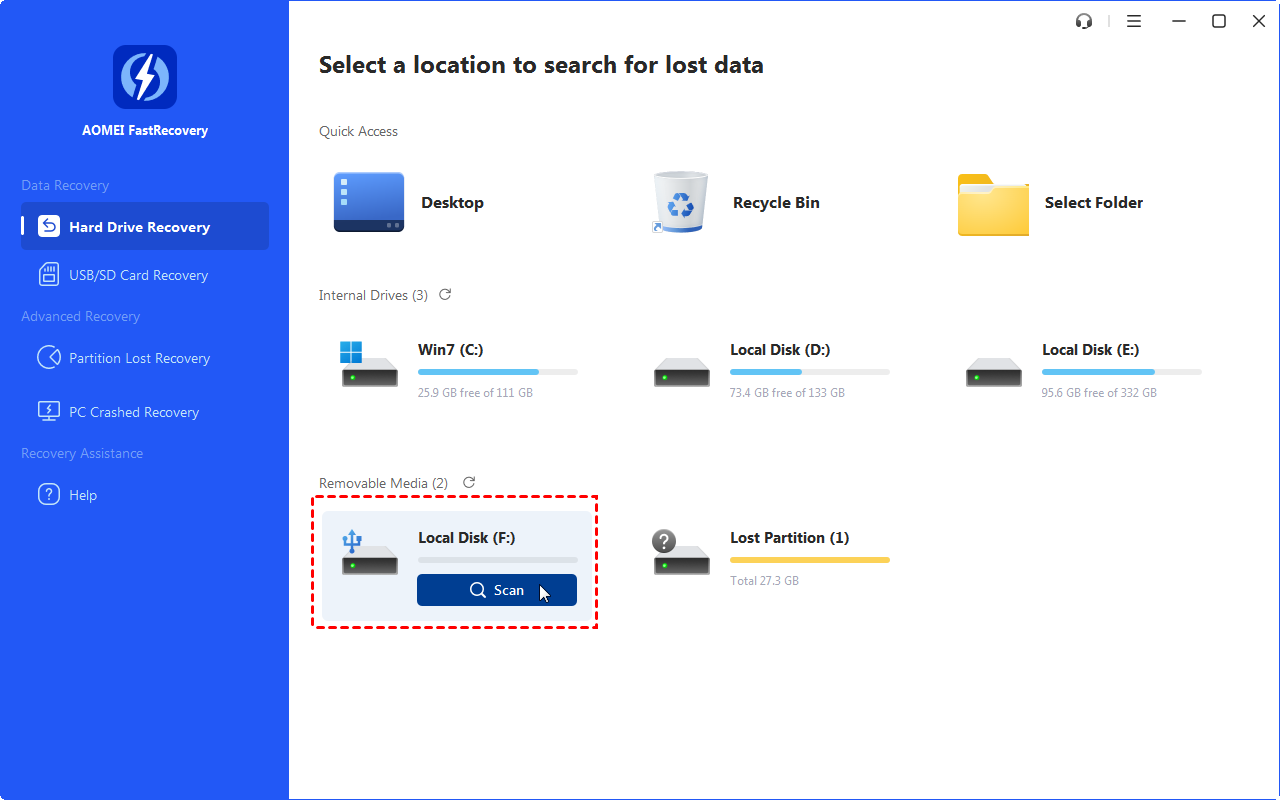
Step 1. Install and run the software > Find the formatted hard drive to start quick format data recovery > Click Scan.
Step 2. It will scan the drive with Quick Scan. In addition, you can use the Filter and Search bar to narrow the scope to search for the files you need quickly. If the target file is still not found, click Deep Scan to search for more disappearing files on that drive.
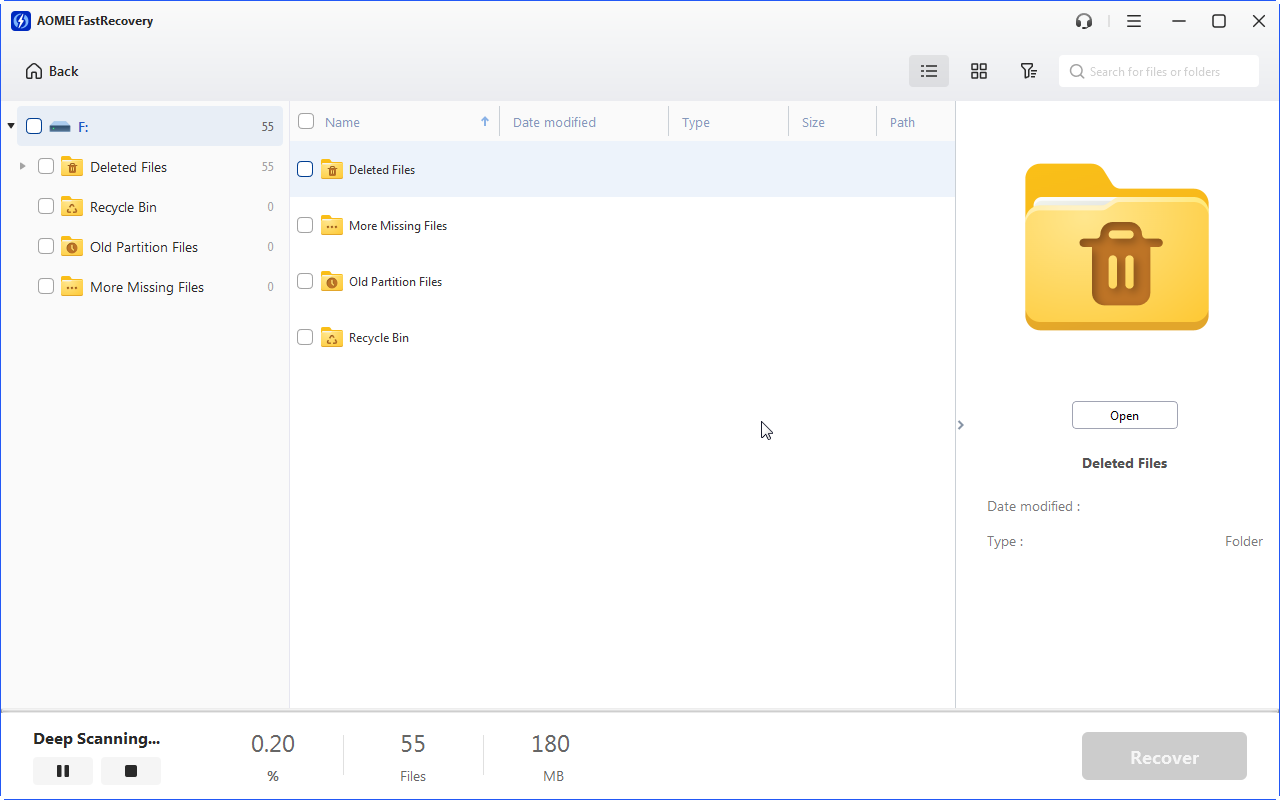
Step 3. Finally, find the files or folders you need to recover and click Recover.

It not only applies to an internal hard drive but also works perfectly when connecting an external device; for example, you could use it to recover data from flash drive after format.
▶ Method 2. Recover quick format data via Windows File Recovery
Windows File Recovery is one of the eligible tools to help you recover files after quick format. Developed by Microsoft, it is available on Windows 10 and above machines.
Using recovery modes and switches, it restores deleted and missing files from a healthy/formatted/corrupted source drive to a target drive.
- Recovery mode: according to different file systems and data loss situations, the tool uses different modes to scan data.
- Switch: parameters to filter the scanning range.
- Source drive: the place where the deleted or missing files were stored.
- Target drive: another drive to save the recovered files.
To learn a more detailed explanation of modes and switches, refer to the how to use Windows File Recovery guide.
- Notes:✎...
- This app only supports machines using Windows 10, version 2004 (Build 19041), and above.
- If needing any help in correcting the syntax of the command, check the Windows File Recovery tutorial.
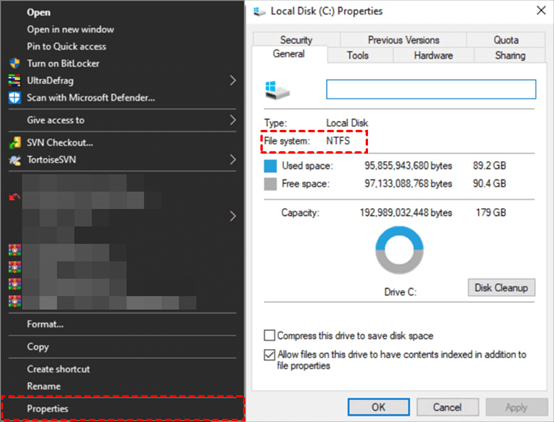
Step 1. Go to This PC > right-click on the formatted hard drive > click Properties. Check the File System.
Step 2. Choose a recovery mode. Extensive is recommended.
| File system | Scenarios | mode |
| NTFS | Deleted recently | Regular |
| NTFS | Deleted for a while | Extensive |
| NTFS | Formatted disk | Extensive |
| NTFS | corrupted disk | Extensive |
| FAT and exFAT | Any | Extensive |
Step 3. Select switches to narrow the scanning range and target your files faster.
| Switches | Meaning | Supported mode(s) |
| /n | Filter the scan range: scans for a specific file with its file name/path/type, etc. | All |
| /y: | Recovers specific extension groups. | Signature |
| /k | Recovers system files. | NTFS Segment |
| /segment | Segment mode; recovers files under NTFS drives using file record segments. | Segment |
| /signature | Signature mode; recovers files under all file system types using file headers. | Signature |
| /u | Recovers undeleted files, for example, from the Recycle Bin. | NTFS Segment |
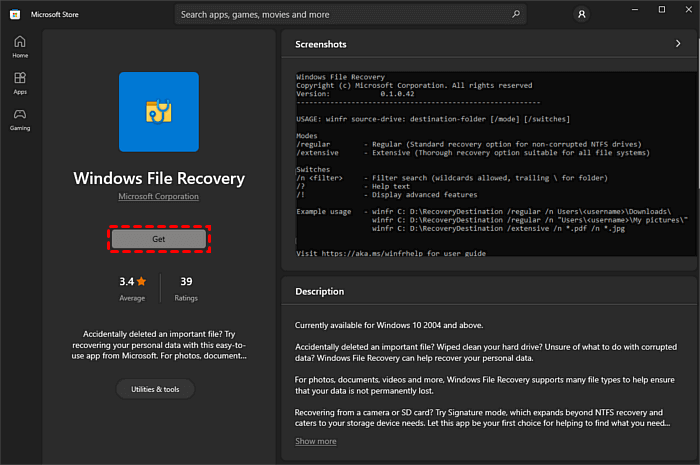
Step 4. Go to Microsoft Store > click Get to install Windows File Recovery.
Step 5. Run the program > input the command:
winfr source-drive: destination-drive: [/mode] [/switches]
For instance,
winfr F: D: /extensive /n *.jpg
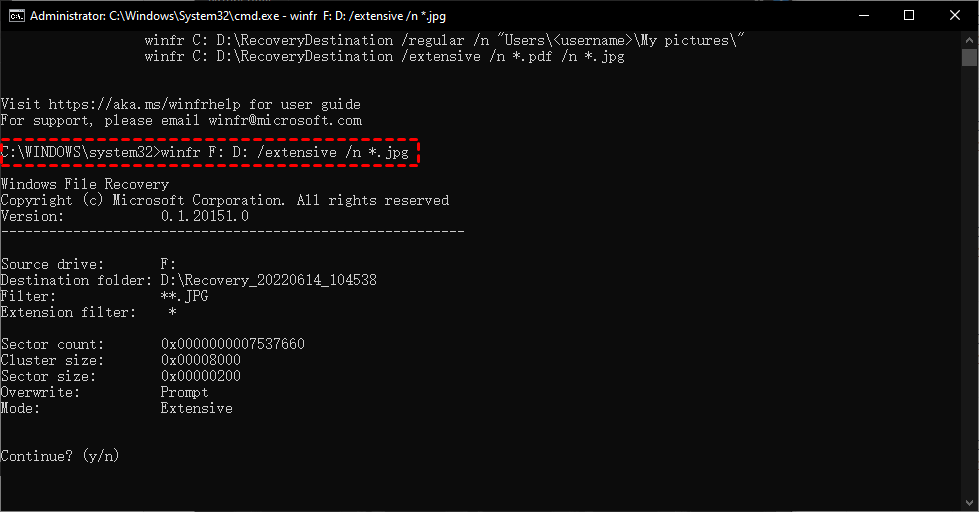
Press y to continue. Thus you could retrieve all lost jpg files from the quick formatted F: drive to the D: drive.
- Pros: free;
- Cons: Without GUI, not user-friendly, and difficult to use; slow in speed and recovery rate;
How to recover quick format hard drives from Windows backup
If you have the habit of backing up Windows regularly, you can restore files from backup after quick format, including Backup and Restore, File History, and OneDrive.
▶ Method 1. Recover files after quick format using Backup and Restore
Backup is another remedy to fight against data loss. Users could restore files from backups in Windows 10 and 11 to get their data back.
Backup and Restore (Windows 7) is the backup tool built in Windows machines since Windows 7. Using it, users could back up any files or folders from any local location.
- Note:✎...
- But please note that it can only backup and restore files on local drives. If you need to undo quick format on external hard drives, please use professional data recovery apps like FastRecovery.
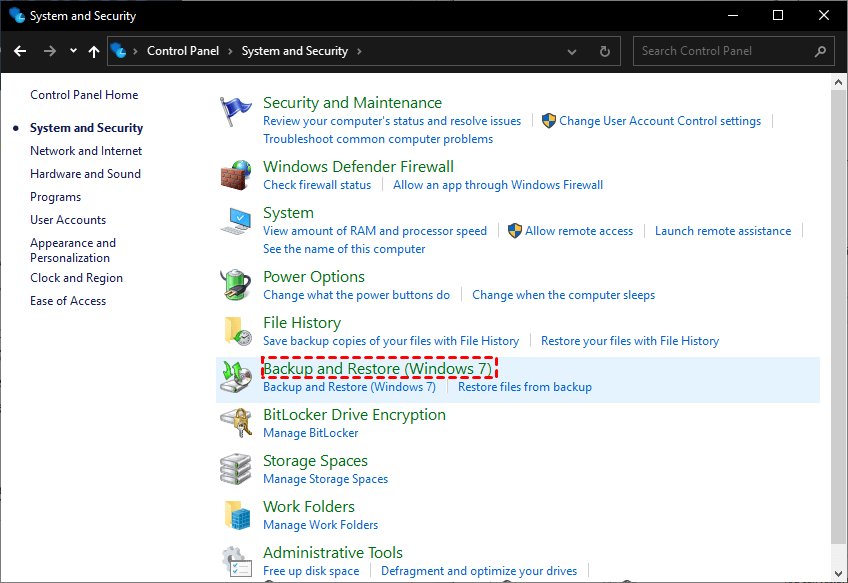
Step 1. Open Backup and Restore.
Go to Control Panel > System and Security > Backup and Restore (Windows 7).
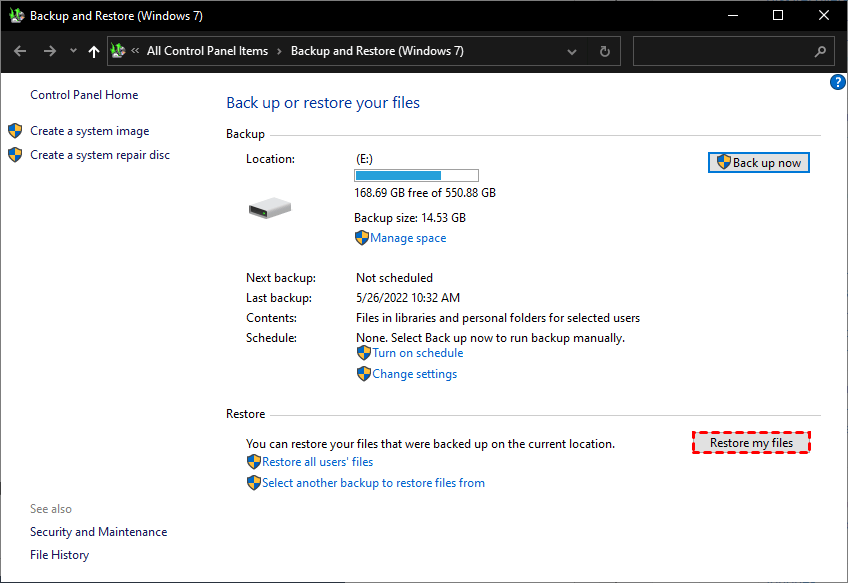
Step 2. Click Restore my files.
Under the Restore menu, click Restore my files.
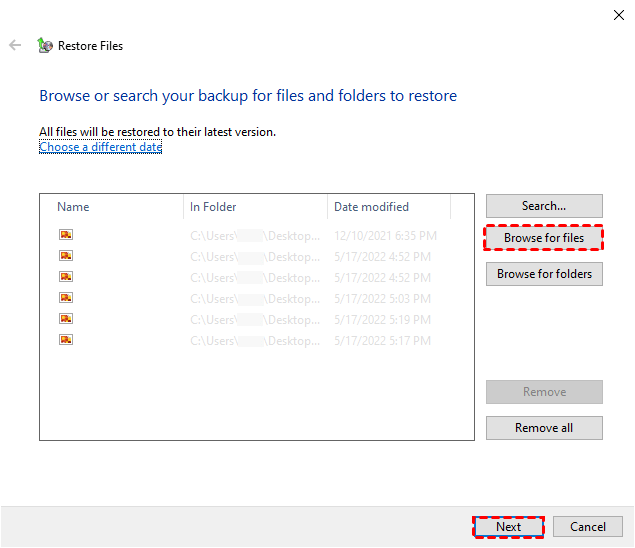
Step 3. Select the target files.
Click Browse for files/folders > select the files you want > Next.
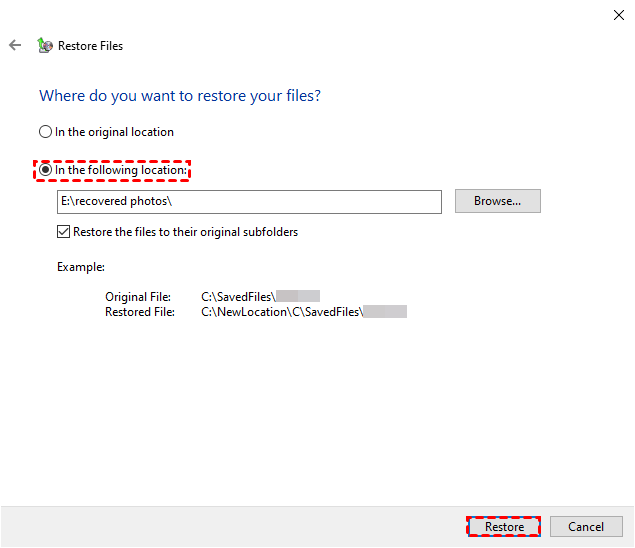
Step 4. Select a location to store these files.
Choose a target place > click Restore. It is suggested not to restore the files to their original locations to prevent overwriting.
Windows 7 machines also have this feature. Users could recover deleted files in Windows 7 using this app.
- Pros: free; compatible with a wide range of Windows OS;
- Cons: require backups in advance; only apply to local drives but not external hard drives;
▶ Method 2. Recover quick format files with File History
File History is designed to back up pictures, music, videos, desktop folders, document files, and files in offline OneDrive files saved on your computer. In addition to Backup and Restore, you can also use File History to retrieve files that have been formatted.
- Note:✎...
- File History is supported on Windows 8.0 and above.
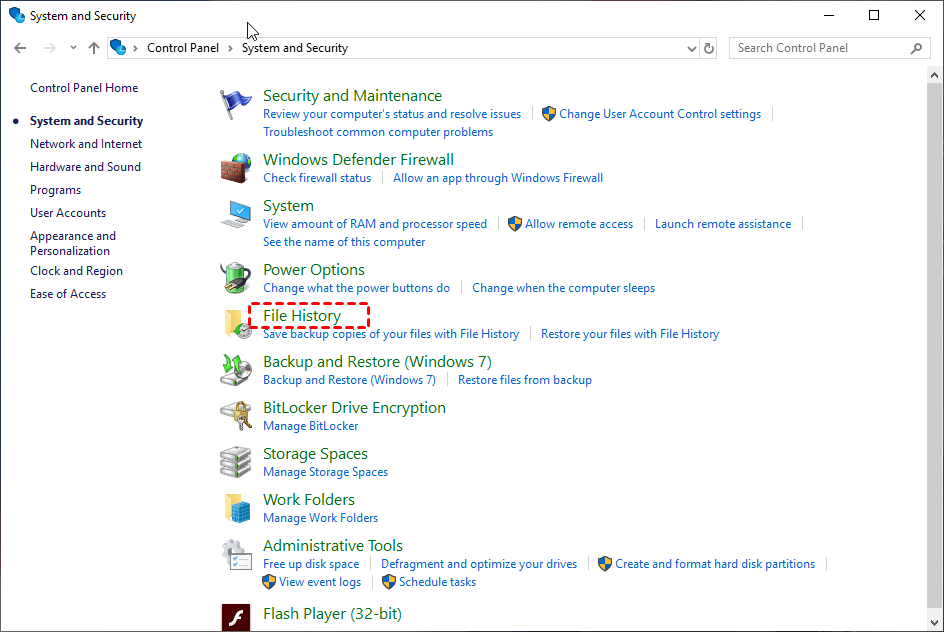
Step 1. Open the “Control Panel”. Then, click “System and Security”.

Step 2. Under the "File History" menu, select “Restore your files with File History”.
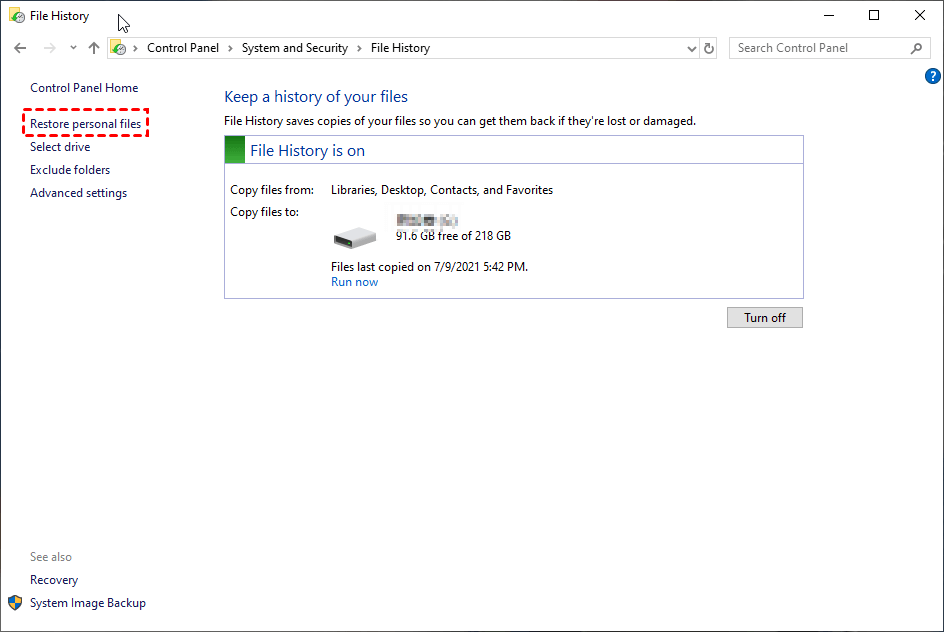
Step 3. Click the “Restore personal files”.
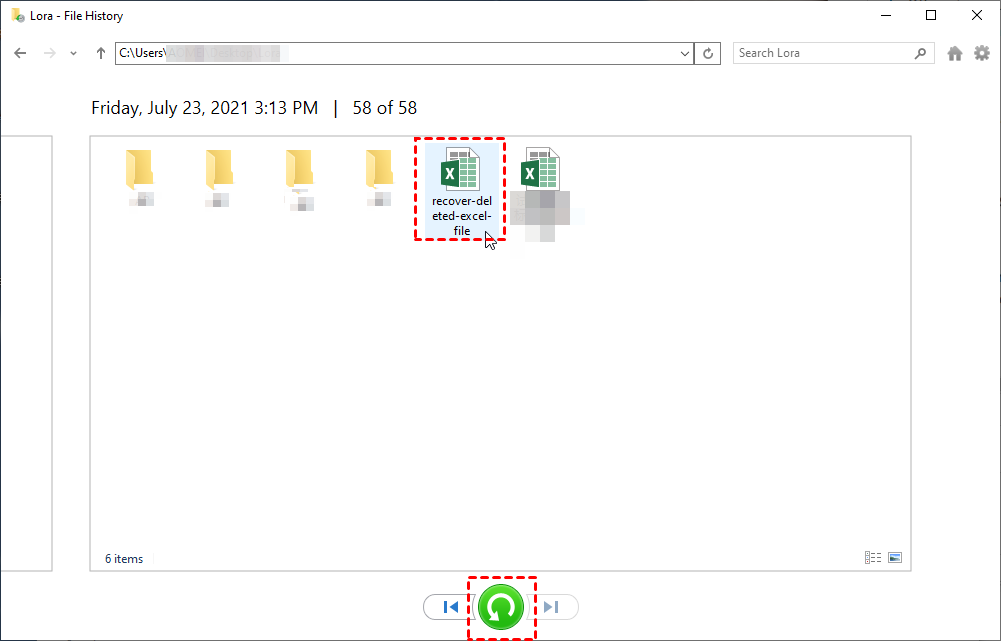
Step 4. Locate files erased by formatting and click “Restore” to get it to its original location.
▶ Method 3. Recover formatted drive using OneDrive
OneDrive is Microsoft's next-generation network storage tool, renamed from SkyDrive. It is designed to help users store data better, synchronize backup data, etc. to prevent data loss. If you have already backed up your data in OneDrive, then you can use it to recover the formatted hard disk.
Step 1. Navigate to the OneDrive website and log into your account.
Step 2. Use "Search everything" to find files. You can search for files by name or scroll through the list of files displayed. Note that files in your personal vault are not displayed in the search results.
Step 3. If you don't find your missing files in the search results, you can try checking the Recycle Bin. On the left side of the page, click Recycle Bin.
Step 4. In the Recycle Bin, look for the missing file or folder. If you find the item you are looking for, select it and then select Restore at the top of the page.
Step 5. If the item is not found in the long list, you can select "Restore all items" at the top of the page.
FAQ about undo quick format
Solutions to undo quick format are all given with details above. Choose one that suits your needs. Also, some extra info is gathered as well.
