A Complete Guide to ASUSTOR Backup Plan and Its Alternative
You can learn how to use ASUSTOR Backup Plan to create a backup to the NAS in this article. This article also provides you with another NAS backup software, which is applicable to any other NAS besides AUSTOR.
By Rosie Updated on March 24, 2026
A Brief Sight of ASUSTOR NAS Backup Plan

ASUSTOR is a leading innovator in private cloud storage (NAS) and video surveillance (NVR) solutions. The company also specializes in developing and integrating firmware, hardware, and applications related to these technologies.
Backup Plan is ASUSTOR’s free backup software for Windows OS, allowing users to back up data from Windows PCs or servers to various destinations, including NAS, FTP servers, or local machines. It offers features such as one-time backups, scheduled backups, and synchronization. With Backup Plan, you can perform external and internal backups to ASUSTOR NAS, remote sync, FTP backups, and cloud backups. In case of data loss or damage, it also includes user-friendly data recovery options.
How to Create a Backup Using ASUSTOR Backup Plan
First, I will teach you how to create a scheduled weekly backup plan that backs up data from your computer to your ASUSTOR NAS.
- Download the latest version of Backup Plan and install it on the computer.
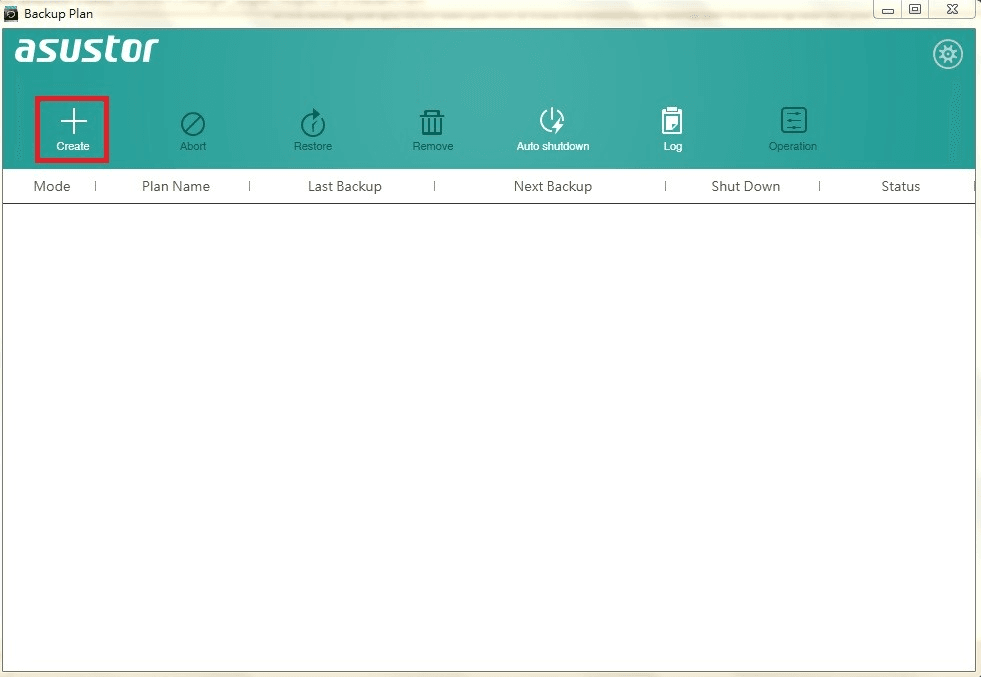
- Double-click Backup Plan to start it. To create a backup to ASUSTOR NAS, click Create in the upper left corner.
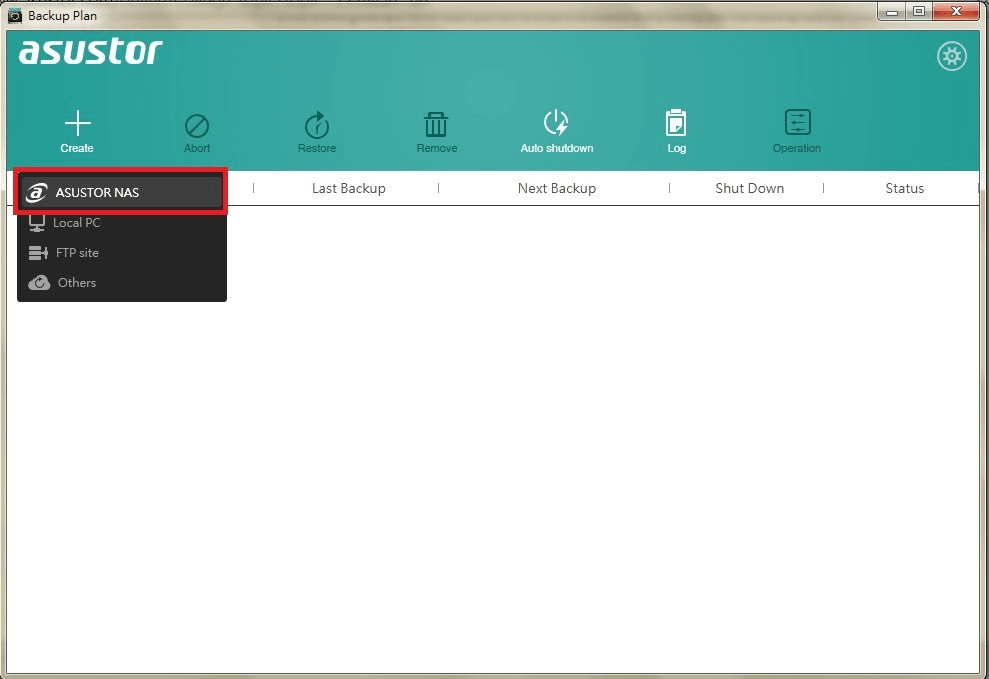
- Select ASUSTOR NAS as your backup destination.
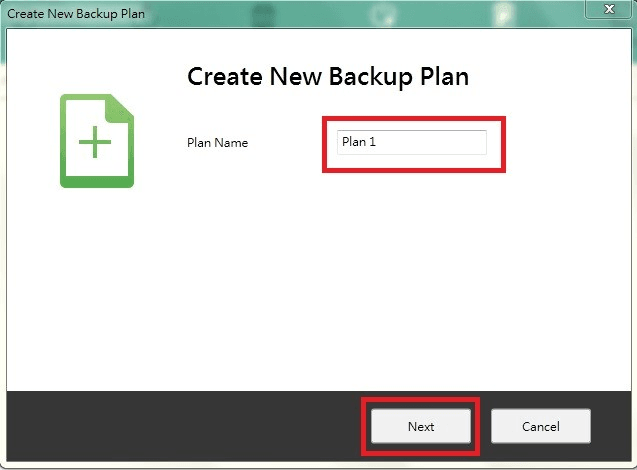
- Type in plan name and click Next.
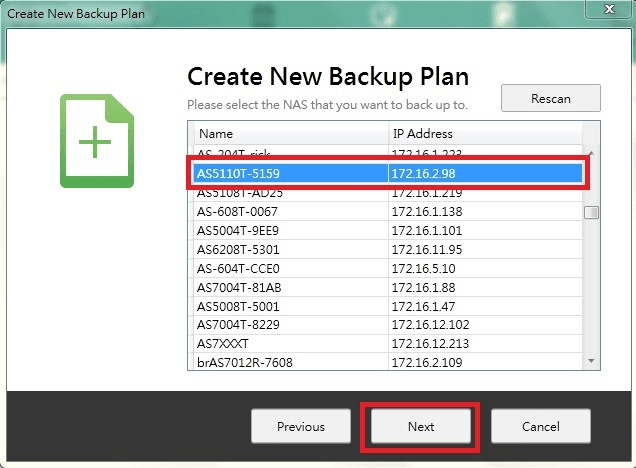
- The program will scan your local area network to find ASUSTOR NAS devices. Select the NAS of your choice from the list and click Next.
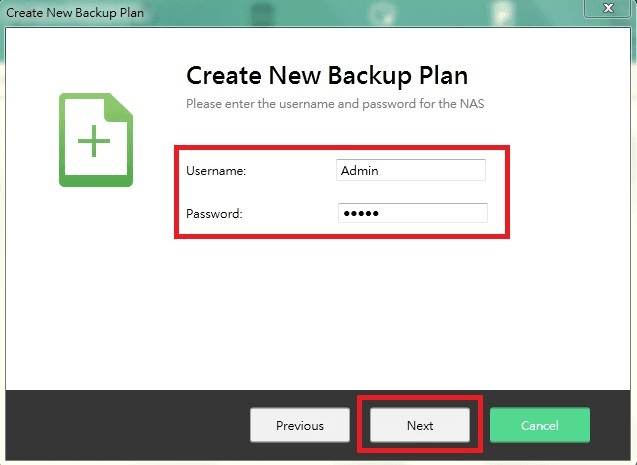
- Enter the username and password for your NAS and then click Next.
- Then you will be asked to specify the backup method. Backup Plan provides 3 different backup methods. To create a scheduled weekly backup plan, we select Schedule Backup and set the backup frequency to Weekly.
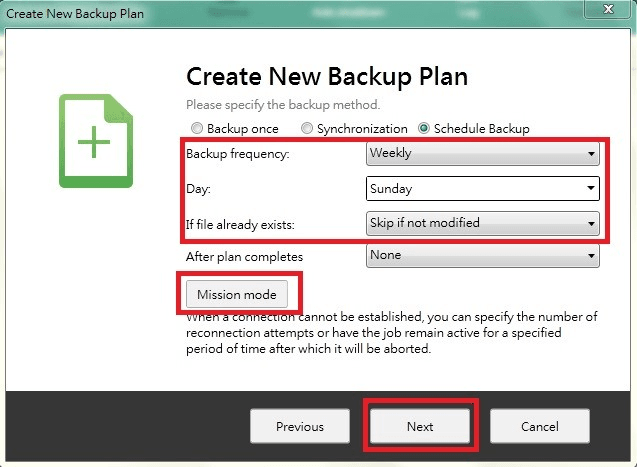
Tips✍:
◑ Backup once: After configurations are completed Backup Plan will execute a one-time backup.
◑ Synchronization: After configurations are completed, Backup Plan will execute the backup job once. Afterwards, Backup Plan will continue to monitor the local computer source folder that you have selected. When new files are added to this folder, they will be automatically synced to the destination NAS.
◑ Schedule Backup: This method allows you to schedule a recurring backup job.
◑ If file already exists: You can choose to Skip if not modified or Overwrite any already exiting files.
◑ Mission mode: Enabling Mission mode allows you to configure the time period under which your backup job will be active, after which it will be aborted if not started.
- Then Backup Plan will now scan your local computer for folders that can be backed up. Select the folder(s) that you wish to back up from the list and then click Next.
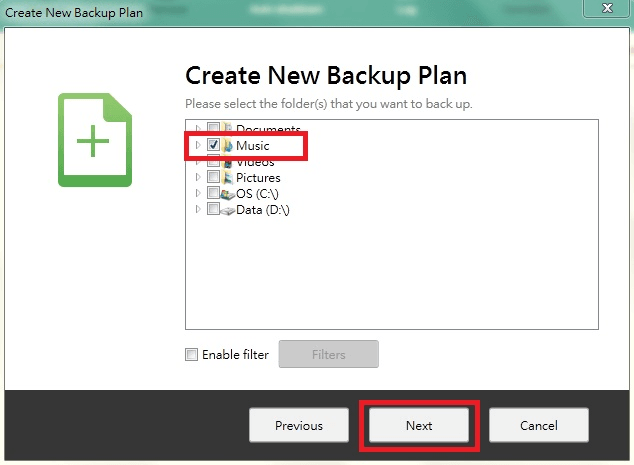
Tip✍: The Filters button can allow you to select the file types that you wish to exclude or include in your backup job.
- Select the destination folder to save the backup job from the provided list, and then click Finish.
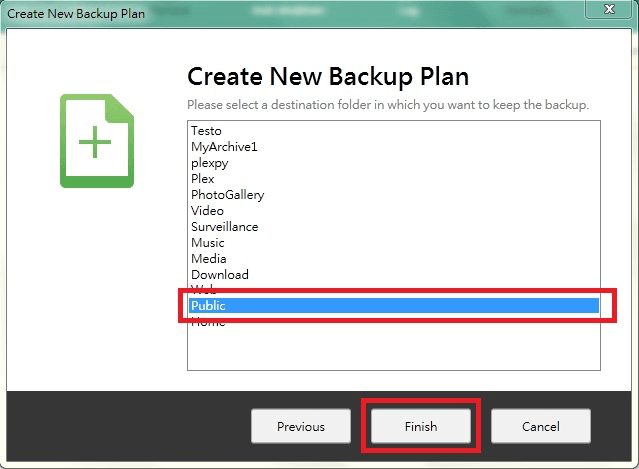
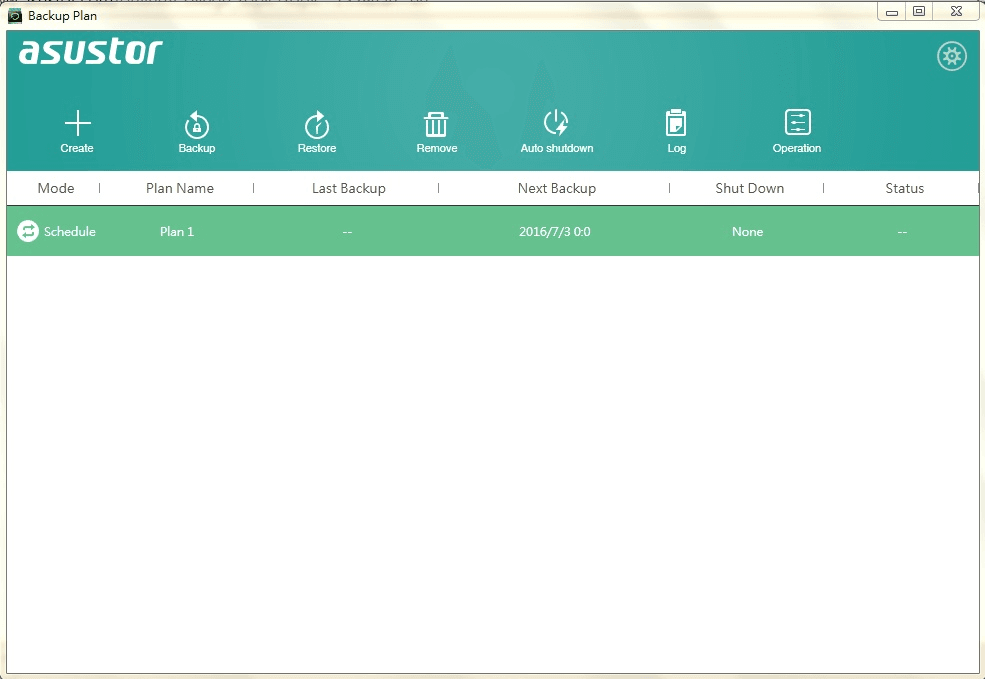
- Then you should now be able to see the backup plan you just created in the Backup Plan interface.
Backup to NAS of All Kinds with Free AOMEI Backupper
ASUSTOR Backup Plan utility allows users to easily backup data from Windows PCs or servers to an ASUSTOR NAS. If you want to create a backup to other NAS, you may encounter the problem of ASUSTOR Backup Plan not working. In this case, I recommend you to use another free NAS backup software—AOEMI Backupper Standard.
Next, I will show you how to use this freeware to backup files to NAS. Click the download button below to install it on your computer.

-
It supports backing up system/disk/partition and files to all kinds of NAS or network share, such as QNAP NAS, Synology NAS, Seagate NAS, etc.
-
It allows you to schedule automatic backup to NAS or network share. You can use Daily/Weekly/Monthly schedule backup or Event triggers, etc.
-
It enables you to perform data recovery when an accident occurs as long as the NAS is connected. Such as Synology file recovery, Seagate NAS recovery or QNAP disaster recovery, etc.
-
It provides you with 3 backup methods: full backup, incremental backup or differential backup to ensure that you can always have the changes made on your computer.
Step 1. Launch AOMEI Backupper, then navigate to Backup -> File Backup.

Step 2. Click Select Source to specify the data you want to backup. You can add multiple items as you like.

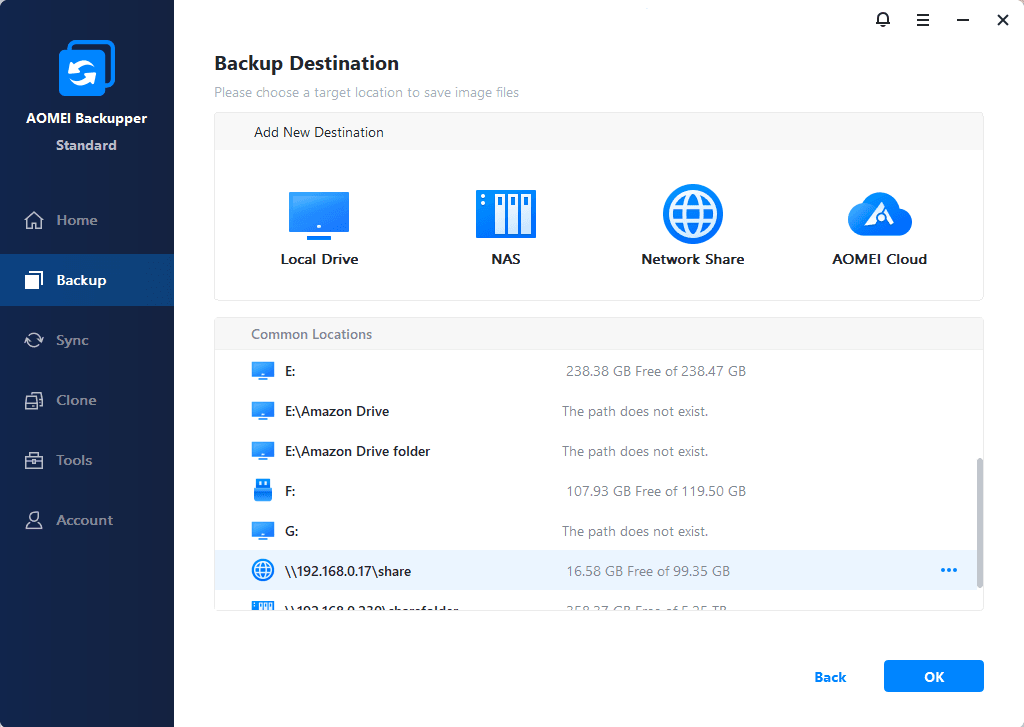
Step 3. Click on the destination box. In the pop-up window, click NAS > Add NAS.
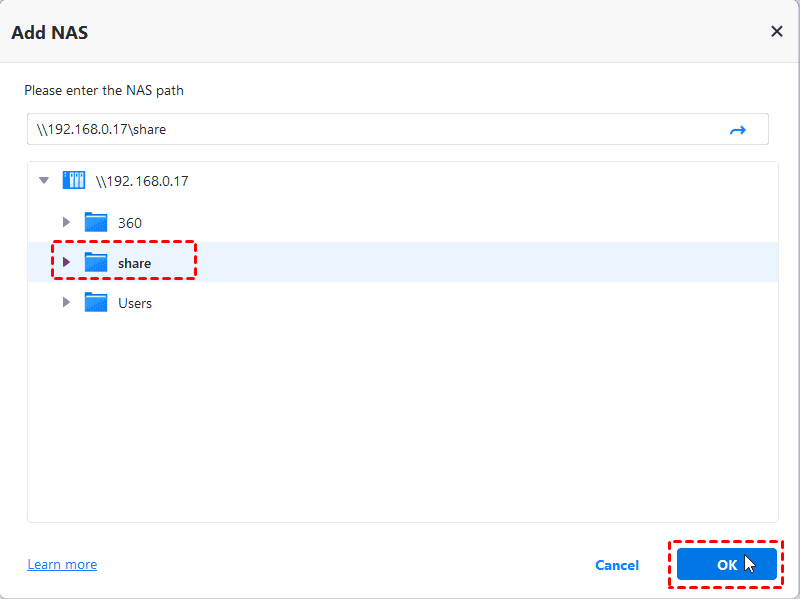
Step 4. In the following window, enter the path of the NAS device. After the NAS device has been added, all the folders under this NAS device will be listed. Choose one folder as the destination path, and then click OK.
Step 5. Then you can further configure the backup by clicking Schedule in the lower left corner of the program to set automatic backup to NAS.
✦ Daily: Set a time point in the future to perform the backup task once a day or at intervals.
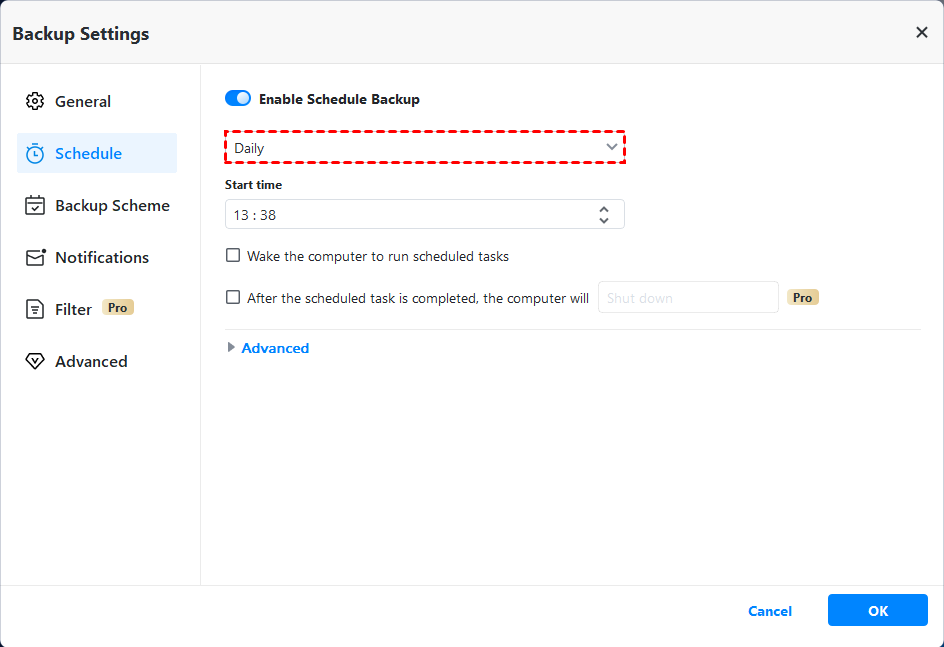
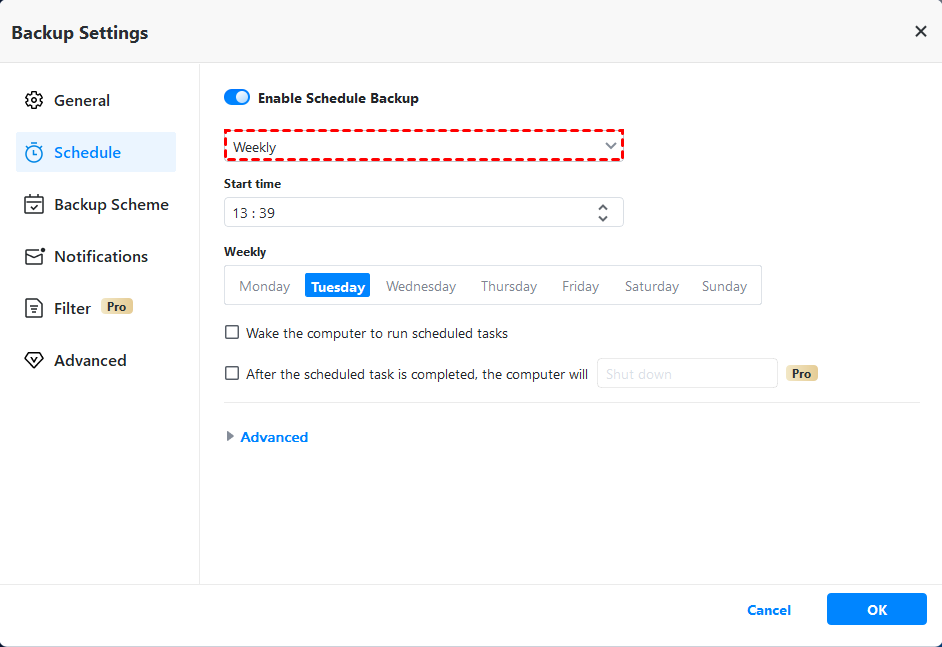
✦ Weekly: Set a time point and the program will automatically perform the backup at this time on the chosen day(s) every week.
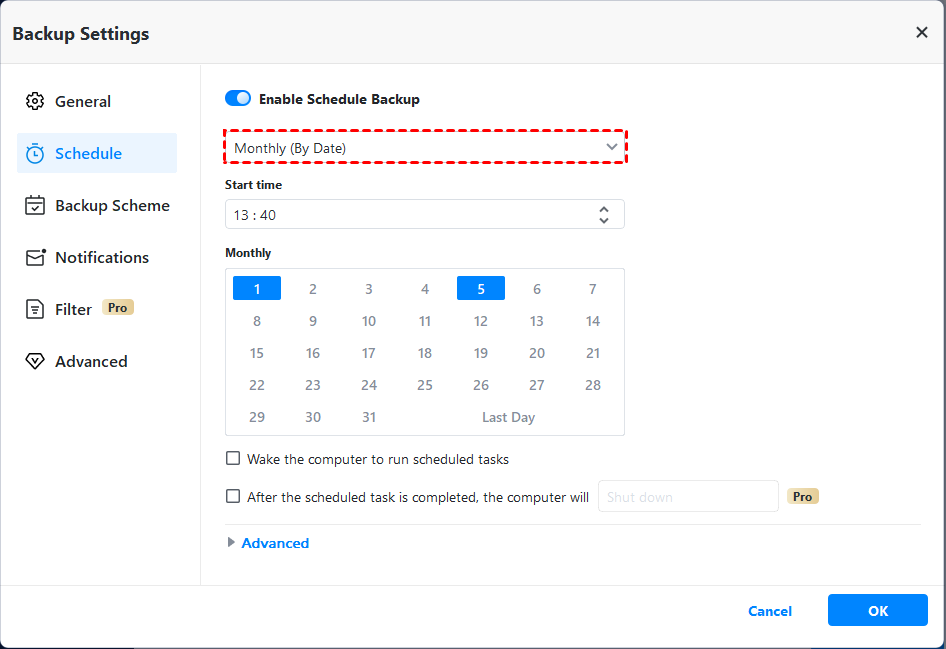
✦ Monthly: Set a time point on a specific day from the calendar to perform the backup task every month and you can select multiple days on the calendar.
Other options:
◐ Options: you can comment on this task, set normal or high compression level, enable email notification, etc.
◐ Backup Scheme: you can choose the backup methods here. If you enable automatic backup cleanup option, it will help you manage destination storage by auto-deleting old backups. This requires a Standard upgrade to AOMEI Backupper Professional edition or higher.
Step 6. Then, click Start Backup to execute this backup task.
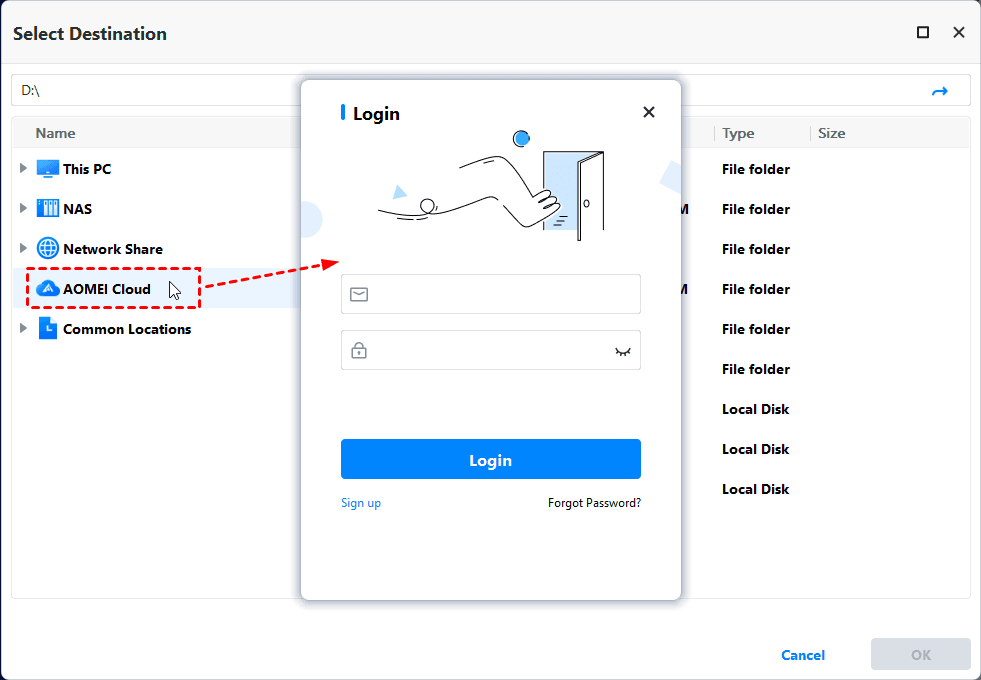
Now you may already have a copy of files and folders. In fact, in addition to Asustor NAS backup, you can still choose to backup files to AOMEI Cloud, which helps you protect your files safely and offers you 1TB free cloud storage in 15 days.
FAQs about ASUSTOR Backup Plan
1. What operating systems does ASUSTOR Backup Plan support?
2. Can I back up data from multiple computers using ASUSTOR Backup Plan?
3. How does ASUSTOR Backup Plan handle file versioning?
4. What should I do if ASUSTOR Backup Plan fails to connect to my NAS?
5. What are the key differences between ASUSTOR Backup Plan and AOMEI Backupper?
Conclusion
After reading this article, I believe you have a comprehensive understanding of the use of ASUSTOR Backup Plan. If your device is not from ASUSTOR, don't be frustrated, you can get help from another comprehensive NAS backup software—AOMEI Backupper.
The software not only provides you with Backup, Restore and Synchronization functions, just like ASUSTOR Backup Plan, but also provides you with Clone and powerful Tools. With its help, you can create a backup of your computer and create bootable media to help you successfully boot your computer when the system crashes. It can also help you perform a bootable clone on Windows 11. Come and try this software now.