Best Synology File Recovery Tools to Recover Files on/from NAS
Backing up data to NAS is no longer a rare situation. By using some Synology file recovery tools, we can quickly retrieve the lost files on the computer. What’s more, you can also learn how to recover accidentally deleted files on Synology NAS from this page.
By Yuka Updated on January 18, 2024
Need to perform Synology NAS data recovery
NAS is the short of Network Attached Storage, which refers to an external storage device connected to the network. NAS devices allow multiple users and computers to store data in a central location, so files can be easily shared among various connected clients.
According to 3-2-1 backup rule, it's safer to have at least three data copies - one for local and two for different devices. Many users choose to back up the operating system, user folders, or entire PC to external disks to prevent unexpected data loss problems resulting from system failures or system updates, etc. In addition to external disks, there are also many users who prefer to back up to NAS, especially for those who have a large family to share multimedia files with, or their requirements for storage space is extremely high. In the long run, NAS will be a cost-effective choice.
But in the process of using NAS, many users have encountered some confusing problems. Below I list the problems encountered by two Synology NAS users.
♨ Case 1: “Hi all, I had accidentally deleted a wrong shared folder on my DS. And, all of my critical data is now gone. A dumb mistake. I am hoping there’s a way to recover this deleted shared folder or the data behind it.”
♨ Case 2: “I am a photography enthusiast and I backed up all my photos on the Synology NAS. When cleaning up my C drive with third-party software, I accidentally deleted all the photos. I also checked the recycle bin and there are no such files. How can I retrieve my files with NAS?”
As we can see, it is inevitable that there will be operating errors in life. Mistakes may result in the loss of important files. Whether it is losing the source file on the computer or the backup file on the Synology NAS, we all need to perform Synology data recovery. Want to know how to solve these problems? Read on!
Recover deleted files on Synology NAS
If you accidentally delete files on the Synology NAS, you can use the Recycle Bin on DSM to retrieve the lost files easily. The Recycle Bin is enabled by default when you create a shared folder. If it is not turned on, you can set it manually to enable the Recycle Bin feature.
Steps to recover deleted files on Synology NAS are as follows:
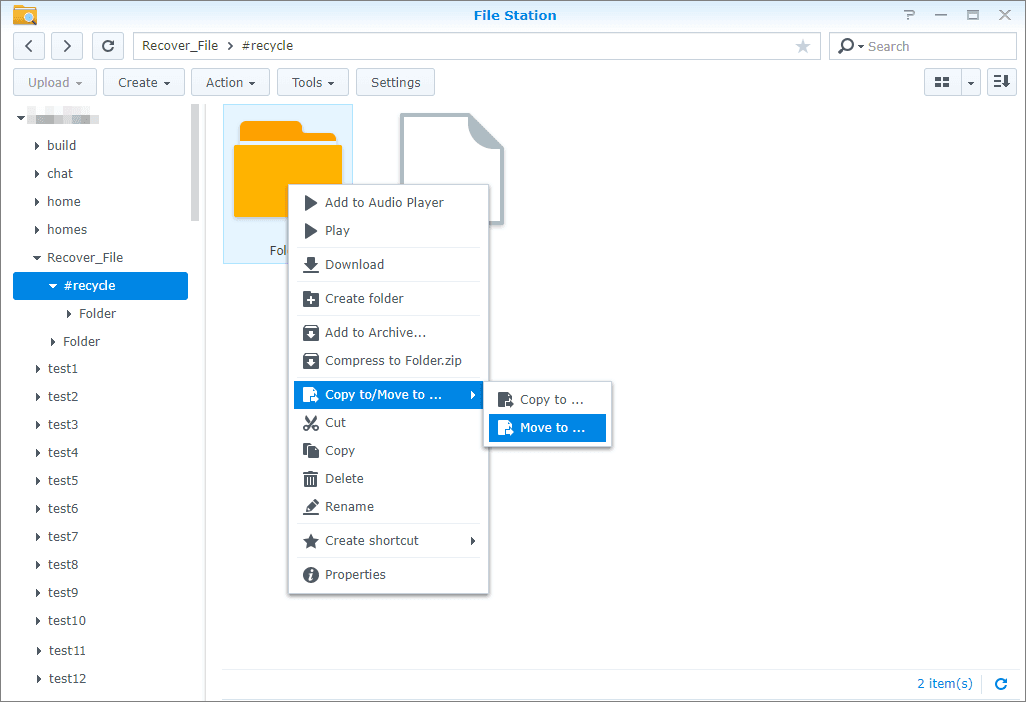
- Launch File Station and go to the shared folder with the Recycle Bin feature enabled.
- Go to the #recycle subfolder.
- Right-click on the file or folder to be retrieved.
- Go to Copy to/Move to… and select Move to… to restore the deleted file to the desired destination
✍ Note: If you did not enable Recycle Bin, but you want to recover your deleted files or folders, you can use Hyper Backup on DSM.
How to recover deleted PC files from Synology NAS
Synology NAS has become a good helper for us to back up data. What if we encounter the problem mentioned by the user above, how to restore our backup from Synology NAS? Two methods are introduced below. You can select the corresponding restore method according to the backup tool used when creating the backup. Select Method 1 if you have backed up files to Synology via Backup and Restore (Windows 7), and Method 2 for backup with third-party software.
Method 1. Synology data recovery via Windows built-in tool
You can use Windows built-in tool Backup and Restore (Windows 7) to retrieve the lost files.
Step 1. Tap the Search button on the taskbar and type “backup” in the search box. Click Backup Settings from the search results and select Backup and Restore (Windows 7) in the pop-up window.
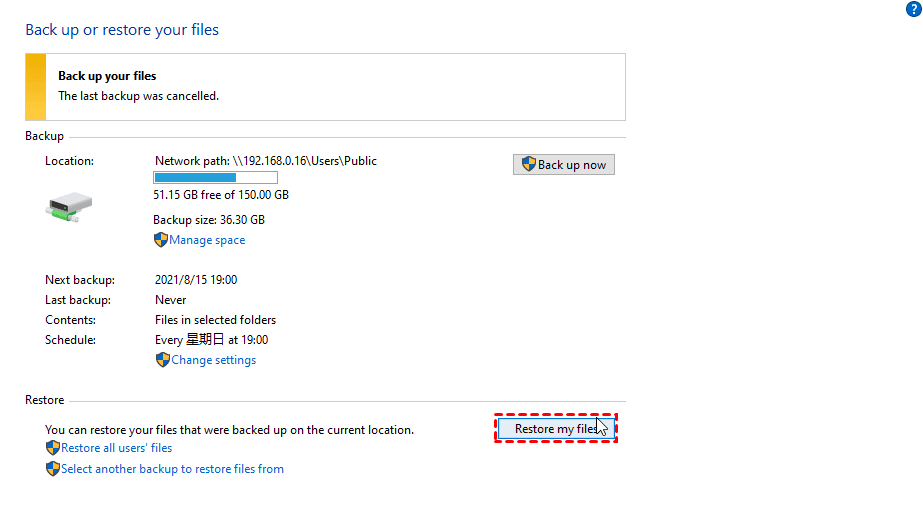
Step 2. Click Restore my files to recover lost files from Synology NAS.
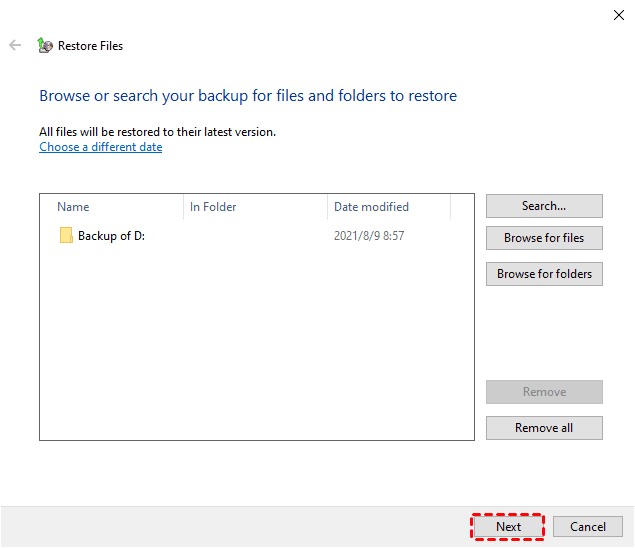
Step 3. In the Restore files page, click Search, Browse for files or Browse for folders to find files or folders you want to restore and select them, then click Next.
Step 4. Select "In the original location" or "In the following location" to store your files. Click Restore to start the pending operation.
Method 2. Free Synology data recovery software—AOMEI Backupper
If you want to find an easier way to recover files saved on Synology NAS, I greatly recommend the best backup and recovery software—AOMEI Backupper to you. Why does this software stand out among many software? There are two reasons.
✹ It is suitable for all Windows PCs and supports all NAS, no brand restrictions. It helps you perform Synology file recovery, Seagate NAS recovery or QNAP disaster recovery.
✹ It allows you to back up data to NAS with just a few clicks. When an accident occurs, you can quickly perform data recovery as long as the NAS is connected. You can also back up NAS data to different storage devices, such as cloud drives, USB, local PCs, etc.
These features are all included in the free Standard version, download AOMEI Backupper and have a try.
Here I use recovering deleted PC files from Synology NAS as an example to show you how to use this free software.
First of all, launch AOMEI Backupper Standard and click Restore, here are two ways provided to perform Synology NAS data recovery.
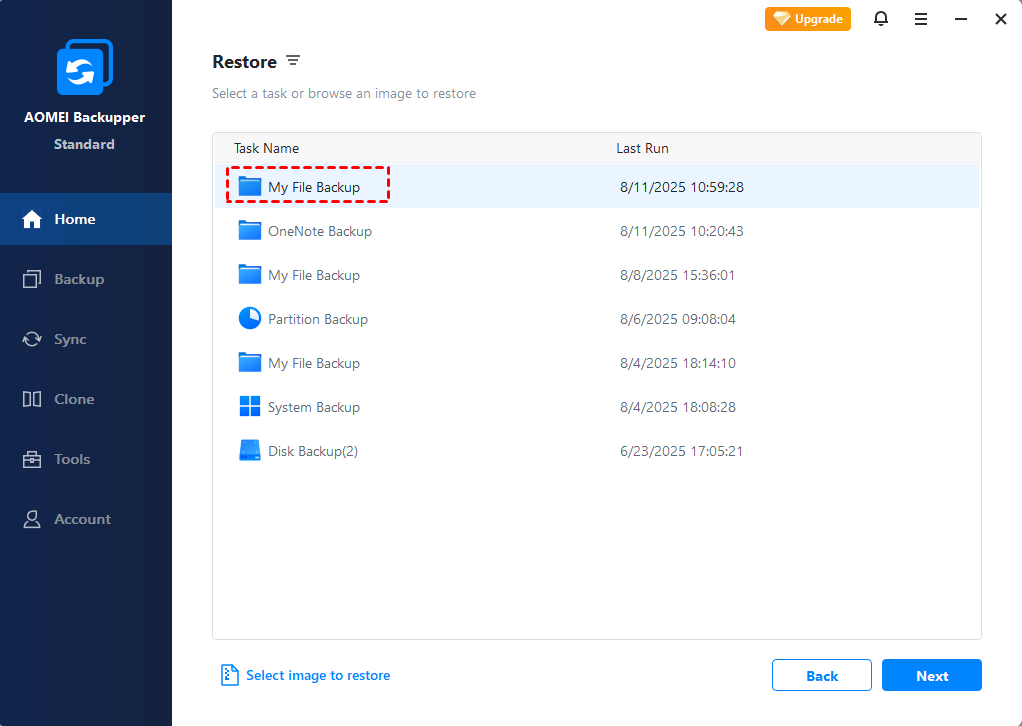
Way 1: Restore from a backup task
Step 1. Click Select Task.

Step 2. Select your file backup and click Next.
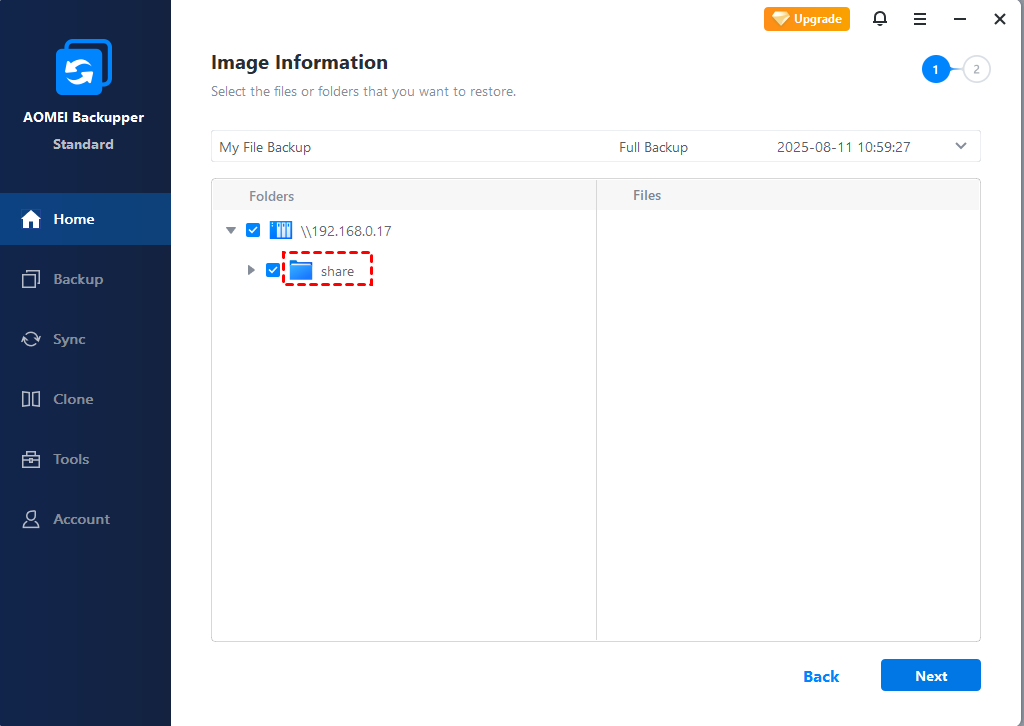
Step 3. Select the files you want to restore and click Next.
Step 4. Select a destination path to restore files and click Start Restore.

Step 5. Wait until the operation has been completed and click Finish.
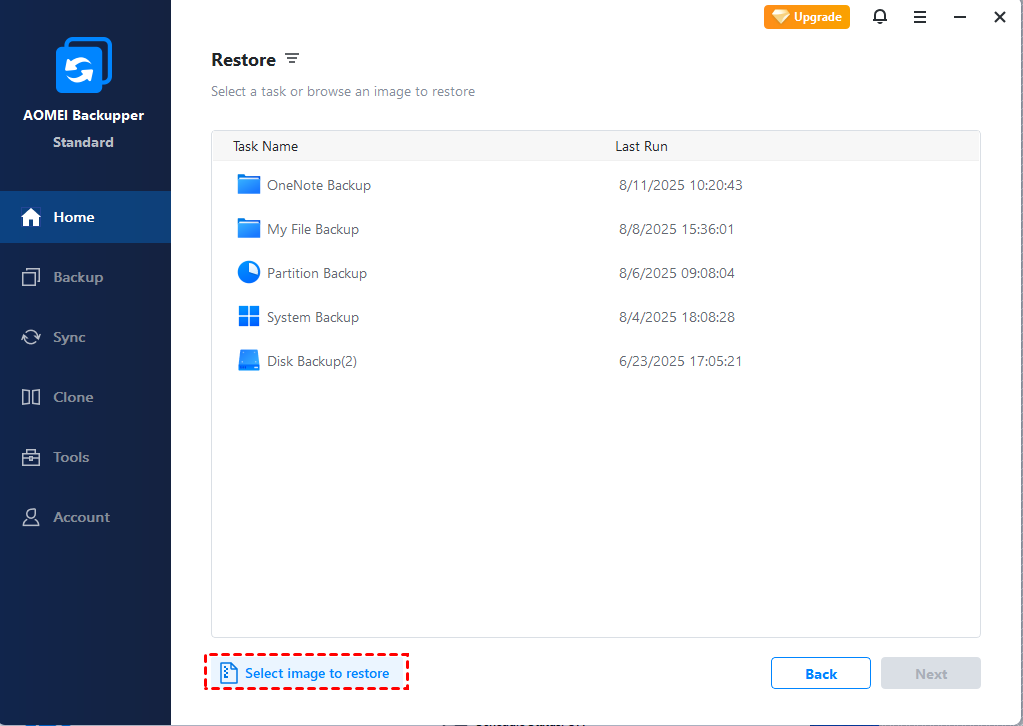
Way 2: Recover from an image file
Step 1. Click Select Image File.
Step 2. Click Share/NAS on the left.
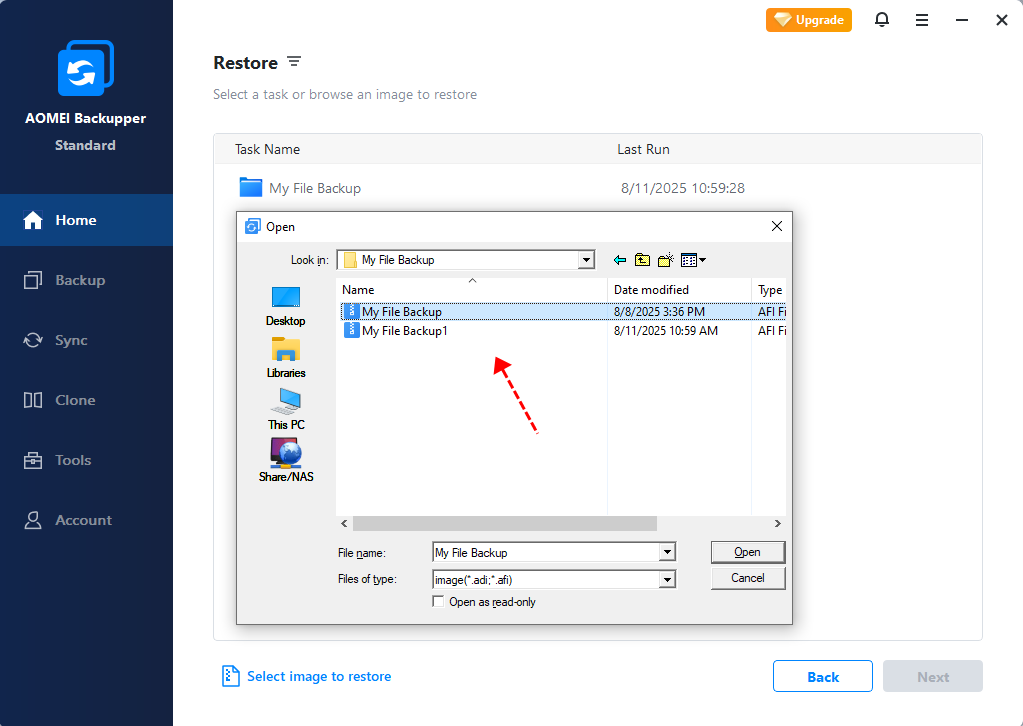
Step 3. In the pop-up window, click Network Location to choose the backup saved on your NAS. And then click OK.
Note: If there is no Synology NAS path under Network Location, you can click Add Share or NAS Devices in the lower left corner to add.
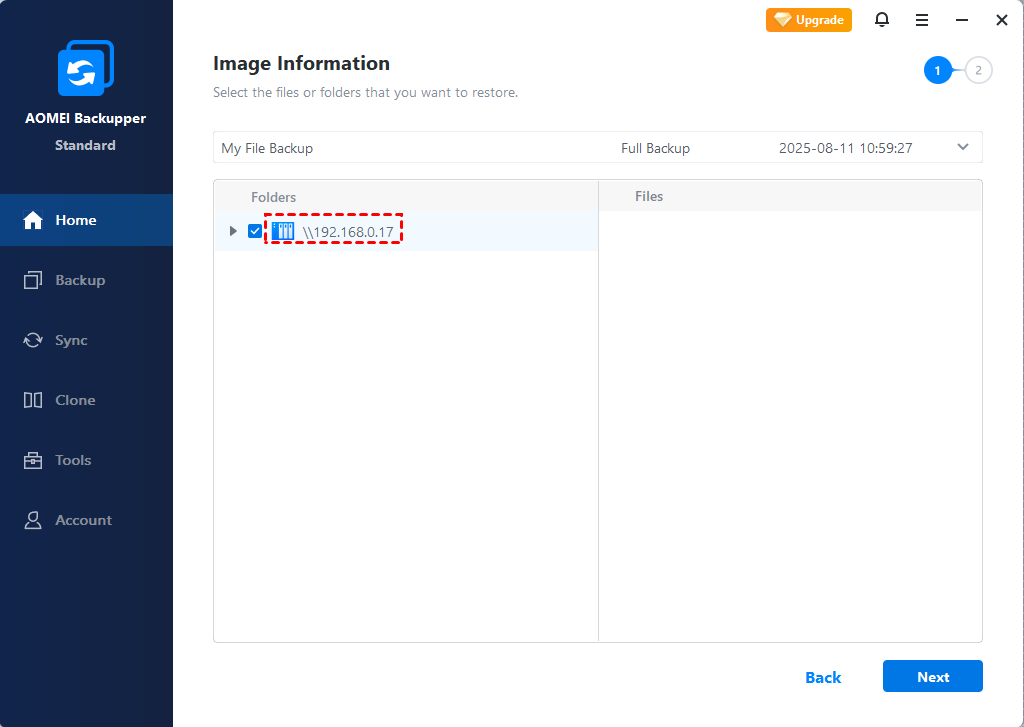
Step 4. Select files you want to restore and click OK.
Step 5. Select a destination path to restore files and click Start Restore.
Step 6. Wait until the operation has been completed and click Finish.
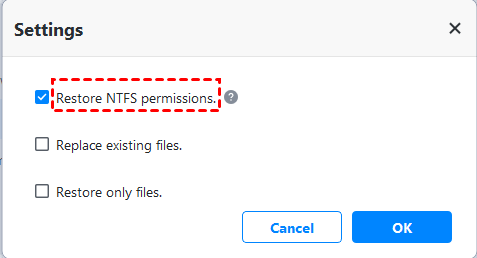
Tips: ❀ You can check the Restore NTFS permissions option (available in the Pro version) to maintain the original rights for the files or folders.
Besides, you are still able to restore files from other backup solutions, such as, system backup, disk backup and partition backup.
In this way, you need to use Explore image feature. It will mount all the partitions to a virtual disk in Windows Explorer and then you can copy files in it to another location.

Summary
As long as you have backed up to the NAS in advance, you can use the best Synology file recovery tools-- AOMEI Backupper Standard and Backup and Restore (Windows 7) to retrieve your files deleted on PC from Synology NAS with ease. Of course, if you accidentally delete file backup on Synology NAS, you don't have to worry, the DSM that comes with it can help you solve it.
What’s more, AOMEI Backupper allows you to create a file backup within just 5 steps, and backup files to multiple storage, such as, external hard drive, network drive, Google drive, OneDrive, USB flash drive, etc. Its cloning function is also very powerful, including disk to disk clone, clone external hard drive to internal, etc. Whether it is backing up data, restoring NAS data or cloning a disk, this software can provide you with the most convenient operation. Why wait? Go for it right now!

