How to Backup NAS to External Hard Drive (2 Ways)
In this guide, we will cover solutions for effectively backing up NAS to an external hard drive, detailing the necessary tools, techniques, and precautions. We will also explore the best practices for setting up automated backups, common issues and FAQs.
By Sebastian Updated on December 12, 2024
Is It Necessary to Backup NAS to External Hard Drive?
Network-attached storage (NAS) is a file-level computer data storage server connected to a computer network providing data access to a heterogeneous group of clients. It is widely used in business and home groups to share their data and information simultaneously by accessing remote NAS devices.
However, like any other hardware, a NAS or its hard drives are subject to problems such as power failure, hardware failure, and physical damage. That’s why it is important to always perform NAS backup. Nowadays, it is not rare to do NAS to NAS backup, but once similar problems appear, hardware failure, for instance, you may not be able to access any of the NAS devices.
Therefore, backing up NAS to an external drive can be part of your 3-2-1 backup strategy to keep an intact copy out of the device, and protect your data from various risks.
Way 1: Backup NAS to External Hard Drive with Inbuilt Tool
Microsoft offers a built-in tool called Windows Backup and Restore for data protection, but it has limitations. One of the key restrictions is that it doesn't allow you to select a network path directly as the backup source. If you want to back up data from a NAS, you'll first need to map the NAS as a network drive before you can use the backup tool.
☛ In Windows 7 and Windows 8:
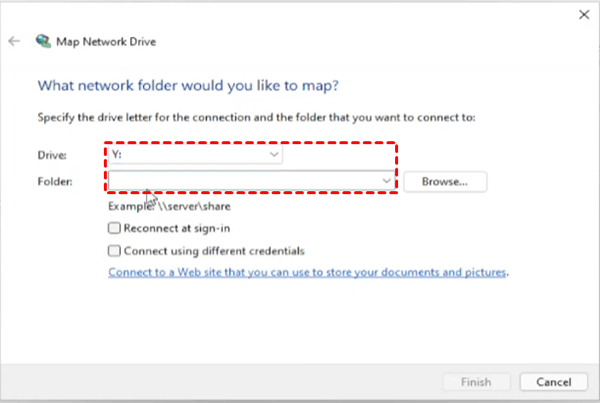
Click Start -> Computer -> Map network drive.
☛ In Windows 10 and Windows 11:
Click Start -> File Explore -> Right-click This PC -> Map network drive.
Then give a letter for the NAS drive and navigate to the NAS device location. The sign of mapping successfully is your NAS router will show up as a letter drive under Network location and then you can perform backup with either backup software or Windows internal backup utility.
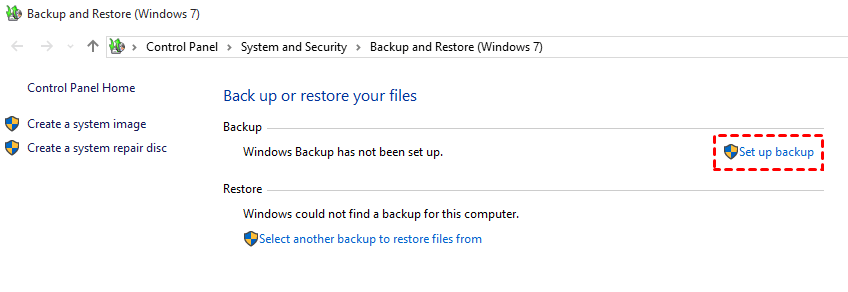
Then you can search for "backup settings" in Windows, and select "Go to Backup and Restore (Windows 7)". Then in the pop-up interface, click "Set up backup" to get started.
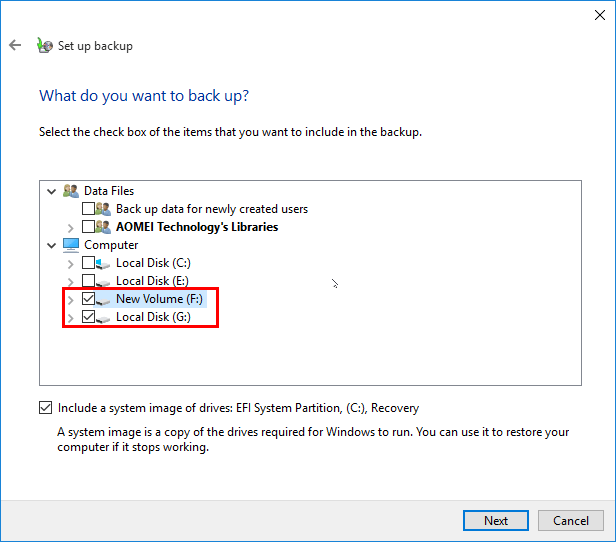
First, you will need to select a destination. The external drive is the recommended option.
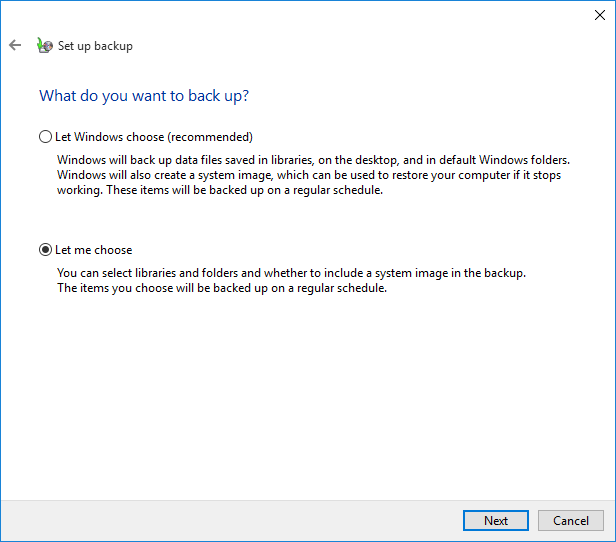
Next is the source data. You can select "Let me choose" and then select the mapped network drive (NAS).
While Windows Backup and Restore does offer the option to set up a backup schedule, its features are fairly basic. If you prefer not to map a network drive to your local computer or need more advanced backup options, such as Incremental Backup, you'll need to use third-party backup software for a more efficient solution.
Tip: Some NAS brands offer additional tools to help with backing up to external drives. For instance, Synology NAS has Hyper Backup, which provides detailed instructions for backup Synology NAS to external drive.
Way 2: Backup NAS to External Drive with Free NAS Backup Software
AOMEI Backupper Standard is a free and easy-to-use backup software that works seamlessly with Windows 11, 10, 8.1, 8, 7, XP, and Vista. It supports a variety of storage devices, including internal and external hard drives, USB flash drives, NAS, shared folders, and cloud storage.
In short, it allows you to easily back up most NAS devices, such as Synology NAS and QNAP NAS, to an external hard drive with just a few clicks.
You can customize your backup by setting up a backup schedule (daily, weekly, or monthly), choosing between NAS incremental backup or differential backup for NAS, and creating multiple backup tasks to strengthen your data protection strategy.
Download AOMEI Backupper Standard and give it a try today!
☛ If you upgrade to the Professional edition, you can also create a retention policy to auto-delete old backups, perform event-trigger or USB plug-in backups, or sync files between 2 NAS in real time.
Step-by-step to Backup NAS to External Drive Easily
With this software, you don’t need to map the NAS device to your computer. Just launch it and follow the steps below:
1. Select Backup -> File Backup. *If you want to create an intact copy of selected data for direct use, you can go to the Sync tab and choose Basic Sync.

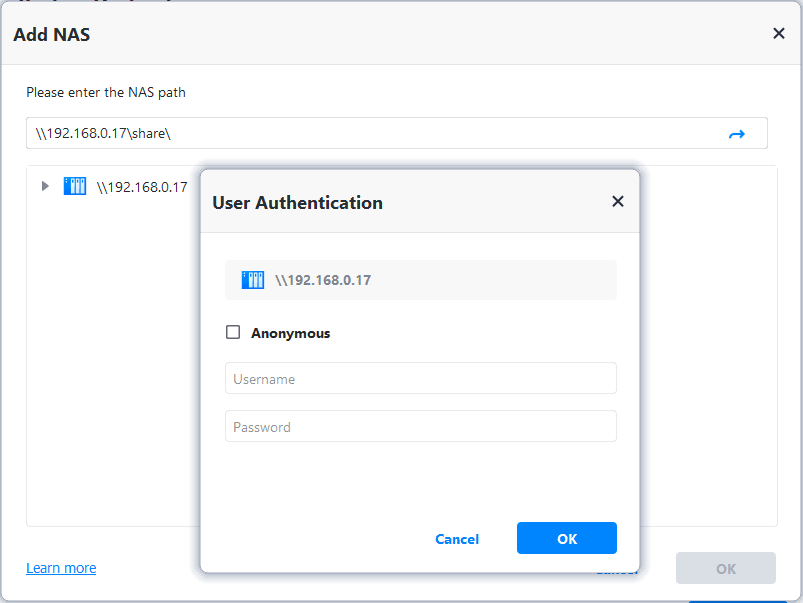
2. Click Add File or Add Folder according to your needs. Click Share/NAS on the popping-out window.

3. Then click Add Share or NAS Devices on the left-bottom corner. Type the required info on your NAS and click OK. Then you can select the specific folders you want to backup.
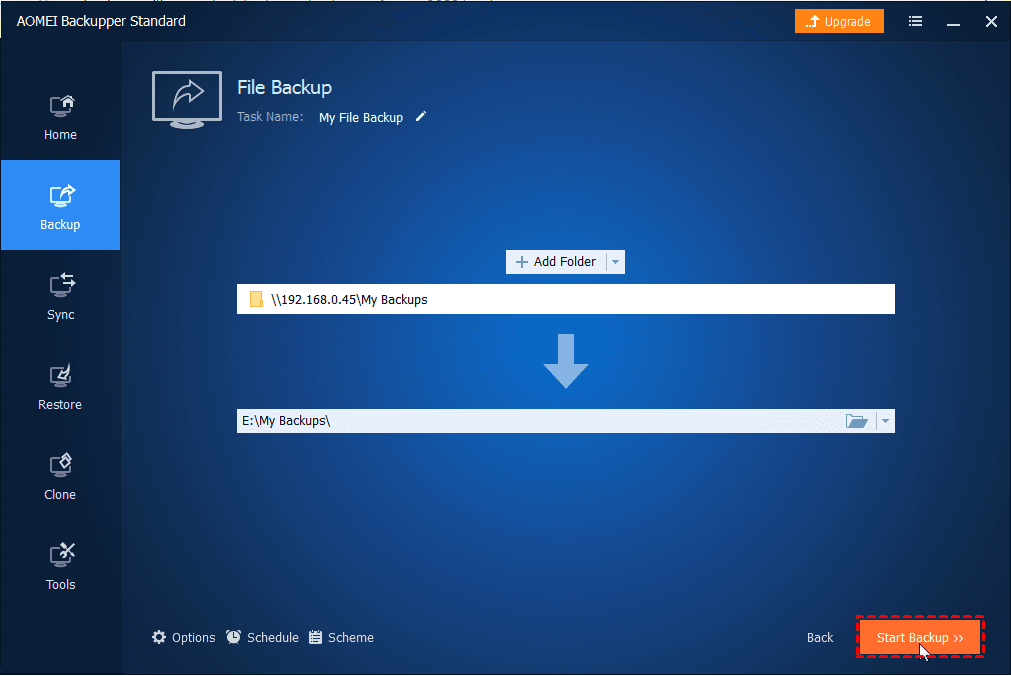
4. Next, choose the connected external hard drive as the destination path and click Start Backup.
Click the 3 buttons on the bottom to customize your backup (some options are available in advanced editions):
Options: Customize your backup by adding comments, adjusting the compression level, encrypting the backup, or splitting the backup image into smaller parts.
Schedule Backup: Set up automatic backups to run daily, weekly, or monthly, or trigger backups based on specific events, such as logging in/out, system startup/shutdown, or when a USB is plugged in.
Backup Scheme: Select your preferred backup method, such as full, incremental, or differential backup. You can also enable automatic cleanup of old backups and set a retention policy to manage your backup history.
★ Bonus tip: backup files to AOMEI Cloud
There is a growing trend to backup files to cloud storage. You can backup files to AOMEI Cloud if you create an AOMEI account. It offers you 1TB of free storage for 15 days after you sign up for an AOMEI account.
FAQs About Backing Up NAS to External Hard Drive
Q1: Can I automate the backup process from NAS to external hard drive?
A1: Yes, tools like AOMEI Backupper and third-party backup software allow you to automate backups. This ensures your data is always backed up without manual intervention.
Q2: What file system should I use on my external hard drive?
A2: For Windows users, NTFS is recommended. If you're working with both Windows and macOS, exFAT is a versatile option that works on both systems.
Q3: Can I backup my NAS to multiple external hard drives?
A3 Yes, you can use multiple external hard drives to create redundant backups, providing an extra layer of security.
Tips for Efficient NAS Backup to External Hard Drive
- Use Encryption: For sensitive data, enable encryption on both your NAS and external hard drive to ensure privacy.
- Monitor Backup Health: Regularly check the health of your external hard drive to avoid data loss due to hardware failure.
- Test Restore Process: Periodically test the restoration process to ensure your backups are functional and reliable when needed.
Conclusion
AOMEI Backupper is an all-in-one backup solution with a range of powerful features. For instance, you can easily clone boot drive to SSD for improved performance. It also offers a "dissimilar hardware restore." feature, allowing you to transfer your system to a different computer with different hardware.
Additionally, AOMEI Backupper includes centralized backup management, enabling you to back up all machines on your local network from a single server. This is a must-have tool for anyone looking for a reliable and efficient backup solution.