Full Guide: Windows Server In-Place Upgrade vs Clean Install
Learn the difference between Windows Server in-place upgrade and clean install. Check the pros and cons of Windows in-place upgrade and install and remember to make a backup.
By Maggie Updated on May 20, 2024
User Case
Windows In-Place Upgrade vs Fresh Install
“I'm debating whether to try to perform an in-place OS upgrade from 2012 to 2016 on some of my VMs. Since the underlying hardware isn't a factor, it seems logical to not have to constantly rebuild servers to upgrade to a new OS. If anyone has had positive or negative results from doing so or any other experiences to share regarding this, I'd appreciate the input. Thanks!”
- Question from Reddit
Windows in-place upgrade vs fresh install - what is the difference?
If you decide to upgrade to a newer version of Windows Server, you can do it in two ways: Windows in-place upgrade and clean install. Some users don't know what are they and the difference between them, the following will provide you with a detailed description.

Windows In-Place Upgrade:
Windows Server supports in-place upgrades, allowing you to upgrade from an older version of Windows Server to a newer one without losing your data or settings. This can be done using installation media or through Windows Update, depending on the specific version and edition of Windows Server.
Clean Install for Windows Server
Similarly, a Clean Install is also applicable to Windows Server. This involves wiping the existing installation of Windows Server and installing a fresh copy of the operating system. It's often used when transitioning to a new version of Windows Server or when the existing installation is corrupted or needs to be rebuilt from scratch.
The Difference Between Them
1. Windows In-Place Upgrade: This method updates the existing Windows installation to a newer version while preserving personal files, settings, and applications. It's like giving your current Windows setup a facelift without starting from scratch.
2. Clean Install: In contrast, a Clean Install involves wiping out the existing Windows installation entirely and installing a fresh copy of the operating system. This process erases all data, settings, and applications, providing a clean slate for the new Windows installation.
As you can see, while a Windows In-Place Upgrade updates the existing Windows setup, a Clean Install starts fresh with a brand-new installation of Windows. Both methods serve different purposes depending on your needs and preferences. They also have their pros and cons:
Windows Server In-Place Upgrade vs Clean Install - Cons and Pros
★ In-Place Upgrade in Windows Server
| Pros | Cons |
| It is a commonly used upgrade method for users because it is very simple. With Windows Update Assistant, the process is almost automated, so hardly any technical skills are required. If for any reason you do not want to keep the new version of Windows Server, it also allows you to return to the previous system version. | With an in-place upgrade, Windows tries to bring everything from the old version to the new version, which results in the accumulation of many old and unused files, registry entries of certain uninstalled programs, and all other types of garbage. In addition, some programs may not be compatible with the new version. |
★ Clean Install in Windows Server
| Pros | Cons |
| A fresh installation is a good way to start over, especially if you have been running the same system version for a long time. A clean installation will only install the apps you need and re-control your system apps, starting with a clean Windows Registry. | For many users, the worst part of a fresh install may be that all data will be wiped off. You need to back up your personal files and create an installation media with Windows installer. What’s more, you need to have some technical skills as well. After performing a clean install, you need to spend some time re-personalizing your PC. |
Stepwise: Perform Clean Install and Windows In-Place Upgrade
After comparing Windows Server in-place upgrade vs clean install in detail, I believe you have a choice based on your own situation. So next, I will give you a detailed introduction to how to perform these two operations.
Perform an In-Place Upgrade in Windows Server
Before you start a Windows in-place upgrade, it's important to know that it can make big changes to your computer, and accidents could happen. To stay safe, it's wise to back up your stuff first. One good method is creating a system backup, so if anything goes wrong, you can bring your PC back to normal.
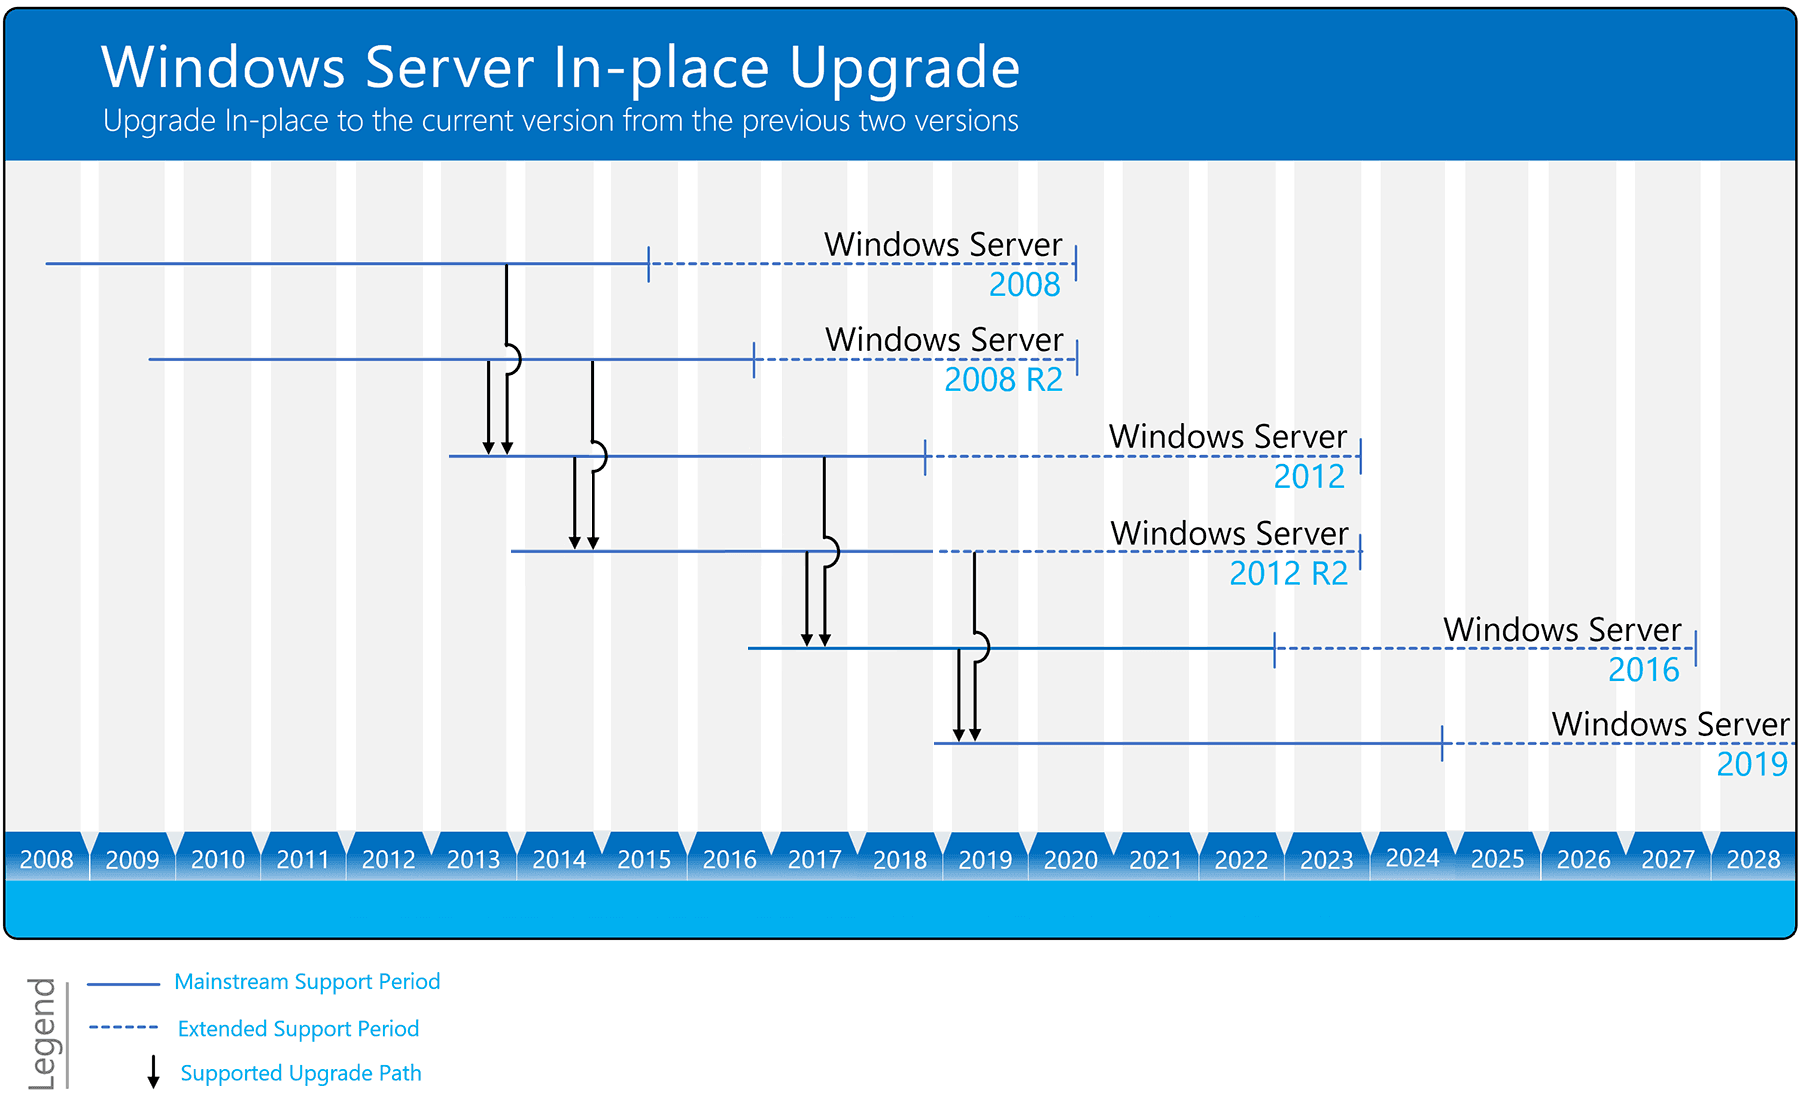
Although the latest version of Windows Server is Windows Server 2025(Preview), Windows Server 2022 or 2019 are still recommended. We realize that it is not always possible to perform a Windows in-place upgrade to Windows Server 2019. You can use the figure below to determine which version of Windows Server you can upgrade to based on the version you are currently using:
Then I will show you how to upgrade Windows Server 2012 R2 to 2019 for free step by step.
Preparation before upgrading:
>> Patch your Windows Server 2012 R2 with the latest updates.
>> Insert and mount the Windows Server 2019 setup media.
>> Before upgrading, Microsoft suggests you collect some information about the device. You can use it for troubleshooting purposes when the upgrade fails.
Note✍:
1. Although the in-place upgrade should theoretically not delete any content, there are also cases of data loss. Therefore, it is strongly recommended that you use the backup software described in the next section to back up the operating system and important data.
2. Also, if you're doing the upgrade on a laptop, remember to plug it into a power outlet and make sure it's charging. The last thing you want is for it to shut down unexpectedly during the upgrade, which could cause more issues for your Windows PC.
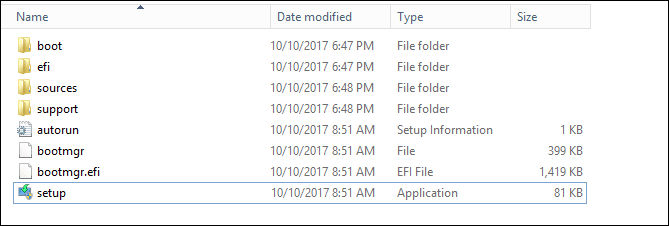
- Locate the Windows Server 2019 setup media, and run setup.exe directly.
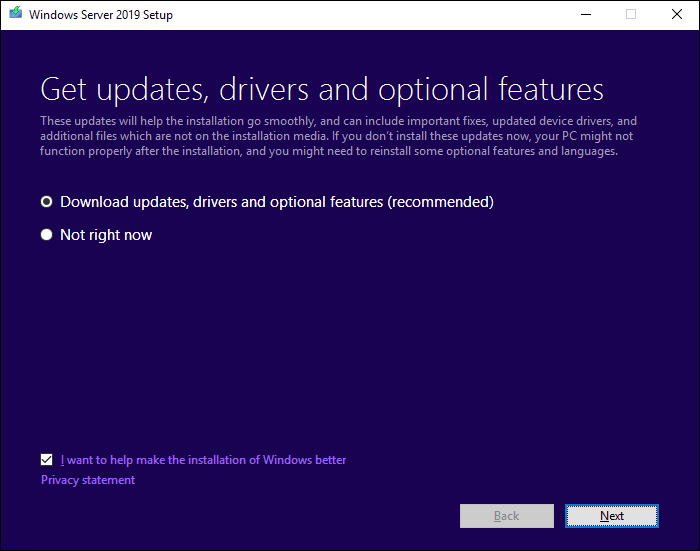
- Select Download updates drives and optional features (recommended) and click Next.
- Setup checks your device configuration, you must wait for it to finish, and then select Next.
Tip✍: Depending on the distribution channel that you received Windows Server media from (retail, volume licensing, OEM, ODM, etc.) and the license for the server, you may be prompted to enter the license key to continue.
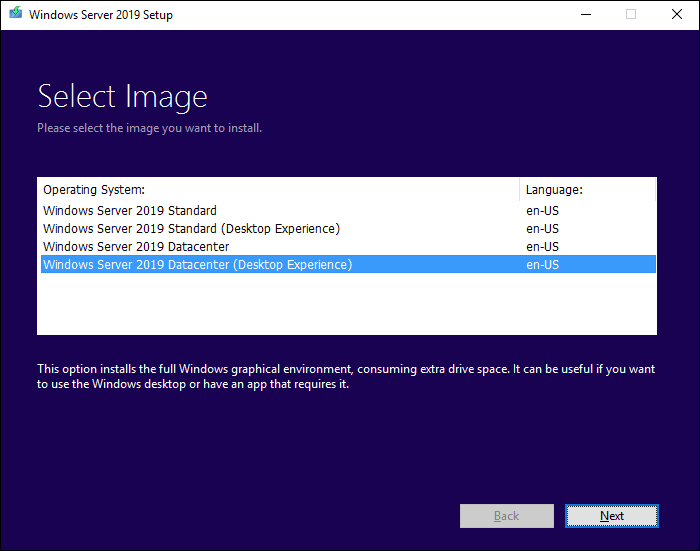
- Select the version of Windows Server 2019 you want to install and click Next.
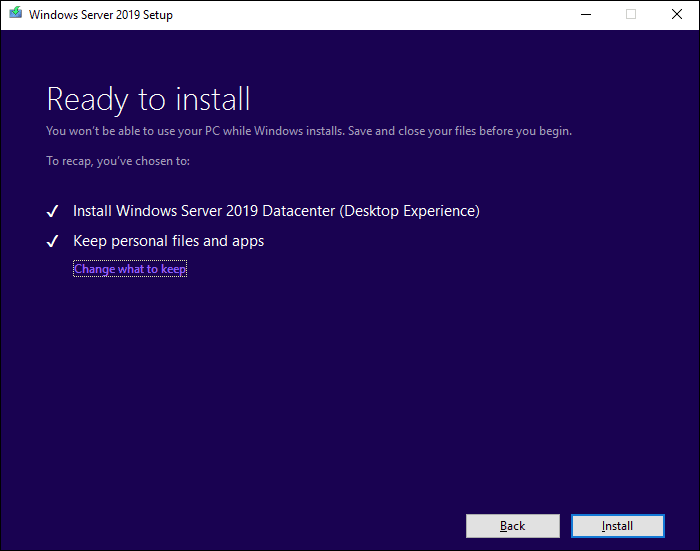
- Accept the terms and then select Keep personal files and apps to choose to do an in-place upgrade, and then select Next.
- After Setup analyzes your device, it will prompt you to proceed with your upgrade by selecting Install.
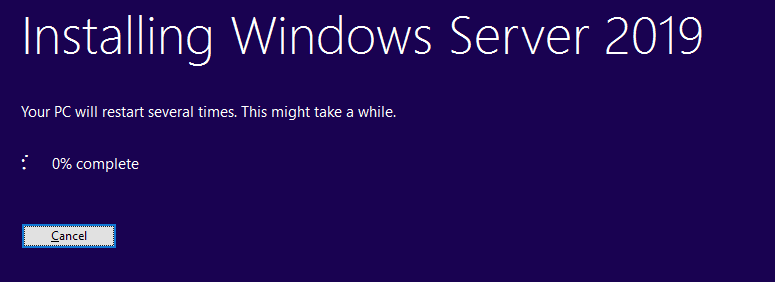
- Then, upgrading Windows Server 2012 R2 to 2019 for free will begin. After the upgrade is complete, your server will restart.
After your upgrade is done, you must make sure the upgrade is successful. You can open Registry Editor and go to HKEY_LOCAL_MACHINE\SOFTWARE\Microsoft\WindowsNT\CurrentVersion to check the edition of your Windows Server in ProductName.
Perform a Clean Install on the Windows Server
Here, I will show you how to perform a clean installation of Windows Server 2019 as an example.
Preparation before installing:
>> Download the Windows Server 2019 ISO file from Microsoft and burn Windows Server 2019 ISO to USB (over 8 GB) for installation.
- Insert the USB installation media, restart your PC, and set boot from the USB.
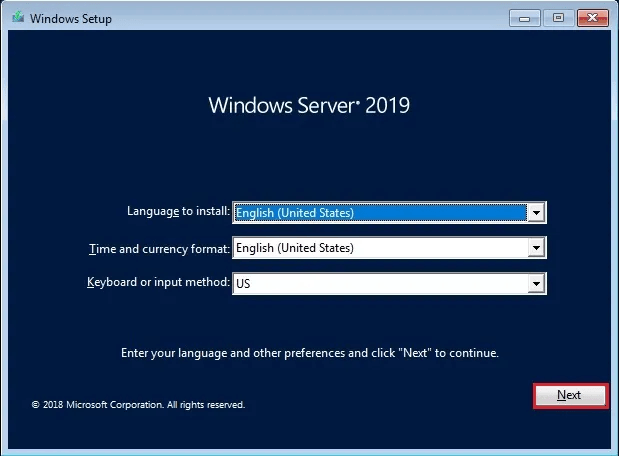
- On the Windows Setup page. Enter your language and other preferences and click Next to continue.
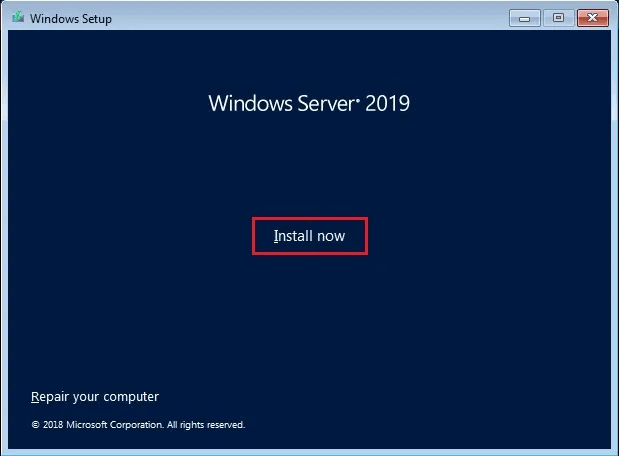
- Click Install Now to start out the Windows Server 2019 installation.
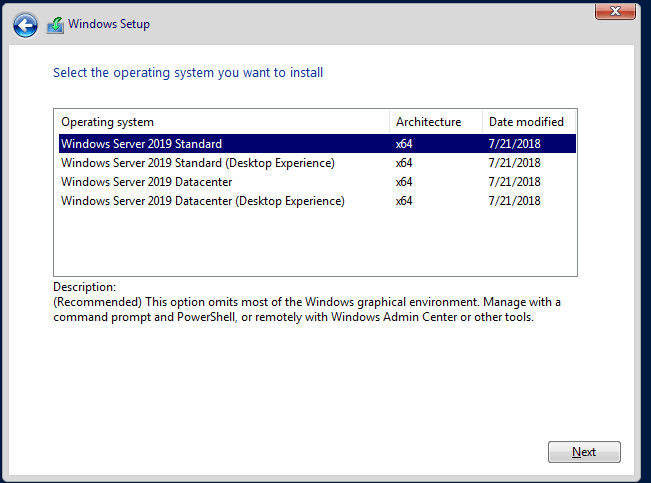
- Select the version of Windows Server 2019 you want to install and click Next.
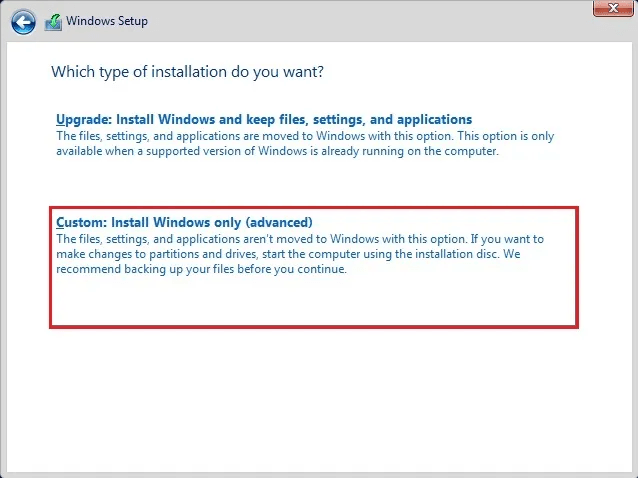
- Then, accept the license terms and select Custom: Install Windows only (advanced) to perform a fresh install.
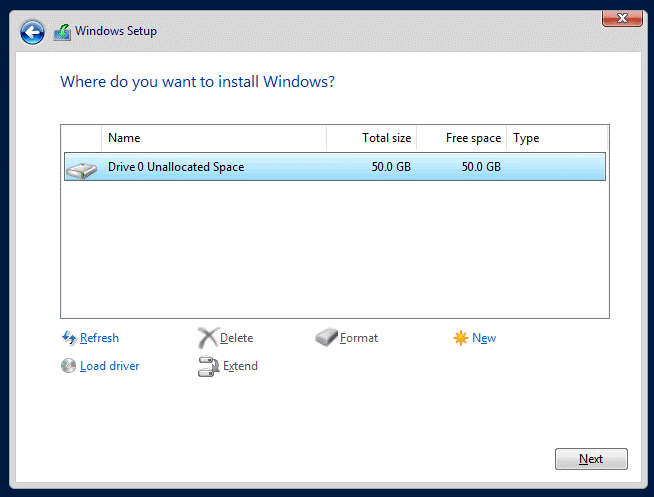
- Select the destination to install the Windows Server and click on Next.
- The installation will begin, wait for it to complete. The system should restart automatically after installation.
Backup Windows Server OS to Avoid Any Data Loss
As you can see, Windows in-place upgrade and clean install have their own usage scenarios. However, both methods can result in a data loss situation. So, it is recommended that you back up your server in advance before performing either of these operations to prevent any data loss.
AOMEI Backupper Server is a full-featured backup and recovery software for all Windows Servers (Server 2003/2008 (R2)/2012 (R2)/2016/2019/2022) and PCs. It provides continuous data protection for businesses and makes all data backup and disaster recovery work easy. No professional skills or technologies are required.
It supports you to back up the Server to different storages. For instance, backup Server to an external hard drive, NAS, network share, cloud service, etc. No matter what accidents happen, you can restore your backups from these places.
The following is a thorough tutorial to show you how to back up Windows Server through AOMEI Backupper.
Step 1. Download and install the AOMEI Backupper Server to your computer. Besides this version, you can also use AOMEI Backupper Technician Plus to protect priceless data and systems on unlimited PCs and Servers.
Step 2. Launch this software, click Backup in the left panel, and then select System Backup.

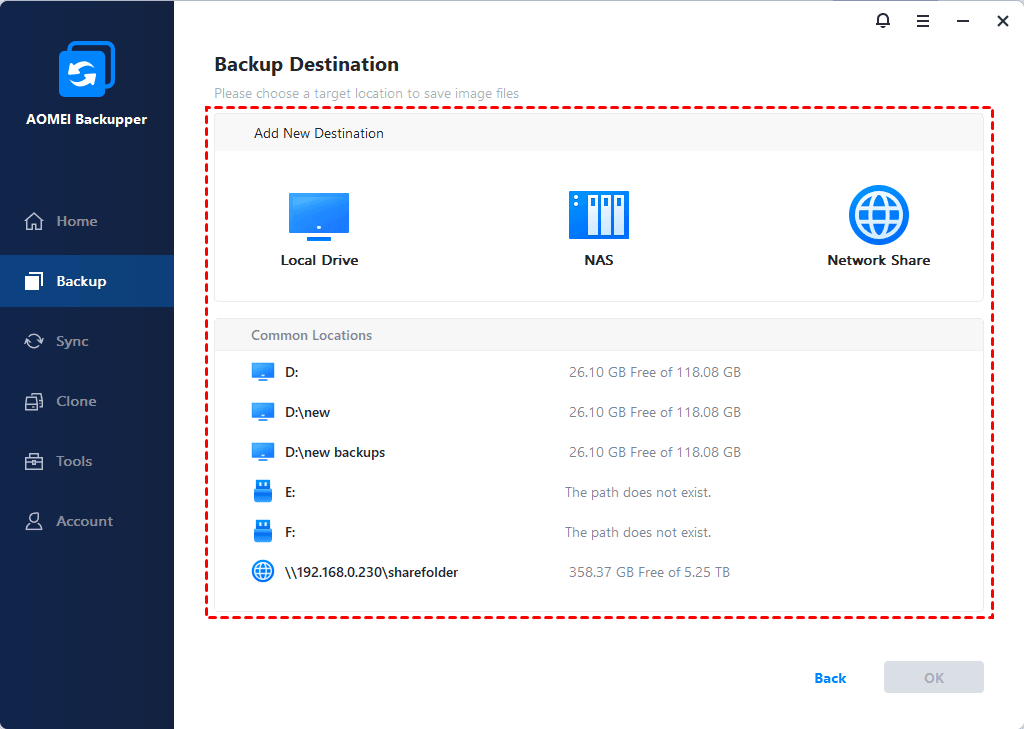
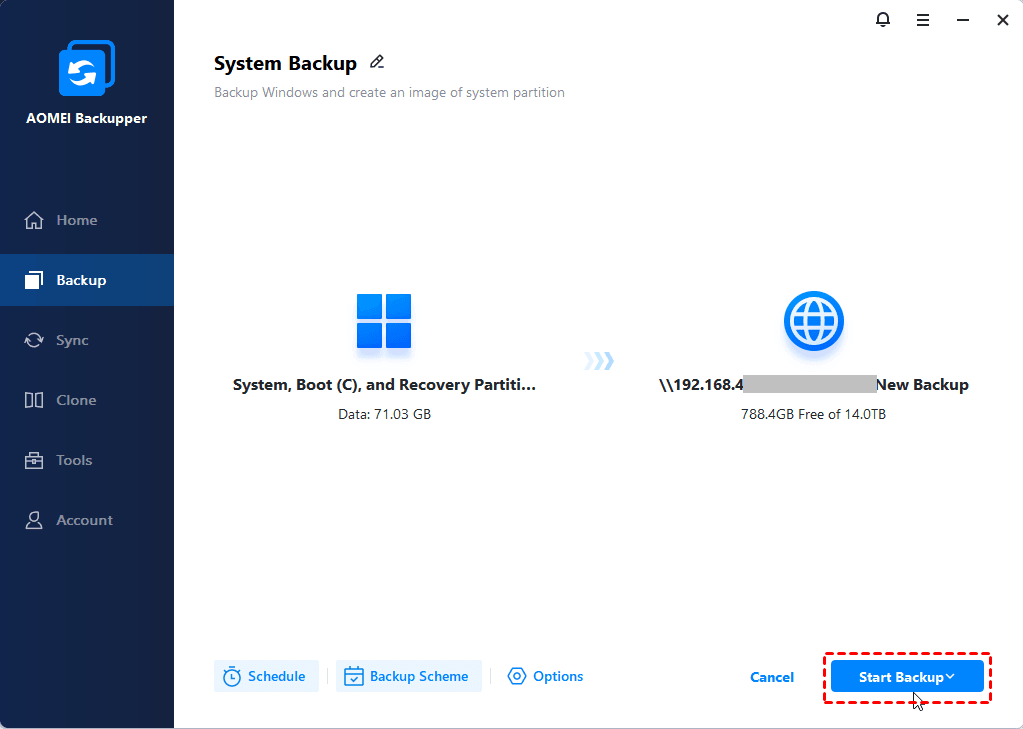
Step 3. The program will automatically select the system partitions by default. Click the box below the arrow to select the destination to save the Windows Server image backup.
Step 4. Click Start Backup to back up the Windows Server.
Tips on long-term data protection✍:
✮ Options: You can configure task-specific settings, including the compression level, backup encryption, notifications, splitting images, intelligent sector, VSS, and more.
✮ Schedule Backup: You can specify the exact time you want the backup to run, which is useful if you want to protect your data for a long time. You can set a specific time of day, any day of the week or month, or event triggers, USB plug-in.
✮ Backup Scheme: It offers 3 common backup schemes, including full backup, incremental backup, and differential backup. It will automatically delete backup image files according to the type of scheme you choose, which is quite helpful for saving disk space and keeping all backups up to date.
Frequently Asked Questions
1. What is the difference between a Windows in-place upgrade and an out-of-place upgrade?
In contrast, with an in-place upgrade, the existing software in the current Oracle Grid Infrastructure home gets overwritten. To do an out-of-place upgrade, you need to create new Oracle Grid Infrastructure homes on each node.
2. How long will it take to make a Windows in-place upgrade?
The time it takes for a Windows in-place upgrade to complete depends on the type of machine your VM instance is and your Windows Server setup. Generally, it could range from 10 to 60 minutes.
3. How long does a Windows clean install take?
The duration of reinstalling Windows 10 can vary based on your PC's hardware and how you're installing it. Typically, a clean installation might take anywhere from 30 to 90 minutes, while a repair installation could take an hour or more.
Conclusion
Windows Server in-place upgrade vs clean install, you may have a complete understanding of both after reading this article. But whichever upgrade method you choose, you still need to consider the risk of data loss. So, it is recommended that you make an early backup of your server in advance. Besides AOMEI Backupper Server, you can also use another tool - AOMEI OneKey Recovery to back up your system, which can help you boot your computer directly and successfully without the need for a boot disk.

