How to Run System Restore from BIOS in Windows 7 (2 Ways)
How to realize System Restore from BIOS in Windows 7? Whether you have an installation disc or not, you can find the corresponding solution from this page.
by Lily Updated on October 13, 2023
When to do System Restore from BIOS?
System Restore is a built-in recovery tool in Windows. It helps you to revert to a previous software, registry and driver configuration which is called a restore point. It is particularly useful when you are having serious problems with your computer and can’t figure out exact solutions.
With System Restore, you can undo any changes that may cause the current problems and bring your computer back to the way it was when system restore point was created.
There must be a certain number of people who are confronted with computer boot failure due to serious problems. In this case, you should try System Restore from the computer’s basic input/output system (BIOS). Then, how to do System Restore from BIOS in Windows 7?
How to restore Windows 7 from BIOS efficiently
If your computer fails to start up, you can perform system recovery from BIOS in Windows 7 following instructions below:
1. Insert the Windows 7 installation disc into your computer. Turn on your computer and wait for the prompt to press a key to start Recovery Mode.
2. At the Windows setup dialog, set your appropriate settings and click “Next”.
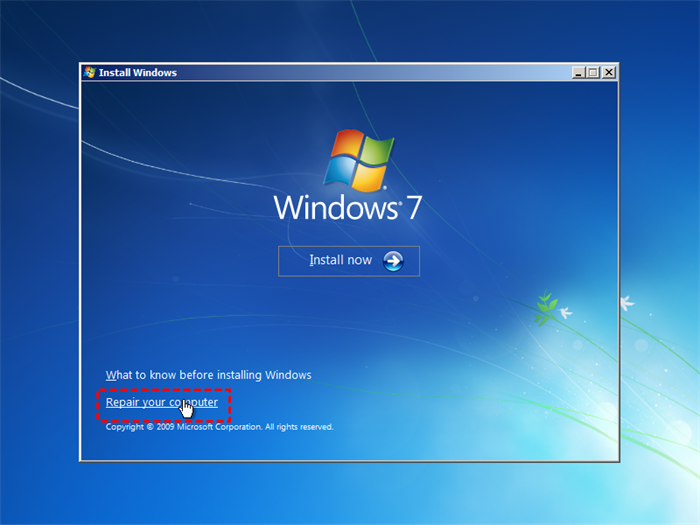
3. Click on the “Repair your Computer” option.
4. Click on your Windows 7 operating system in the list provided and click “Next”. If you don’t see your operating system, click “Load Drivers” to find it.
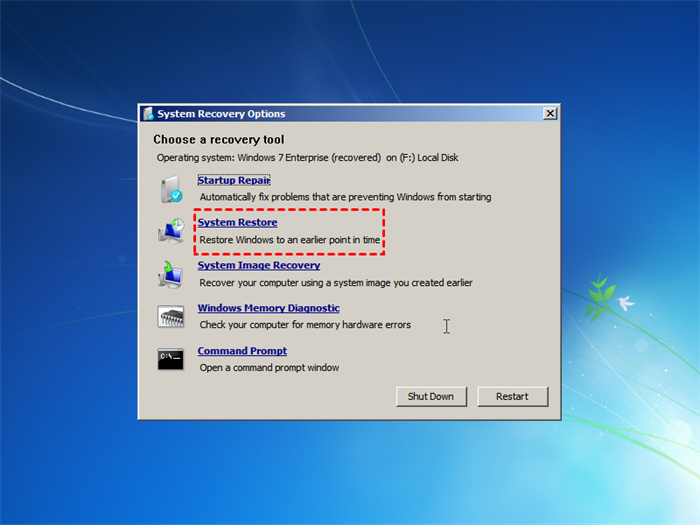
5. Select “System Restore” from the recovery tool list. Click “Next” to start the System Restore wizard.
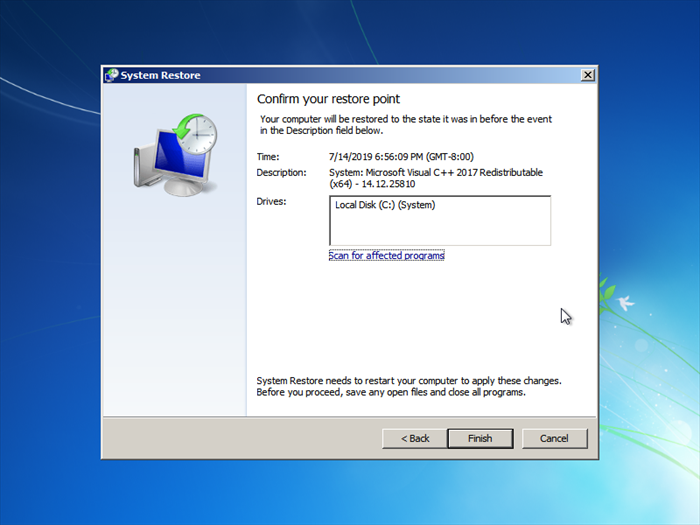
6. Pick a restore point from the next screen and click “Next”. Each restore point is dated, so select a date when the computer was functioning normally.
7. Click “Finish” in the next screen to start the system restore. When prompted to restart your computer, click “Restart” to get your computer back in the restored state.
Now you see how to restore Windows 7 from BIOS. As for Windows 10, you need a Windows 10 installation media and then select Repair your Computer > Troubleshoot > Advanced Options > System Restore successively to restore Windows 10 from BIOS.
To protect your computer in a more reliable way, you may create a recovery drive which is able to boot your computer and restore the system in case of computer boot failure caused by serious problems. Learn specific steps from the next part.
Create Windows 7 recovery disk to restore system from boot🔥
AOMEI Backupper Professional, all-around Windows PC backup software, comes to help. It enables you to protect your computer from losing data and recover your computer from tough situations.
- There are four backup types to meet your different needs: System Backup, Disk Backup, Partition Backup and File Backup.
- You can create incremental and differential backup to improve backup efficiency and save disk space.
- It allows you to create a bootable USB drive/CD/DVD to boot your computer in case of boot failure.
If you have created a recovery drive before your computer fails to boot, it is easy to restore Windows 7 via AOMEI Backupper; if not, you can create one on another computer running the same operating system. However, your computer will be restored to the state of the computer where the recovery drive is made, so it should be used as a last resort to bring your computer back to work.
Download AOMEI Backupper and follow the guidance below to create a recovery drive and restore Windows 7 from boot:
◉ Create a recovery drive
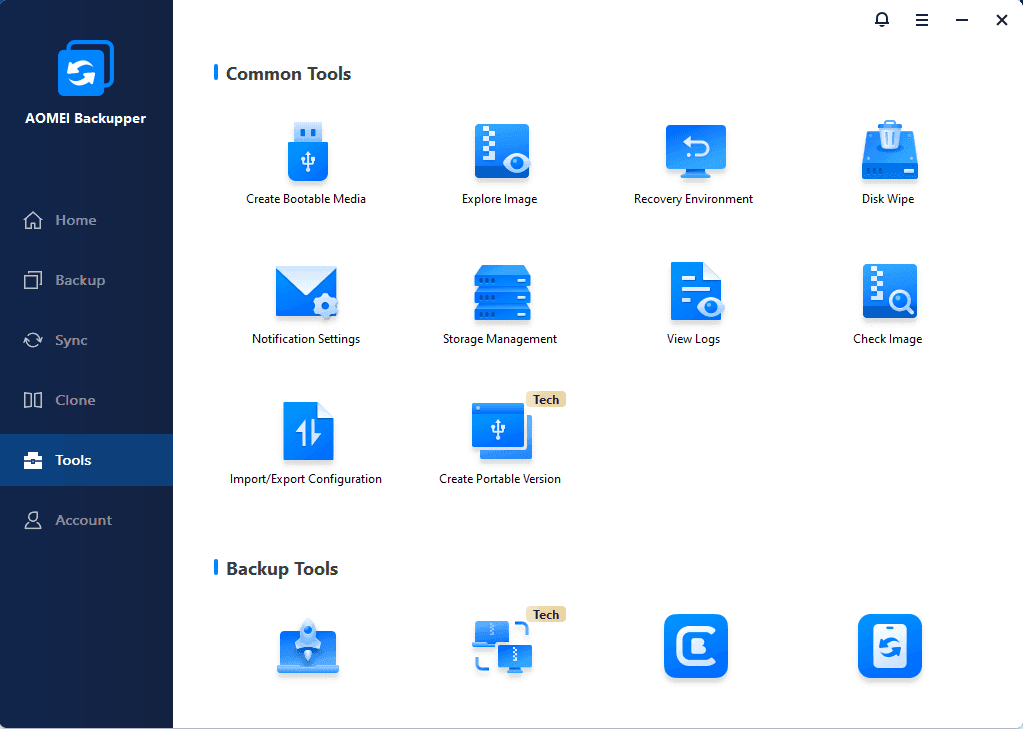
1. Connect a USB drive to your computer. Install and launch AOMEI Backupper. Create bootable media on the USB.
2. Click “Backup” on the left pane and select “System Backup” to backup system on the bootable USB.

3. The required system partition(s) is (are) selected by default. Choose the USB drive as destination path to store the backup files.

4. Confirm the operation and click “Start Backup”. After the backup process is finished, safely disconnect your USB drive.

Note: You can create a scheduled backup task for your system by clicking “Schedule Backup” in the left bottom.
◉ Restore Windows 7 when it fails to boot
1. Connect the recovery drive you’ve made to your computer. Boot from it by changing boot order in BIOS.
2. You’ll see loaded AOMEI Backupper once login. Select “Restore” and then click “Select Image File”.

3. Locate the system image file on the recovery USB drive and click “Next”.
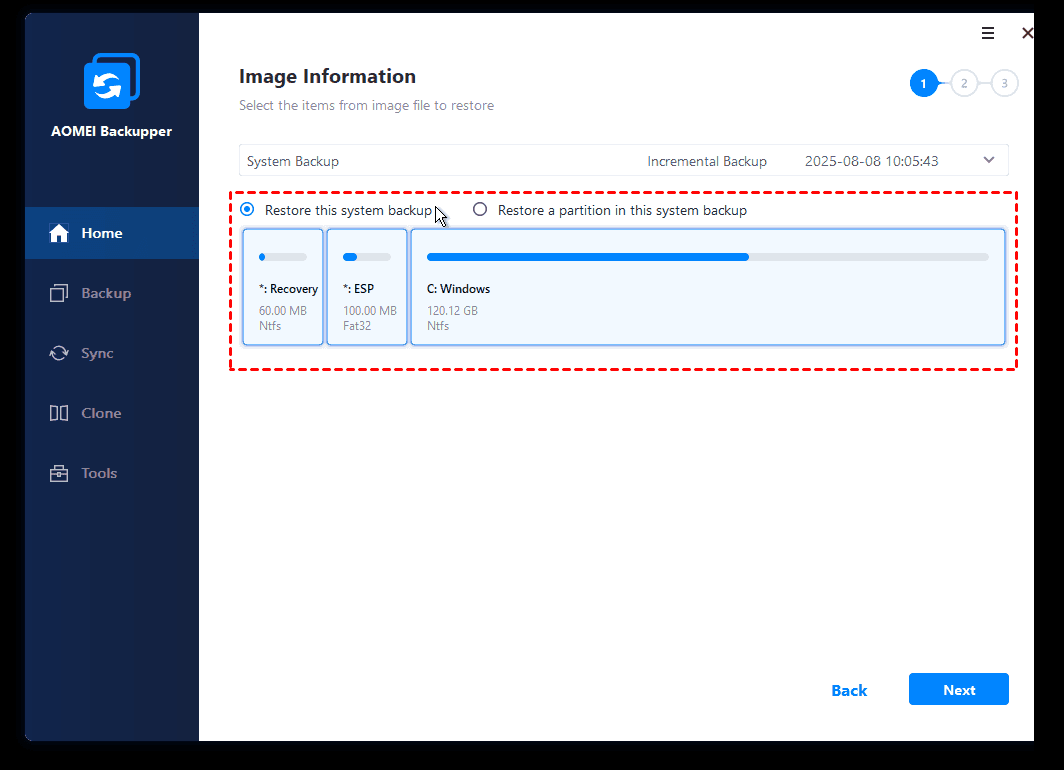
4. Select “Restore this system backup” and click “Next”.
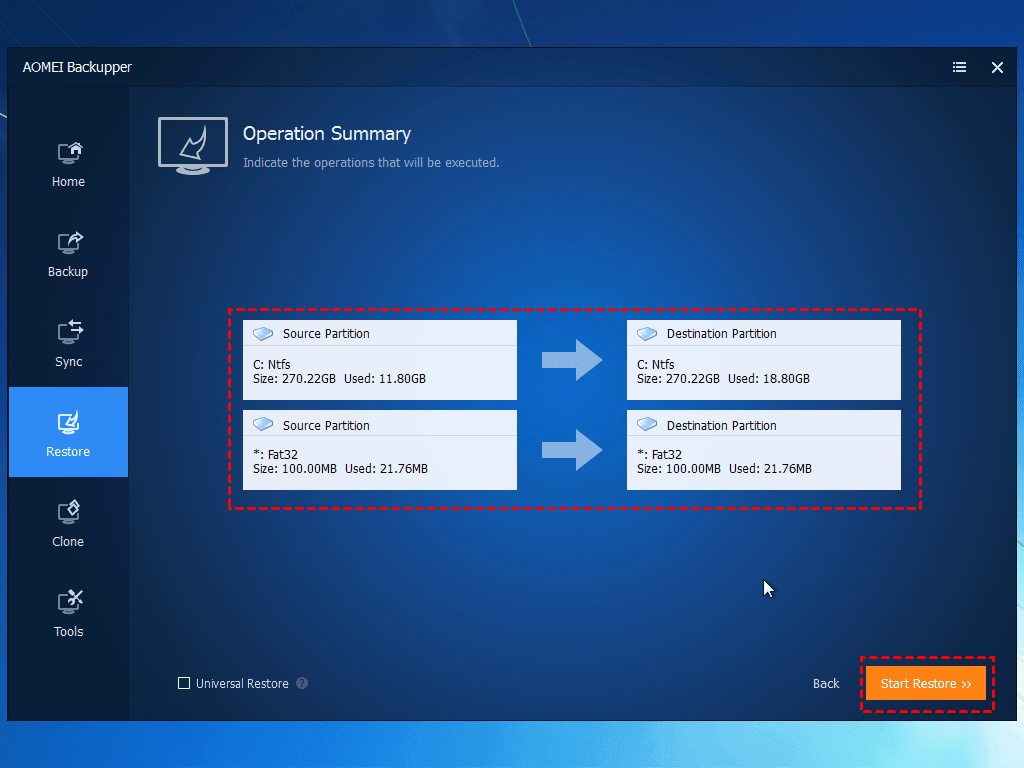
5. In the Operation Summary page, preview the operation that will be executed. Then, click “Start Restore” to begin system restoration process.
Notes:
▪ The program automatically selects the original system partition(s) as the destination drive(s). If it does not detect the original system partition(s), you will be asked to select a destination path manually.
▪ If your system backup image is from another computer, you should tick “Universal Restore” in Step 5 to ensure the system is bootable after recovery.
▪ To deploy/restore your system image to multiple computers within LAN, you will need the image deployment software AOMEI Image Deploy (AID).
Conclusion
You have learned step-by-step guide of System Restore from BIOS in Windows 7 and a more reliable way to protect your computer. Actually, you can enjoy many other practical features in AOMEI Backupper, such as clone an SSD to a larger SSD and transfer data from one Surface Pro to another. Go for AOMEI Backupper right now!

