How to Backup File Versions in Windows 7 with File History Similar
It's disappointed that Windows 7 does not have File History feature, but you could use Previous Versions or third-party backup software as an alternative.
By Yuka Updated on October 31, 2024
Is there a similar tool to File History in Windows 7?
Have you ever mistakenly deleted some files or lost files mysteriously? If you have enabled the feature built in Windows 7 that I am about to tell you, you can recover permanently deleted files, and view or restore a previous version of a file.
This feature is called Previous Versions. With a little bit of disk space, you can use this feature to run file backup in Windows 7, thus protecting your valuable files from inadvertent file deletions and data loss of other causes.
How to enable Previous Versions and restore files in Windows 7
By default, the Previous Versions feature is enabled, but it may not include the files that you want to protect. Previous versions of files are saved as a part of a System Restore Point, so when a Windows 7 restore point is created, the file versions will be recorded.
Enable Previous Versions in Windows 7 step by step
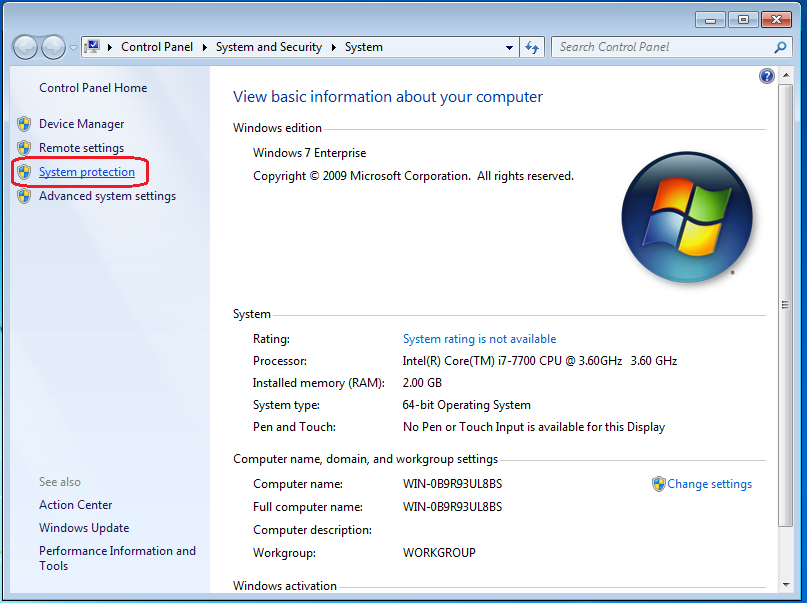
1. Right click on My Computer and select Properties. From there, click System protection.
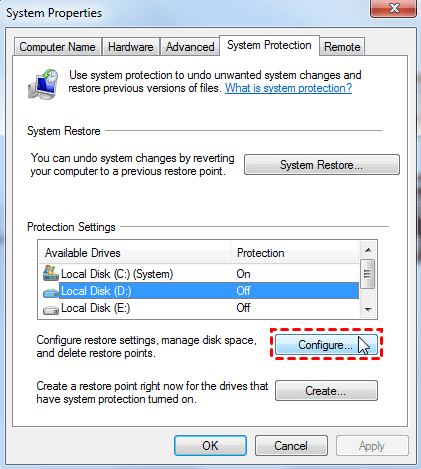
2. Under the System Protection tab, C: drive protection is on by default. If the files that you want to record are located on another drive, select the drive and click Configure button to enable system protection for it.
The program will create a restore point under the below circumstances:
-
New application or drivers installed.
-
Windows auto updates installed.
-
No restore point created in the last 7 days.
Restore previous versions in Windows 7
Once you have system restore point set up, you can restore a file to its previous version or restore deleted files.
To restore a modified file, locate the file, right click on the file and select Restore previous versions. You will see all the available versions with the time specified. Then, open the files to compare the previous version and the current version, select the one you want to restore and click Restore to restore previous version of files.
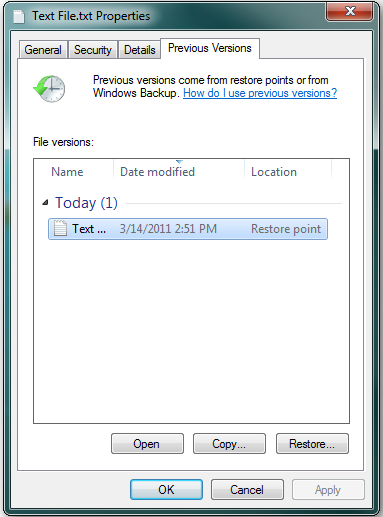
Tip: If you see no previous versions, that is because the file has not been modified or the restore point has not been created since the date someone modified the file.
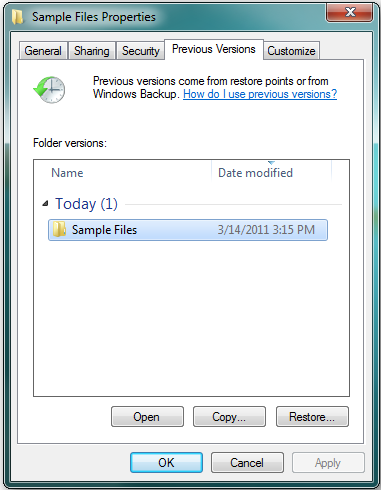
To restore a deleted or renamed file, view the previous version of it in the parent folder. Then, right click on the folder and select the Properties option. In the Properties window, click on the Previous Versions tab. Afterward, open the folder to check if it contains the renamed or permanently deleted files and click Restore to retrieve your files.
Previous Versions vs. Backup Image
Previous Versions automatically create snapshots of the files that you want to protect, so it is able to provide several versions of the same file for you to choose. And it is smart enough to cover all the files on your hard drive using a little disk space
However, it cannot replace regular image backups. As mentioned, the previous versions are saved in the corresponding volume. If the volume corrupted or the hard drive failed, then you cannot restore the previous version of any file
Therefore, if you want to have complete protection of your files, you should create an image file backup besides the previous version.
How to create an image backup of your files
To make an image backup of your files, you can use free backup tool AOMEI Backupper Standard. Compared with Windows Backup and Restore, AOMEI Backupper is more secure, runs faster and gives you more backup options.
- It supports daily, weekly, monthly schedule backup, so you can backup files automatically, without human intervention.
- By default, it backup only changed files with the help of incremental backup, thereby saving much backup time and disk space. Besides, it still compresses or split backup image to smaller one.
- It is able to backup files to external hard drive, USB drive, network drive, NAS, etc This helps to achieve the 3-2-1 backup strategy plan.
- If you want to backup files without booting into Windows or recover files quickly in a disaster, it's suggested to create a universal bootable USB in advance.
To get started, please download AOMEI Backupper to have a try!
(Note: The free version only supports Windows 11/10/8/7. For server users, try AOMEI Backupper Server.)
1. Under “Backup” tab, select “File Backup”.

Tip: You can also backup files to AOMEI Cloud with the help of Cloud Backup features. And it still provides AOMEI users with 1TB free storagein 15 days after registration.
2. In this screen, click “Add File” or “Add Folder” to specify files or folders into the backup.

3. Click the second bar to select a location path to save the image backup. It brings you a File Explorer window, so you can select any folder on the local drive, external drive or network drive as the destination location.

4. In order to have your backup updated automatically, click “Schedule Backup” to set a scheduled backup mode, you have 3 options, including Daily, Weekly, and Monthly.
The schedule backup is usually used with incremental backup, which backup only changed files since last backup. In view of increasing backups and limited space, you may receive backup disk full error. To prevent it at begining, try automatic backup cleanup (supported by professional version), it helps you delete old backup image regularly.
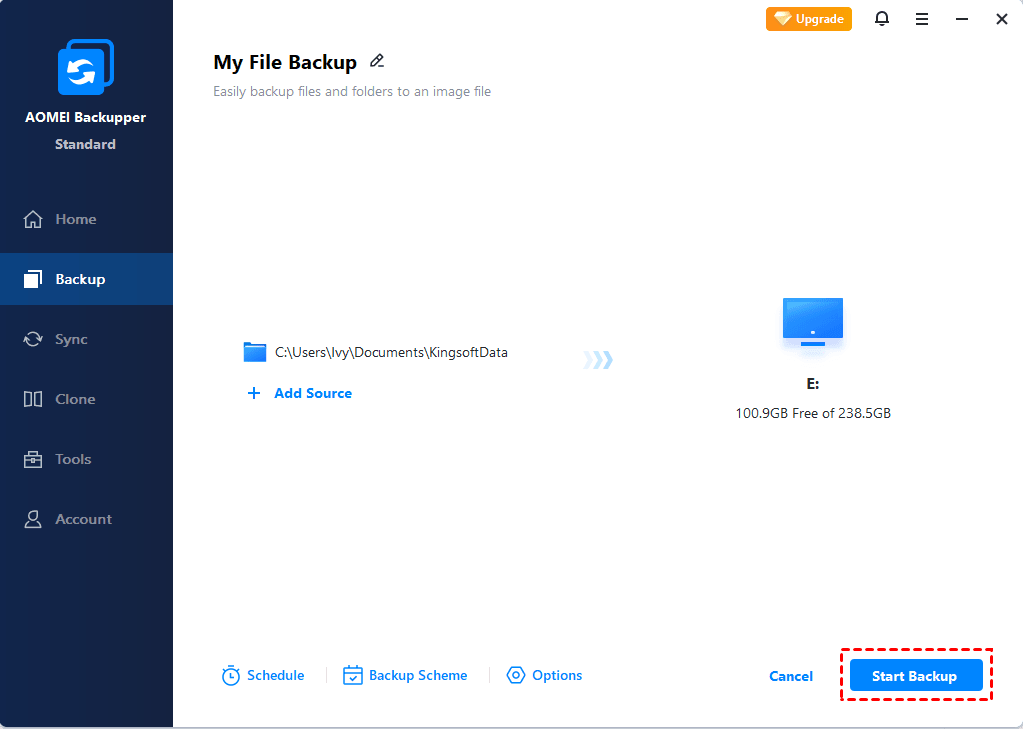
5. Confirm all the backup settings and click “Start Backup” to start the backup.
Summary
You can never be more careful about your valuable data. The Previous Versions feature works as an alternative to File History in Windows 7, and it can help to protect your data to some extent. For more comprehensive data protection, you need to create an image backup of your files with AOMEI Backupper. It also allows you to backup Windows 10 to NAS.
With it, you can backup files on a regular basis, such as, daily, and intelligently manage disk space by deleting old backup image with given cleanup methods. Also, it allows you to reduce backup image size as much as possible, you can use incremental or differential backup, compression, splitting, etc. Why not try it now?

