Top 6 Ways: Windows 11 Transfer Files to New Computer
The best free and easy ways to transfer files from the old to the new computer are here for you, now open your PC to follow up.
By Maggie Updated on March 28, 2024
What does it mean: transfer files from the old PC to the new one?
Nothing is more exciting than getting a brand-new computer. Getting a new PC means you can enjoy more advanced configurations, fancy outlook or bigger storage space. However, it could be really troublesome at the time when Windows 11 transfers files to new computer. A good way can be safe and time-saving, but if you use an unsuitable method, some terrible things occur like:
- Data loss or damage
- Slow transfer speed
- Data security is threatened by hacker attacks or stolen
- Incompatibility
- Waste of time
All in all, when transferring files to new computer Windows 11, you need to choose a suitable transfer method. Wondering what’s the best way for you? We’ll help you determine which one is the best. For a quick view of the pros and cons of each method, scroll down to the conclusion part.
How to transfer data to a new PC on Windows 11
There are many ways to transfer data to new PC Windows 11. However, different ways have their own pros and cons. You can choose yourself.
| Methods | Pros | Cons |
|---|---|---|
|
✨AOMEI Backupper transfer files Go...>> |
√ Easy to use |
× Some featured functions are not available in the free version |
| 🔁E-mail transfer files Go...>> | √ Free to use √ Easy to transfer files |
× Can’t transfer massive files × Unable to encrypt transfer files × Needs stable power and network connection |
| 💿 OneDrive transfer files Go...>> | √ Convenient to transfer √ Easy to restore the lost files √ Safe and security by encrypting files |
× Need a stable network connection × Limited storage space × Possibility of losing personal privacy |
| 📂 USB cable transfer files Go...>> | √ Quick | × Too technical for some users × Incompatible connection for some devices |
| 🖥External hard drive transfer files Go...>> | √ It’s portable √ No network required √ Comparatively massive storage space |
× Data loss led by hard drive stolen × Incompatibility with devices × Physical damage |
| 🔍Network transfer files Go...>> | √Quick √ Easy to use √ No dependent third-party service |
× Network environment restrictions × Device dependent Security |
Method 1. Using file sync software to transfer[Easiest]🔥
The manual copy-and-paste method we usually use is essentially a one-time synchronization. However, this approach isn't ideal for those who need to synchronize data over a long period, especially when dealing with large amounts of data.
To automatically sync files from one folder to another and update all changes, you'll need file sync software. Reliable software can be time-saving and easy to use. That’s to say, you don’t have to be a computer expert or know too much computer knowledge, you can still execute data transfer in Windows 11 freely and easily. AOMEI Backupper Standard is the best free sync software that has a clean and user-friendly interface and settings.

- Multiple options: You can use four modes per your needs: basic sync, real-time sync, mirror sync and Two-way sync.You can enjoy the last three modes in the professional version.
- Automatic sync files: Schedule sync is enabled in daily/weekly/monthly/event trigger/USB plug-in mode.
- Full data protection solutions:If offers backup and restore utilities as well, you can create bootable media to prevent system errors.
Now download AOMEI Backupper and launch it. Here is the tutorial to show how to sync transfer files to new PC Windows 11.
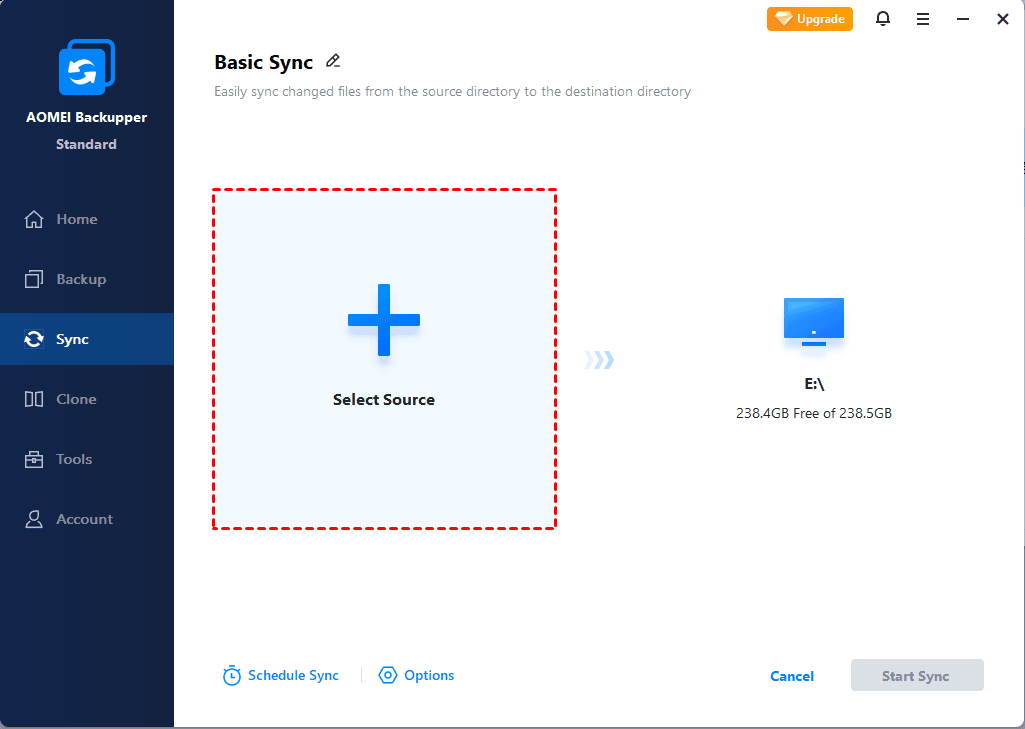
Step 1. Choose Sync on the left page and click on Basic Sync.

✤Real-Time Sync: This feature monitors files or folders in real-time and instantly syncs any detected changes from the source to the destination. It's incredibly useful for team collaboration or situations where files are frequently updated.
✤Mirror Sync: This feature ensures that the target folder mirrors the source folder exactly. Any changes or added data in the target folder will be overwritten to match the source folder.
✤Two-Way Sync: Any changes made in either the source or target directory will be synced to the other side automatically and mutually.
Step 2. Then when you enter the Basic Sync window, click Add Folder and select the folder containing all the files you want to transfer from Windows 11 old PC to the new PC.
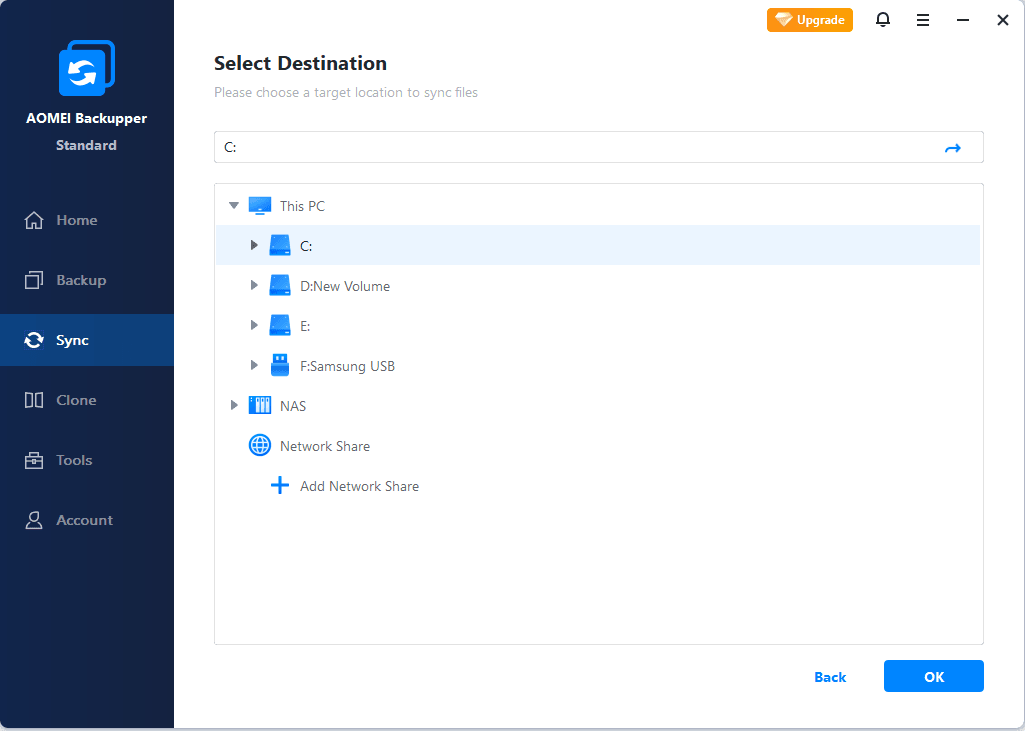
Step 3. After selecting files, you need to select a location to store the files that need to be transferred. Here you should choose Add Share or NAS Devices to select a shared folder on the new PC. Fill in the required PC information on the prompt screen.
Step 4. Then confirm the sync task and set the schedule settings if you want to get changes. You are able to sync in daily/weekly/monthly mode and then don’t forget to click Start Sync to transfer files from the old to the new.
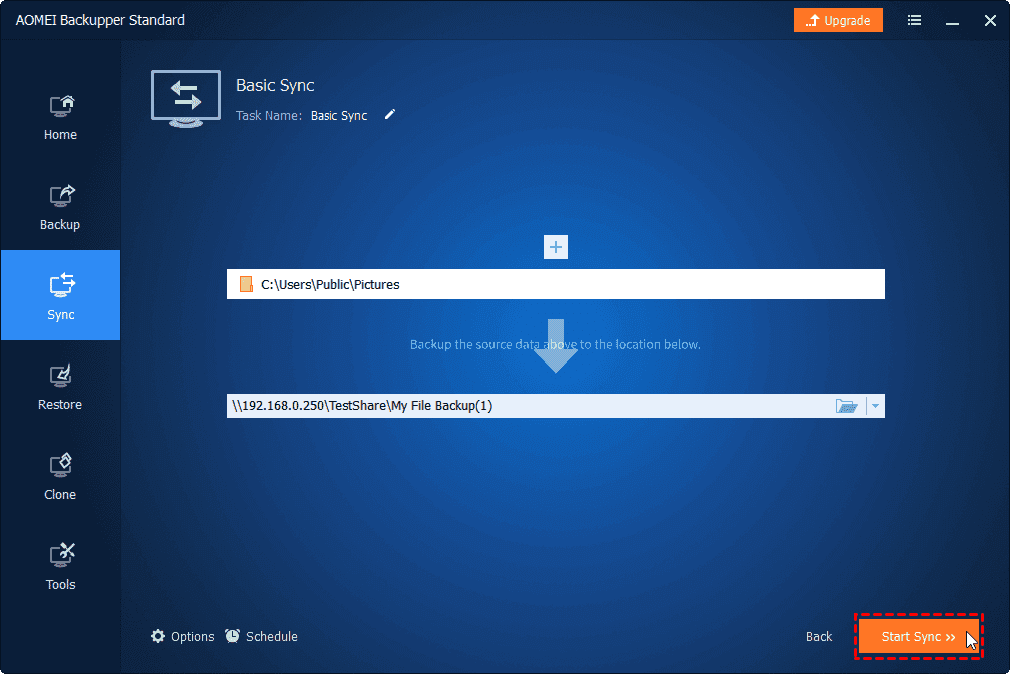
Step 5. After the sync process is finished, access the shared folder(s) on the new PC.
Method 2. Send files via e-mail
The straightforward way to transfer files via two devices is using e-mail. You can just log in to your e-mail account and then choose the folder you want.
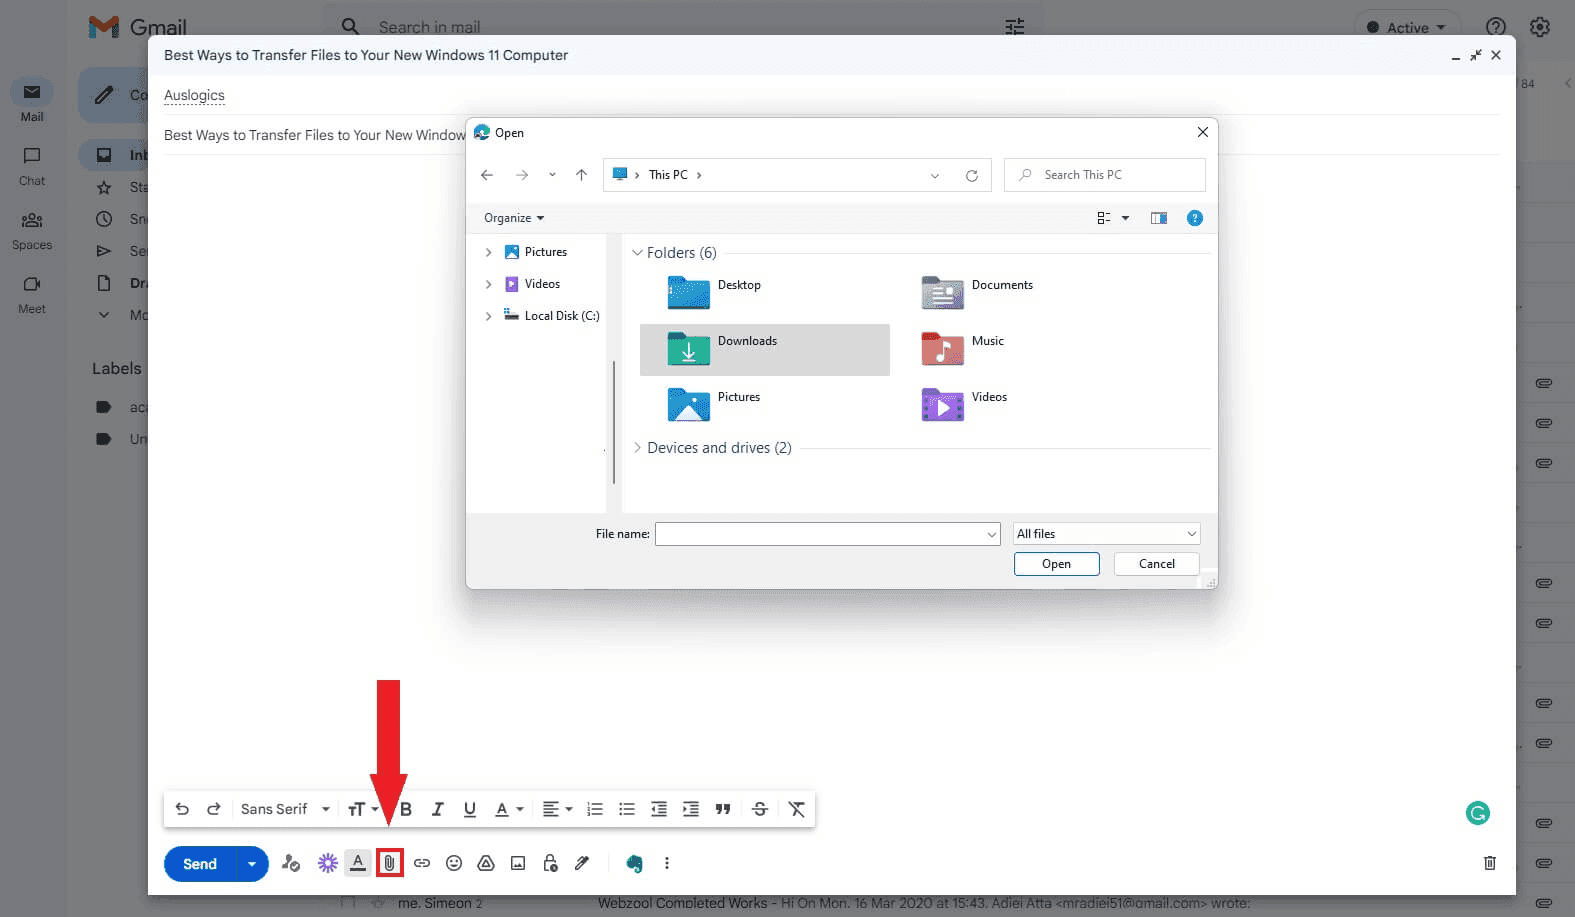
Frankly speaking, e-mail transfer is easy for transferring a small number of files. For massive files, it will cause disasters and even cause data transfer loss.
What’s more, when you use e-mail transfer, you have to keep the power and network connection stable, otherwise, once it is abrupted, it will lead to data transfer interruption and even data loss. Also, for important files that need to keep a high level of privacy. Email transfer does not provide an encryption method.
Method 3. Transfer files via OneDrive(Cloud)
OneDrive is well integrated with Windows, which makes it easy to backup important files and folders, and it enables you to transfer the needed files to a new PC once you signed in with the same account between the two PCs. Now I’ll show you how to do it:
Step 1. Search OneDrive on your old computer and you will be asked to set up your OneDrive if you have never used it before.
Step 2. Enter your email address and fill in your password, please remember to click Sign in.
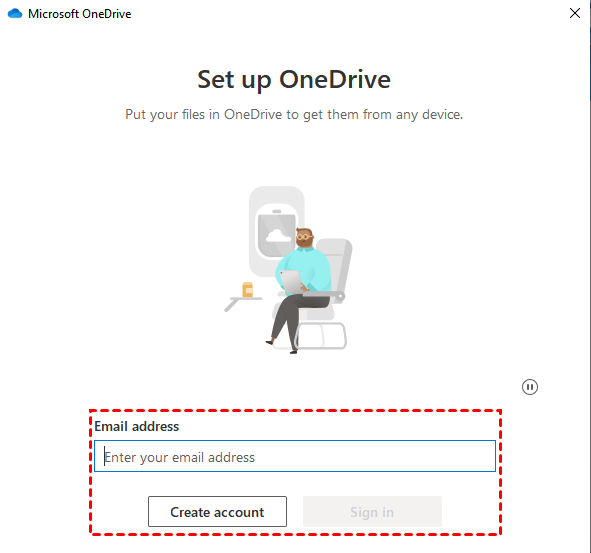
✍Warmly note: If you don’t have a OneDrive account, click Create account at the left bottom and fill in the required info.
Step 3. After loading the account info, you will see your OneDrive folder window and the default location of OneDrive. Confirm and click Next.
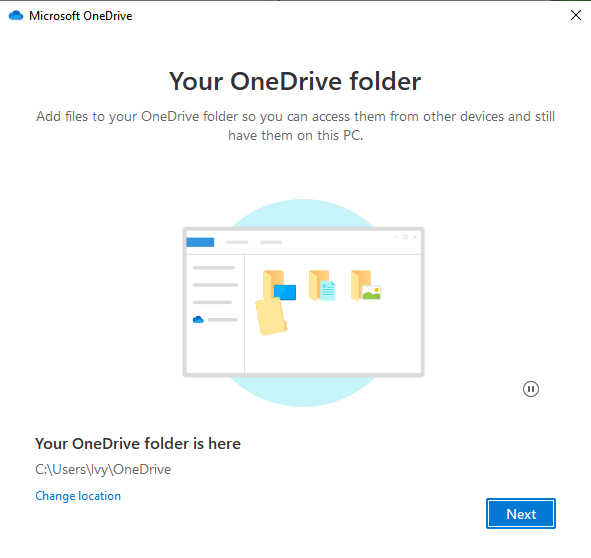
✍Note: You are available to change the location by clicking on Change location tab at the left bottom corner.
Step 4. Then on the Get the mobile app page, click Later to enter the next window.
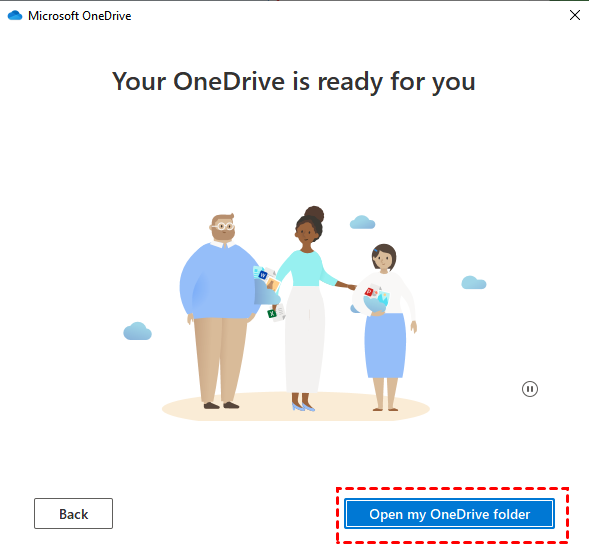
Step 5. In the Your OneDrive is ready for you window, click Open my OneDrive.
Step 6. Then start your new computer, firstly you should sign in and set up your Microsoft OneDrive account as previously. Then by default, it will sync your original backed-up info automatically.
Method 4. Basic USB transfer cable to send files
Simply, you are able to use the USB transfer cable to transfer data to new computer Windows 11. You can save lots of time and energy because no additional hardware is involved. Let’s see how it works:
Step 1. Download and install the USB bridge cable’s manufacturer-supplied drivers on both computers.
Step 2. Plug the USB cable into the corresponding USB ports on the two computers.

Step 3. Turn on both computers so they can detect the USB cable. This can start an installation wizard.
Step 4. Select the USB Super Link Adapter for the installation.
Step 5. Choose the High-Speed Data Bridge.
Step 6. Launch Device Manager, enlarge System devices, and double-check that if the USB cable is shown as a High-Speed USB Bridge Cable. The cable’s name could be different between vendors.
Step 7. Load the USB cable’s installation disc into the CD or DVD-ROM drive. After that, download the necessary data transfer software and run it. Then, repeat the process on the second computer.
Step 8. Launch the program on both computers. A window will appear with your PC on the left and the destination PC on the right.
Step 9. Open the drive, choose the files and folders you want to transfer, and then drop them in your preferred location.
Method 5. Using external hard drives or USB drive
Another alternative to the previous method is using an external hard drive or USB drive to transfer files to new computer Windows 11
Step 1. Connect your external hard drive to your old pc and make sure it can be detected properly.

Step 2. Open File Explorer, click This PC at the sidebar, find your drive and double-click it to open a new window.
Step 3. Copy all the files you want to transfer into a folder. Then select Copy option by right-click this folder.
Step 4. Then go back to your drive in File Explorer. Right-click the blank space and select the Paste option, now your files start to transfer, just wait until the whole process completes.
Step 5. Then disconnect your external drive to your old one and reconnect it to your new PC. Then open File Explorer and copy the folders you previously saved in the external drive and paste them into your new PC.
Method 6. File transfer via Network (WIFI or LAN)
If both your computers are on the same network and within range, you can set up a local network (LAN). Then you are able to use one PC to search another PC’s hard drive to choose which files you want to be transferred over.
On the old computer:
Step 1. Open File Explorer.
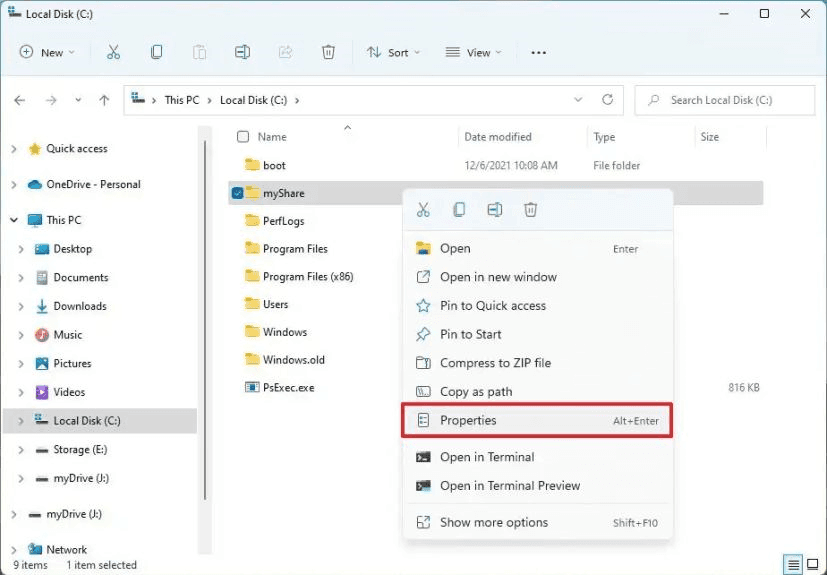
Step 2. Select the files you want to transfer and allocate them into one folder.
Step 3. Right-click the item and select Properties option.
Step 4. Click the Share… button under the Sharing tab.
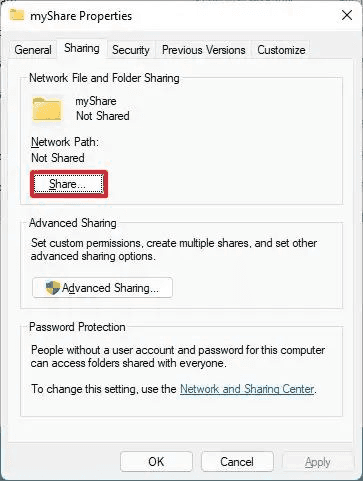
Step 5. Select the user or group to share the folder, and click on Add button.
Step 6. Under the permission level section, select the Read/Write option.
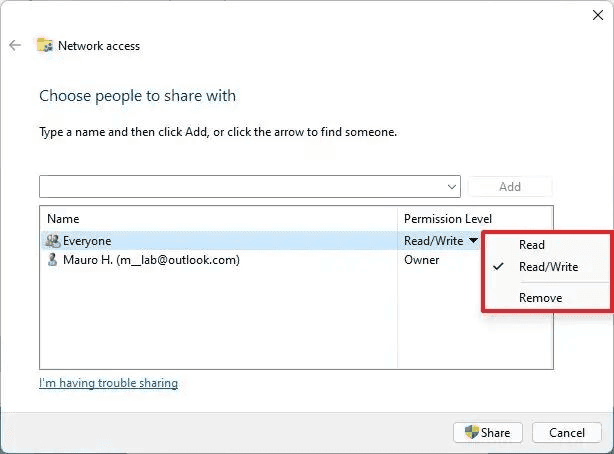
Step 7. Now you can click on Share button.
Step 8. Click the No, make the network that I am connected to a private network option.
Step 9. Confirm all the settings and click Done button and close it afterwards.
On the new computer:
Step 1. Open File Explorer, and choose Network from the left navigation pane.
Step 2. Double-click to open the old computer from the right side.
Step 3. Confirm the account credential to access the shared folder.
Step 4. Select everything by pressing Ctrl +A button.
Step 5. Click the Copy button in the command bar.
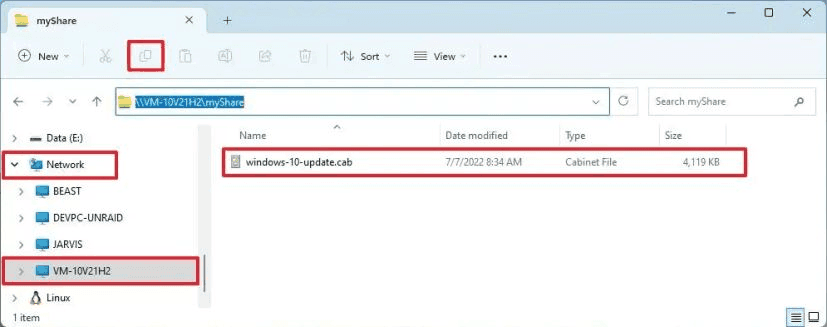
Step 6. Open the destination folder. And choose Paste button.

✍Note: For a large number of files, you can transfer the data to a few folders at a time.
FAQ on 'Windows 11 transfer files to new computer'
1. Can I transfer files wirelessly between two Windows 11 computers?
Yes, you can transfer files wirelessly between two Windows 11 computers using built-in features like Nearby Sharing or using third-party software like AOMEI Backupper, designed for file sharing over a local network. Make sure both computers are connected to the same Wi-Fi network for this method to work effectively.
2. What is the best way to transfer large files from my old PC to a new Windows 11 PC?
For transferring large files from your old PC to a new Windows 11 PC, utilizing an external hard drive or a high-capacity USB flash drive is often the most efficient method. You can also consider using cloud storage services like Google Drive, Dropbox, or Microsoft OneDrive to upload large files from your old PC and then download them onto your new Windows 11 PC.
3. I want to transfer all my files, including programs and settings, to my new Windows 11 PC. How can I do this?
To transfer all your files, programs, and settings to your new Windows 11 PC, you can use the built-in Windows Easy Transfer tool or third-party migration software like AOMEI Backupper. These tools allow you to transfer not only files but also installed programs, application settings, and user profiles from your old PC to your new one.
4. Are there any precautions I should take before transferring files to my new Windows 11 PC?
Before transferring files to your new Windows 11 PC, it's essential to ensure that your old PC is free from malware or viruses by running a thorough antivirus scan. Additionally, back up important files to an external storage device or cloud service to prevent data loss during the transfer process. Finally, make sure both your old and new PCs are fully updated with the latest Windows 11 updates to avoid compatibility issues.
Conclusion
Here below I list the pros and cons of each six methods for your convenience, you can choose by yourself. Given the ease of operation, we recommend you use third-party software ----AOMEI Backupper. It is not only an incredible sync software that helps you perform Windows 11 transfer files to new computer, but also powerful backup and restore software that saves your data once it lost unfortunately. It can backup C drive Windows 11 to add another layer of protection to your computer security.

