How to Install Windows 10 from USB to M.2 SSD Easily| 2 Ways
Here are 2 ways to install Windows 10 from USB to M.2 SSD, both manual and professional way. Now start to know the details and make your choice.
By Maggie Updated on November 13, 2023
Why does install Windows 10 from USB on M.2 SSD Drive?
An M.2 SSD, initially called Next-Generation Form Factor (NGFF), is a type of solid-state drive designed to meet a computer industry specification for internally mounted storage expansion cards in a compact form. Similar to other SSDs, M.2 SSDs offer quicker boot-up times, lower power consumption, and generate less noise compared to traditional HDDs.

In comparison to mSATA SSDs, M.2 SSDs boast several advantages:
1. Smaller Size: M.2 SSDs are more compact and are widely used in notebooks and laptops.
2. Faster Speeds: M.2 SSDs can reach speeds of up to 4GB per second, whereas SATA SSDs max out at 600MB per second.
3. NVME Protocol: Some M.2 SSDs use the NVME protocol, providing significantly lower latency than mSATA SSDs.
In summary, installing Windows on an M.2 SSD drive is often considered the fastest way to enhance Windows loading and overall performance. Then let’s talk about how to install Windows 10 to M 2 SSD in the next section.
How to install Windows 10 on M 2 SSD drive
Way 1. Manual way
The Windows built in backup and restore utility allows you to create a system backup and then restore it on SSD with an installation disc. This method contains several procedures and I will sh ow you how as follows:
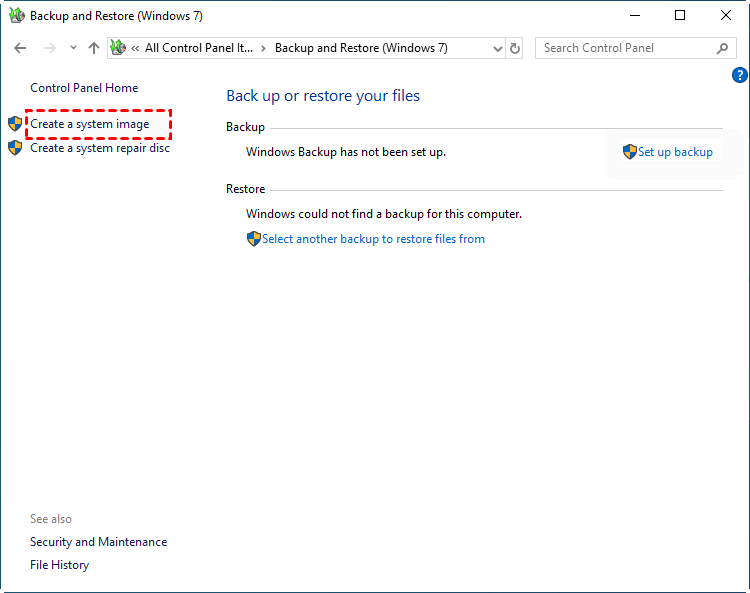
Step 1. Create a Windows 10 system image
- Open Control Panel and go to Backup and Restore (Windows 7). Then click Create a system image as the picture shows.

- Then choose the USB as the destination path to save the backup image. Then click Next to continue.
- Confirm your settings and choose Start Backup.
Step 2. Create installation media
Once you've created a system image in Windows 10, migrating the OS to an M.2 SSD is a straightforward process. However, you'll need an installation disc for booting to initiate the procedure. Please download Windows 10 Media Creation tool on the Microsoft software download page and create a bootable USB with it.
Step 3. Restore system image to M.2 SSD
Then, you can insert the bootable USB drive into your computer for system image recovery. The detailed steps are below:
- Shut down the computer and connect the SSD to it and make sure it can be detected.
- Reboot your computer and access the BIOS window to change the boot device to the USB drive. Save the changes and then restart the system from the USB drive.
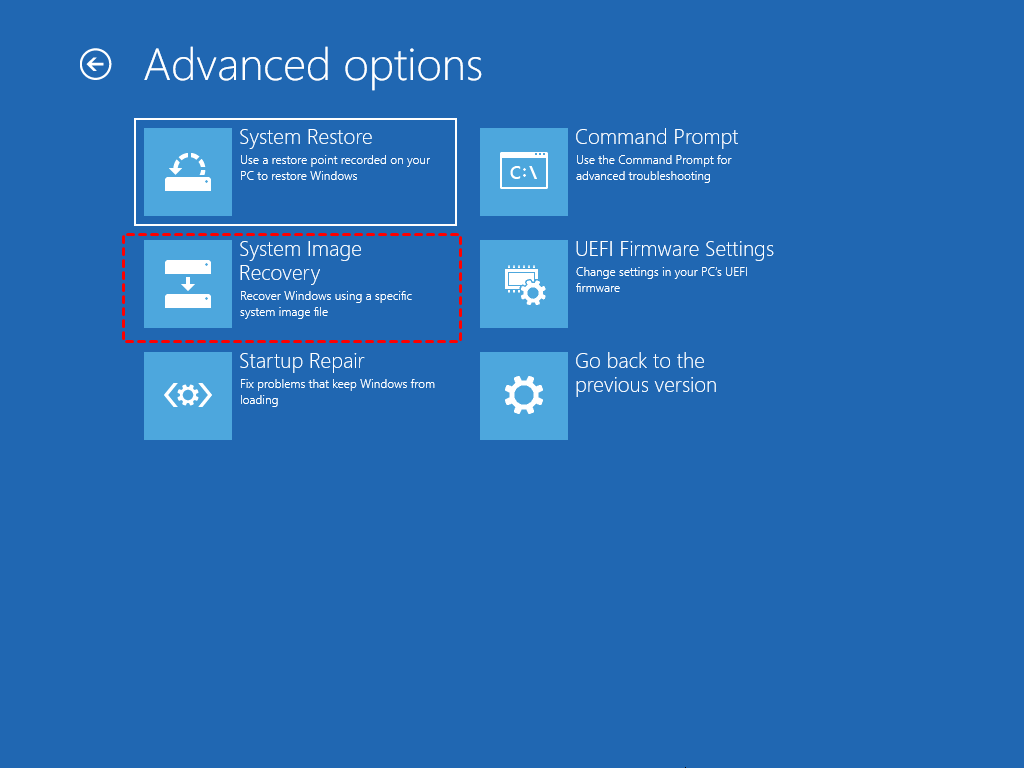
- In the Windows Setup window, click Repair your computer -> Troubleshoot -> Advanced Options -> System Image Recovery.
- Following that, you'll encounter the Re-image your computer screen. Click on Use the latest available system image (recommended), then click Next. Follow the instructions to complete the restoration process.

This method outlines the process of transferring Windows from USB to M.2 SSD. While effective, the operation steps can be somewhat troublesome and may pose a challenge for users with limited computer knowledge and skills. In some instances, users may encounter the error of Windows 10 backup not working.
Way 2. Direct Simpler way
For a simpler approach, it's advisable to consider the second method: migrating Windows 11/10 with an M.2 SSD cloner. This option features a user-friendly interface and is well-regarded among Windows users. AOMEI Backupper Professional stands out as powerful and secure system clone software. It enables you to effortlessly transfer Windows 10/11 to an M.2 or NVMe SSD without the need for a complete operating system reinstallation. Also, you can use the USB as the middle tool to transfer, but we suggest the direct transfer might be easier and time-saving.
✍Flexible cloning options: you can clone systems, disks and partitions separately to suit your needs.
✍Intelligent Clone: By default, it will only clone the used sectors on your source disk, which makes it possible for you to clone larger hard drives to smaller ones.
✍Live clone: It allows the clone task to work in the background, so the cloning process won't interrupt running programs in the Windows and you can work normally while cloning.
Preparations:
1. Connect the M.2 SSD to your computer. In case you plan to clone an M.2 SSD to another M.2 SSD but have only one slot, it's recommended to prepare an M.2 to USB enclosure beforehand.
2. Download AOMEI Backupper and install it.
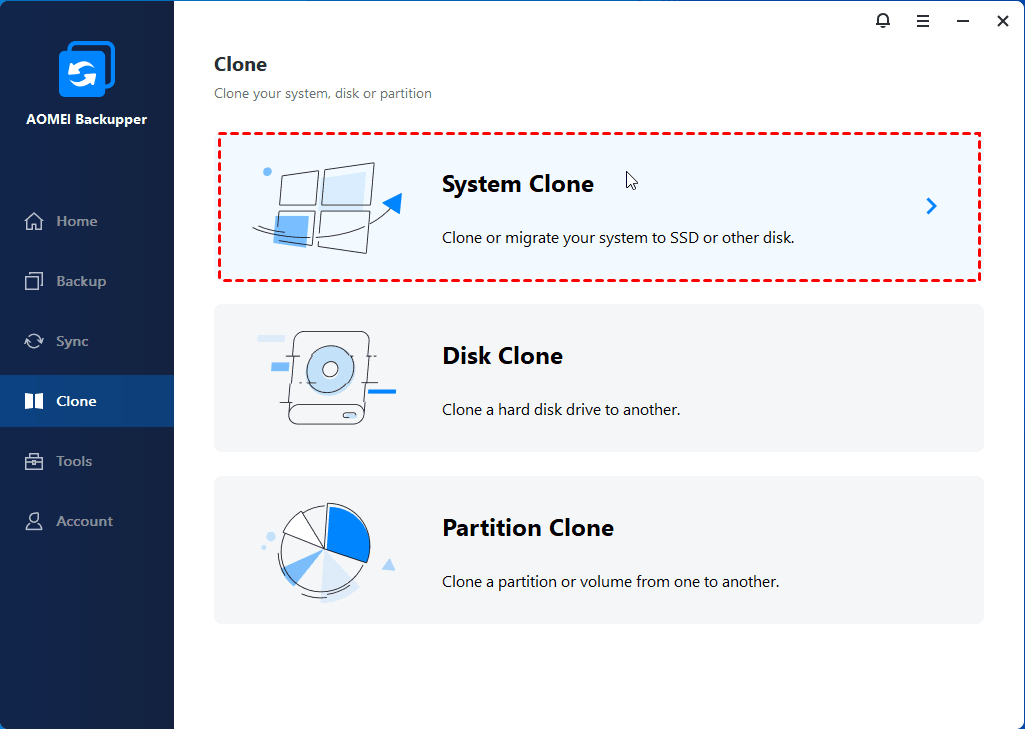
Step 1. Launch AOMEI Backupper Professional. Click Clone and then select System Clone.
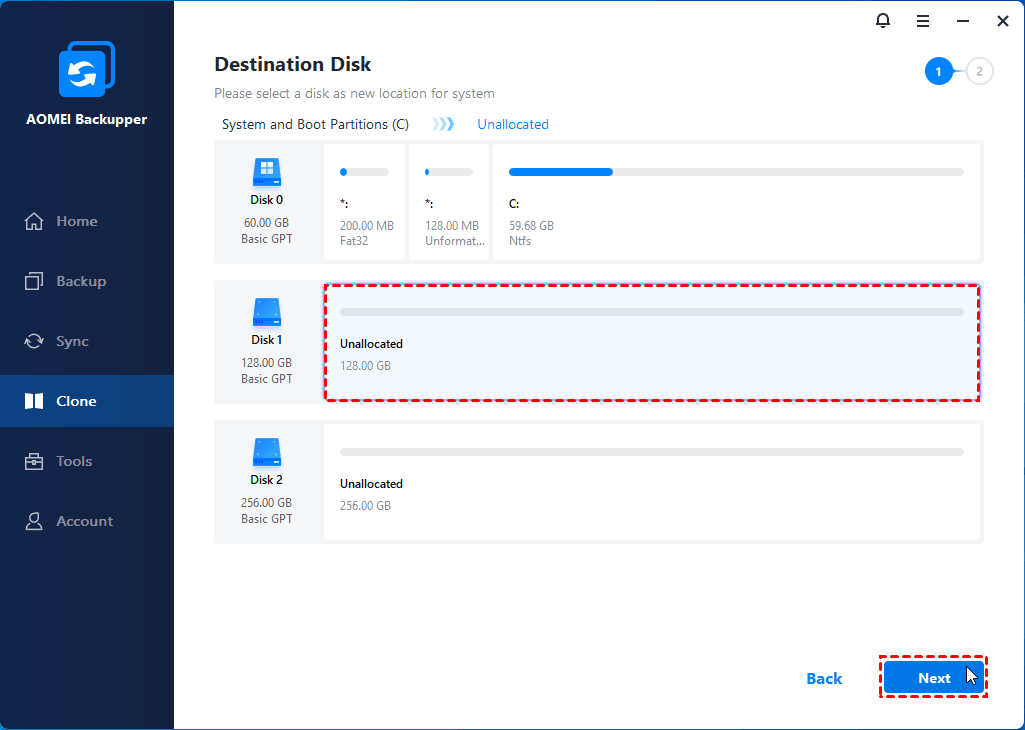
Step 2. The system partitions will be selected automatically. You just need to select the M.2 SSD as the destination disk, and click Next to continue.
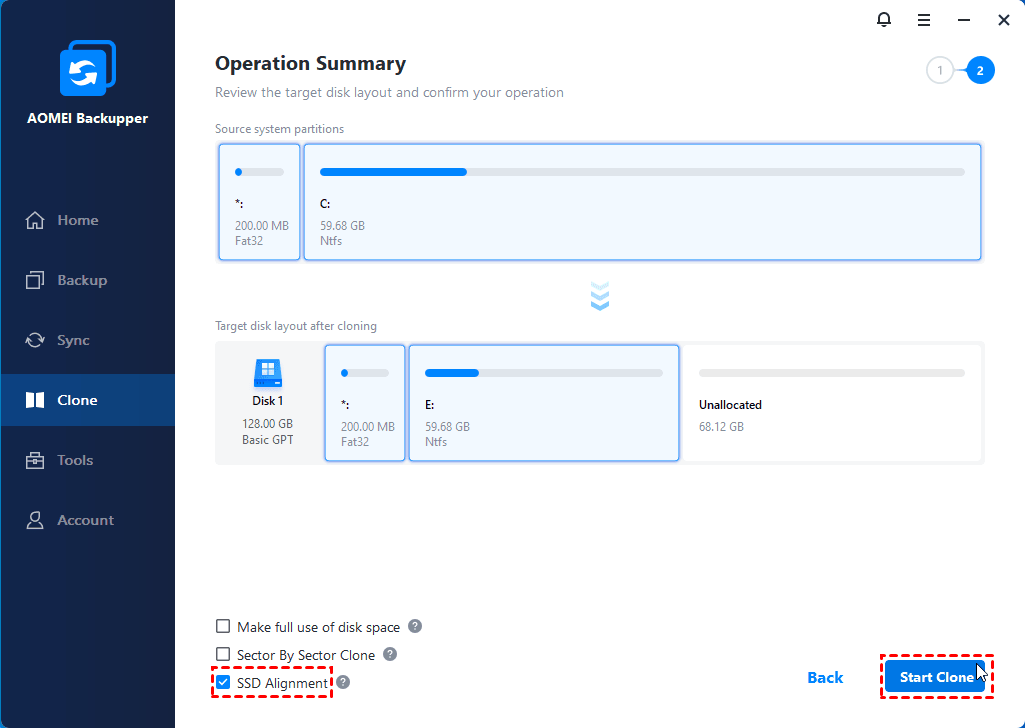
Step 3. Check SSD Alignment to accelerate M.2 SSD's reading and writing speed. Then click Start Clone to migrate Windows 10 to M.2 SSD.
If you intend to use AOMEI Backupper on different computers without the hassle of repeated installations, it's advisable to upgrade to AOMEI Backupper Technician Plus.
Bonus tip: booting from the M.2 SSD
After cloning, you can go to BIOS and change the boot device to boot from the M.2 SSD.
Step 1. Restart your PC and press the manufacturer-specified key to enter BIOS. This key could be F2, F10, F12, Del, etc. If you're uncertain, refer to your user manual or search online for guidance.
Step 2. In the BIOS menu, navigate to the Boot tab and designate the M.2 SSD as the first priority in the boot order.
Step 3. Press F10 to save the changes and exit.
Verdict
Usually, there are two methods to install Windows 10 from USB to M 2 SSD: using the built-in Windows tool or a professional third-party cloning tool. Your choice depends on your preferences and comfort with computer operations.
For those who enjoy DIY tasks, the first method is a good fit. However, if you're less familiar with computer operations, the second option, using AOMEI Backupper, is an excellent choice. Moreover, it's versatile and can be used for various tasks such as transferring Windows from M.2 SSD to larger M.2, cloning SSD to a larger SSD, cloning NVMe SSD, and replacing a laptop HDD with an SSD, among other functions.
That’s the end of the article, hoping you can get your ideal answer!
FQA
M.2 vs. SATA SSD for boot drive, which is better?
An M.2 SSD occupies less space compared to a 2.5-inch SSD. Additionally, M.2 SSDs typically utilize the NVMe protocol (PCI-e), making them generally faster than SATA SSDs that use the AHCI protocol. Consequently, there is an increasing demand to migrate Windows 10/11 to M.2 SSDs nowadays.
Would a 250GB M.2 SSD be sufficient purely for OS storage?
For Windows OS installation and basic applications, a 128GB SSD is generally sufficient. Opting for a 250GB SSD provides extra space for future use, making it a good choice for those who anticipate expanding their storage needs over time.

