[5 Ways] How to Transfer Photos from iPad to Computer
This guide will tell you how to transfer photos from iPad to computer. Whether you are using an iPad Pro, iPad Air or iPad mini, you can use one of 5 methods to successfully transfer pictures to Windows PC or Mac.
By Kathy / Updated on May 14, 2026
Import pictures from an Apple iPad to a PC.
I have an HP Windows 11 PC, I have an Apple iPad which I have pictures that I would like to import to my PC to save them to an external drive for later use. I have installed the latest version of iTunes on my PC. Is there a better set of instructions to import the pictures than the one I downloaded from the Microsoft web page?
- Question from Microsoft Community
With time and use, the limited storage space of iPad will be consumed by photos. In this case, you can choose to transfer pictures from iPad to computer to make a backup and then delete them from iPad to free up space.

iTunes is the default management tool for Apple devices, but you find that it cannot help you import iPad photos to your computer. But don’t worry, this guide will tell you how to transfer photos from iPad to PC without iTunes or to Mac easily. Keep reading to learn more.
For Windows users, if you want to transfer lots of photos saved in different albums, Method 1 is your first choice. If you want to transfer Camera Roll photos, you can refer to Method 2 or Method 3. If you need a wireless transfer tool, iCloud mentioned in Method 4 will be your ideal choice.
For Mac users, you can go to Method 5 to finish the process efficiently.
#1. Easiest way to transfer photos from iPad to PC without iTunes/iCloud
If you are a Windows PC user, you can use the free iPhone transfer tool named FoneBackup to help you transfer pictures from iPad to computer.

- Preview and select the pictures you want to transfer.
- Super-fast transfer speed shortens the process.
- Pictures will be kept in original quality without any damage.
- Only USB connection makes all data safe.
Just free download this tool on your Windows PC and follow the steps below to finish the process.
How to transfer pictures from iPad Pro, iPad Air, iPad mini to Windows 11/10/8/7
Step 1. Launch FoneBackup > Plug in your iPad. (You need to enter the passcode on iPad to let the software access your device.)
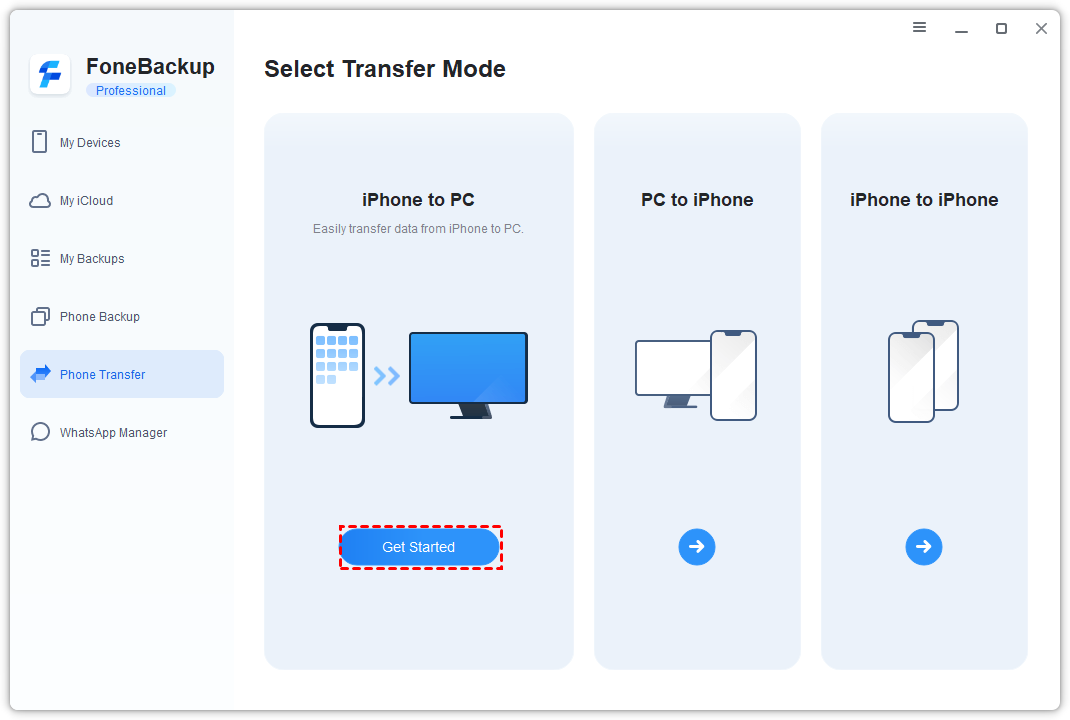
Step 2. On the Home screen, click Phone Transfer on the left pane. Move mouse on the iPhone to PC option. Click Get Started.
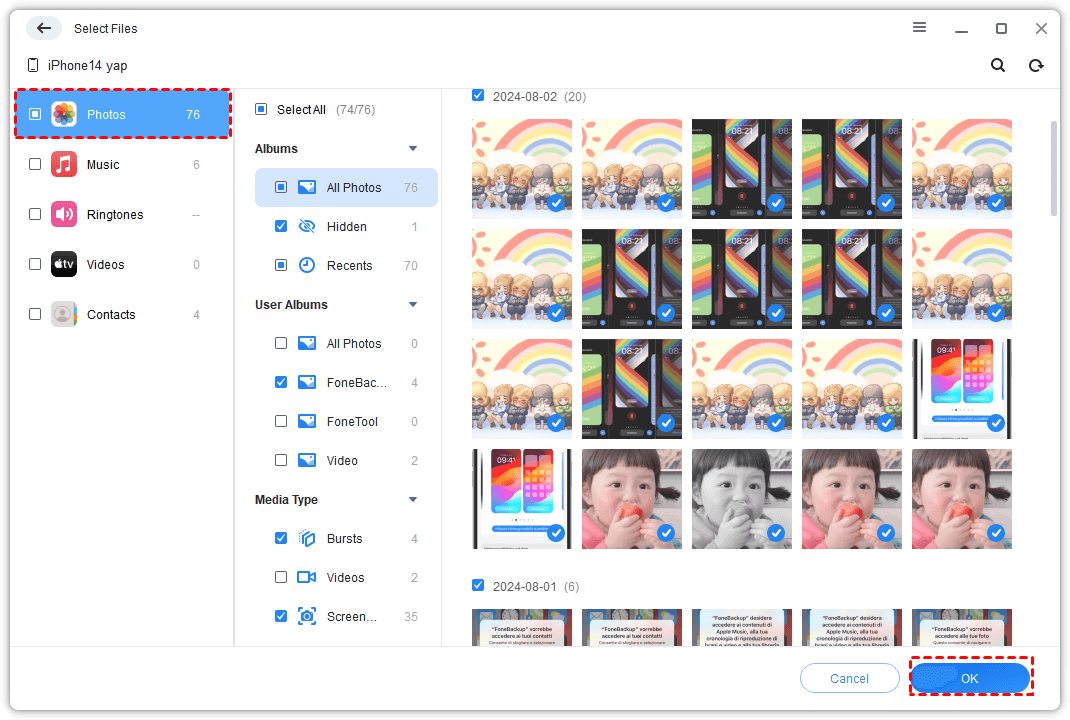
Step 3. Click the “+” icon > Choose the pictures you want to transfer > Click OK to continue.
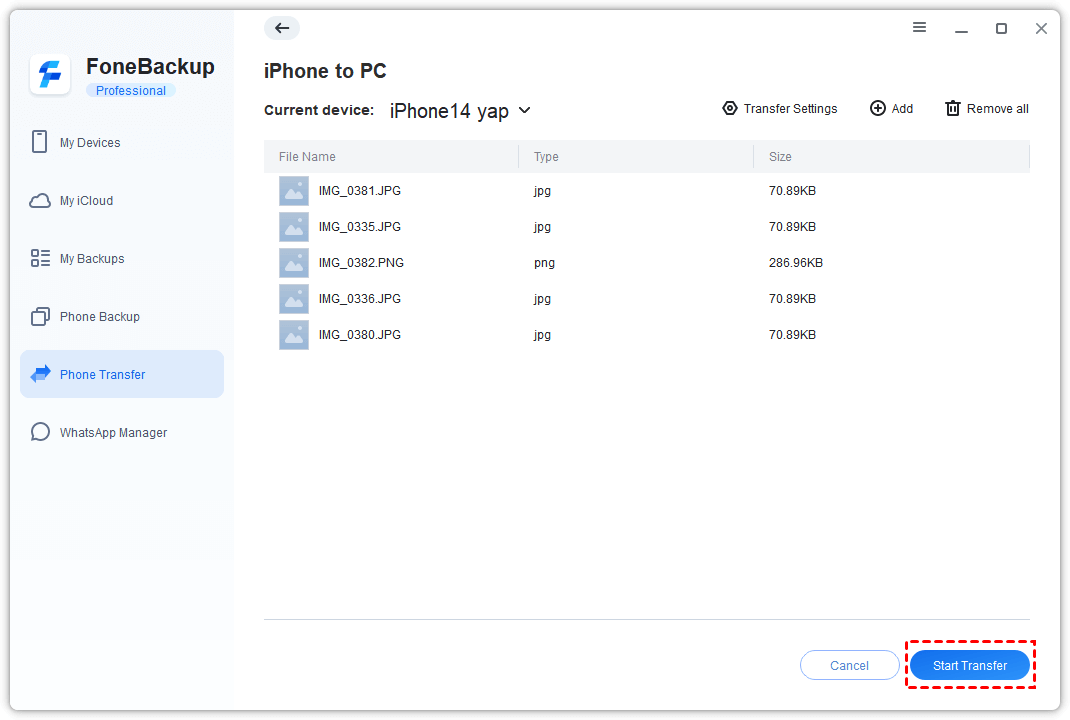
Step 4. Select a destination to save the pictures from the Transfer Settings > Click Start Transfer to begin the task.
#2. Export photos from iPad to PC in Windows Files Explorer
File Explorer is a built-in function of Windows PC that lets you view and manage files in your devices and drives. It will take your iPad as a digital camera or storage device and you can easily import those photos saved in Camera Roll to your PC.
How to download photos off iPad to PC in Windows 11/10/8/7
Step 1. Connect your iPad to computer via the USB cable.
Step 2. Open This PC or Computer > Find your iPad name under “Devices and drives” > Open your iPad.
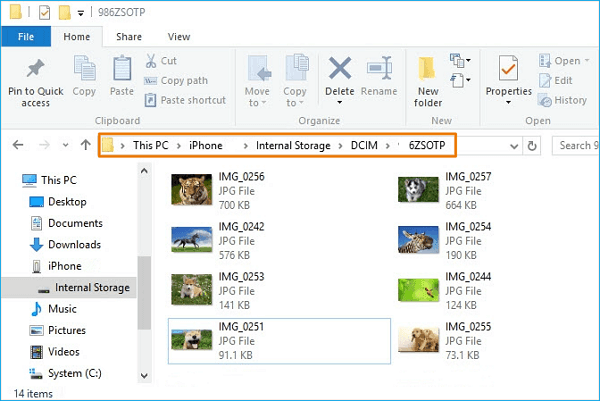
Step 3. Go to Internal Storage > DCIM > click the folder and you will see the pictures.
Step 4. Copy and paste the photos to your computer.
#3. Copy pictures from iPad to PC via the Photo app
Photos app is one built-in photo manager for Windows computer. It helps users transfer Camera Roll photos from iPad to computer.
How to transfer photos from iPad to PC in Windows 11/10/8/7
Step 1. Connect your iPad to computer via the USB cable. Tap Trust or Allow when a prompt appears on your iPad.
Step 2. Open Photos app > Click Import > Choose From a USB device.
Step 3. Uncheck the photos you don't want to transfer. (New photos will be selected for import by default.)
Step 4. Click the Import button to transfer photos from iPad to PC.

#4. Move images from iPad to PC with iCloud
If you need to finish the transfer process without USB, then iCloud is available. But it has a limited free storage (usually 5GB). If you have enough iCloud storage to make it, just follow the guidance below to move your pictures.
There are 2 options to help you move iCloud photos to PC, and Option 2 might be the most convenient way to accomplish the task.
Option 1. Save iCloud photos to PC via the iCloud client
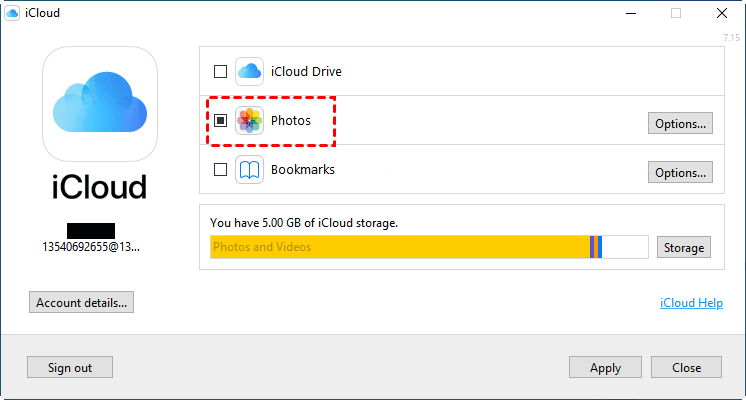
Step 1. On your PC, download iCloud for Windows > Run the app and sign in with your Apple ID.
Step 2. Click the Options next to Photos > Select iCloud Photo Library > Click Done > Apply > iPad photos will sync to your PC automatically with a stable network connection.
Option 2. Download iCloud photos to PC using the professional FoneBackup
When it comes to accessing iCloud data from PC, the iCloud manager - FoneBackup will be your best helper. With it fast download speed, you can easily get your photos in a short time. And this app offers two-factor authentication which is same as the Apple service to protect your iCloud data. So you don't need to worry about any data leakage risk.
Now just download it on your PC and follow the instructions below to finish the process.
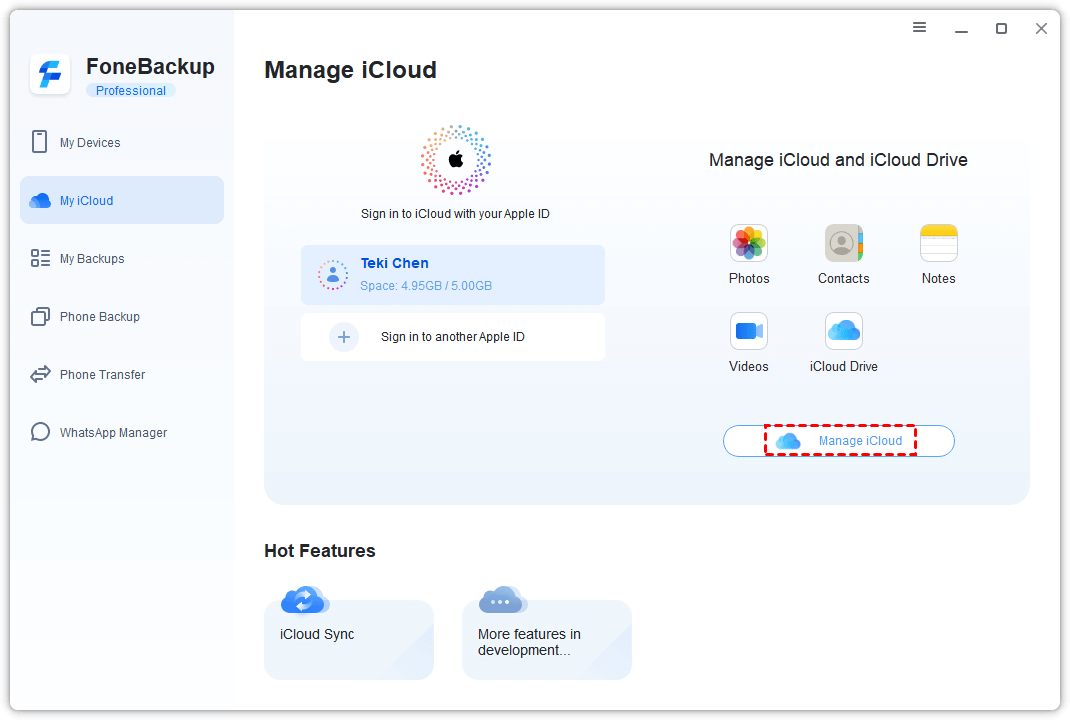
Step 1. Launch FoneBackup > Go to My iCloud > Log in with your Apple ID > Choose Manage iCloud to continue.
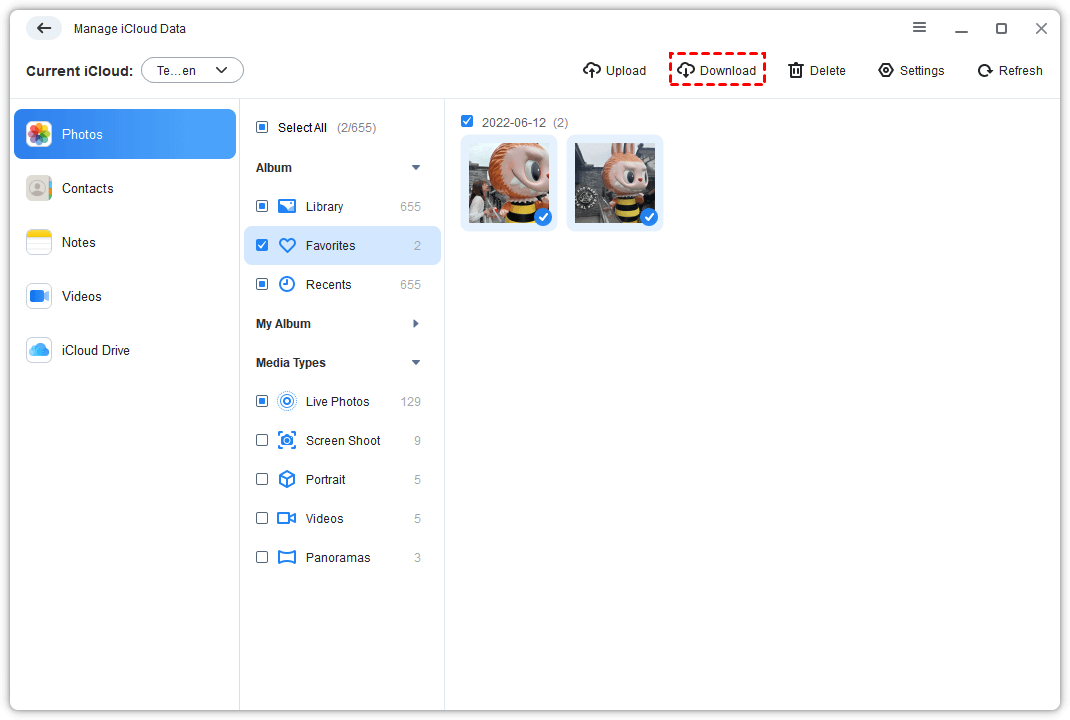
Step 2. Select your targeted photos under the Photos option > Click the Download button.
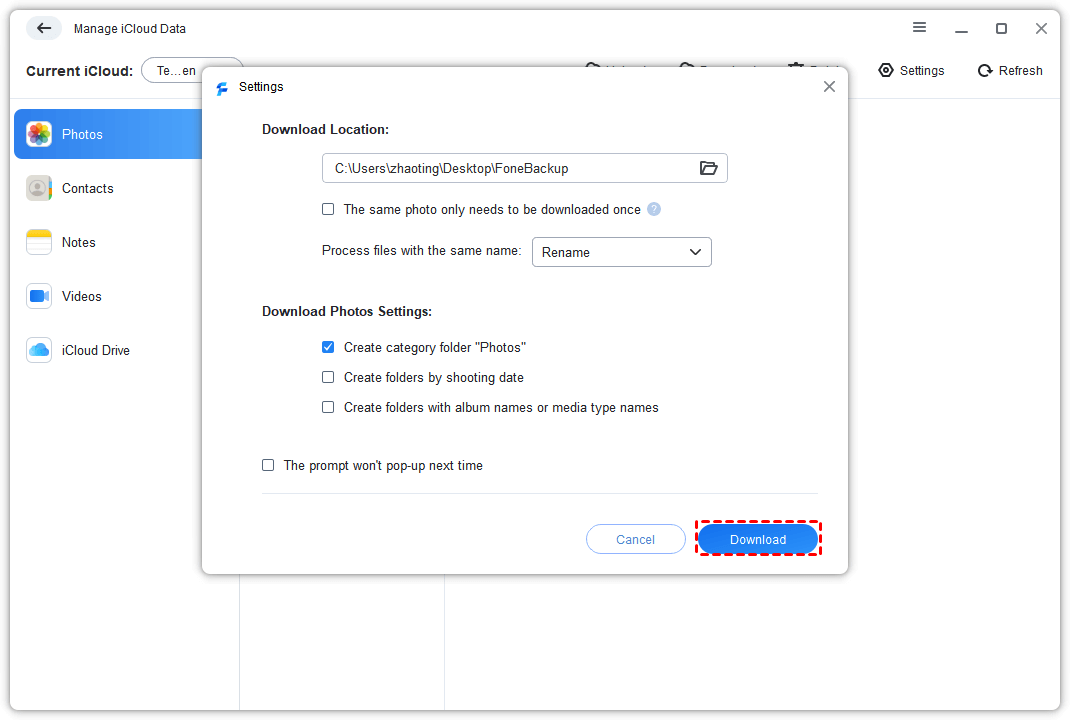
Step 3. Change the download settings from the pop-up window > Tap on Download to start.
#5. Import pictures from iPad to Mac via USB
When you have iCloud Photos sync enabled on both your Mac and iPad, as long as they are signed in with the same Apple ID, the photos on your iPad will automatically sync to your Mac. However, if you have insufficient iCloud storage or need to transfer a large number of photos, using a USB connection for transfer is also a viable option.
Step 1. Connect your iPhone or iPad to your Mac using a USB cable.
Step 2. Launch the Photos app on your computer, and if the Import screen doesn't appear automatically, click the device's name in the Photos sidebar. If prompted, unlock your iPad and trust the computer.
Step 3. Choose the destination for importing photos, either an existing album or a new one > Select the desired photos and click Import Selected or Import All New Photos. Once the process is complete, disconnect your device from your Mac.

Conclusion
That’s all for how to transfer photos from iPad to PC in Windows 11, 10, 8, 7 and Mac. You can choose the most suitable method based on your device and transfer needs. If you are a Windows user and need to transfer a large number of photos from your iPad to your computer, FoneBackup might be your best choice.
Its fast transfer speed and powerful features can help you finish the process efficiently. So why not download FoneBackup to discover more right now!
FAQs