5 Tips for Organizing Photo Library on iPhone & Computer
Why is your photo library always in a mess? Do you get annoyed by a cluttered photo gallery? If the answers to the two questions are both YES, you may need this guide to get 5 tips to organize photo library on iPhone.
By Demi / Updated on May 15, 2026
Photos organization
I am overwhelmed with the 9,000 pictures I have on my iPhone. I try to organize them but since they stay in the main library I get lost. I am also having problems finding how I look for duplicate photos. I need help.
- Question from Apple Community
It couldn’t be easier to take photos using your iPhone. However, it is convenience and simplicity that bring merits along with demerits. It may be too late if you have found you’re overwhelmed with mountainous photos on your iPhone. But please don't be disappointed, the five tips in this guide can help you better organize the photo library on iPhone or computer.
![]()
How to organize photo library on iPhone
There is much to do with your photo library on iPhone to make everything fall nicely into place. Organizing photo library on iPhone takes time, just try the three tips with patience.
Tip 1: Delete unnecessary images in time
Most essentially and regularly, deleting unnecessary images and videos from time to time helps free up space on your iPhone. At the same time, it makes it easier to do further organization of your photo library.
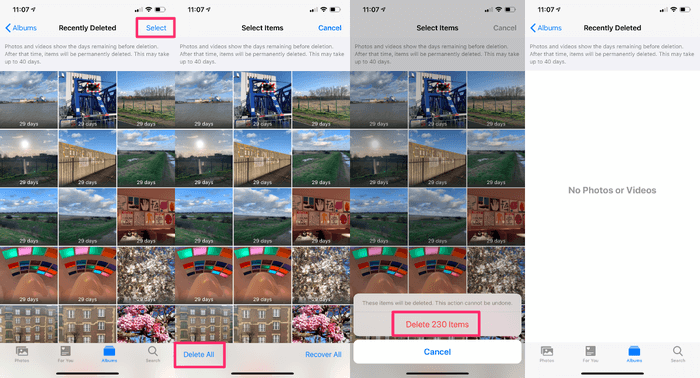
You can click on a single photo to delete it, or delete photos in bulk. Please note that if you intend to free up space by deleting pictures, you need to completely delete them by going to Photos app > Scroll down to locate and choose Recently Deleted > Click Select > Delete All.
If your iPhone are running iOS 16 and later, you can merge duplicate photos on iOS 16 to manage duplicate photos in the Photos app directly.
Tip 2: Organize photos into relevant albums
To make sure you can easily and quickly find certain pictures in the future, organizing the photo library into relevant albums can be a nice try. The following example can be a nice reference for you.
Create a new album to organize pictures categorized by location
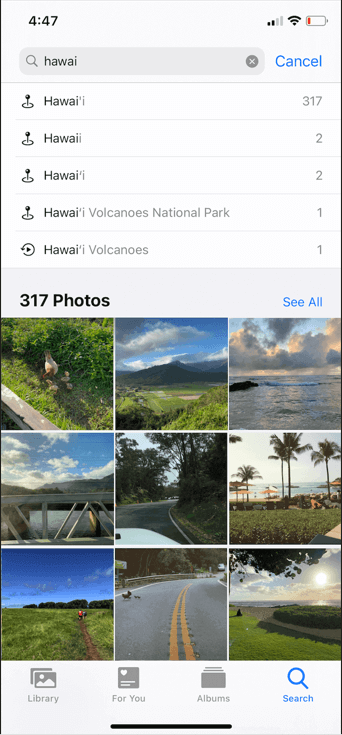
For better illustration, let’s take creating a photo album categorized by location as an example. You can also repeat the steps below to create other themes of albums.
Step 1. Go to the Photos app > Tap the Search tab in the bottom > In the Search bar, type a location > Tap See All.
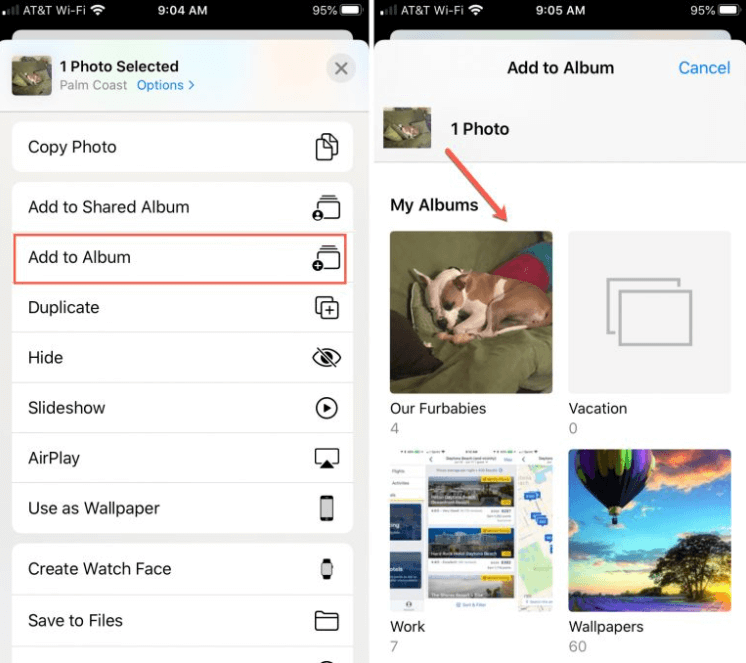
Step 2. Click Select to select the images you’d like to add to the album.
Step 3. Tap the Share icon > Add to Album > New Album > Name your album and hit Save.
Tip: Optionally, you can also create a new album by going to Photos app > Albums > Click the + icon > New Album to make it.
You can also make use of face recognition feature in the Photos app to organize photos. Just go to Faces and find the row of Suggested Faces to choose the images and add to the specific albums.
How to add photos to an existing album
Once you have created relevant albums to organize photo library, you’re free to manage photos by adding them to the existing album in the future.
Step 1. Go to the Photos app on your iPhone > tap Select to choose the photos and videos you want to add.
Step 2. Tap the Share button > Tap Add to Album to choose an album.
Note: Photos aren’t copied or duplicated when added to an album. The albums simply create pointers to the photos.
Tip 3: Add keywords and tags on photos
It’s not a stop to organizing photos into relevant albums. If albums make all your images on iPhone in order, adding keywords and tags to photos can help you keep your images in mind. If you have no idea about how to organize photo library by adding keywords and tags, the two clues below may be helpful.
Clue 1. Think about why you search for the photo.
Clue 2. Create a keywords list to make sure keywords are created consistently.
The one inconvenience with adding keywords or tags on pictures is that it can’t be done on your iPhone without a third-party app like Photo Investigator.
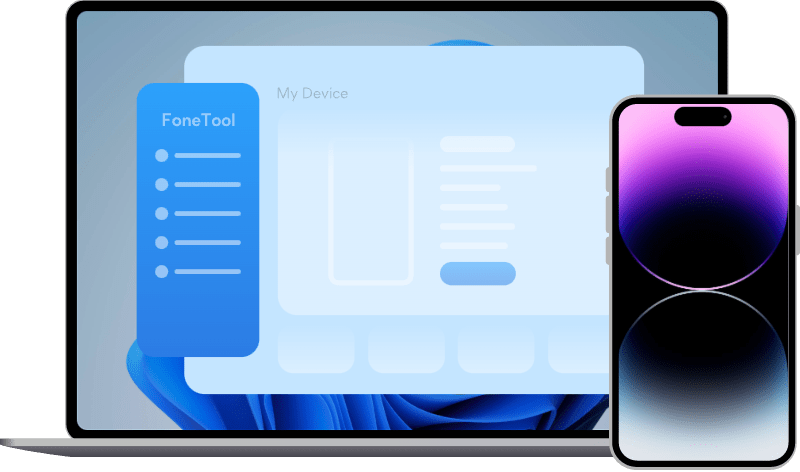
Advanced: How to organize iPhone photos on computer
The powerful software - FoneTool is a professional PC-based tool to manage your iDevices data. To better organize iPhone photo library, it can be one of the best choices for you. It supports all models of iPhone, iPad, and iPod, and works with Win 11/10/8/7/XP.
Free download FoneTool to your computer, and organize your iPhone pictureswith these tips below.
Tip 4: Automatically scan and delete duplicate photos
If you are used to editing images with third-party apps or syncing them to multiple cloud services, your iPhone may be full of duplicate photos. How can you organize photos on iPhone without duplicates? Let FoneTool help you.
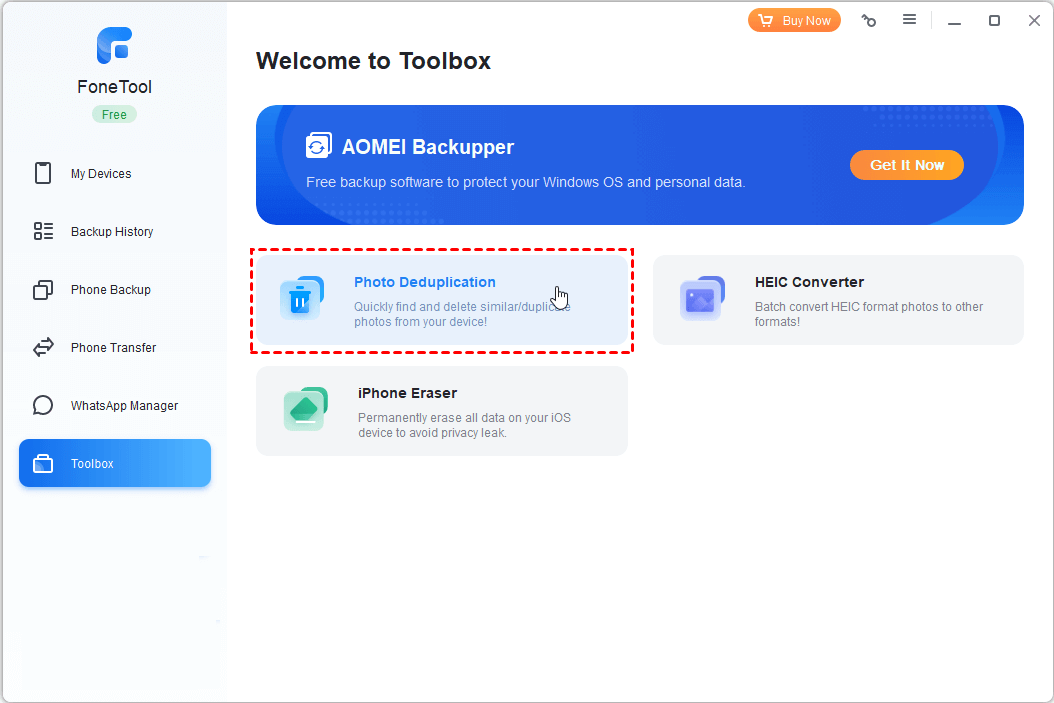
With the Photo Deduplication function in FoneTool, all the duplicate and similar photos on your iPhone can be scanned and deleted in a flash.
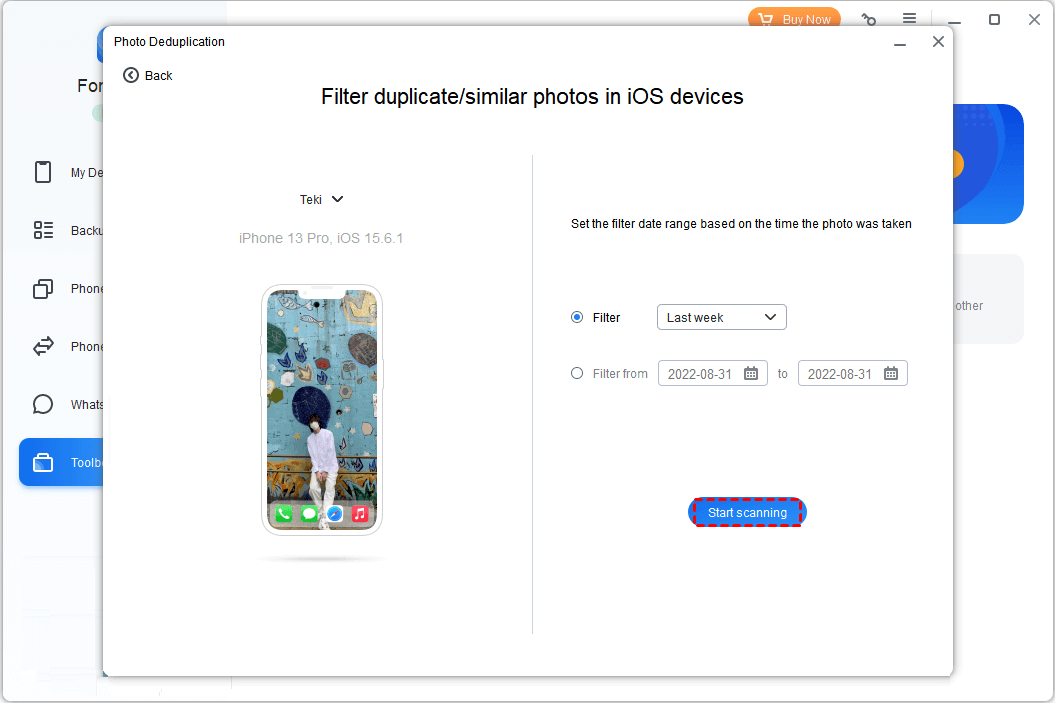
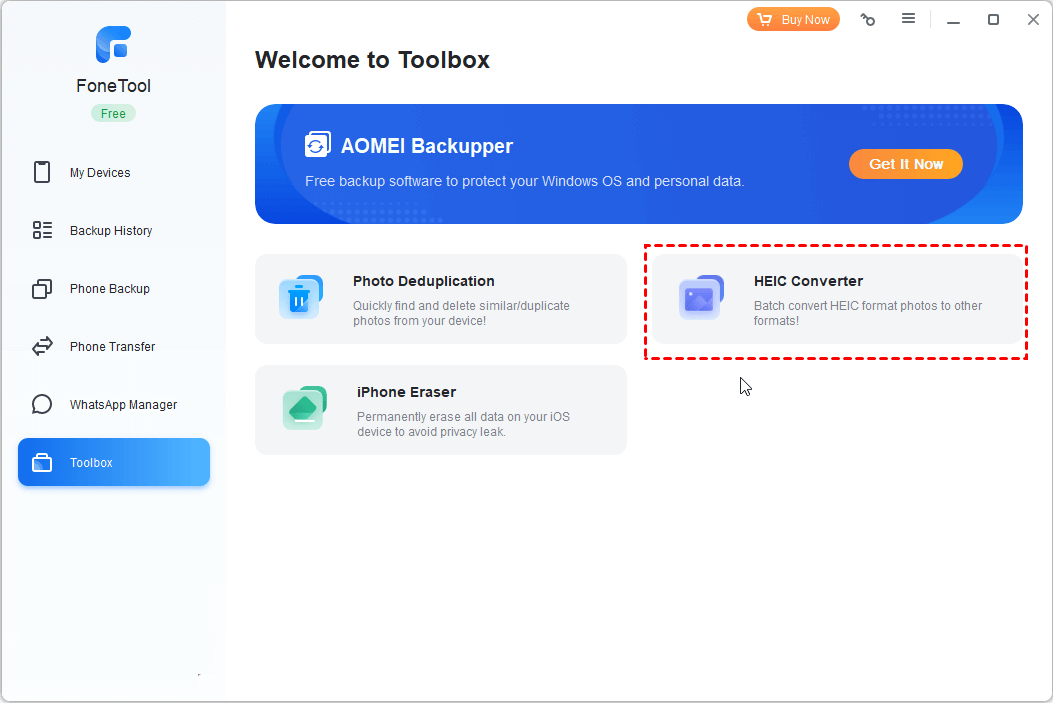
Step 1. Connect your iPhone to computer > Launch FoneTool > Click Toolbox and choose Photo Deduplication.
Step 2. Click Scan iOS Device > Click Start Scanning to begin.
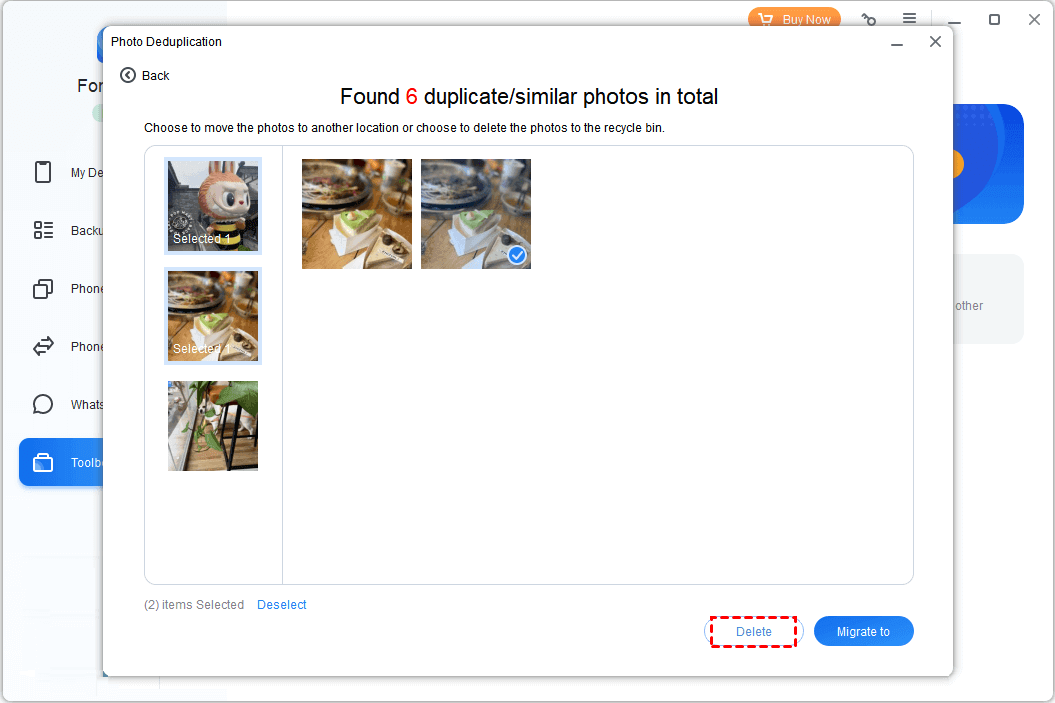
Step 3. After the duplicates are listed in groups in the left pane > Select the unwanted images and click Delete.
Tip 5: Schedule regular photos backup
Regularly backing up iPhone photos to PC makes your data safer. Although you may backup iPhone with iCloud, it seems that FoneTool can be a better solution for you.
Compared with iCloud, FoneTool has these features:
★ Unlimited backup space. iCloud just provides you with 5 GB of free storage space, while FoneTool allows you backup iPhone to Flash Drive, NAS, any local folder on computer as you like.
★ Preview and selective process. You’re free to preview and backup the wanted photos to PC.
★ Incremental backup. FoneTool just backs up the photos that have changed since the last backup.
★ Fast backup speed. Without the influence of network conditions, it just takes you a few seconds or minutes to finish the backup task.
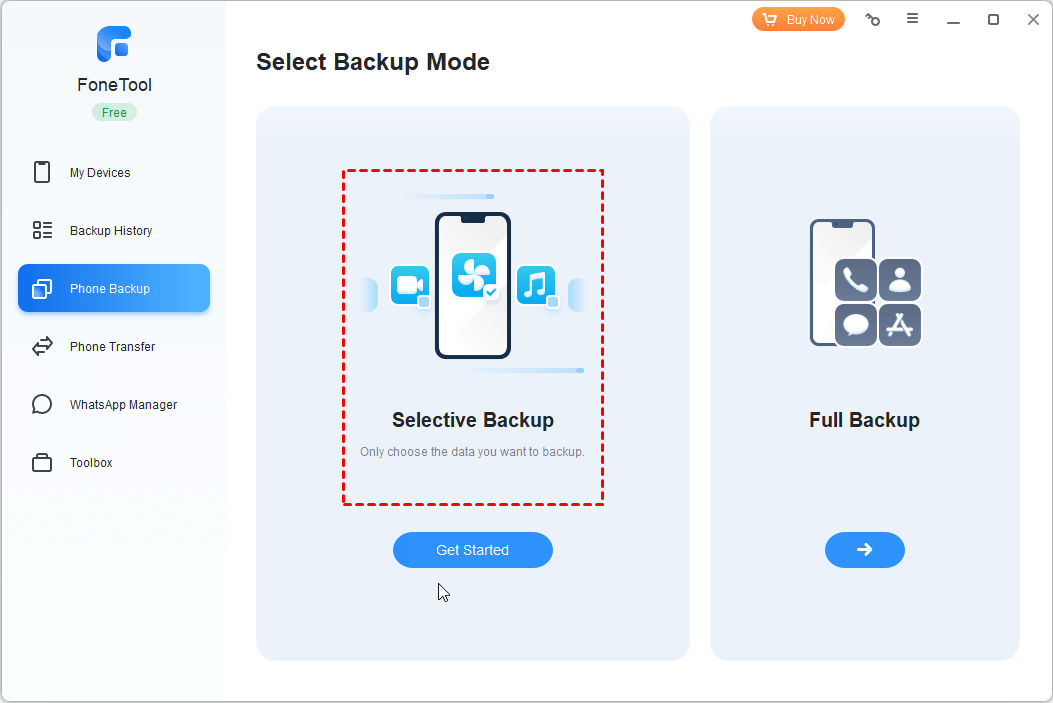
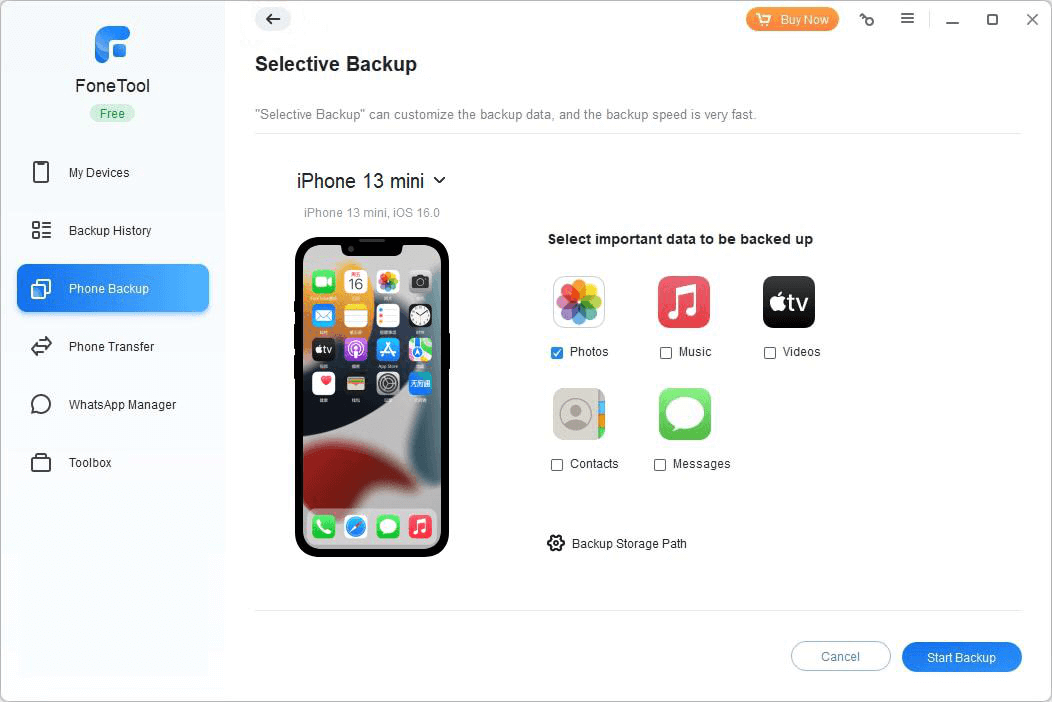
Step 1. Connect your iPhone to computer with USB > Launch FoneTool > Click Phone Backup and go to Selective Backup.
Step 2. Click the plus icon and choose Photos icon to preview photos > Select the pictures you’d like to backup > Click OK to confirm.
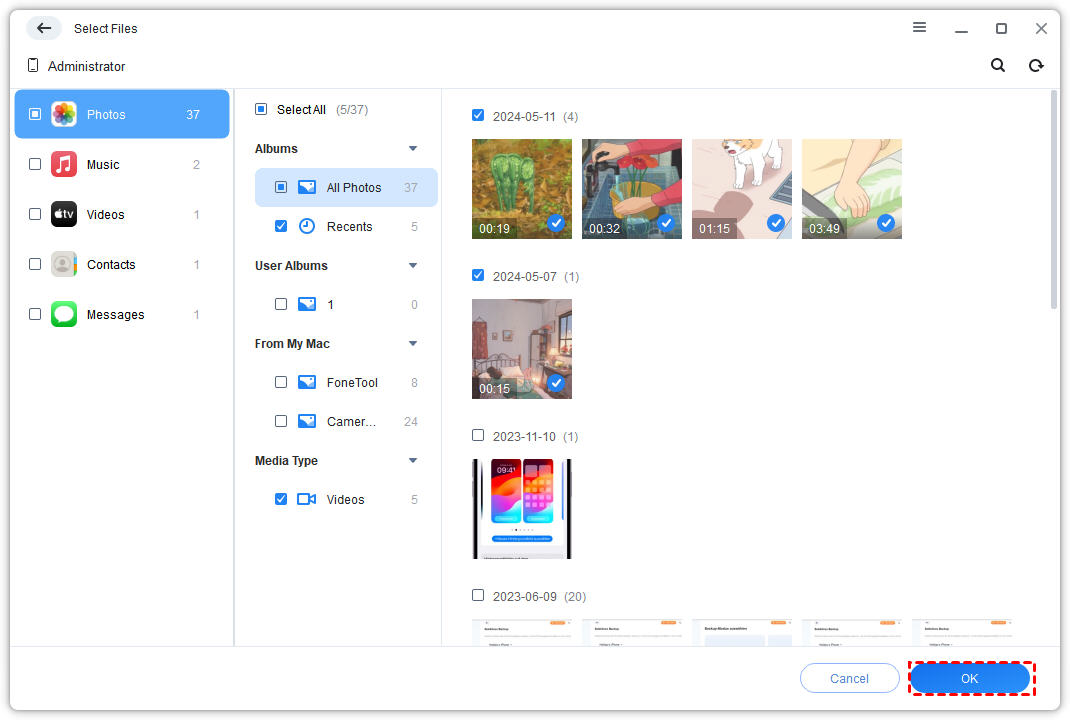
Step 3. Choose a storage path as you like > Click Start Backup to begin the task.
Bonus: More tips to manage iPhone photos with FoneTool
Besides deleting duplicates and backing up iDevices, there are more other functions in FoneTool waiting for you to discover.
Convert HEIC to JPG/JPEG/PNG
To save iPhone storage, you may have enabled the High Efficiency function to save your pictures in HEIC format.
One of the biggest disadvantages of HEIC is that you have to convert HEIC to JPG or other formats before browsing or editing them on computer or any other platform. You can rely on the function HEIC Converter in FoneTool to make it.
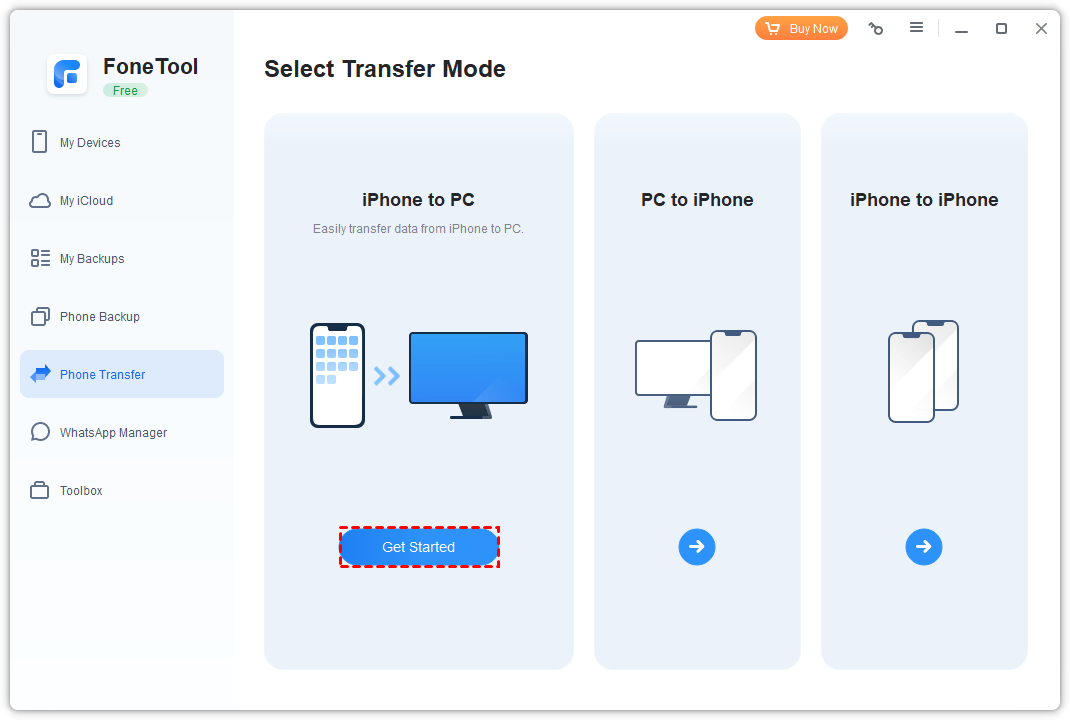
Transfer among iOS devices and computer
FoneTool supports you to transfer files from iPhone to iPhone, iPhone to computer, and vice versa. You’re free to transfer music, photos, videos, contacts among your iDevices and computer with the two functions: PC to iPhone and iPhone to PC in FoneTool.
Conclusion
In conclusion, you can organize photos library on iPhone and computer with the help of FoneTool. After trying these tips, it’s more important to keep your photo library organized in daily life. If this guide helps you, please share it with others.