How to Move Photos from iPhone to iCloud Storage
Wanna know how to move photos from iPhone to iCloud storage to free space or backup? Here in this post, we provide you with detailed steps to help you move photos as well as the solutions if iCloud storage is full.
By Ellie / Updated on May 14, 2026
How do I move photos from iPhone to iCloud to free space?
“Good day, everyone. I have a question and need your assistance. My iPhone's storage space is full, so I'd like to move photos from my iPhone to iCloud to free up space. Could you please tell me how I can accomplish this? Thank you ahead of time!”

The top way to move photos from iPhone to iCloud Storage
It must be annoyed when our storage is full and we’re asked to keep on deleting some data again and again to free space. To avoid data loss, some users may tend to move photos to iCloud so that the storage will be free and data can remain. Now let’s learn how to transfer or move photos from iPhone to iCloud storage.
Part 1: Move photos from iPhone to iCloud storage on iPhone
❀ Option 1. Move all your photos to iCloud storage
Step 1. Navigate to "Settings" > [your name] > "iCloud".
Step 2. Click the "Photos" option and enable the "iCloud Photos" button.
Step 3. For the choice "Optimize iPhone Storage and "Download and Keep Originals”, we recommend choosing the former one because it can free up more space.
❀ Option 2: Select the photos you want to move
Step 1. Open Safari on your iPhone and then enter icloud.com.
Step 2. Log in to your iCloud account.
Step 3. Select "Photos" on the main interface, tap "Upload", and then choose "Photo Library."
Step 4. Choose the photo you wish to transfer and hit "Add."
Note: Because iCloud works by syncing, if you delete the photos then they may disappear.
Part 2: Move photos from PC to iCloud Storage
If your photos are on Windows PC, transferring them to iCloud storage is also accessible. Follow me to operate.
Step 1. Download iCloud client for Windows.
Step 2. Click "Options" next to "Photos"
Step 3. Enable "iCloud Photo Library". Ensure the option "Upload new photos and videos from my PC" is checked and copy the photos you want to upload to the folder shown under the option.
Step 4. Go to Windows Explorer, click iCloud Photos in the sidebar, and then click Uploads photos and videos.
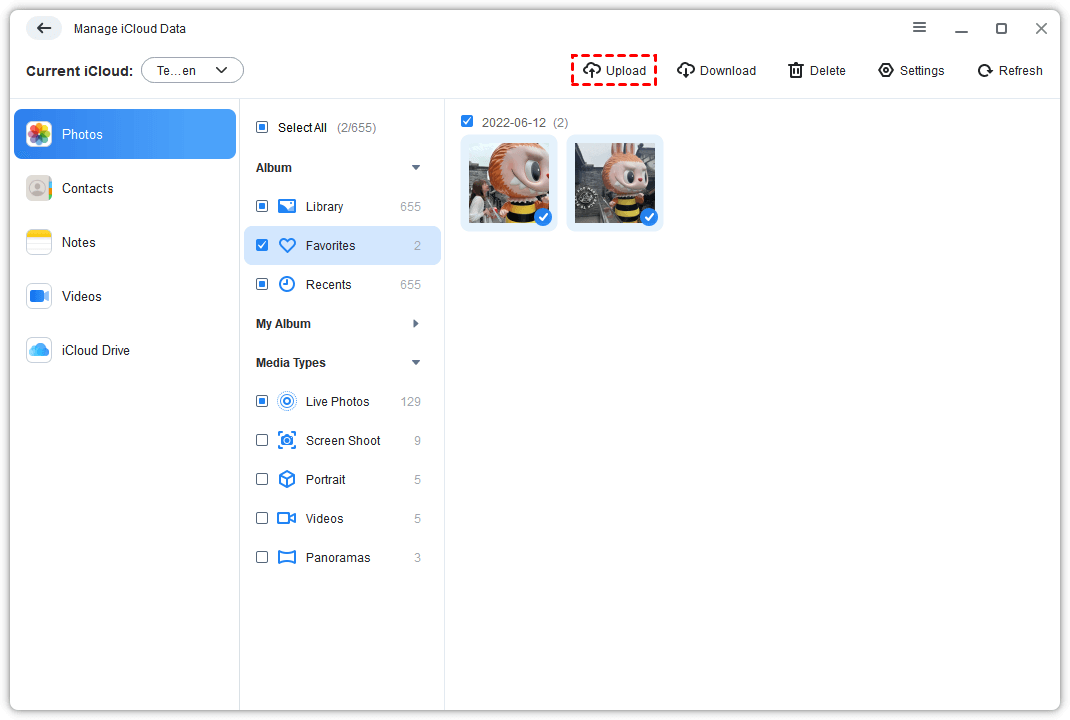
Or you can use the professional FoneBackup to help you upload photos to iCloud from PC efficiently.
Just launch FoneBackup > Go to My iCloud > Log in with your iCloud account > Choose Manage iCloud from the interface > Click the Photos icon and choose Upload to make it. From this interface, you can also download or delete your iCloud data easily.
Further reading: What if iCloud storage is full?
When storage on iPhone is full, we tend to transfer the photos or other data from iPhone to iCloud. However, what if iCloud storage is full? Here are 2 tips for you to easily get rid of the problem. Keep reading!
Solution 1. Manage/delete iCloud data
When you find your iCloud is running out of space, the first thing you can do is to check your storage and manage data on it. Here are the steps of how to check iCloud storage.
Step 1. Go to iPhone “Setting” on your iPhone or iPad.
Step 2. Tap “[Your Name]” > “iCloud” > “Manage Storage”.
Step 3. Here you can check specific backups information, and you can tap an item that takes up a large space, and choose “Disable & Delete” to release space.
Solution 2. Get backup and transfer with FoneBackup
It’s disappointing that iCloud only offers 5 GB of free space for each Apple user and obviously, it’s totally not enough for daily use. If it’s full and you may meet with the error code saying iCloud backup failed due to not enough space and the existing data won’t be back up in iCloud. What’s more, you may not trust iCloud. Because iCloud uploads your Apple Server. Some users worry about data leaks, so it is suggested that to have a safe way to transfer/backup personal data.
To avoid the shortcomings, resorting to a third-party backup and transfer tool and then deleting the photos on your iPhone to free up space is far more effective, such as FoneBackup. When you need them, you can transfer them from PC to iPhone.
- ★Tips:
- With FoneBackup, you can backup or transfer all your data to a computer and there’s no space limitation.
- The operation is fairly easy. You can backup or transfer data with a few clicks, which guarantees your efficiency.
- The speed for photos transfer is fast. Theoretically, you are able to transfer 100 photos in 2 seconds.
- There won’t be any data loss in the process of transferring or backing up, and apart from iPhone, you can also use it on the iPad and iPod.
- FoneBackup don't use network or Wi-Fi to transfer data. It won't save data to any Server. It is completely safe.
Now follow me to know how to operate.
Step 1. Run FoneBackup on your computer, and connect the iPhone to a computer with a USB cable.
Step 2. Go to Phone Transfer, locate iPhone to PC option, and then click Start Transfer.
Step 3. Click “+” to preview photos.
Step 4. Select the photos you wish to transfer and click OK.
Step 5. Choose a destination to save photos, then click the Start Transfer button.
Conclusion
Here in this post, we show how to move or transfer photos from iPhone to iCloud storage and illustrate 2 ways to fix the issue if your iCloud storage is full, such as managing iCloud data or transferring photos with FoneBackup. Hope the ways can really help you work it out.