
Recover Deleted Photos from Recycle bin After Empty (5 Ways)
Wondering how to recover deleted photos from Recycle Bin after empty? Read this article for an in-depth look at the possibilities of data recovery with 5 proven methods, with or without software.
By Ivy / Updated on May 10, 2026
Recycle Bin, as the last chance for ordinary users to repent their deletion behavior, it saves many urgent situations and recovers data loss for plenty of users. However, some users have accidentally emptied Recycle Bin. The family photos, artwork, etc., are the kind of files that are lost most frequently.
“I deleted some photos, and they were sent to recycle bin. I emptied recycle bin. Now I find I need back some of them back. I need to restore the documents that were in recycle bin when I emptied them.” – Question from Microsoft Community
So this article explains how to recover deleted photos from Recycle Bin after empty including the possibilities and multiple methods.
Is it possible to recover deleted photos from Recycle Bin after empty?
Some users may ask does putting a file to Recycle Bin permanently deletes it. Actually, when you delete files, not files but the pointer of them will be thrown to the Recycle Bin. Still, the files themselves will stay in the original location till new data come in to overwrite them, even after emptying.
What’s more, Recycle Bin won’t delete your files intentionally. If you find deleted files not in Recycle Bin, it means that the files have been permanently deleted. The possible reason may be due to size limit, time limit, improper settings, etc.
In a nutshell, before overwriting, getting files back after emptying Recycle Bin is possible for sure, as long as you stop using the affected drive after emptying.
Recover deleted photos from Recycle Bin after empty with software (Easiest)
Frankly, a backup is helpful when data loss occurs. But there are still so many users who have no backup habits because they think that data loss risk won’t come to them. Now, with no available backups, how to restore deleted files after emptying recycle bin? How to get back your cherished pictures?
Luckily, a trustworthy data recovery tool for Windows will be of great help. FastRecovery, supported by a sophisticated team with over 10 years of development experience, is aimed to recover deleted files from hard drive in Windows 7, 8, 10, 11, and Windows Server.
Recover Deleted Photos from Recycle Bin After Empty Effortlessly
- Two advanced scanning technologies locate all the recoverable data, making the data recovery process easy and quick, with a high success rate.
- Recover the most frequently used image formats, including png, jpg, tif, heif, gif, psd, SVG, x3f, etc., from hard drive effortlessly, whether it's HDD or SSD.
- Locate photos in specific formats quickly and accurately and preview them before recovering.
- Compatible with Windows 11/10/8/7. Also, you can use it to restore deleted files from Windows Server 2016/2019/2022/2025 and previous servers.
Now, FREE download this trustworthy data recovery software for Windows - FastRecovery and learn how to recover permanently deleted photos from Recycle Bin effortlessly using it.
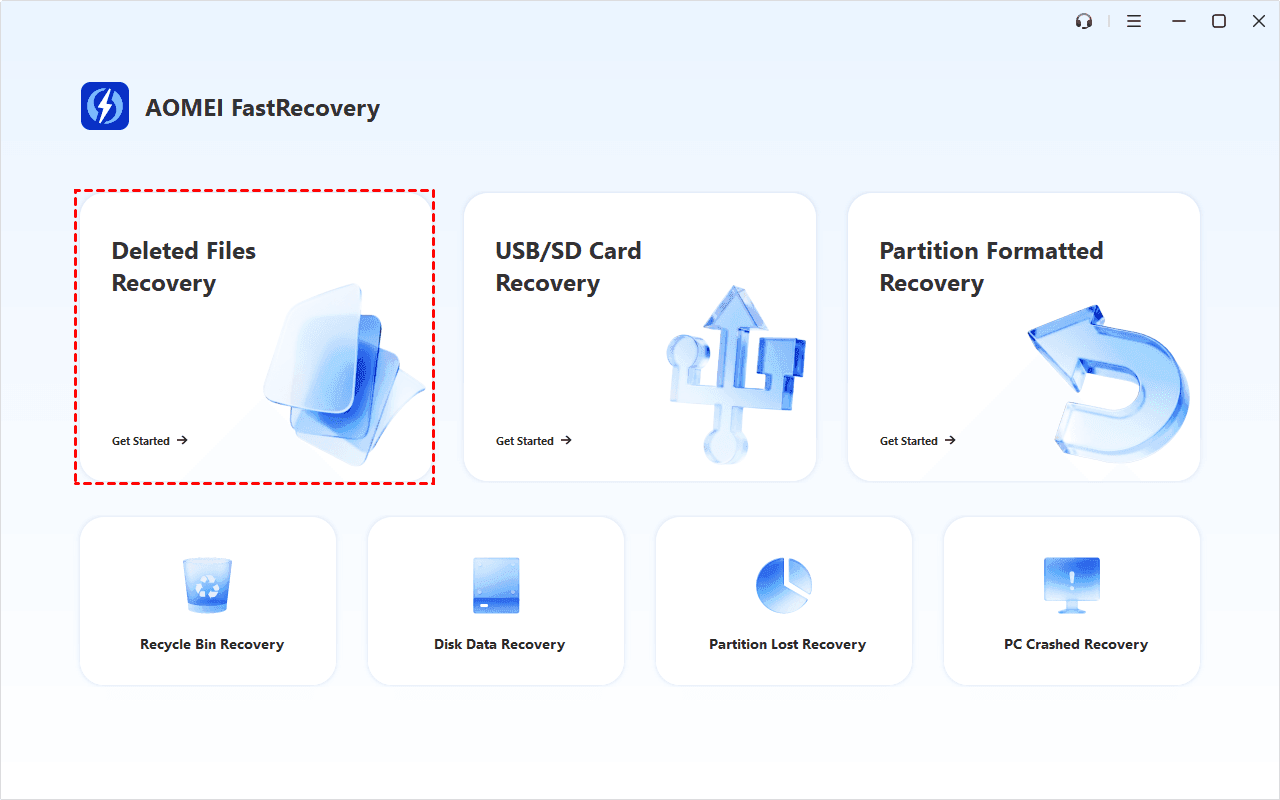
Step 1. Open FastRecovery, then click Deleted Files Recovery for fast recovery. You can also choose a more suitable alternative. All of them can help you retrieve data without causing any damage.
Step 2. Hover the mouse over the drive and click Scan.

Step 3. It will start scanning your disk automatically with Quick Scan. You won't have to wait long.

-
Scan time mainly depends on disk size and health, especially regarding bad sectors or file system corruption.
-
During scanning, you can click the Stop or Pause button if you select the wrong disk or something goes wrong.
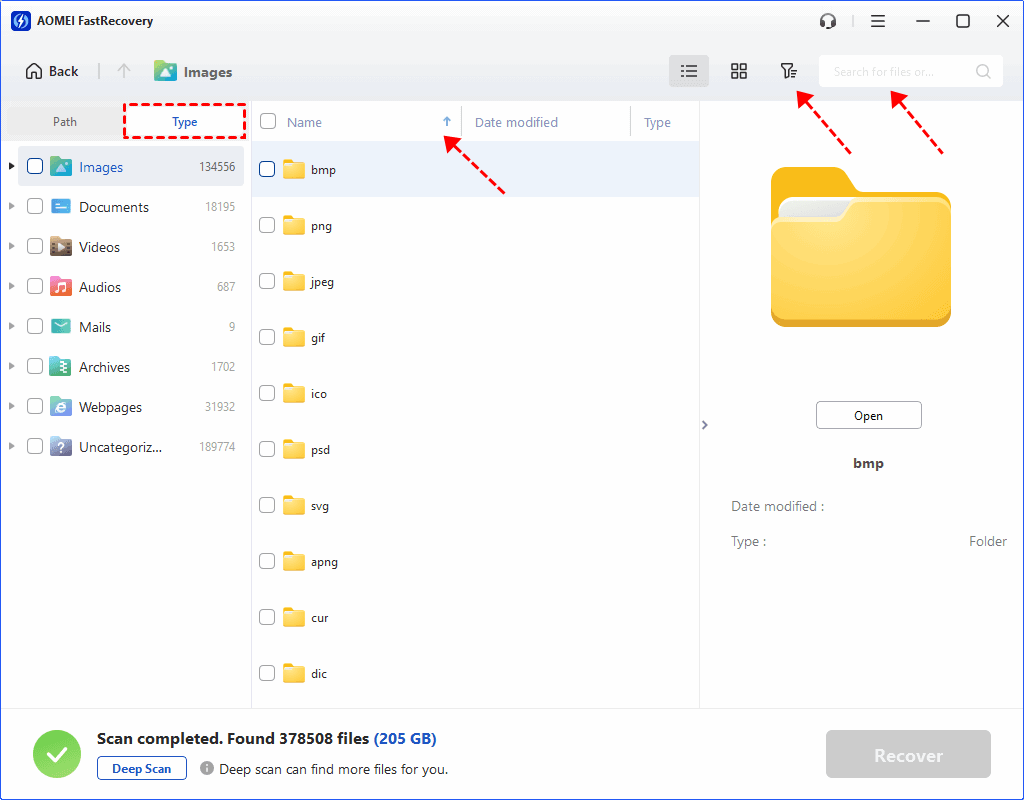
Step 4. Wait for the process to complete, then select files by Type (default) or Path, with options to sort, search, filter, and preview files.
👉Under the Type section:
- Specify the data type and click the arrow next to type, size, date modified, etc., to sort files.
- To locate files quickly, type the file name or extension in the search box.
- Or use the filter feature, similar to the Type category, allowing you to further specify the size of files, from less than 512 KB to 1GB above.
- Once found, double-click the files to preview.
👉 Under the Path section: Directly navigate to the original location where you saved deleted files. Sort files if needed.
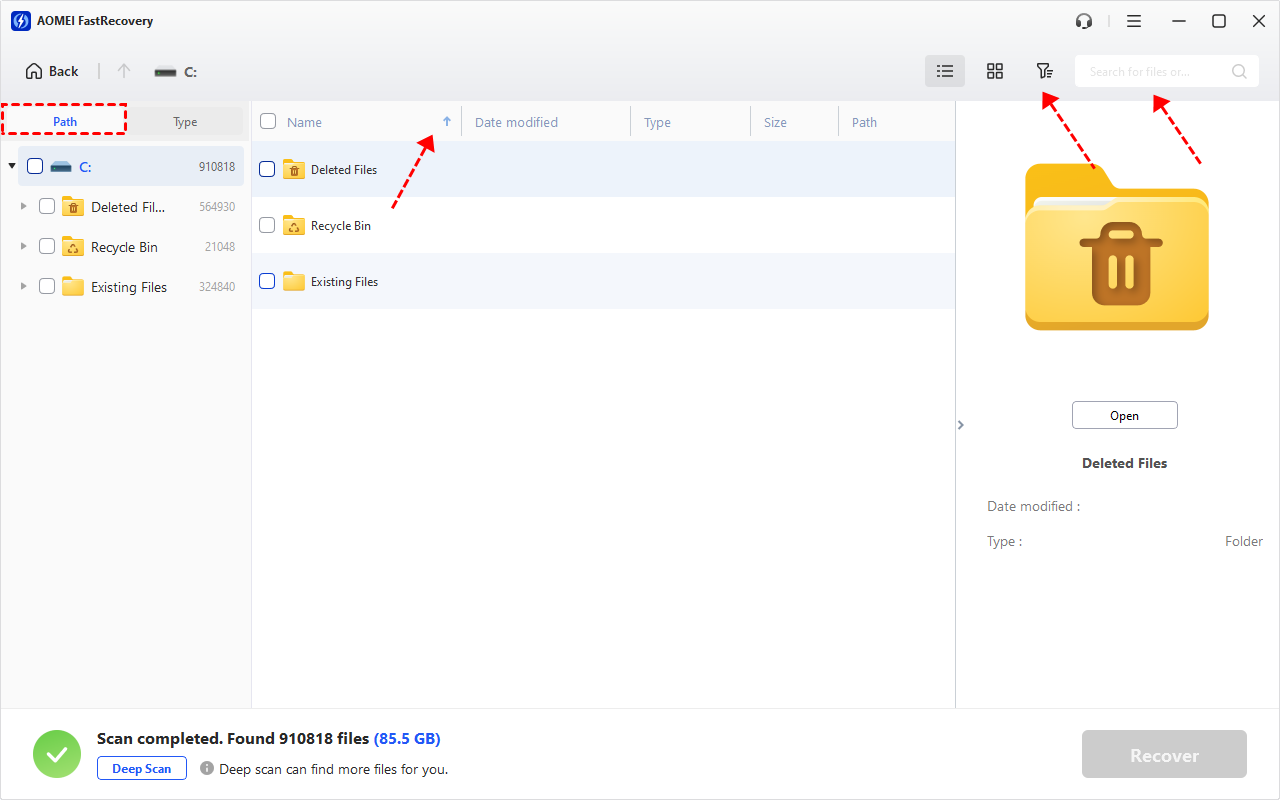
- The Type categories and filter options include all supported data types, such as images, videos, documents, mails, web pages, compressed files, etc.
- Click the Deep Scan to find more data if Quick Scan fails. It will scan every sector of the disk and take longer.
Step 5. Once you have found the desired photos, select them and click Recover.

Step 6. You will be asked to select a location to save the recovered files. Please select a new location to save the recovered data.
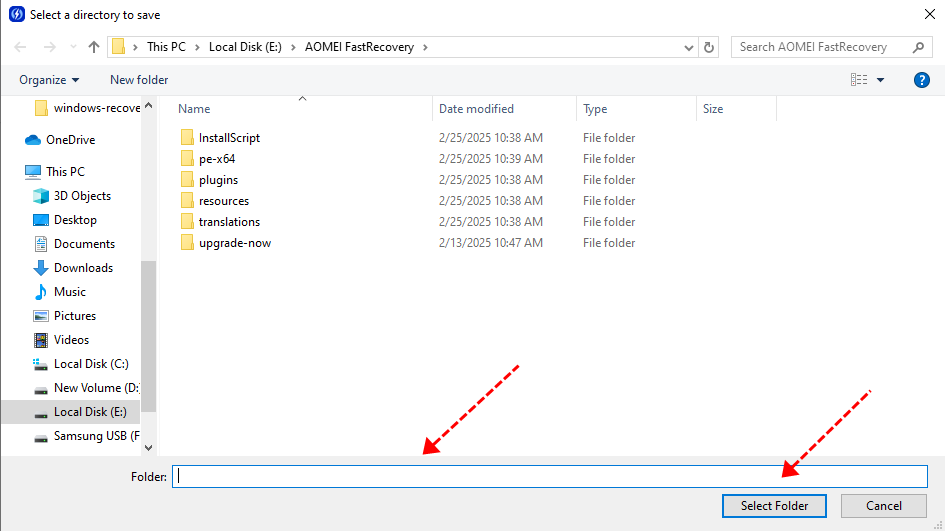
-
Don't save files to where you deleted pictures as it will cause data overwriting.
-
The free edition can recover deleted photos from Recycle Bin after empty for free over 500MB. To recover all data, try the advanced editions.
This powerful tool allows users to get back their wanted files in Windows 10 and 11 in a breeze, which is reliable and professional. What’s more, videos (e.g., recover deleted WMV videos), audio, documents, emails, compressed files, etc., are also recoverable.
Recover permanently deleted photos from Recycle Bin without software (4 Ways)
There are also some other methods to restore permanently deleted pictures from Recycle Bin after emptying. Restoring from backups is a good idea when data loss occurs. So in this part, we will introduce several Windows built-in backup tools to help you get images back.
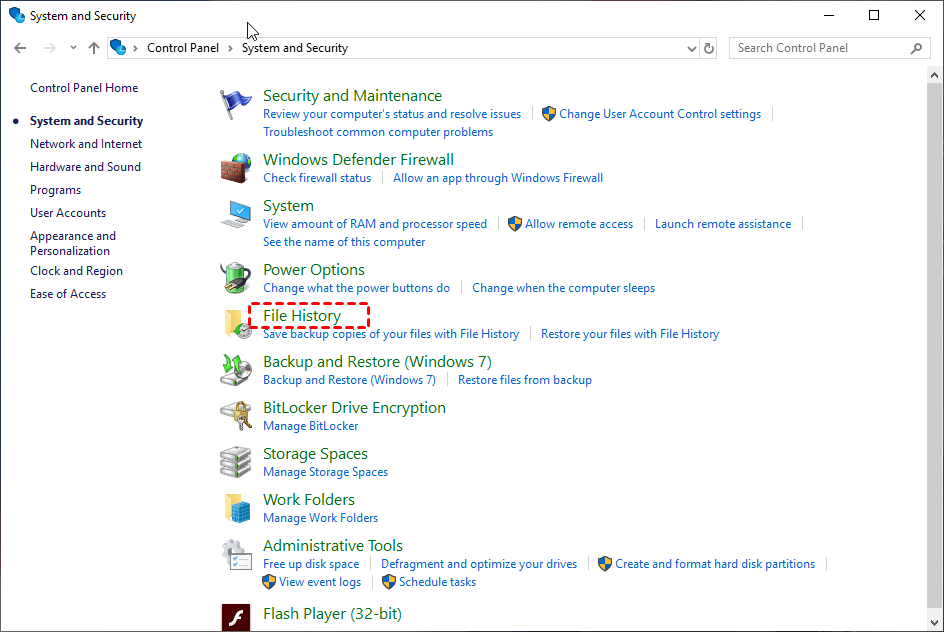
Solution 1. Turn to File History to restore permanently deleted photos
Using File History to restore deleted photos is a good idea because it saves the copies of files on the C: drive. If the deleted files were lost from there, this way is suitable for you.
Step 1. Go to Control Panel > System and Security > File History.
Step 2. Click Restore personal files.
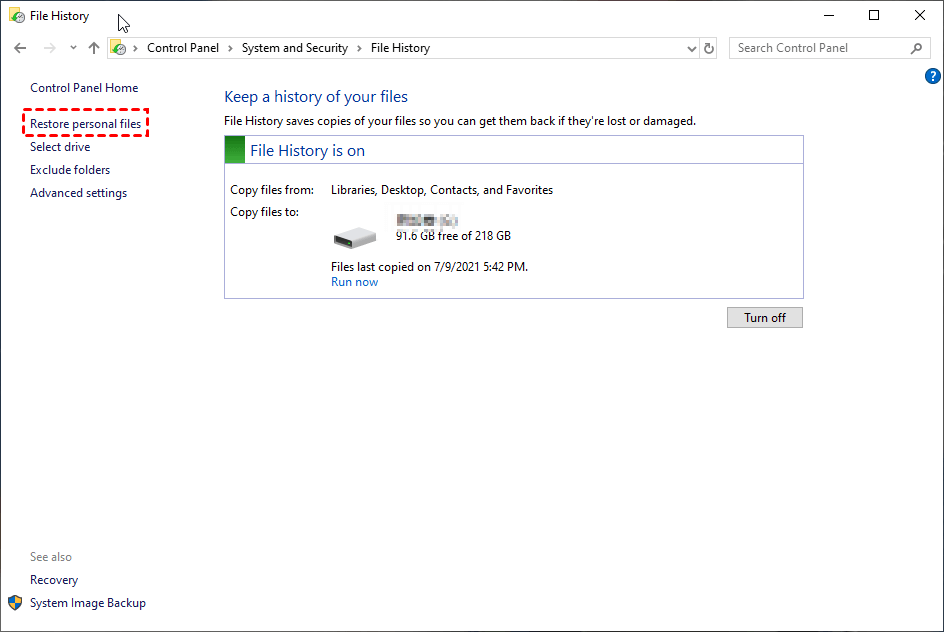
Step 3. Click the left arrow icon to access the previous/earlier versions of copies. Find and select the photos you want > click Recover.

This feature also facilitates users to recover permanently deleted Excel files from desktop.
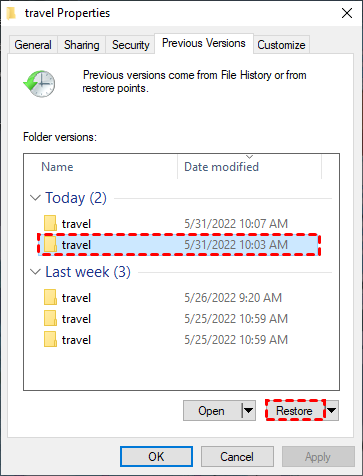
Solution 2. Restore previous versions to get deleted photos back
The previous versions of files come from system restore points or File History, which allows you to restore previous versions of files or folders, saving your precious pictures.
Step 1. In File Explorer, navigate to the upper or parent folder that stores the deleted photos. Right-click the folder and select Restore previous versions.
Step 2. Under the Previous Versions tab, choose a version based on date and time and click Restore. Or, click Open to check it first.
Using this method, you can find previous version of Word documents as well.
Solution 3. Get files back after emptying Recycle Bin via Windows backup
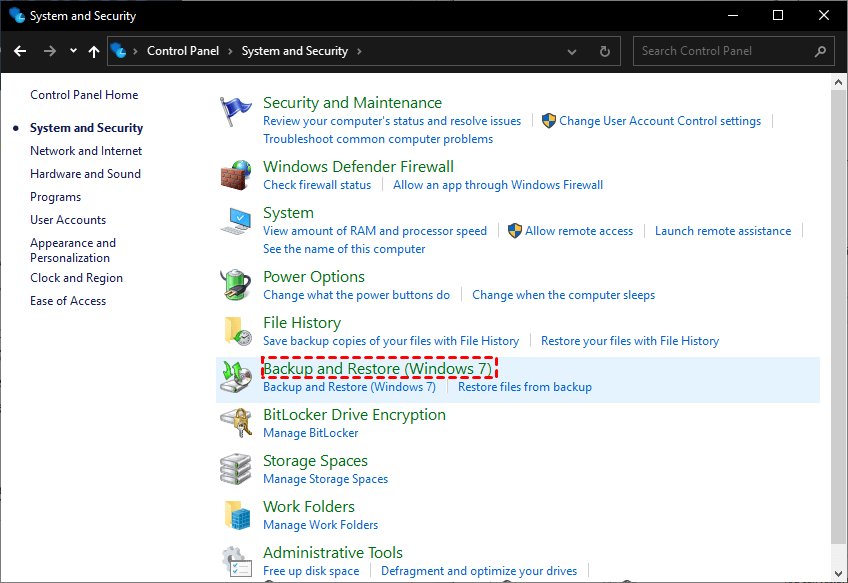
Also, Windows 10 or 11 includes Backup and Restore (Windows 7), a backup software that comes from Windows 7, which helps users to protect the system or their data from vanishing. Anyway, restoring files from backup in Windows 10 is one of the safest ways.
Step 1. Go to Control Panel > System and Security > Backup and Restore (Windows 7) and select it.
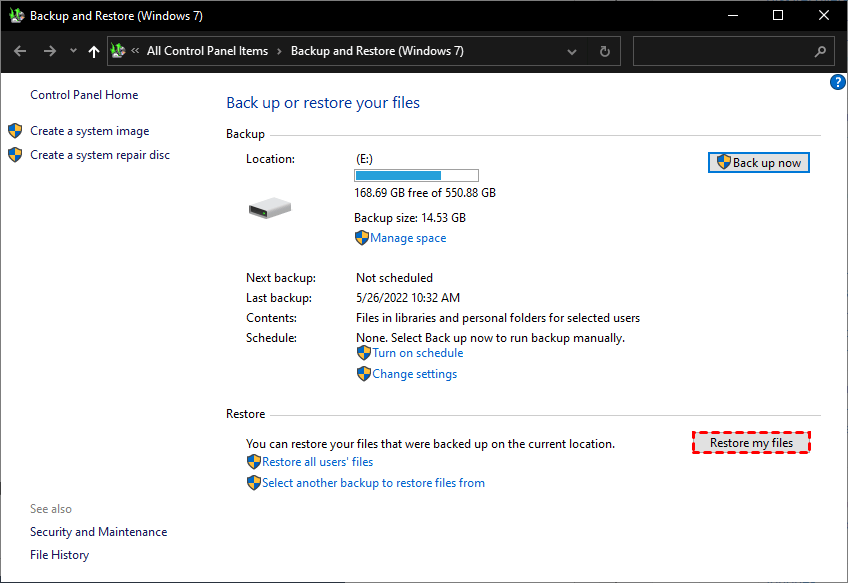
Step 2. Click Restore my files.
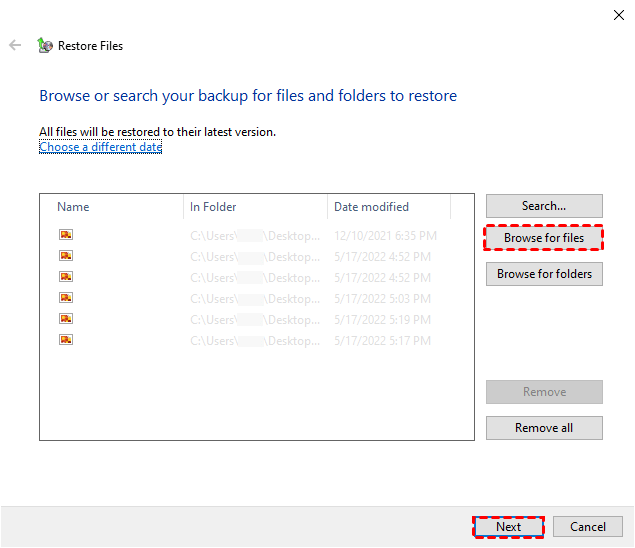
Step 3. Search or browse for files and folders. Then, select the backup containing deleted photos and click Next.
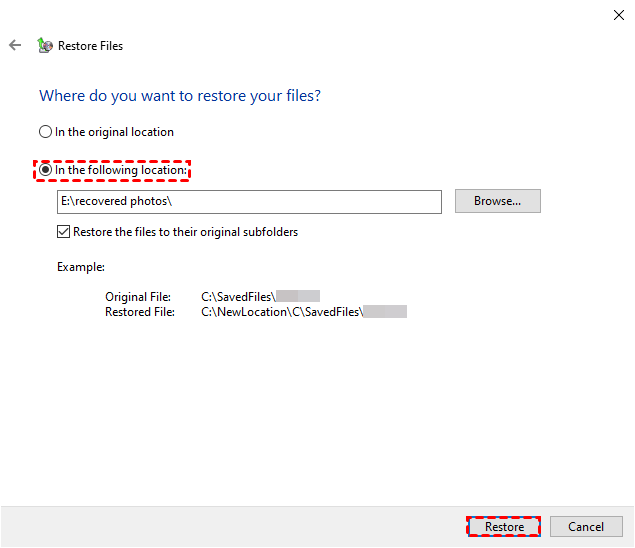
Step 4. Choose a destination you like (a new one will be better)> click Restore.
With a backup, you could easily recover deleted photos after emptying Recycle Bin.
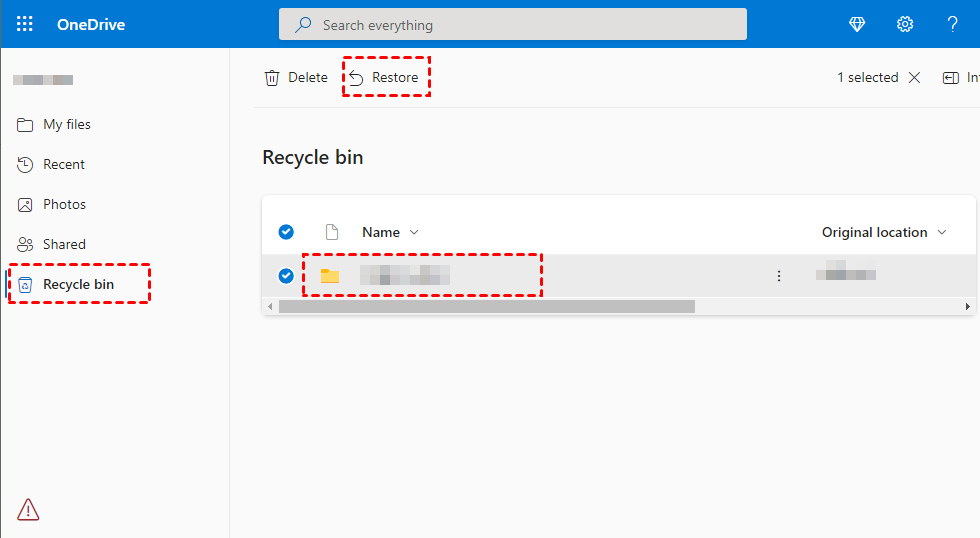
Solution 4. Restore deleted files after emptying Recycle Bin using OneDrive
Microsoft integrates the "Back up to OneDrive" feature in Windows 10 or 11, which, if enabled, will backup files to OneDrive automatically and restore deleted files when necessary.
Step 1. Open a web browser and go to https://onedrive.live.com/.
Step 2. Sign in to your Microsoft account.
Step 3. Search the deleted files in OneDrive. Select and click Download to restore deleted files to a local drive.

If you don't find the deleted files, it's deleted in OneDrive as well. Go to the Recycle Bin directory and locate the deleted files for data recovery.
Wrap things up
In short, by reading this article carefully, users will know how to recover deleted photos from Recycle Bin after empty. The trustworthy data recovery software for Windows - FastRecovery will be a wise choice if you don't have a copy of your files.
They will take care of the entire recovery process, from scanning to filtering files, previewing, and recovering, saving time and effort. So you can easily find pictures whether it's on internal or external hard drive.
Save time and effort with reliable photo recovery software
In addition, Windows built-in backup tools are a big help! But they all require you to create copies of files before you encounter any misfortune data loss scenarios.
FAQs

