How to Clone HDD to M.2 SSD Step by Step (Bootable)
If you want to upgrade hard drive (HDD) with an M.2 SSD, you can clone HDD to M.2 SSD along with system and all the programs installed.
By Lily Updated on August 28, 2025
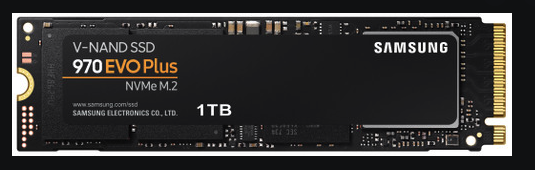
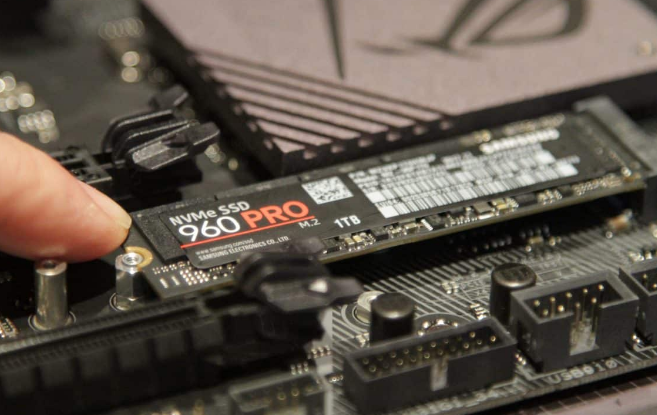
M.2 is a form factor for SSDs that resembles a stick of gum. They are much smaller than traditional 2.5-inch SSDs or hard drives - users can add an M.2 SSD to a laptop that does not have room for a regular one.
Can you transfer Windows 10/11 from HDDs to M.2 SSDs without reinstalling? The answer is YES. You can directly clone HDD to M.2 SSD and keep the old data and OS intact without boot errors.
💡Key Takeaways:
|
|
|
Step 1. Choose the Disk Clone option in the clone tool Step 2. Specify old HDD and new M.2 SSD respectively Step 3. Accelerate SSD speed and start cloning |
Essential tool for M.2 SSD migration
The easiest way to clone Windows 11/10 and all the files from HDD to M.2 SSD is disk cloning.
Important preparations before cloning HDD to M.2 SSD
If you are going to replace HDD with M.2 SSD, you need to figure out a few things before purchasing or replacing the M.2 SSD:
#1. Make sure your computer is compatible with M.2 SSDs.
Only the latest generation of motherboards will accept this new SSD, so please locate the M.2 interface on your motherboard first - it should be a horizontal slot about an inch wide labeled "PCIe" or "SATA" or both. You will need to purchase a matching M.2 SSD, because PCIe devices won't work with SATA connection and vice versa.
#2. Make sure the motherboard supports booting from M.2 SSD.
Note that booting from an NVMe PCIe SSD is only supported on systems that support UEFI. If your target drive is an M.2 NVMe SSD, then it will only boot in UEFI mode.
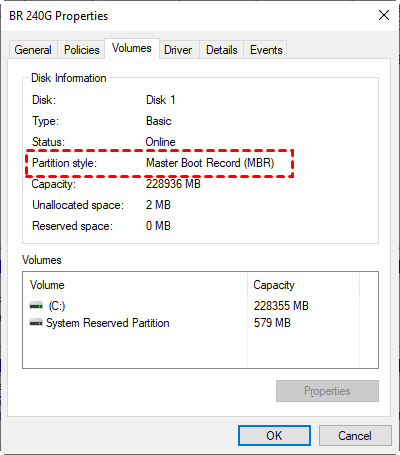
#3. Make sure the M.2 SSD has the right partition style.
Each partition of the disk must have a partition style (GPT or MBR) to help Windows understand how to access the data on the disk. And the partition style must be compatible with the boot mode (MBR/Legacy BIOS and GPT/UEFI) to ensure Windows can boot properly.
So if you purchased an M.2 NVMe SSD, it should be partitioned to GPT to support UEFI boot; if it's M.2 Sata SSD, there should be no strict requirements about partition style and boot mode. But GPT is still recommended because it is more suitable for modern computers and operating systems (e.g. Windows 11).
To check the partition style, press Win + R to open Run window -> type "diskmgmt.msc" and hit OK to open disk management -> right-click the disk and select "Properties" -> "Volume" -> check the "Partition style".
*You can change partition style after deleting all volumes from the disk, here's an example to convert MBR to GPT.
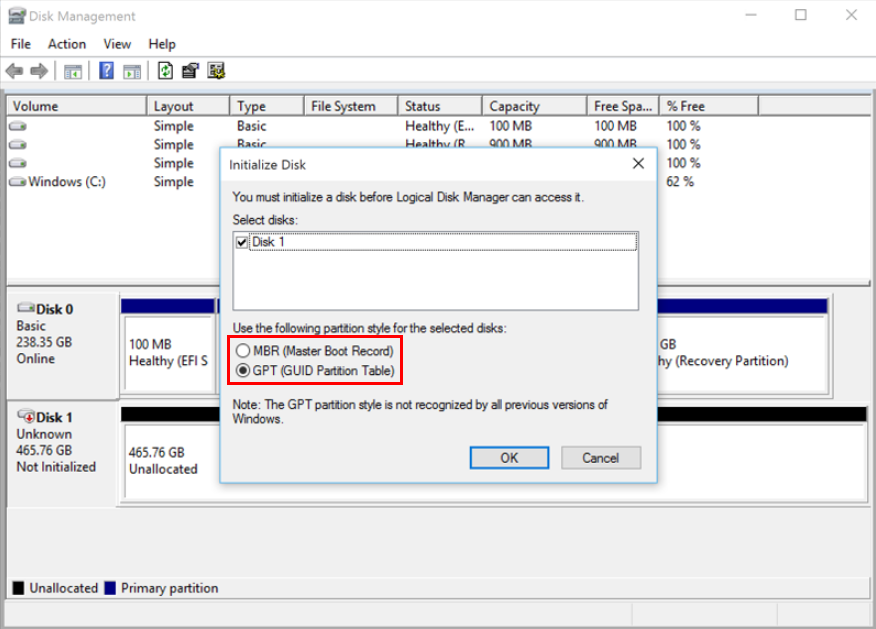
#4. Make sure the M.2 SSD can be detected by Windows.
If you add a brand new disk to your PC and it does not appear in File Explorer, you may need to initialize it first.
Launch Disk Management with the above mentioned steps -> right-click the disk you want to initialize and click "Initialize Disk" (If the disk is listed as "Offline", first right-click it and select "Online") -> select the correct partition style in the Initialize Disk dialog box, and then click OK to confirm it.
#5. Pick an effective tool to help you clone HDD to M.2 SSD.
Windows does not come with cloning functionality so you may need the help of 3rd party M.2 cloner.
When making your selection, you will also need to consider the above factors, such as whether the tool supports MBR/GPT disks, whether it supports cloning between disks of different sizes, whether it can take full advantage of SSD performance, etc.
Best HDD to M.2 SSD cloning software to suit different cases
In order to copy hard drive to M.2 solid state drive, the cloning software you use must be reliable and powerful. Here I recommend AOMEI Backupper because it has the following capabilities:
🔹Clone disks of different sizes: An M.2 SSD likely has different capacity with the old HDD, AOMEI's intelligent-sector cloning enables you to clone larger HDD to smaller SSD without problems. In addition, it allows you to edit partition size, which helps to make the full use of the disk space when the target drive is larger.
🔹Support MBR/GPT disks: With it, you can clone MBR to MBR, GPT to GPT (eg: clone NVMe to NVMe), or MBR to GPT/GPT to MBR without conversion. If you want to make the partition style of the target disk the same as the source disk, there's also an option to convert it manually.
🔹Flexible cloning options: Besides entire Disk Clone, there are System Clone for only OS migration, and Partition Clone for selected partitions cloning. Optionally, you can perform sector-by-sector clone, or align partitions to optimize the use of the target SSD.
🔹Fully compatible: It works with Windows 11, 10, 8.1/8, 7, Vista (all editions) perfectly. If you are running Windows Server, you can turn to the specialized Server edition.
Download the free trial of this cloning software to demonstrate its powerful cloning features:
*The clone feature in Trial version is for demonstration only; please upgrade it for full functionality.
How to clone HDD/SSD to M.2 SSD (step by step)
To clone HDD to M.2 SSD, you need to connect the M.2 SSD to your computer first, and make sure it is recognized by Windows. Then you can follow the guide below to clone hard drive to M.2 SSD step by step - cloning SSD to M.2 SSD is the same operation.
Note that this software clones only used sectors to target disk by default, which enables you to clone HDD to SSD, even a smaller one. So you just need to make sure the target disk has enough space to hold all the data existing on the source disk.
Video Tutorial of Cloning Windows 10/11 from HDD to M.2 SSD:
Steps to clone hard drive to M.2 SSD
Here I will introduce the steps of cloning OS and files from HDD to M.2 SSD in detail with screenshots.
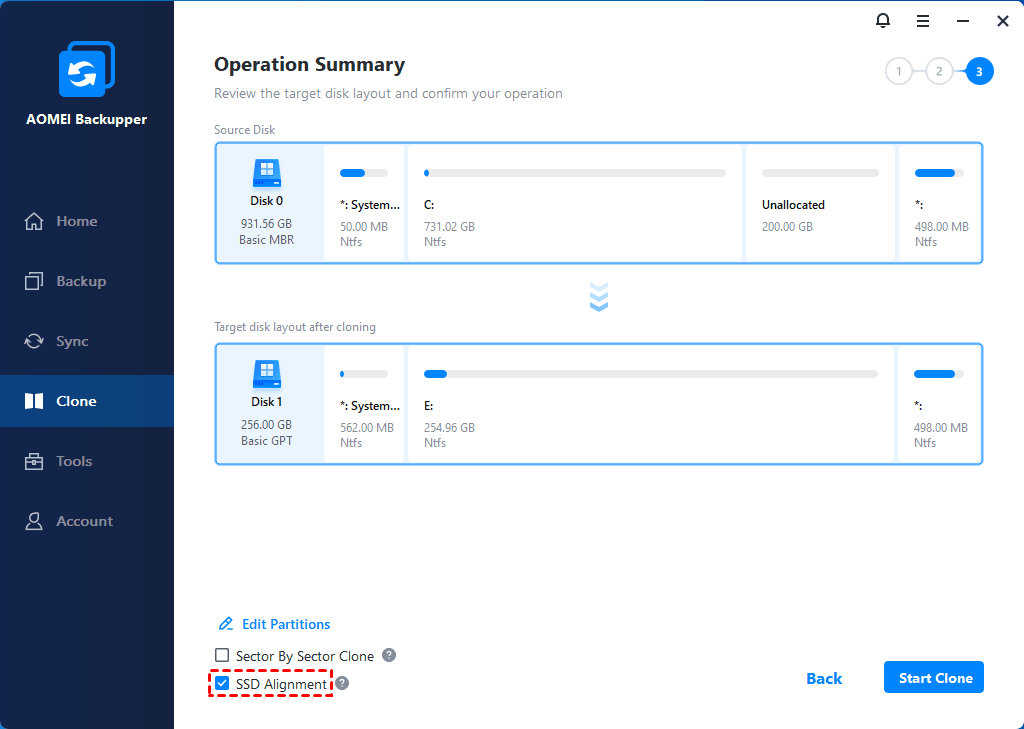
Step 1. Choose the Disk Clone option in the clone tool
Launch the software, click “Clone” and select “Disk Clone”. If you want to clone only OS, select “System Clone”.

Step 2. Specify old HDD and new M.2 SSD respectively
Select the original hard drive as source disk and select the M.2 SSD as the destination disk successively.

Step 3. Accelerate SSD speed and start cloning
Tick "SSD Alignment" to accelerate the reading and writing speed of the destination SSD. Click “Start Clone” to start cloning HDD to M.2 SSD.
✎Optional options:
Sector By Sector Clone: By default, AOMEI Backupper will copy only used sectors to save space. If you want to copy all the sectors indiscriminately, please check this option. Note if you want to clone a disk with system reserved recovery partition, you need this option to ensure the recovery partition can work on the target SSD.
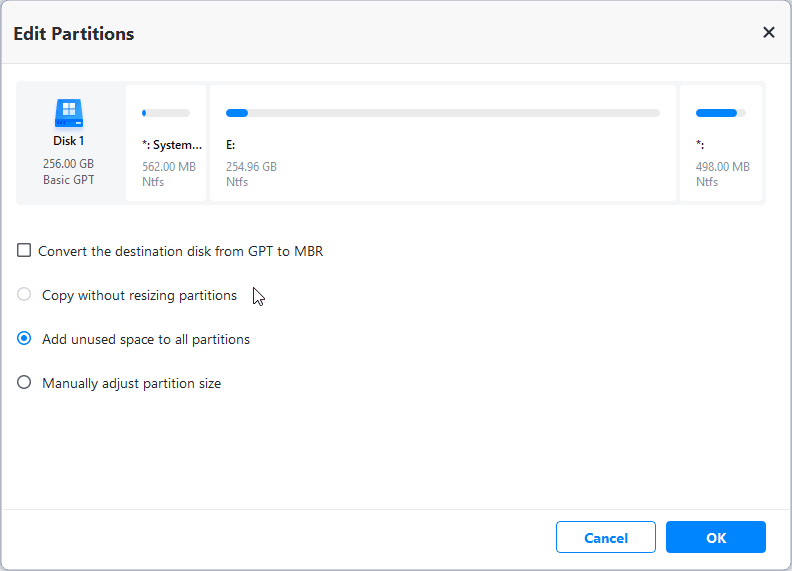
Edit Partitions: To make the full use of the space of the M.2 SSD (especially when you clone smaller disk to a larger one), you can edit partitions by the following options (Edit Partitions cannot work with Sector By Sector Clone).
- Copy without resizing partitions: It will not resize the partition size.
- Add unused space to all partitions: Reallocate the unallocated space to each partition of the target disk.
- Manually adjust partition size: Extend unallocated space to any partition on the destination disk you want.
- Convert the destination disk...: Convert the partition style of the target disk to make it the same as the source.
Post-cloning: How to boot from the cloned M.2 SSD
After successful cloning, you can shut down the computer to replace the hard drive with M.2 SSD. Then start the computer, if it boot into Windows properly, then your job is done.
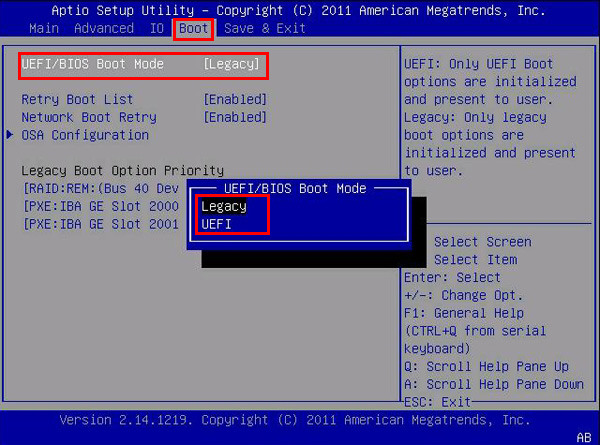
Note if your old HDD is partitioned with MBR, and your cloned drive an M.2 NVMe SSD partitioned with GPT, then you need to access BIOS by pressing the specific key (could be Del, F2, F8, F12, etc.) during startup, and change the boot mode from Legacy BIOS to UEFI.
You can also connect the old hard drive for the secondary storage, but to avoid Windows booting from the wrong disk, you need to make sure the M.2 SSD is selected as the first boot option in BIOS.
Frequently asked questions about HDD to M.2 SSD cloning
Q1. How long does it take to clone an HDD to an M.2 SSD?
The time it takes to clone an HDD to an M.2 SSD depends on the amount of data for transferring, the cloning method you pick, the read and write speeds of the computer system and the hard disk, etc.
Generally speaking, it's normal to spend 10 minutes to 1 hour cloning. If you have a particularly large amount of data to clone (e.g. 2TB), it is possible to spend several hours. So if you don't want to take too long to clone, try to make the data on your source disk as lean as possible (remove unnecessary files and apps beforehand).
Q2. Does adding M.2 NVMe drives disable SATA ports?
Q3. Are M.2 and NVMe the same?
Q4. How long does M.2 SSD last compared to HDD?
Q5. Can you use M.2 SSD and HDD together?
Final Words
After reading this article, you may know how to clone HDD to M.2 SSD. It is strongly recommended to replace the old hard drive with an SSD for better performance. With the help of AOMEI Backupper, you can easily clone all kinds or brands of hard drives or upgrade M.2 SSD without reinstalling Windows.

