How to Create Windows Full System Backup for PCs and Severs
What is the difference between a full system backup and a restore point, and how to create a Windows full system backup on PCs or even servers? This post will answer these question and provide you a simple approach to do it.
By Delia Updated on September 11, 2024
What is a full system backup and what should it include
A Windows full system backup is usually used to recover a PC or server from severe malfunction, or even recover a machine without previously installed operating system, i.e. bare metal recovery. It should contain all the boot files, system settings, apps and personal files in related partitions, as thus you could avoid cumbersome reinstallation and reduce the downtime significantly.
By this definition, the commonly used File History and Restore Point obviously do not meet the requirements. Then what should we do for full system backup?

How to create Windows full system backup exactly
☛ For Windows PCs: There is a feature that has existed since windows 7 and has not changed much since then – System Image Backup. Even if you're running the latest version of Windows, you can use it to create an image for all the system-related drives, namely a Windows full system backup.
☛ For Windows Servers: To create Windows Server full system backup, you need to install Windows Server Backup from Server Manager, and create a bare metal backup.
How to create a full system backup for Windows 11/10/8/7
1. Locate the Backup and Restore utility by following path:
Windows 7: Start > Control Panel > System and Security > Back up your computer
Windows 8/8.1: Start > Control Panel > System and Security > File History > System Image Backup
Windows 10: Start > Settings > Update & Security > Backup > Go to Backup and Restore (Windows 7)
Windows 11: Start > Settings > System > Storage > Advanced storage settings > Backup options > Go to Backup and Restore (Windows 7)
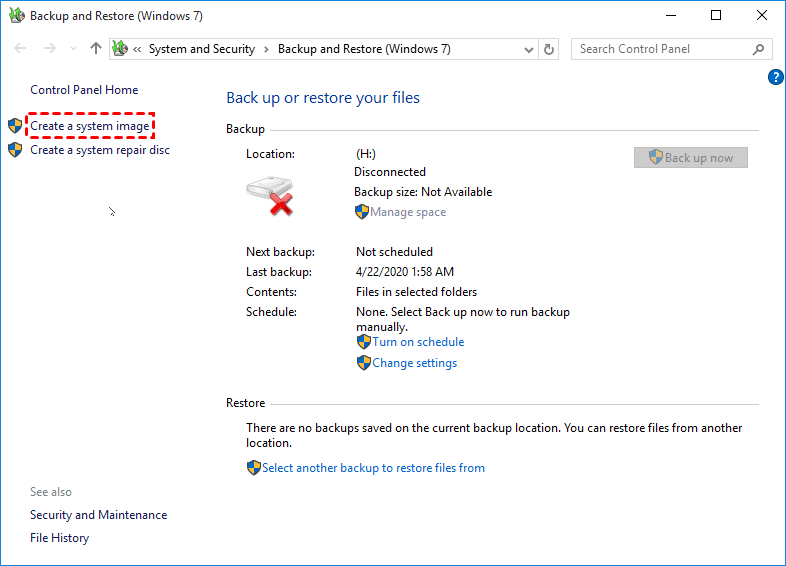
2. I will give an example to create full system backup in Windows 10. Click Create a system image at the top-left corner to get started.
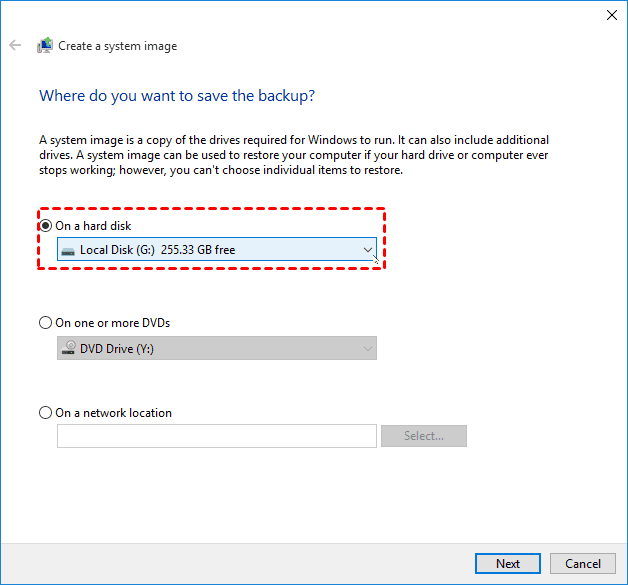
3. Choose a destination. Instead of local drive, it’s recommended to backup Windows 10 to external hard drive. Optionally, you can also back up it on a network location.
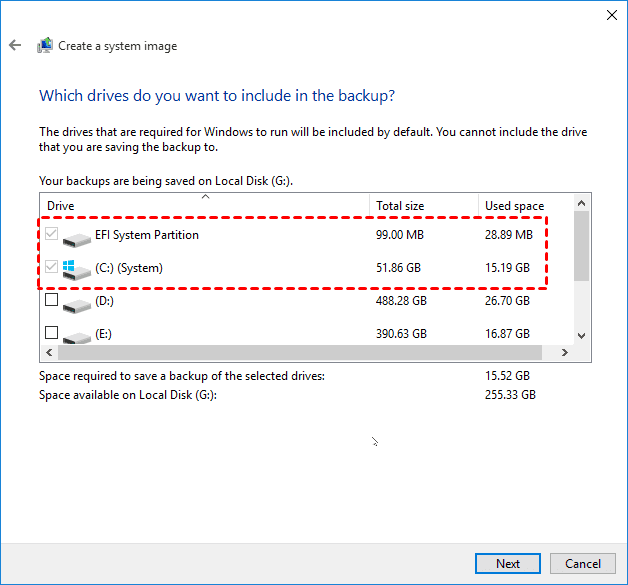
4. Add additional drives you want to backup. You could also create a full disk backup by selecting all the drives.
✎This utility only displays partitions with drive letters, so you can't use it to backup hidden recovery partition.
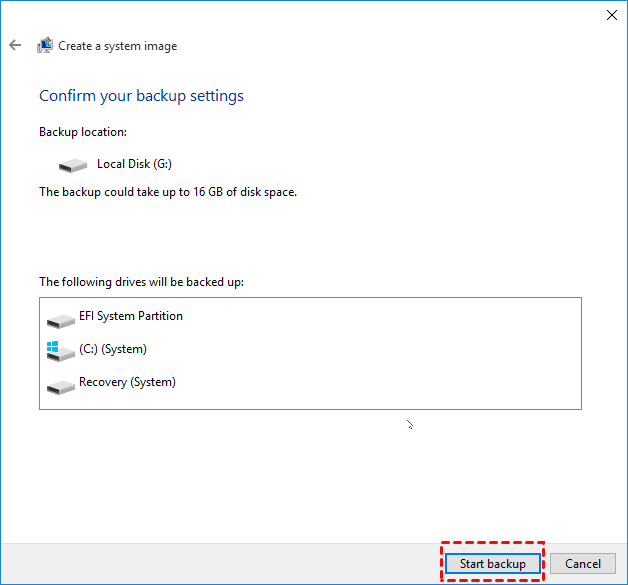
5. Confirm the operating and Start Backup.
Thus you can create a complete system backup for Windows 10. Similar steps also apply to Windows 8/7.
▶ How to restore from the full system backup
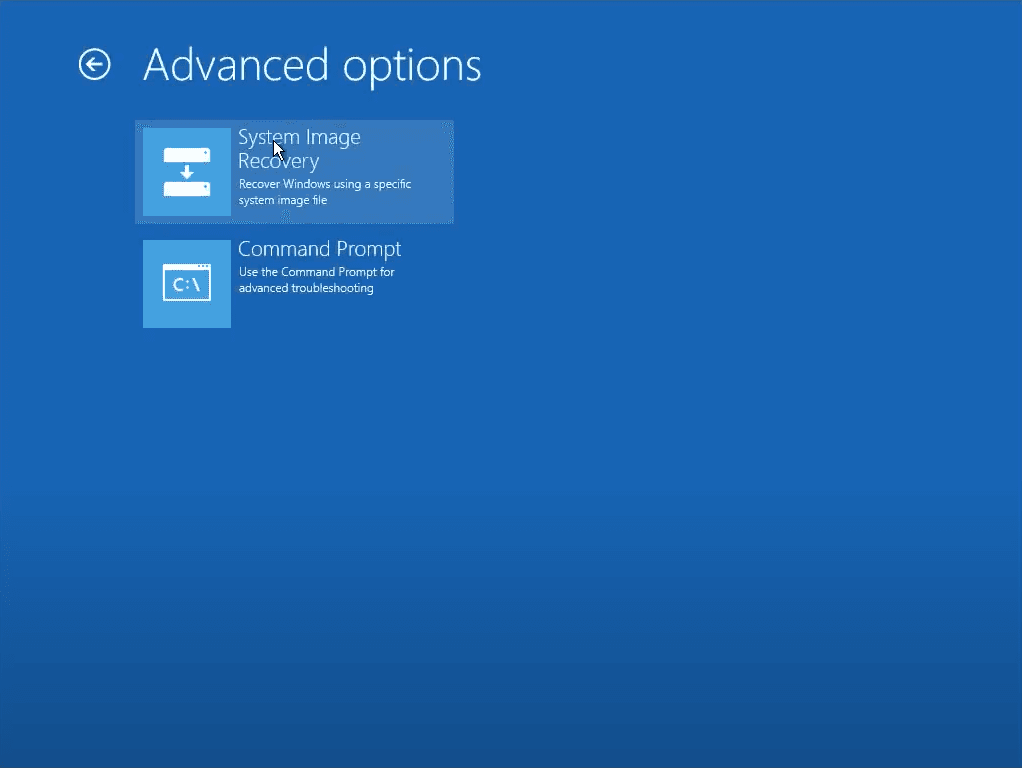
Use installation disk or recovery drive to boot the target PC into Windows Recovery Environment. Then you can select System Image Recovery from advanced boot options and follow the wizard to complete it.
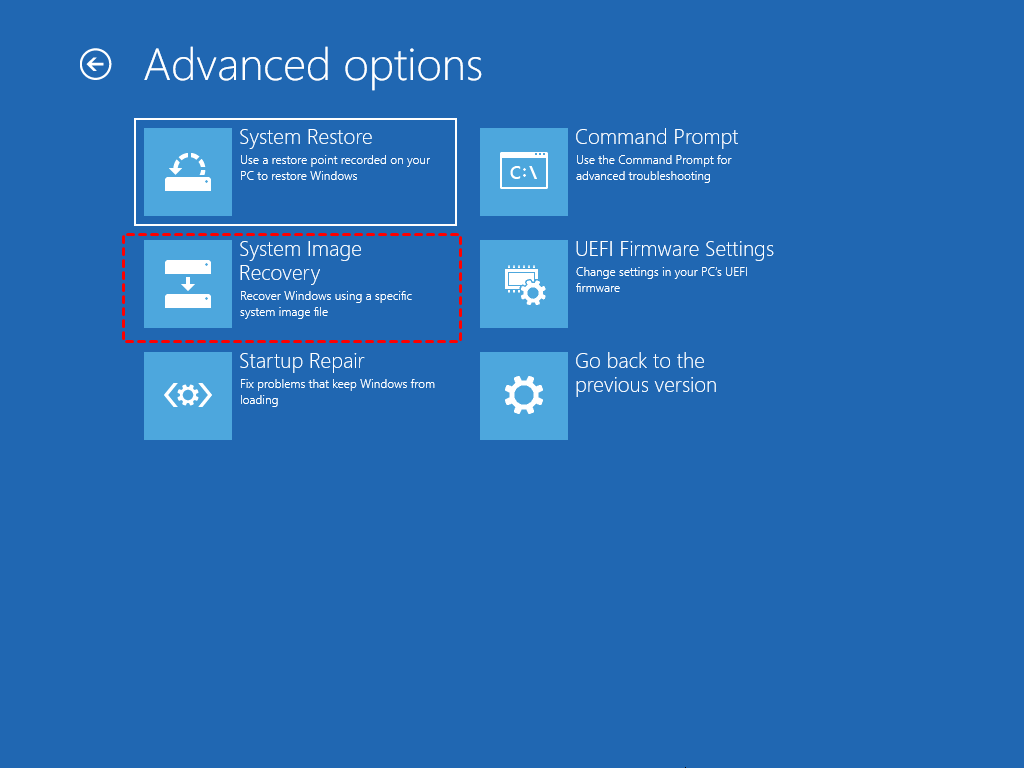
Reference reading: use System Image Recovery to restore hard drive.
▶ Windows system image backup and restore failed
System Image Backup was originally introduced with Windows 7 Backup and Restore, and hasn’t evolved much since then. This means even though it still works in Windows 10 and even Windows 11, it doesn’t work perfectly. You may encounter various errors during the process, causing you fail to backup or recover.
If you run into such situation, try troubleshooting System Image Backup failed in Windows 10/8/7, or directly turn to another way with higher success rate.
How to create full system backup for Windows Server
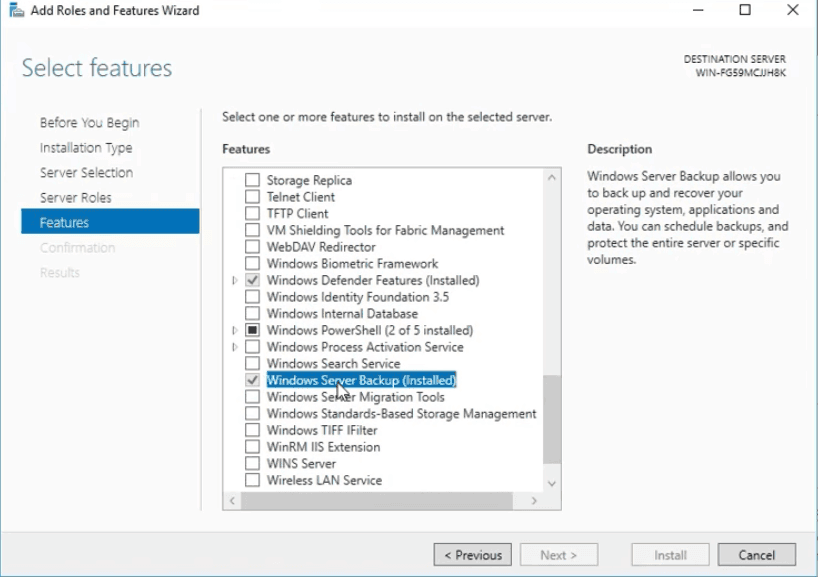
1. To create Windows Server full backup, you need to install Windows Server Backup first. The path is:
Server Manager > Manage > Add Roles and Features > Role-based of feature-based installation > Select a server from the server pool > Windows Server Backup
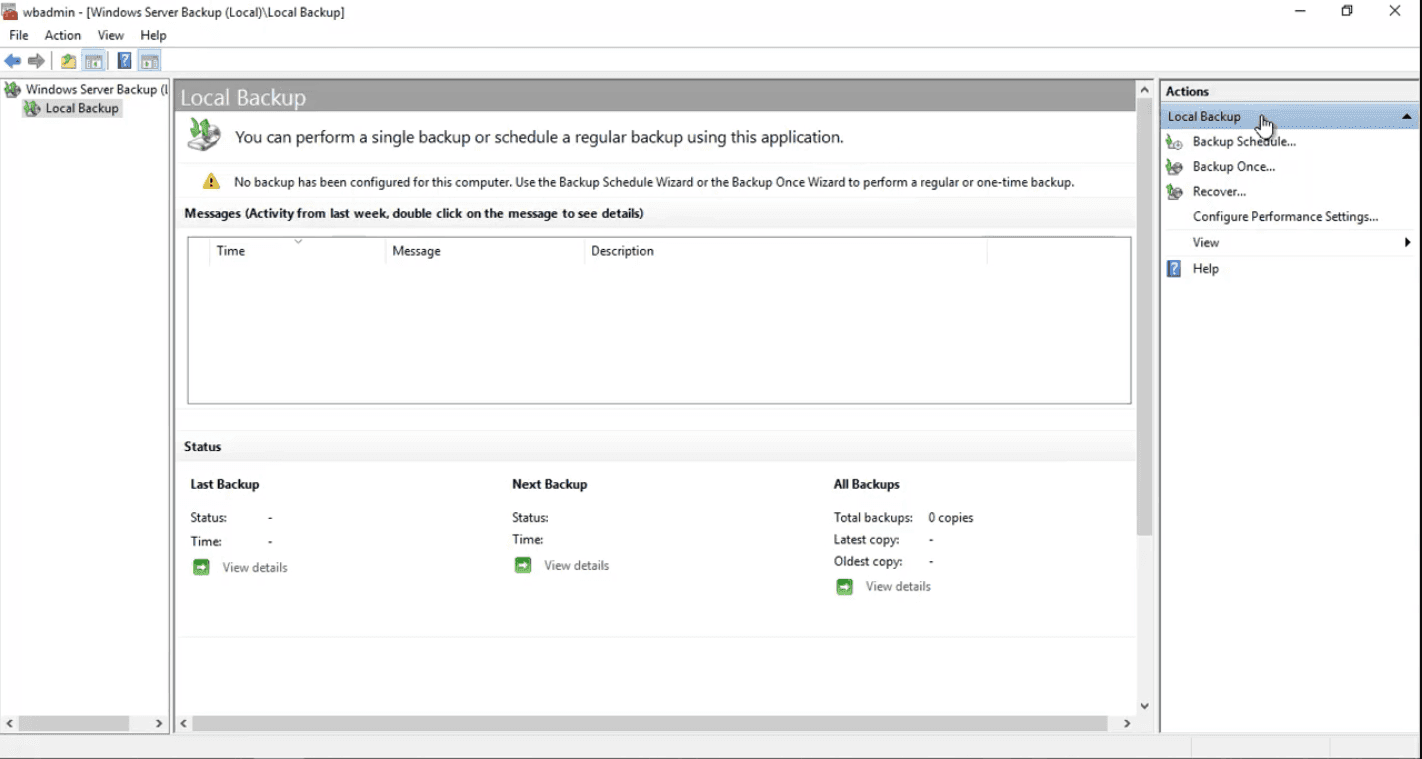
2. After installing it, you can go to Server Manager > Tools > Windows Server Backup to get started, and click Local Backup to choose a backup mode. If you want it to run regularly, just choose Backup Schedule.
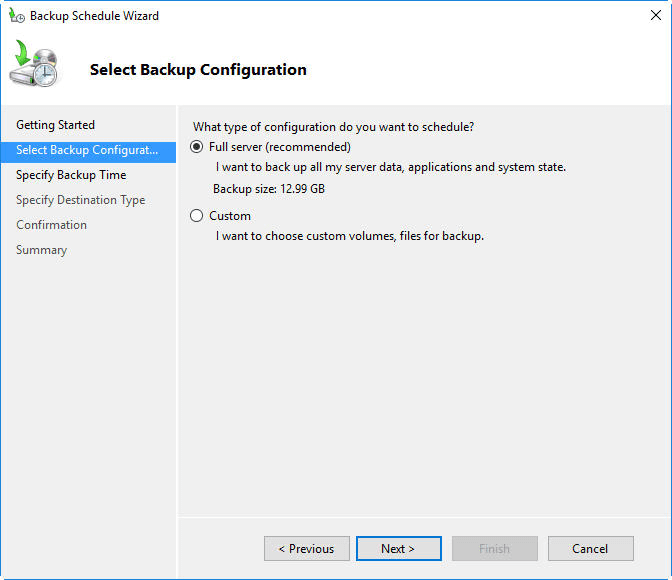
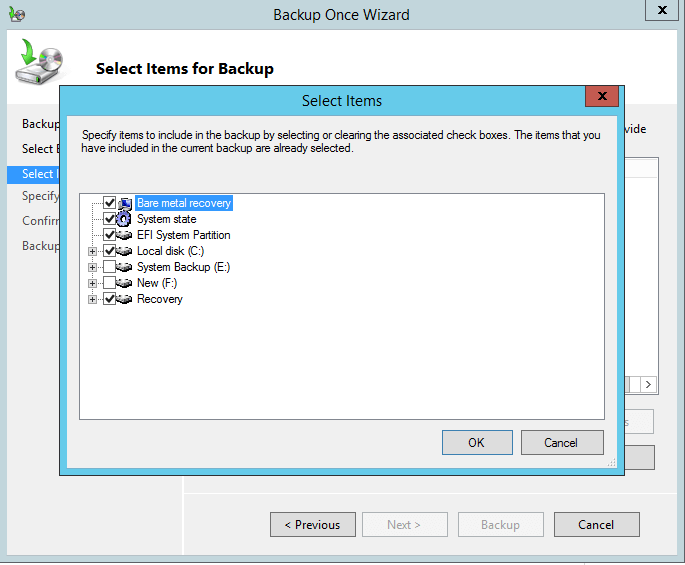
3. Choose what to backup. To back up literally everything on the machine, choose Full server. Otherwise you can choose Custom to select volumes and files manually.
4. By Custom, you will be given the option of Bare metal recovery, which includes all your operating system files and all data except user data on critical volumes. It allows you to recover a server even when it won't start.
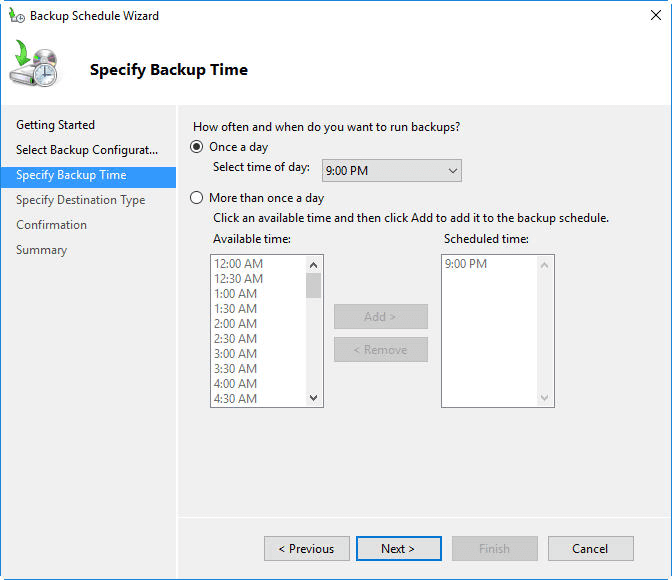
5. If you have previously chosen Backup Schedule, this is where you set up the schedule. As shown in the pic, it only gives you options to perform the backup Once a day or More than once a day. If you need more flexible schedule options, please turn to the next method.
6. Specify your destination, like a hard disk, a volume or a shared network folder. A hard disk is recommended, but since it will be formatted during the process, please make sure it’s a blank disk, or create a backup of it in advance.
7. Click Finish to execute the task.
▶ How to restore from Windows Server full backup
Similarly, insert the recovery drive to boot the server to startup options, select System Image Recovery to proceed.
Reference reading: Windows Server 2016 system restore
More secure and flexible way to create Windows full system backup
Although Windows comes with the ability to create system image, the process is often slow and laborious with a high probability of failure. So in many cases we tend to use more robust backup software.
The one to be introduced here is AOMEI Backupper, it has a completely free Standard edition to help you create full system backup for PCs running Windows 11, 10, 8/8.1, 7, Vista and XP. If you want to create a Windows Server full backup, there’s also a specialized Server edition with equally rich functionality and simple operation.
Whichever edition you choose, you can enjoy the following benefits:
Simple operation: It has an easy-to-use interface and wizard to complete any operation with several clicks.
Full functionality: Besides full system backup, you can also perform full disk backup, or file, partition backup.
Flexible schedule: It allows for schedule backup daily, weekly, monthly in full, incremental or differential mode.
Various storage devices: The supported devices include internal/hard drive, USB, NAS, network share, cloud drive.
Next I will give an example based on Windows 10. Download and install the free Standard edition to get started:
*The steps to backup system in Windows Server are roughly the same, but you will need to use the free trial for Server edition to demonstrate the operation.
How to create Windows full system backup with AOMEI Backupper
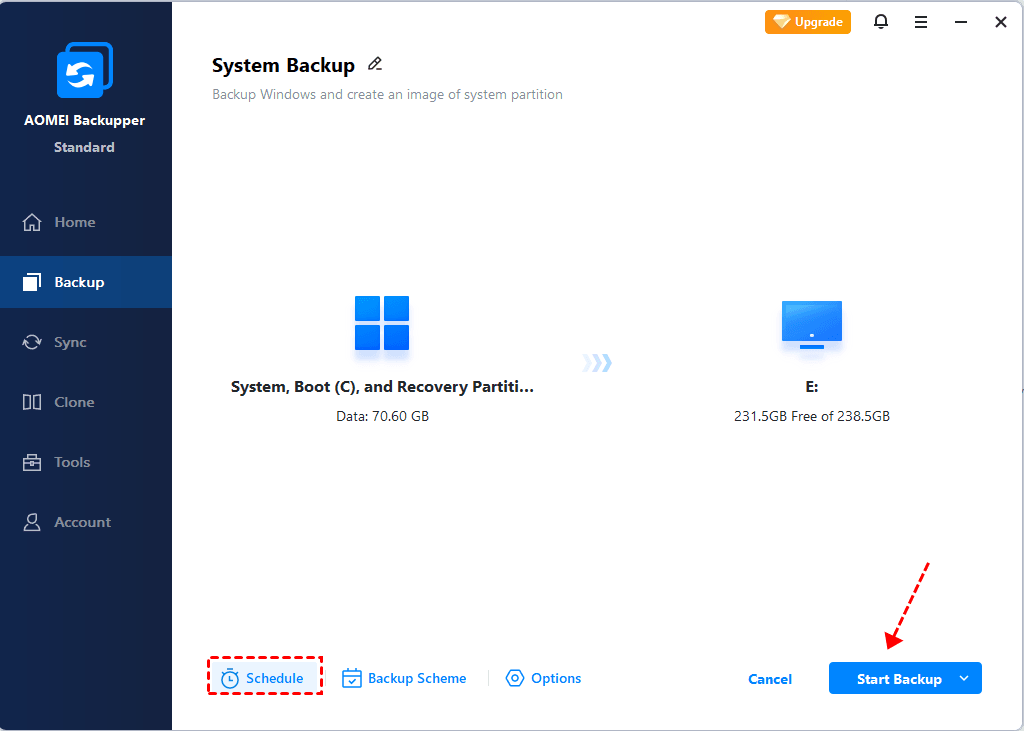
1. Launch the main interface. Choose System Backup to create a Windows full system backup. It will auto include the system related partitions.
✎If you want to create a full disk backup in Windows 10/11, choose Disk Backup instead.

2. Specify a destination path. In addition to hard drive or USB drive, you can click on the small triangle to Select a cloud drive or Add Share or NAS Devices.

3. Set up a Schedule Backup to perform backup regularly if necessary. Then Start Backup.
Schedule Backup: Daily/Weekly/Monthly/Event triggers/USB plug in. The last 2 requires advanced editions.
Backup Options: Manage backup modes, image compression and splitting, comments, email notification, etc.
Backup Scheme: Create a rule to auto delete older backups and save your storage space. Available in Pro edition.
Now you’ve got a system image. It’s also recommended to create a bootable media. Thus when problem occurs, you could start the machine into WinPE and perform system restore.
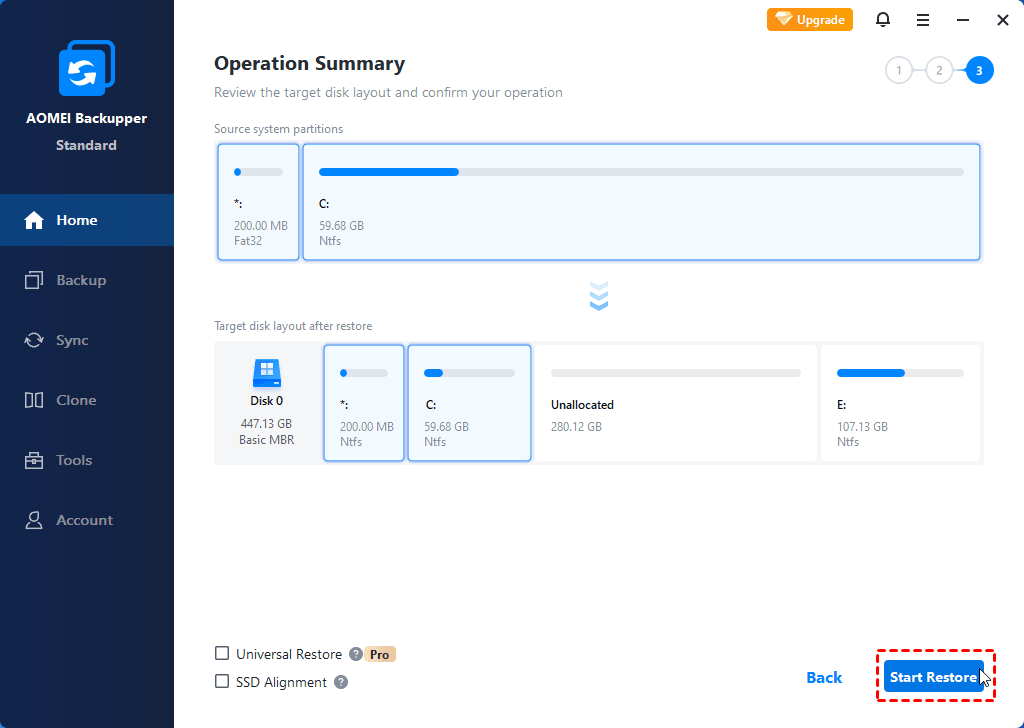
How to restore from a full system backup in different cases
◆ If the machine is still bootable: Launch the software, go to "Restore" tab and restore from a task or a system image.
◆ If the machine cannot boot: Insert the bootable media and the device containing the system image. When the software pops up in WinPE, go to "Restore" tab and complete the process as normal.
◆ Restore to another working machine: Launch the software on that machine, restore as normal but remember to tick "Universal Restore" at last. It ensures you can restore system image to different hardware with secure boot.
◆ Restore to another unbootable machine: Insert the bootable media and device containing the system image. Perform system restore in WinPE and remember to tick "Universal Restore" at the last step.
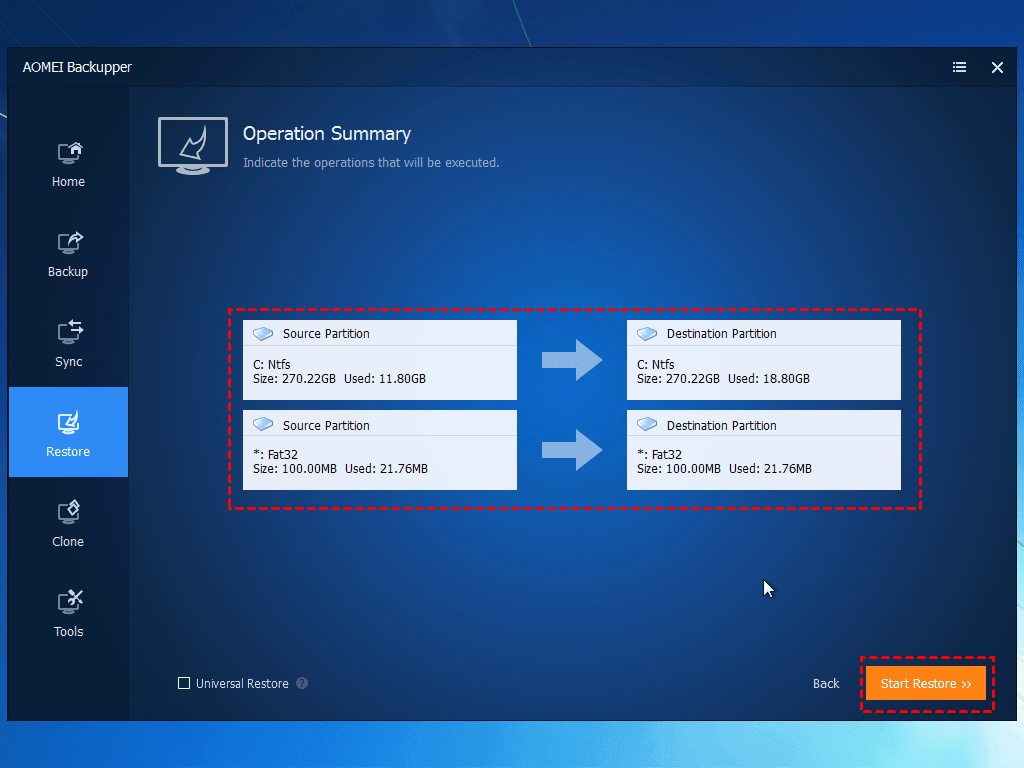
✎The "Universal Restore" feature is available in AOMEI Backupper Professional and above versions. For more details about the differences between editions, you can check the edition comparison page.
Conclusion
Creating a Windows full system backup could help you recover a machine from severe malfunction, or another machine with different hardware. One of the methods to implement is Windows built-in backup tool, but if you find the process complicated or error-prone, there are powerful backup software like AOMEI Backupper could help.
It includes rich functions for data protection and recovery. In addition to those mentioned in above article, you can also use if for file sync or disk clone. For example, when you need to replace the hard drive, instead of system backup and restore, you can directly clone OS to another hard drive.

