Synology Active Directory Backup: Enable with 2 Easy Ways
In this article, you can learn how to make Synology Active Directory backup with 2 easy ways. You can choose Hyper Backup or a professional backup software according to your needs.
By Clytze Updated on February 16, 2023
This page covers:
User case
Need to backup Synology Active Directory server
I managed to have a volume crash, and Synology's tech support says to backup, wipe, and rebuild. That would be fine, but how do I backup my Active Directory settings? It doesn't get backed up with the backup from the control panel. I tried setting up on a new Synology unit, and tried cloning over the /volume1/@appstore/ActiveDirectoryServer directory, but did not have any luck with it. Any ideas? What should I do?
- Question from reddit
Do you know that the Synology NAS offers Active Directory functionality? Synology Directory Server provides the AD-based Synology Directory service, allowing you to store and deploy resources on an intuitive interface.
We know that due to a sudden hardware failure, natural disaster, accidental deletion or other unknown reasons, it’s quite easy for Synology NAS users to lose their data. Thus it’s a wise move to make Synology Active Directory backup regularly.
This article will explain what are the best solutions available for backing up Synology AD server, and how to finish it. Continue reading for details below.
Backup Synology Active Directory with Hyper Backup
Hyper Backup allows you to backup various kinds of data (system configurations, shared folders, and applications, packages) on your Synology NAS, manually or automatically.
You can backup your Synology NAS AD to another device, either a USB drive or a remote Synology NAS, or even to a cloud account like Synology C2, Dropbox, Google Drive, Amazon S3 etc.
Follow the presented steps to set up Hyper Backup to backup Synology Active Directory server.
1. Go to Package Center and install Hyper Backup.
2. Launch Hyper Backup.
3. Click + on the upper-left corner, and select Data backup task to launch the backup wizard.
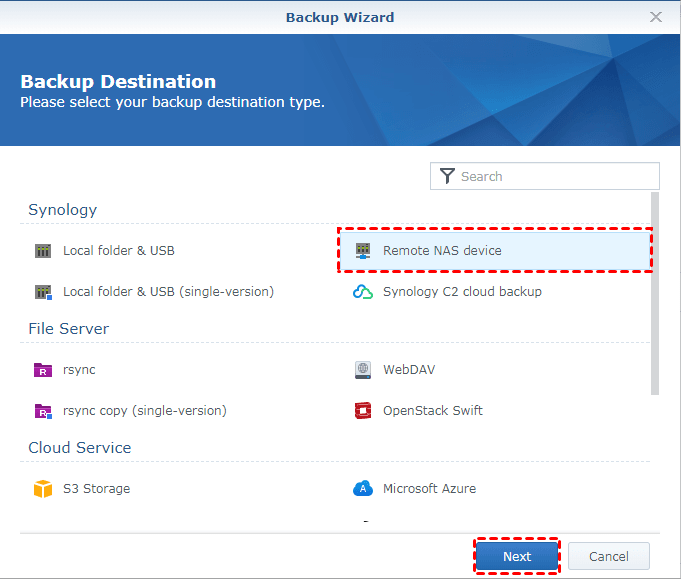
4. Select the desired type of backup destination. We suggest backing up your data to a destination on another device, such as Remote NAS device.
5. On the Backup Destination Settings page, select Create backup task and enter the IP address and account information required to connect with the remote NAS device. Select a shared folder as the backup destination.
6. Select any source folders to backup the contained data and click Next.
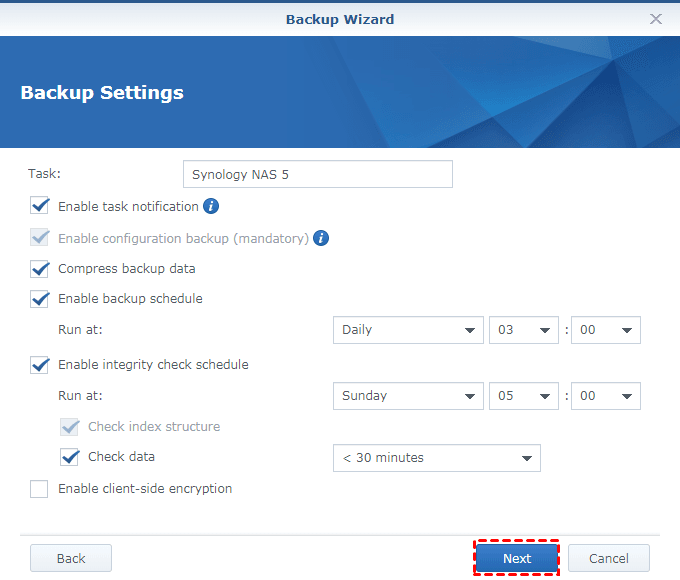
7. Specify the backup settings below as you need.
8. Select Enable backup rotation to set up the rotation scheme.
9. Click Apply to complete the setup. To perform the backup task immediately, follow the Backup Wizard's instructions and click Yes.
💙 Tips:
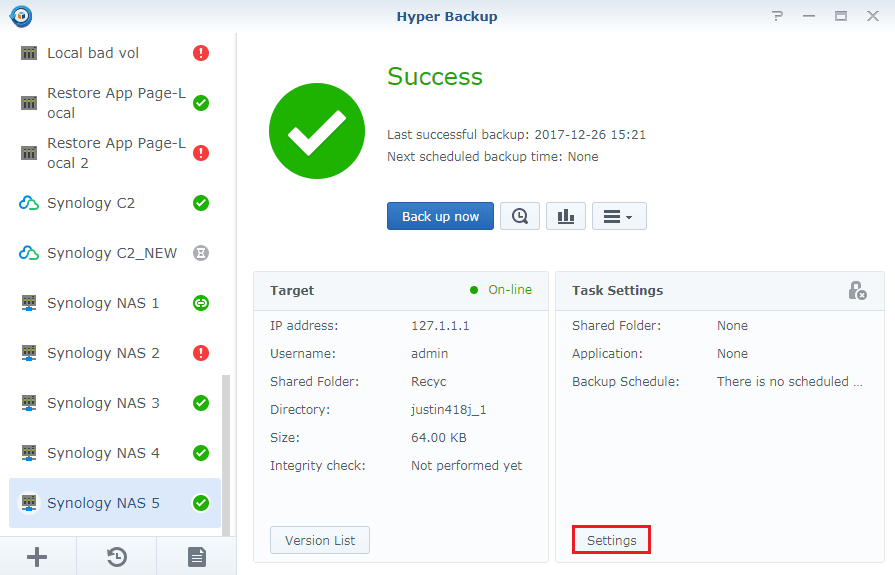
✦ You can always modify your backup settings by clicking the Settings button located at the lower right-hand corner of the page.
✦ Hyper Backup allows you to recover your directory once errors occur to Synology Directory Server. You can also migrate Synology Directory service to another Synology NAS via service.
Enable Synology Active Directory backup via AOMEI Backupper
Owing to that Hyper Backup have some limitations of backup, such as it can only set once backup task once a time, NAS brand restrictions, or USB flash drive are not supported to be backed up, etc., it's suggested to try the best free NAS backup software - AOMEI Backupper Standard. This program comes with an intuitive interface, which makes it very easy to operate Synology Active Directory server backup. It also provides users with the ability to restore their AD data from the backup if needed.
✜ It offers system backup, disk backup, partition backup, file backup or cloud backup to meet users' different backup needs.
✜ It enables you to backup Synology NAS to another one automatically with the Schedule Backup option.
✜ It is able to reduce backup image size as much as possible, such as compression, incremental backup etc., and even don't need to configure it manually.
✜ It supports backing up NAS to NAS devices, network, internal/external hard drives and cloud drives in Windows 11/10/8.1/8/7.
How to make Synology Active Directory Server backup? Just refer to the following guide:
1. Download and install this best free NAS backup software on your PC.
2. Execute this Synology AD backup software after the installation, select Backup -> File Backup.

3. Click Add Folder or Add File button -> Share/NAS.
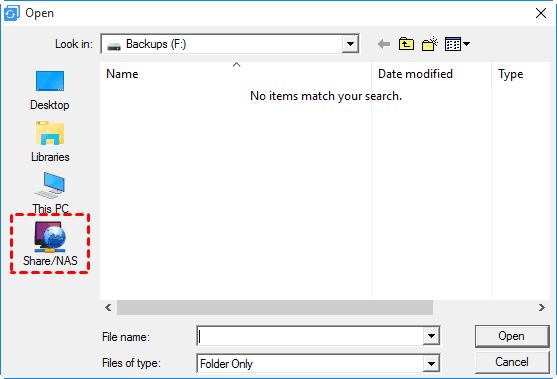
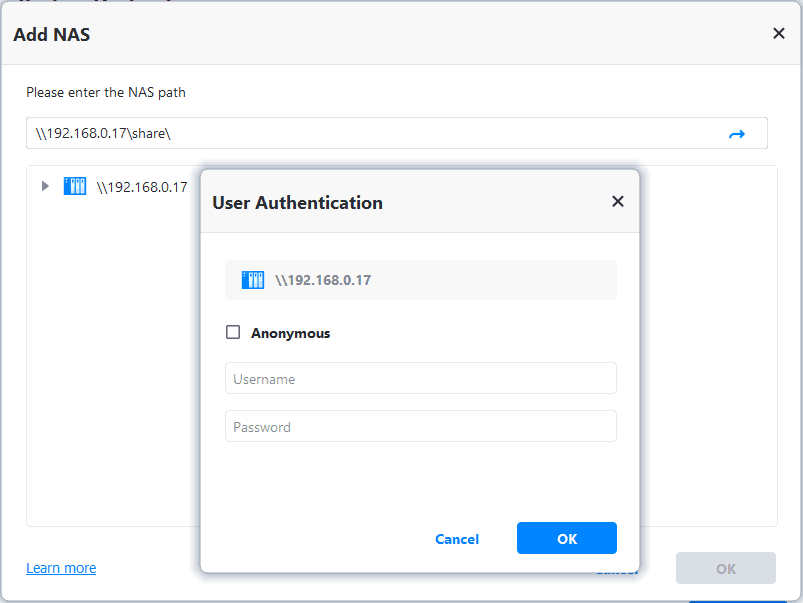
4. Click Add Share or NAS Devices, type the IP address (Network Path), username and password of the Synology NAS and click OK to connect it. And then, you will see all the shared folders on it, select the files or folders you want to backup and click OK.
5. Click the inverted triangle in the second box and choose Add Share or NAS Devices. Use the same way to choose another Synology NAS as the destination path.
✍ (Optional): Customize your backup settings:
Θ Options: You could modify the backup image, like compress, split, or comment on the backup image. You can even get email alert via enabling email notification, etc.
Θ Schedule Backup: The Event triggers and USB plug in are advanced features, you need to upgrade to professional version or higher to enjoy them.
Θ Backup Scheme: It has the ability to backup only changed files instead of a full copy and delete old backups automatically for more space (paid feature).
6. Click Start Backup to complete the process of backing up Synology Directory Server on Windows 11.
Your turn
That’s all you can learn about how to enable Synology Active Directory backup in the provided 2 ways. Whether Hyper Backup or AOMEI Backupper can help you a lot to achieve this goal. As a powerful NAS backup software, AOMEI Backupper can also allow you to backup Windows 11 to Synology NAS securely, and makes you enable Windows 11 sync folders with sync feature. If you want to explore more features, give it a try now!