How to Transfer Files from Windows 7 to 10 over Network
If you own a Windows 7 and Windows 10 computer and want to perform file sharing between Windows 7 and Windows 10, read this article attentively.
By Lily Updated on September 5, 2025
When run file sharing between Windows 7 and Windows 10?
File transfer is a frequent operation for most computer users. We transfer files between different folders, drives and even computers in order to backup files or share files in different places. You may find it necessary to transfer files from Windows 7 to Windows 10 over network in following occasions:
-
You buy a new computer with Windows 10 preinstalled while your old computer is running Windows 7. Your want to transfer files from the old computer to the new computer without a specified transfer cable.
-
You want to share files with your friends or colleagues from Windows 7 to Windows 10 when your computers are connected to a common wireless or wired network.
Then, how to realize Windows 7 to Windows 10 file sharing over network? Please move on to the next part.
2 easy ways to transfer files from Windows 7 to Windows 10 over network
Before you start network sharing between Windows 7 and Windows 10, make sure your computers are under the same wireless or wired network. Now learn two efficient ways to finish the task below:
|
Tools |
Ease of Use |
Storage and Transfer Limits |
Cost |
|
⭐⭐⭐ |
No specific limits, depends on local storage and bandwidth |
Free |
|
|
2️⃣ AOMEI Backupper |
⭐⭐⭐⭐⭐ |
Depends on the destination (external drives, NAS, cloud) |
Free version available, paid for advanced features |
Method 1: file sharing over network with Windows built-in tool
1. Locate the folder you want to share on the Windows 7 computer and right click on it. Choose “Share with” and then select “Specific people...”.
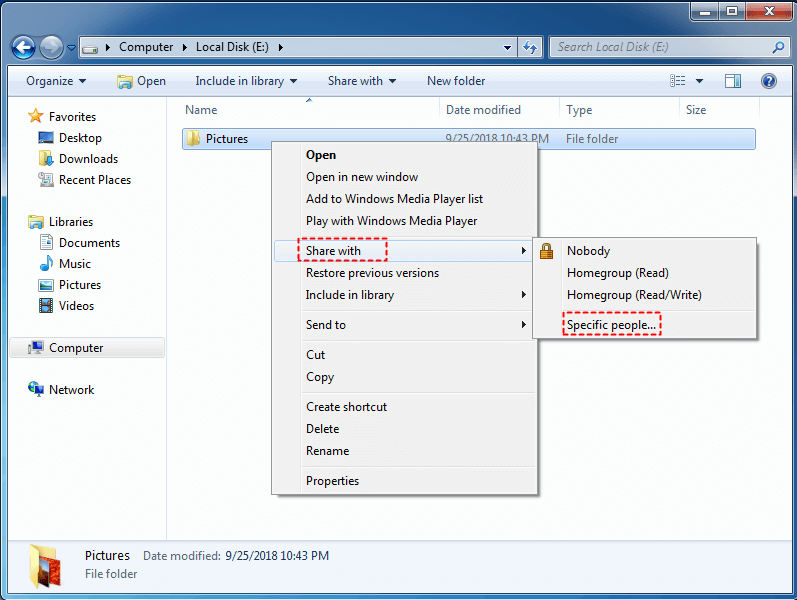
2. In the file sharing window, choose people to share with using the drop-down menu and click “Add”. You can choose to share with “Everyone”, which means the files will be accessible on your local network to anyone even if they don’t have a password.

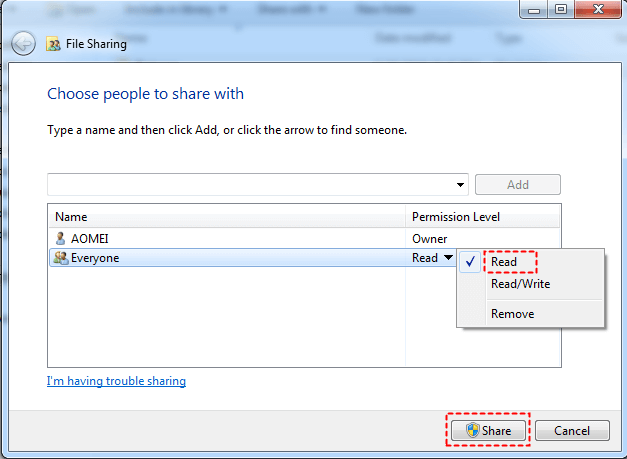
3. Click the user you just added on the list, set permissions for it and click “Share”. When you see “Your folder is shared”, click “Done”.
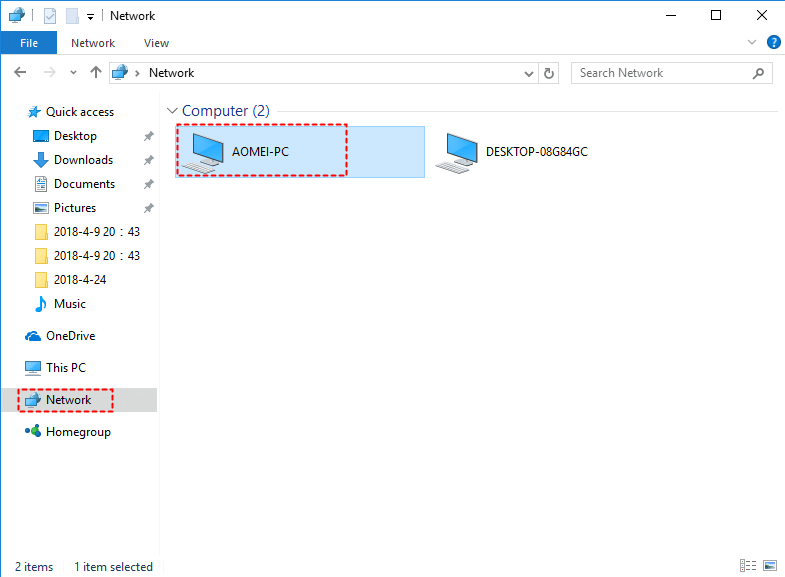
4. Keep the Windows 7 computer on and access the shared folder on the Windows 10 computer. Find the Windows 7 computer’s name in the Network section on the Windows 10 computer. Double click the name to open it, and the shared folder is located there. You can copy the shared folder to anywhere else based on your needs.
✍ Notes:
① Shared items will be inaccessible when the Windows 7 computer is asleep.
② If you have trouble accessing shared items on the Windows 10 computer, please go to Network and Sharing Center > Change advanced sharing settings and change the following options for both the systems:
-
Turn on network discovery
-
Turn on file and printer sharing
-
Turn on sharing so anyone with network access can read and write files in the Public folders
-
Turn off password protected sharing
As you see, you can only share one folder at one time. It will be time-consuming if you have dozens of files from different folders to transfer. Is there a superior tool to make it simple?
Method 2: file sharing over network by a handy freeware
AOMEI Backupper Standard, the best free file sync software for Windows 11/10/8.1/8/7, can help you with fast file transfer from Windows 7 to Windows 10 over network. You can benefit a lot from the Sync feature of AOMEI Backupper:
-
It allows you to transfer files between different locations, such as from one folder/disk/computer to another folder/disk/computer. You can also sync local folders to OneDrive, Google Drive, and Dropbox, etc.
-
It supports transferring multiple folders simultaneously, saving you from repetitive work.
-
It enables you to create automatic sync tasks with the Schedule Sync feature.
Learn how to do network sharing in Windows 7 via AOMEI Backupper below:
1. Download, install and launch AOMEI Backupper on the Windows 7 computer. Click “Sync” on the left pane, and select “Basic Sync”.

2. Name the task so that you can distinguish it from other sync tasks. Click “Select Source” to choose the folder you want to transfer.

✎ Tips:
● To sync more folders, you can click “Add Source” after adding the first folder.
● If you want to exclude certain file type from selected folders, please upgrade to AOMEI Backupper Professional and use “Filter settings”.
3. Click the destination box and select "Add Network Share" in the next window.
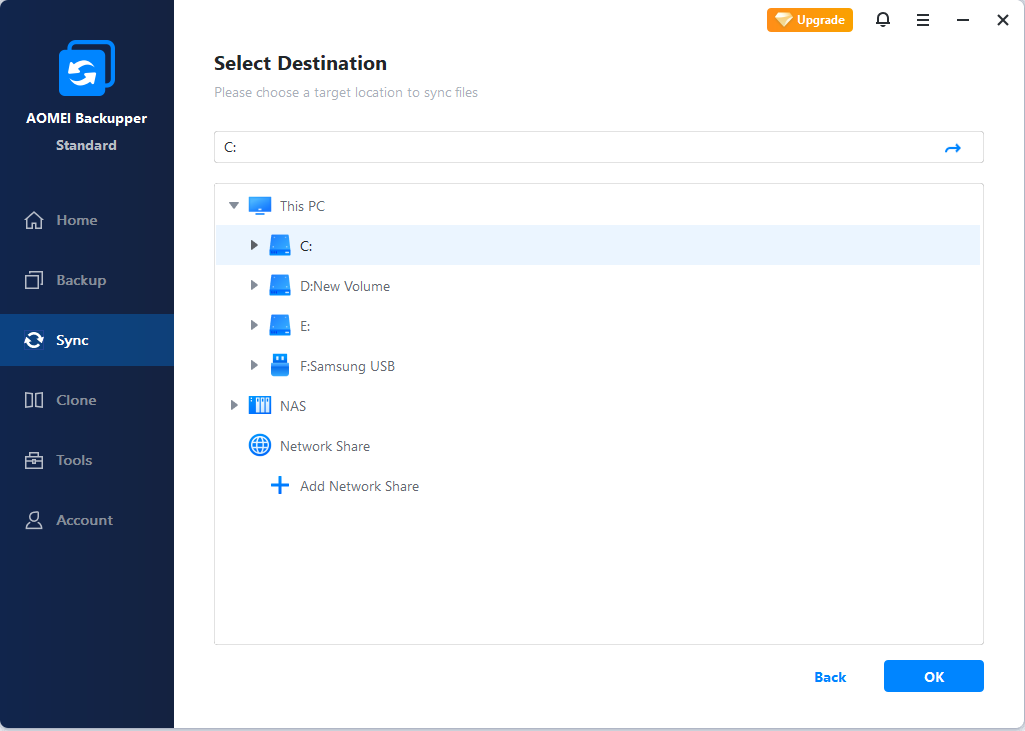
4. In the Add Network Share window, type the IP address of the Windows 7 computer and click the right arrow. Type username and password if it prompts.

5. After the IP address has been added, all network-shared folders under it will be listed. Choose one folder as the destination path and click “OK”.
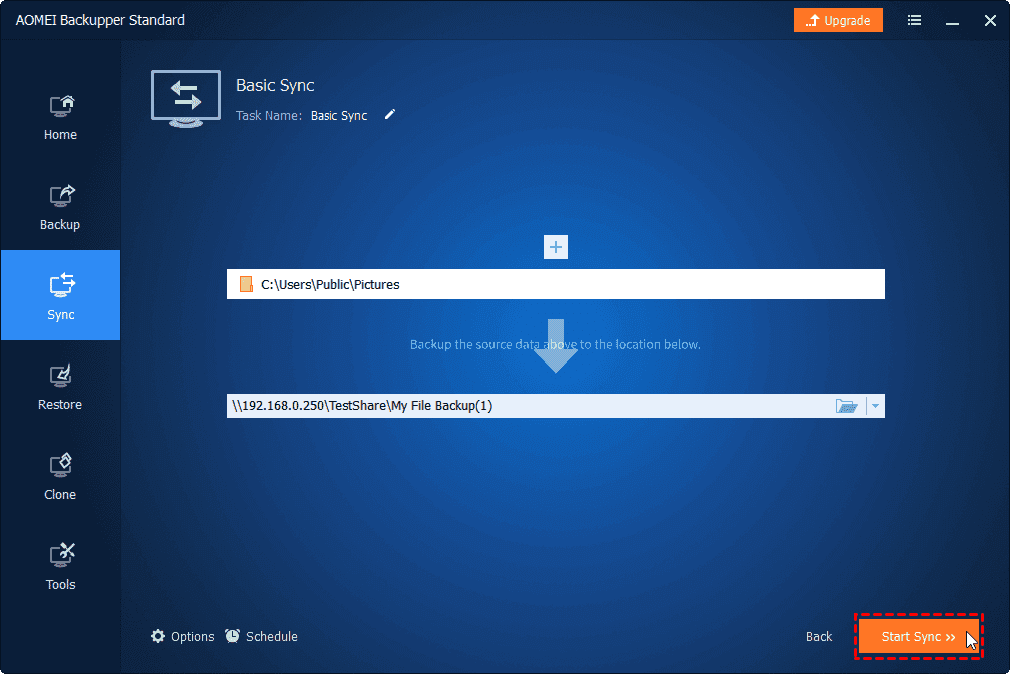
6. Click on “Start Sync” button to perform the operation.
7. Access the shared folder(s) on the Windows 10 computer as mentioned in Method 1.
Besides transferring files from Windows 7 to Windows 10 over the network, you can also perform cloud backup. AOMEI Backupper provides users with their own cloud drive - AOMEI Cloud. After you sign up for an AOMEI account, it will give you 1TB of free storage space for 15 days.

Summary
When you decide to transfer files from Windows 7 to Windows 10 over network, you can either try Windows built-in tool or AOMEI Backupper. Nevertheless, you will benefit more from AOMEI Backupper—it can help you clone Navigation SD card. Get this tool and discover more!

