Dell OS Recovery Tool Not Working? Solved Now!
Dell OS Recovery Tool not working? Learn common causes, step-by-step fixes, and a reliable alternative to restore Windows on a Dell computer.
By Lily Updated on December 22, 2025
Why Is Dell OS Recovery Tool Not Working?
The Dell OS Recovery Tool is designed to simplify system recovery, but it can fail sometimes. Here are some common reasons for the Dell OS Recovery Tool not working error:
🎯 Unsupported or mismatched system — The tool may fail if your Service Tag is invalid, your model is unsupported, or your hardware configuration has changed.
🎯 Internet or server issues — A slow or unstable connection, or temporary Dell server problems, can cause downloads to fail or get stuck.
🎯 Corrupted download — If the OS image is interrupted or disk space is low, the download may become corrupted, causing crashes or errors.
🎯 Faulty USB drive — Incompatible, too small, incorrectly formatted, or damaged USB drives can prevent recovery media from being created.
🎯 Permissions or security interference — Antivirus, firewalls, admin rights, or corporate security settings can block the tool from accessing services or writing files.
If the Dell OS Recovery Tool keeps failing, try the best free Windows backup and restore software.
How to Fix Dell Recovery Tool Not Working
If you encounter Dell recovery not working, you can try the following solutions to get it right:
Fix 1: Retry with Correct Service Tag or Manual OS Selection
Since the tool automatically detects your system to download the factory OS image, any mismatch can cause detection or download failures. Here’s how to fix it:
Step 1. Check the Service Tag on your Dell PC by pressing F2 during startup to enter BIOS, or by locating the label on the device chassis. Make sure the Service Tag entered in the Dell OS Recovery Tool matches exactly.
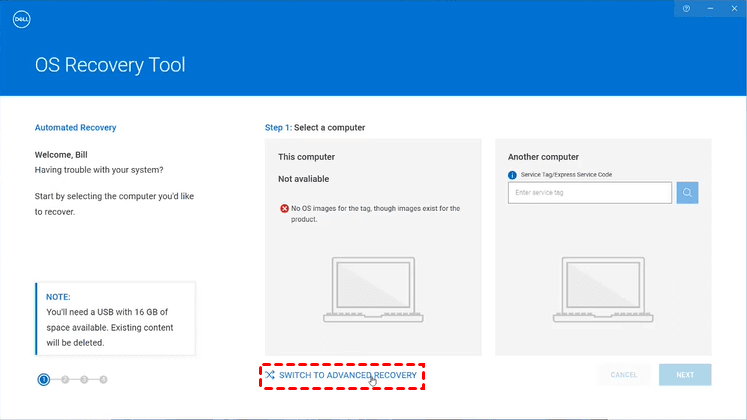
Step 2. If automatic detection fails, choose SWITCH TO ADVANCED RECOVERY. Select the correct Windows version that originally shipped with your Dell device. This bypasses detection errors and helps ensure compatibility.
Step 3. After correcting the Service Tag or selecting the OS manually, create the USB recovery drive again. Avoid running other heavy applications during this process to reduce the risk of interruptions.
Fix 2: Check Network Stability and Dell Support Services
An unstable network connection or temporary issues with Dell support services can cause the Dell OS Recovery Tool to freeze, stall, or fail during the download process. Follow the steps below to fix the issue:
Step 1. Use a reliable wired Ethernet connection if possible. If you’re on Wi-Fi, move closer to the router and avoid public or restricted networks that may block large downloads.
Step 2. VPNs and proxy servers can interfere with Dell’s recovery servers. Temporarily disable them before launching the Dell OS Recovery Tool to prevent authentication or connection failures.
Step 3. If the tool repeatedly fails at the same point, the issue may be on Dell’s side. Waiting a few hours and retrying later can sometimes resolve unexplained download or verification errors.
Fix 3: Prepare USB Drive Correctly
USB drive issues are a frequent reason the Dell OS Recovery Tool is not working, even when no clear error message is shown. Follow the instructions below to fix it:
Step 1. Use a USB flash drive with at least 16 GB capacity from a reputable brand. Avoid very old, slow, or promotional USB drives, as they are more likely to have write errors.
Step 2. Connect the USB drive directly to a USB port on your computer. Avoid USB hubs or front-panel ports to ensure stable power and data transfer during image creation.
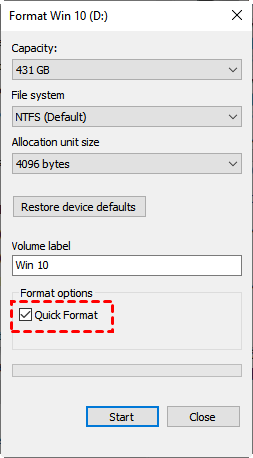
Step 3. Before retrying, format the USB drive using FAT32 or NTFS in File Explorer to ensure the tool can recreate the recovery structure correctly.
Fix 4: Update the Tool and Run as Administrator
Insufficient permissions or an outdated version of the Dell OS Recovery Tool can prevent it from accessing system resources, downloading recovery files, or writing data to the USB drive. Fix it as follows:
Step 1. Download the latest version of the Dell OS Recovery Tool from Dell’s official support site and install it.
Step 2. Install pending Windows updates.
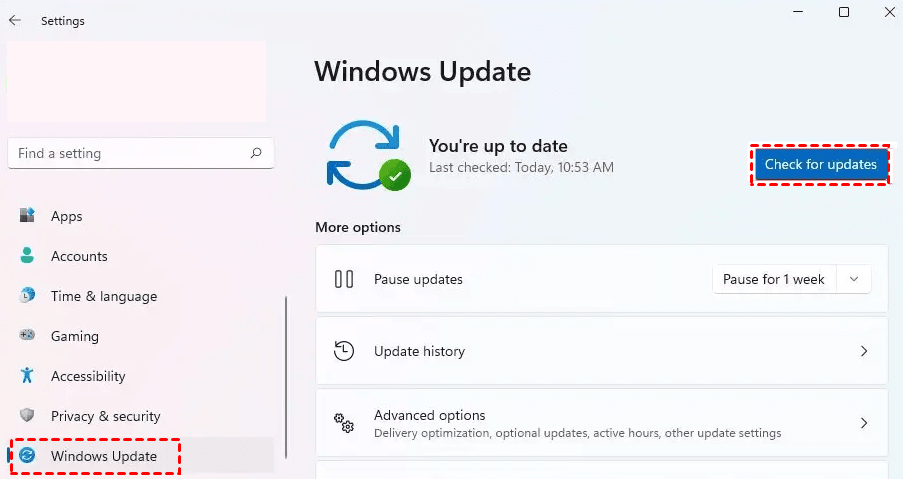
- In Windows 10, go to Start > Settings > Update & Security > Windows Update. Then click Check for updates.
- In Windows 11, go to Start > Settings > Windows Update. Then click Check for updates.
Make sure Windows is fully updated, including required components such as .NET Framework and system services.
Step 3. After updating the tool and Windows, restart your PC. Right-click the Dell OS Recovery Tool shortcut and select Run as administrator to run the recovery process again from the beginning.
Fix 5: Temporarily Disable Security Software
Security software can sometimes mistake the Dell OS Recovery Tool’s activities for suspicious behavior. This can cause the tool to fail without clearly indicating the cause. Use the following steps to fix it:
Step 1. Turn off real-time protection in your antivirus software and, if necessary, temporarily disable third-party firewalls.
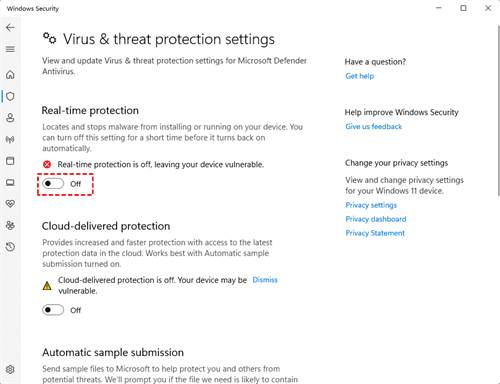
Step 2. Open Windows Security > Virus & threat protection, click Manage settings, and toggle off Real-time protection to disable Windows Defender temporarily.
Step 3. With security restrictions lifted, launch the tool as administrator and attempt to create the recovery USB again. Monitor the process to ensure it completes without interruption.
Step 4. Once the recovery media is created successfully, re-enable your antivirus and firewall to keep your system protected.
Best Alternative Way to Recover Windows on a Dell PC
If the Dell OS Recovery Tool is not working or repeatedly fails, using a third-party backup and recovery solution can be a more reliable and flexible option. AOMEI Backupper Standard is a free Windows backup utility that allows you to recover your Dell PC quickly.

-
Flexible Backup Options: You can back up your entire Windows system, individual files/folders, or your whole hard drive as per your needs.
-
Automatic Backup: Schedule backups on a regular basis to keep things current.
-
Disaster Recovery: In the event of a system crash or hardware failure, you can restore your computer to an earlier date easily with the image created before.
-
Boot Media Creation: Create a bootable USB/CD/DVD to restore your system even if Windows won’t start.
Download AOMEI Backupper right now! To perform system restore, you should do the following preparations:
- Create a system image backup when your computer works well.
- Create a bootable USB drive to boot your computer in case of boot failure.
Now follow the steps below to restore Windows on your Dell computer:
Step 1. (Optional) If your PC encounters severe problems and can’t boot now, you can boot your PC from AOMEI Backupper’s bootable USB.
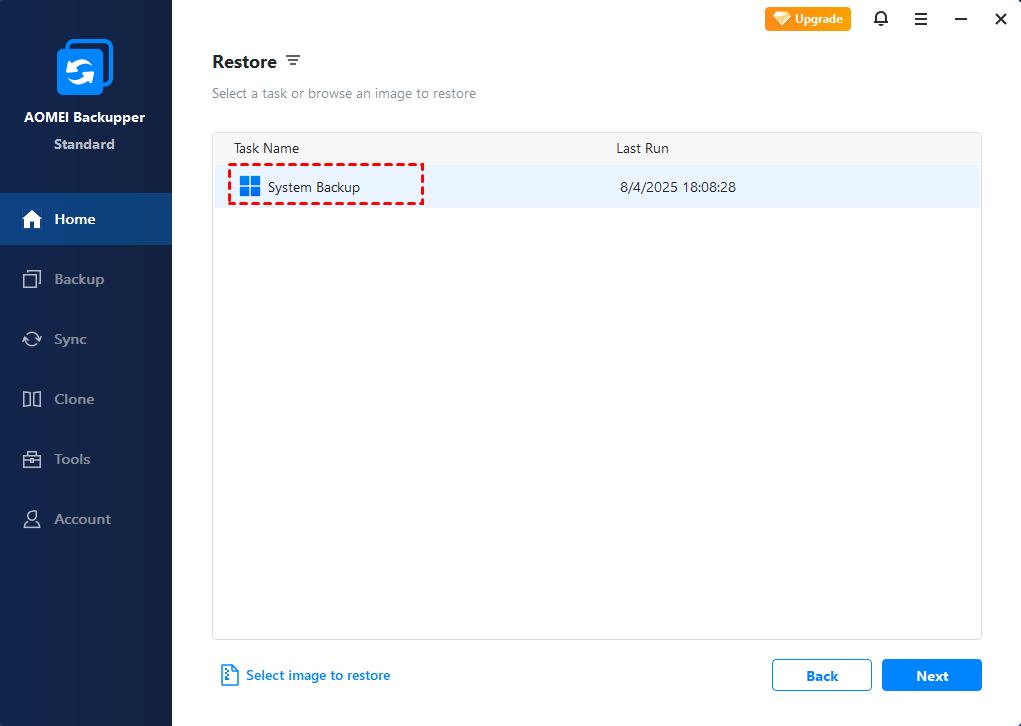
Step 2. After entering AOMEI Backupper, go to Home > Restore. Then select the system backup task you created earlier and click Next.
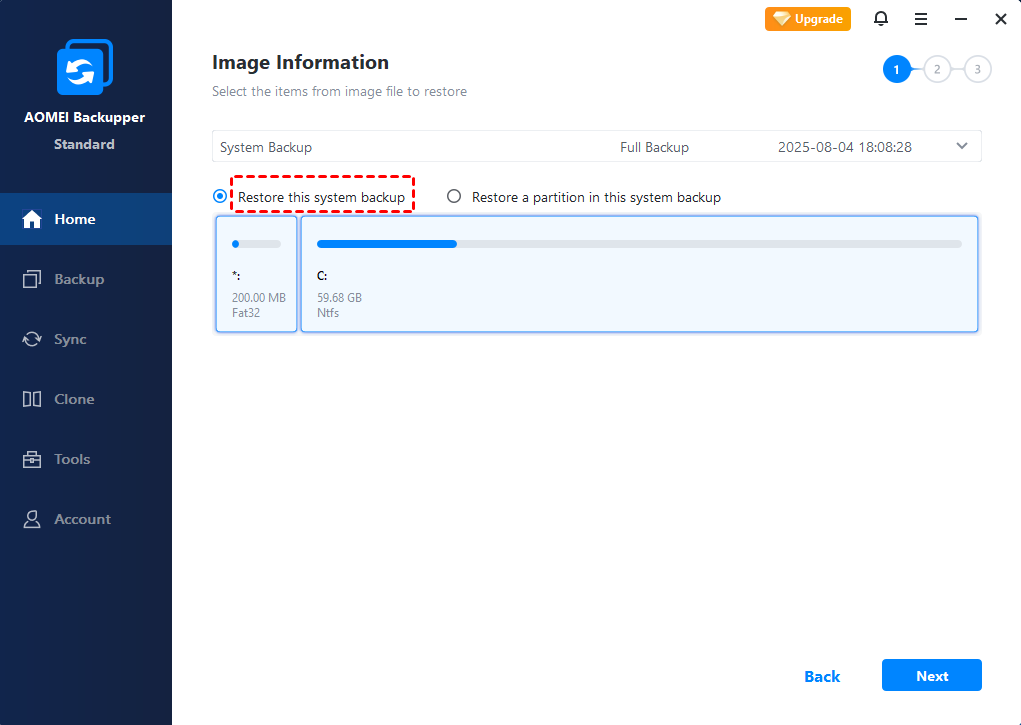
Step 3. If you have multiple backup versions, click the drop-down menu to select a backup version to restore from. Then select Restore this system backup and click Next.
Step 4. Keep the default option Restore to original location and click Next. If needed, check the option Restore to a new location and select a destination path manually.
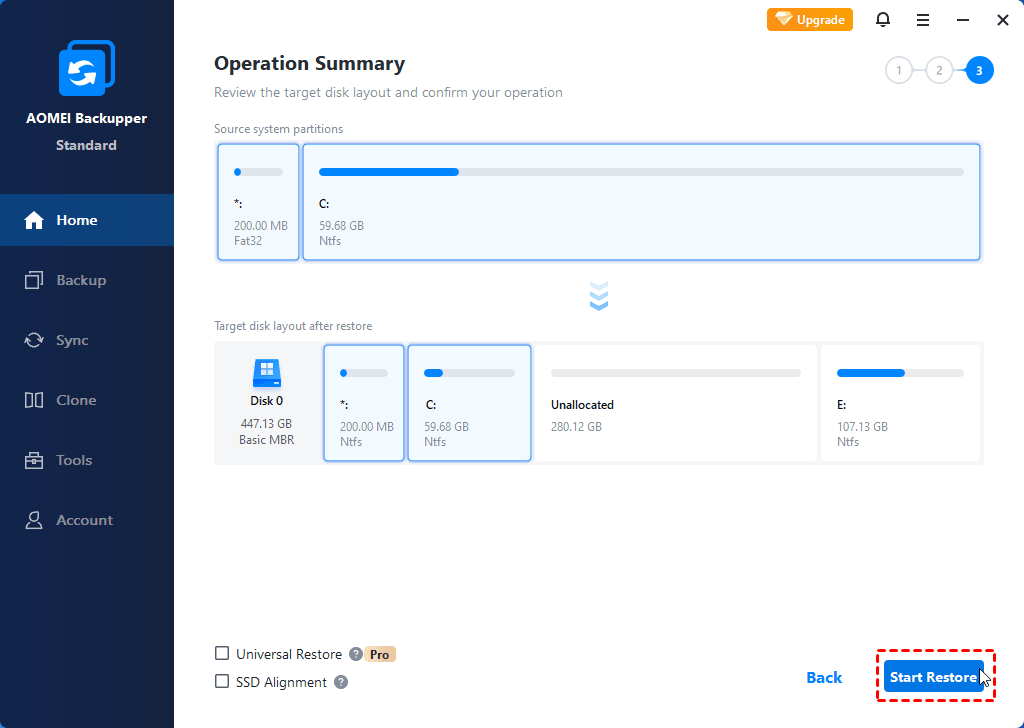
Step 5. Preview the operation and click Start Restore to begin the recovery process.
Wrapping Things Up
This article explained the most common causes of the Dell OS Recovery Tool not working error and provided clear, step-by-step fixes to help you resolve the issue efficiently. If Dell’s built-in recovery tool continues to fail, using a reliable alternative like AOMEI Backupper Standard offers a practical solution.
With system image backups and bootable recovery media, you can restore Windows on a Dell PC without relying on Dell servers or factory images. What’s more, AOMEI Backupper enables you to clone hard drive to SSD. Don’t hesitate to try it out!

