Clonezilla Destination Disk Is Too Small - Fixed Now!
What to do when you receive the Clonezilla destination disk is too small error? This article will show you a workaround to fix this.
By Delia Updated on August 21, 2023
Clonezilla error: Destination disk is too small
Hi all, I want to use Clonezilla to make a clone of my system drive. So if the main drive fails, I have a backup in hand.
When I run Clonezilla using disk to disk mode, I receive the clonezilla error: Destination disk is too small! And I have tried the -icds mode, but I get the same message. Could I shrink the disk first? If so, which partition should I shrink? Thanks in advanced.
Clonezilla is an open-source disk cloning & imaging tool which helps users create exact copies of hard drives or partitions for data migration or backup purpose. However, many users have run into this destination disk too small issue during cloning hard drives of different sizes.
Why does this problem occur and how to fix it? Keep reading to get details.
2 scenarios for “Clonezilla destination disk is too small”
When will you receive "Clonezilla target disk is too small" error message? There are usually 2 cases:
-
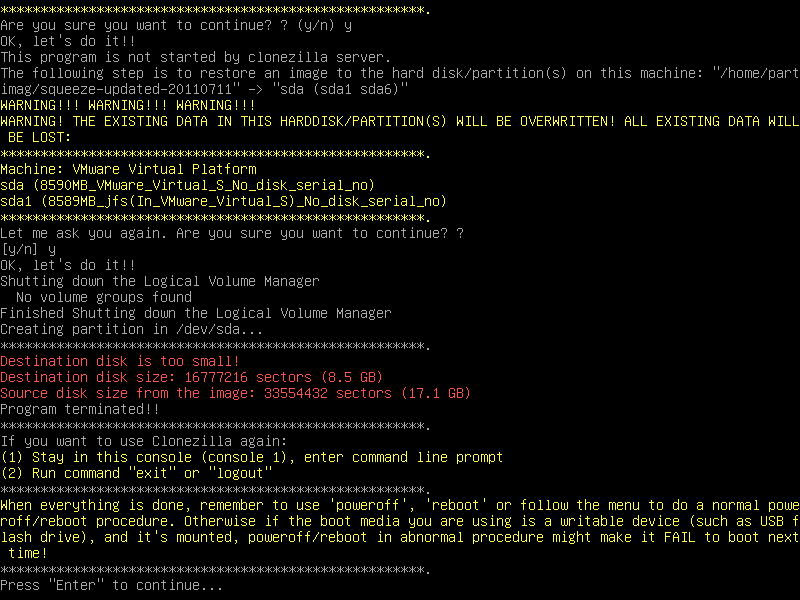
Clonezilla restore destination disk is too small. If you have backed up a large drive and want to restore it to a smaller disk, you will receive Clonezilla destination disk is too small error.
Many users want to migrate OS form hard drive to an SSD, which is generally smaller than HDD at the same price. Clonezilla backups the original size of file system. When Clonezilla tries to restore the original file system onto a smaller disk, it cannot write beyond the destination disk boundary.
-
Clonezilla clone destination disk is too small. The clone function of Clonezilla uses the same way to clone data, so you may get the same error when you clone a larger hard drive to a smaller SSD.
Now, you may have this question: is it possible to let Clonezilla restore or clone a large disk to smaller one?
Fix "destination disk too small" via Clonezilla -icd mode
According to the Clonezilla Official, Clonezilla is not supposed to clone from a larger disk to a smaller one. However, many users have such needs to clone or restore larger disk to smaller one when they want to replace HDD with SSD.
To satisfy users needs, Clonezilla provides an advanced –icds mode, which can let Clonezilla ignore disk size while cloning or restoring. That’s to say, if you use this mode, Clonezilla will not check the destination disk size before creating partition table.
To restore image to smaller drive using Clonezilla, see steps below:
1. Download, install and start Clonezilla. Then, launch this software, choose language > handing keymaps “Don’t touch keymap” > “Start_Clonezilla Start Clonezilla” and hit “Ok” after each option.
2. Then, mount clonezilla image directory. Just select “device-image work with disks or partitions using images” > “local_dev Use local device” and hit “Ok” in turn. After that, mount a local device as /home/partimag and then choose the directory of local disk, hit “Ok” subsequently.
3. Select export mode and restore with image. Choose “Expert Export mode: Choose your own options” > “restoredisk Restore_an_image_to_local_disk” > select the image file to restore > press space key to select “-icds” option > keep the default values and select “-p true Do nothing when clone finishs”, and click “Ok” one by one. After that, just wait until all the process ends.
✍Note: Clonezilla uses "-icds" to ignore disk size, but sometimes the problem may not be the size of the disk, but the size of the partitions. If the sum of the partition sizes are larger than the destination drive, Clonezilla will fail. To make it work successfully, you need to choose "Resize partitional table proportionally" as well, which can shrink the partitions before running Clonezilla with "-icds".

With this method, some users have successfully performed Clonezilla cloning to smaller destination disk. But it's not 100% effective.
If you find it complicated or still fail cloning or restoring, you can shrink the source drive via disk management, or, try an much easier alternative.
Once and for all: Restore or clone to smaller destination disk easily
If Clonezilla says disk is too small after trying all above workarounds, you can consider using effective disk imaging and cloning software software like AOMEI Backupper Standard.
📂It copies only used sectors by default, allowing you to restore or clone from a larger disk to the smaller one, as long as it has sufficient capacity to accommodate all the existing data. You don’t have to do extra configurations.
💾If the target disk is larger (or equally sized), you can choose to copy all sectors including hidden recovery partition, or resize partition sizes to make the full use of the disk capacity.
🚀It has SSD alignment feature to accelerate the read & write speed of the target drive and prolong its life span.
Download AOMEI Backupper, install and launch it to have a try:
How to restore larger disk to smaller disk
Preparations:
-
Install the new HDD or SSD to your computer. If there's only one drive slot, you may need a SATA to USB cable or clousure to connect it.
-
If any important data exists on the target disk, make a backup first to prevent it from being overwritten during the recovery process.
Step 1. Use AOMEI Backupper to create a system backup of the source hard drive. You can choose Disk Backup for a entire disk copy, or System Backup for only system-related partitions.
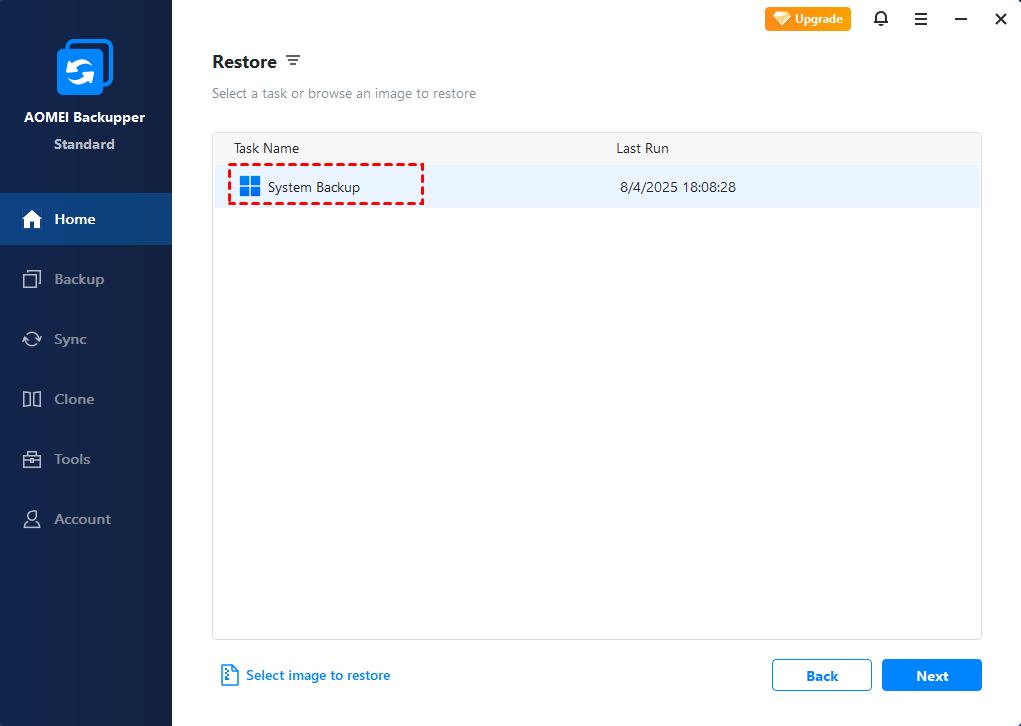
Step 2. Click Restore and Select Task to find the backup image.

Step 3. Select the system backup image and click Next.
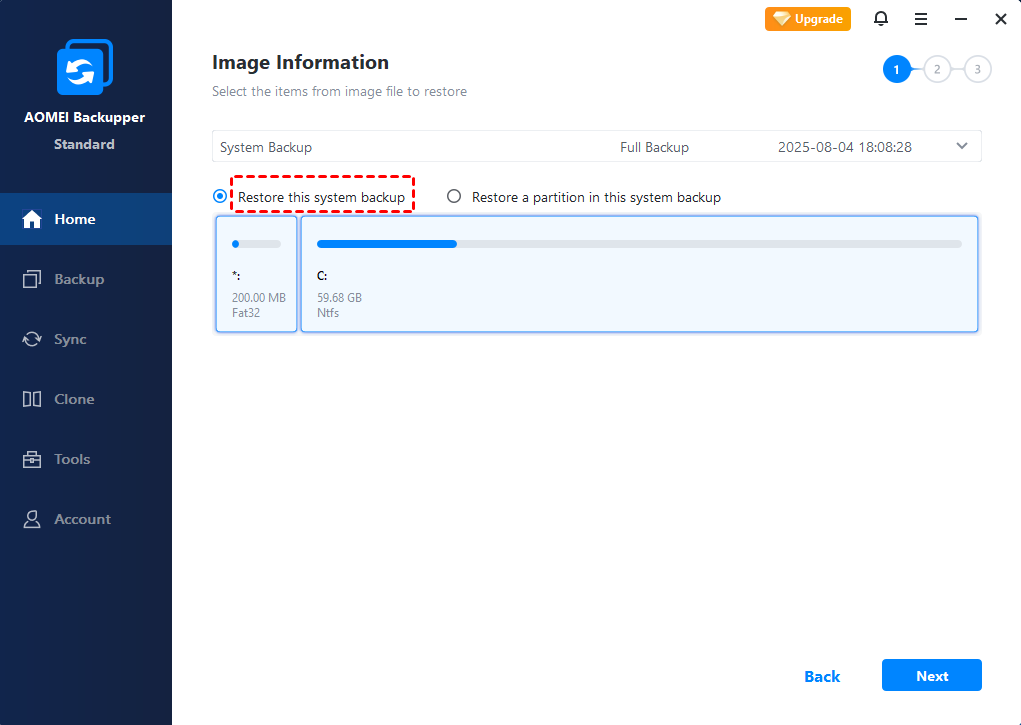
Step 4. Choose Restore this system backup and click Next.
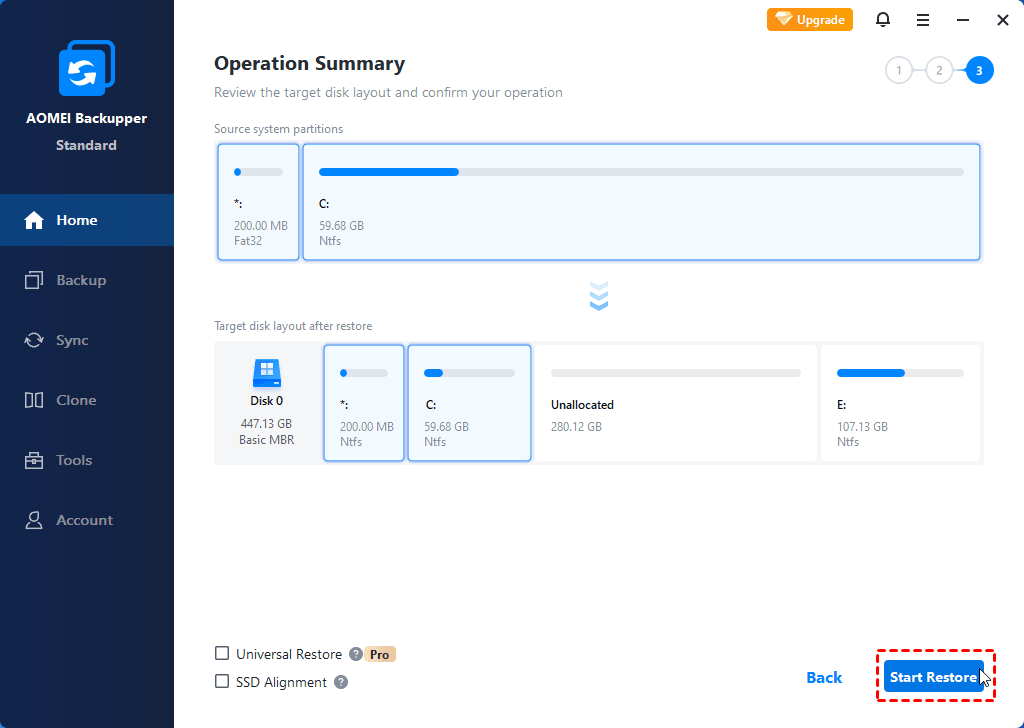
Step 5. Preview the operation and click Start Restore.
📑Tips: The “Universal Restore” feature allows you to restore system image to computer with dissimilar hardware. It is available in advanced editions.
Also available: Clone to a smaller destination disk
You can also use AOMEI Backupper to directly clone a hard drive to a smaller drive without restoration. It includes Disk Clone, System Clone and Partition Clone features to suit your different needs.
Note that if you want to transfer Windows to another drive as well, you need to use AOMEI Backupper Professional. Download the free trial to demonstrate the cloning functions.
Step 1. Launch AOMEI Backuppe, click Clone -> Disk Clone to start the cloning process.

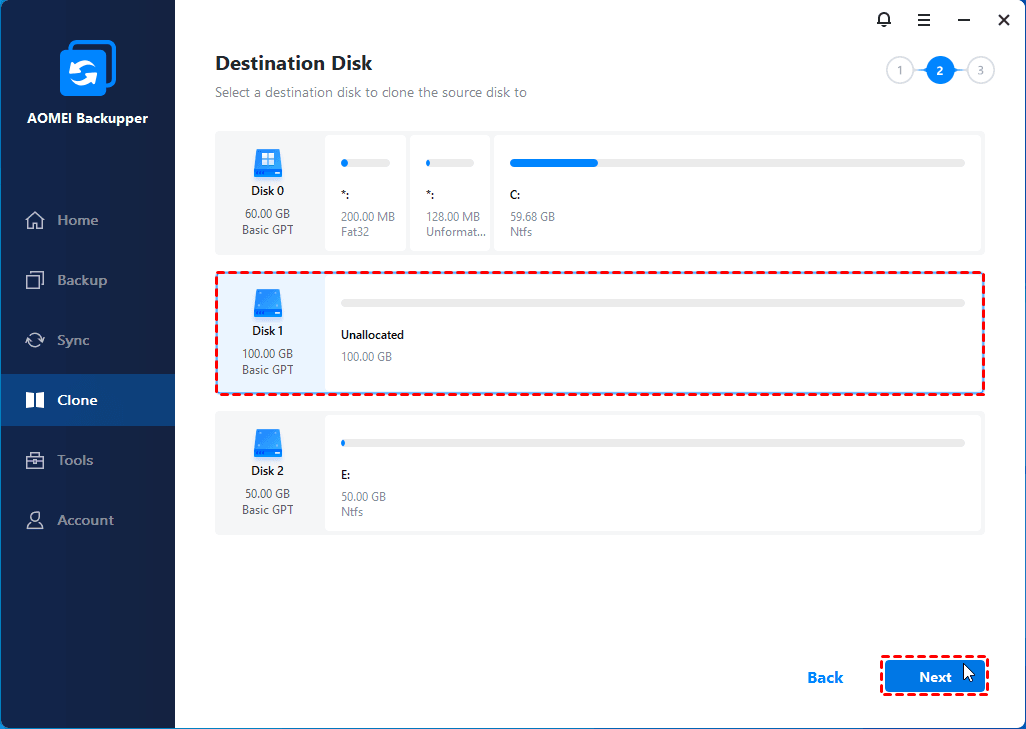
Step 2. Choose the source hard drive and destination drive subsequently, and then click Next.

Step 3. Choose the smaller destination disk and click Next.
Step 4. Review the operation summary and click Start Clone to execute the cloning.

📑Tips:
✏It's suggested to tick SSD Alignment while cloning hard drive to SSD, because it can optimize the performance of SSD disk and make your computer run faster after cloning.
✏Do not check Sector by sector clone because this feature is to clone all sectors on larger drive, and it will fail to clone bigger drive to smaller drive due to insufficient disk space.
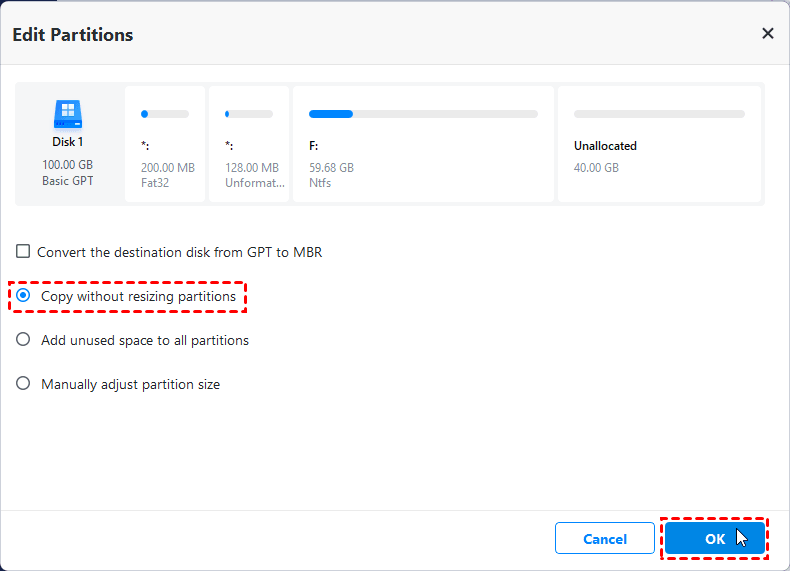
✏Edit Partitions is used to avoid unallocated space after cloning hard drive to larger drive. You can "Copy without resizing partitions, "Manually adjust partition size" or "Add unused space to all partitions" easily.
Step 5. (Optional) Replace larger drive with the smaller disk and try to boot from it. If it doesn't automatically boot from the cloned drive, you need to change boot priority to it in BIOS and try again.
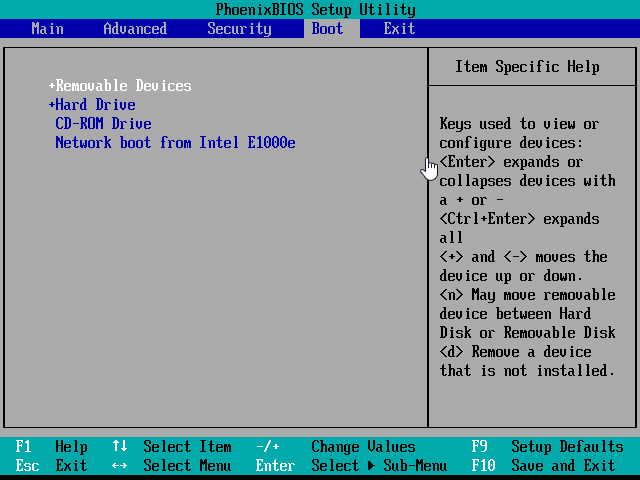
If there's still boot issue, please read: How to make cloned drive bootable
Summary
With AOMEI Backupper, that Clonezilla destination disk is too small will never bother you again. It is a piece of cake to restore image to a smaller drive using AOMEI Backupper. What’s more, it's also a powerful disk clone software, which allows you to clone larger hard drive to smaller SSD, clone MBR to GPT, clone SSD to larger SSD without leaving unallocated space, clone Windows 10 to NVMe, and so on.
If you want to protect unlimited computers within your company, you can pick AOMEI Backupper Technician. With the inbuilt AOMEI Image Deploy tool, you are also allowed to deploy/restore system image file on server-side computer to multiple client-side computers over network.

