Error: Windows Server 2019 Installation Has Failed [Solved]
What should you do if the Windows Server 2019 installation has failed? Read this article to learn the cause of this error and how to fix it from the 2 methods.
By Miya Updated on September 5, 2025
User case: "Upgrade Windows Server 2016 to 2019 ends in a black screen during boot"
“Dear all,
I tried updating my Server 2016 Datacenter to 2019 Datacenter the last two days. Windows Server 2016 is installed in UEFI Mode as far as I can see, on a NVME Samsung M.2 SSD drive. All updates are installed. Whatever I do, the result stays the same. I start the setup, enter my key, select keep all, its installing and then it does a normal reboot within the routine, my bios screen appears, then it loads installer files, the Supermicro logo with the circle and then all goes black, no cursor nothing, CPU idles, system stays like this forever (waited overnight, still the same). Any help on this would be awesome, Thanks!”
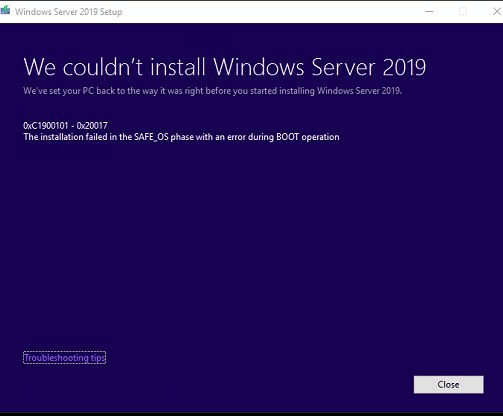
What caused the installation failure of Windows Server 2019?
Just like the user case above, some Windows Server users encountered the problem of "Windows Server 2019 installation has failed" when they wanted to upgrade. A large part of the installation failure may be because the hardware requirements are not met, or the system files are damaged. Microsoft has launched the minimum hardware requirements to run Windows Server. If your computer is below the minimum requirements, you will not be able to install this product correctly. Let's see what the minimum hardware requirements include.
● Processor - 1.4 GHz 64-bit processor
● RAM - 512 MB ((2 GB for Server with Desktop Experience installation option)
● Disk Space - 32 GB
● Network - An ethernet adapter capable of at least 1 gigabit per second throughput
● Optical Storage - DVD drive (if installing the OS from DVD media)
● More other requirements
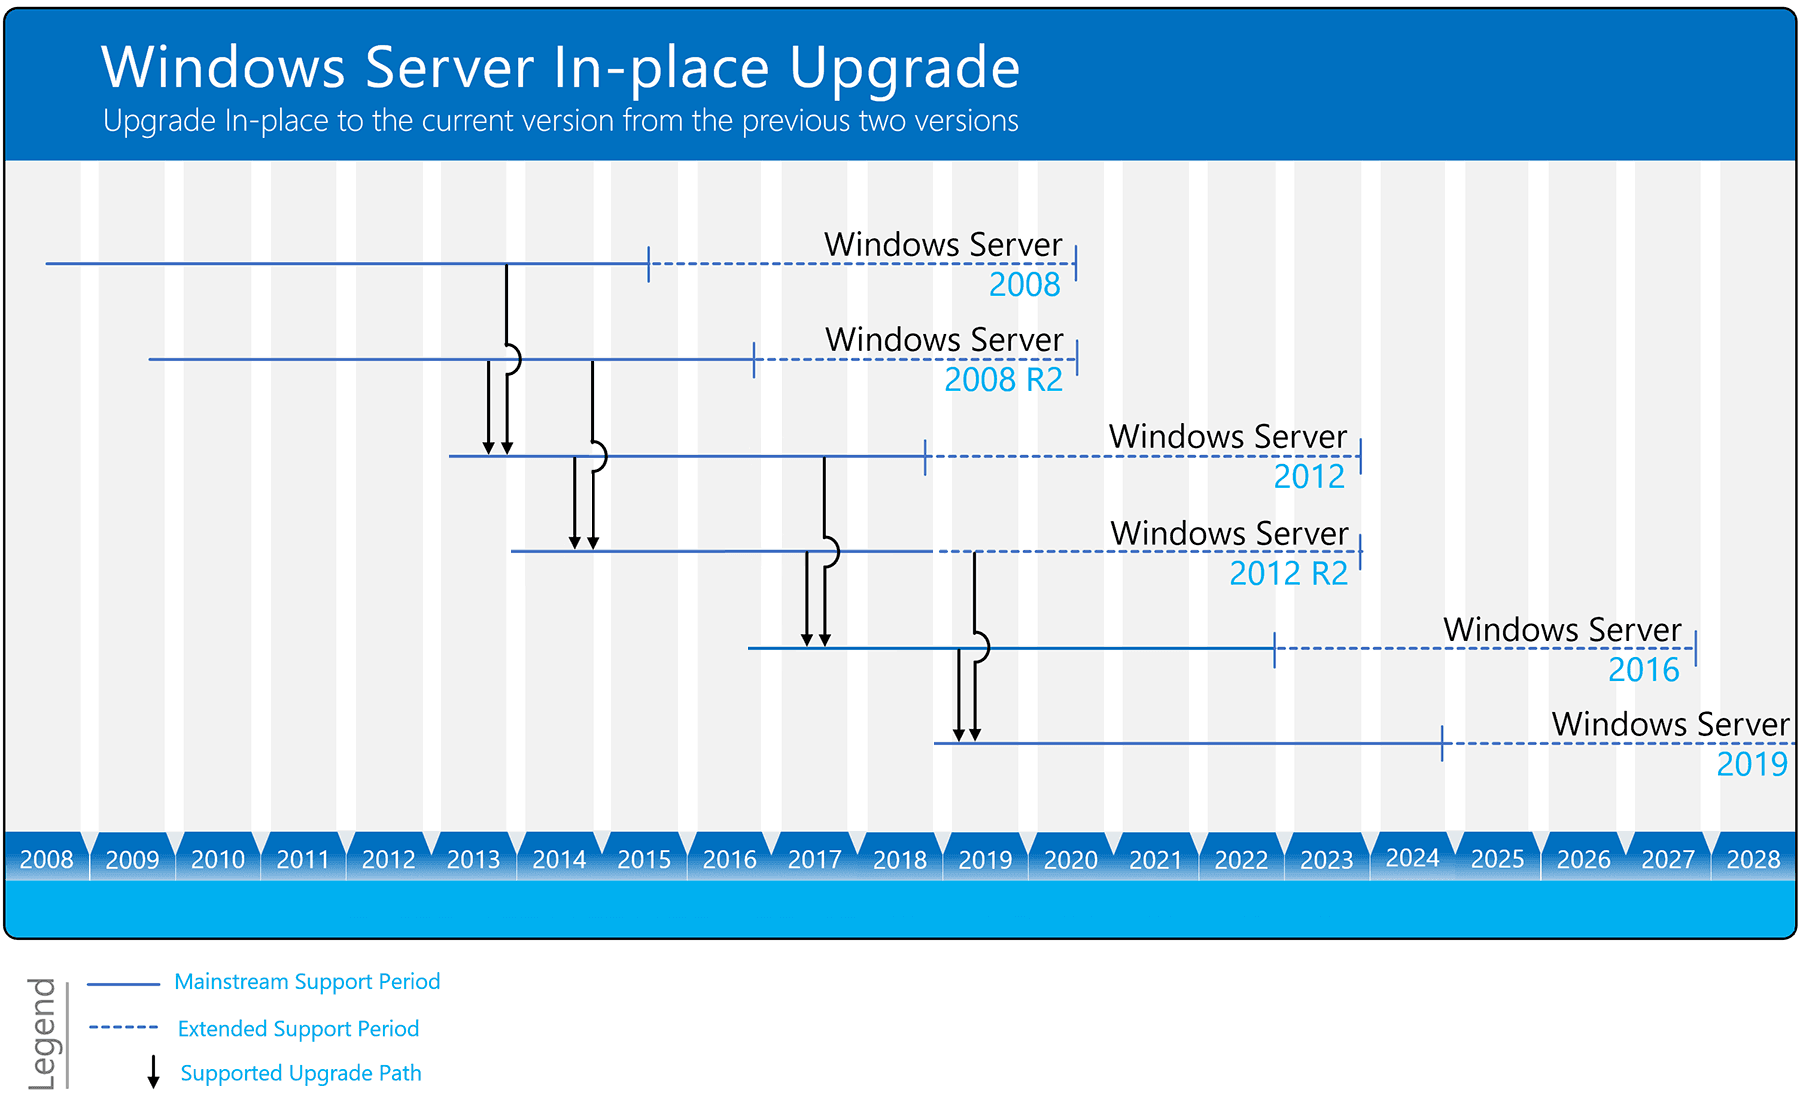
If you want to perform Windows Server 2019 In-Place upgrade (which is not always feasible), you should use the following figure to determine which version of Windows Server you can upgrade to based on the version you are currently using. You can see from the figure that you can directly perform in-place upgrade Windows Server 2012 R2 to 2019, Windows Server 2016 to 2019.
How to fix “Windows Server 2019 installation has failed” error
In this part, I will show you two methods to fix this problem. Many users' problem can be solved by these two methods.
Method 1: Login with a Local Windows Account Instead of Domain Account
Local user accounts are used to control access to the computer on which you are working. Domain accounts are created in Active Directory and are considerably different from local user accounts. Rather than storing information on the local machine, account information is stored in the directory and replicated to other DCs.
If Windows Server 2019 installation failed, please try to log in with a local user account instead of a domain account, and then see if you can successfully install Windows Server 2019.
Method 2: Perform a clean installation of Windows Server 2019
If Method 1 cannot solve the problem you are experiencing, you can perform a clean installation of Windows Server 2019. This method can also fix the “Windows Server 2019 setup has failed to initialize the working directory” error.
- Download the Windows Server 2019 ISO file from Microsoft.
- Prepare a USB flash drive over 8 GB and burn Windows Server 2019 ISO to USB for installation.
- Insert the USB installation media, restart your PC and set boot option from computer BIOS.
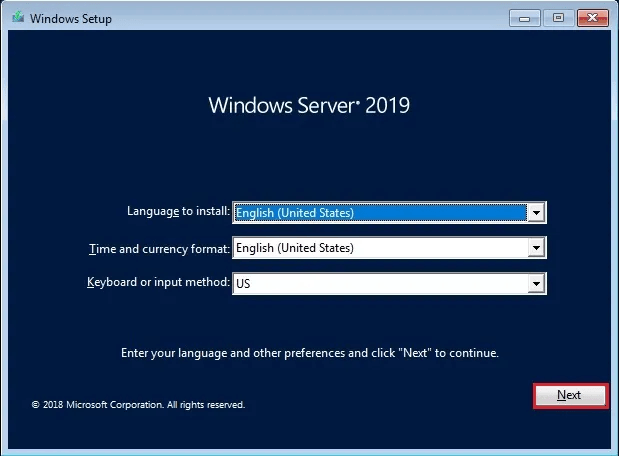
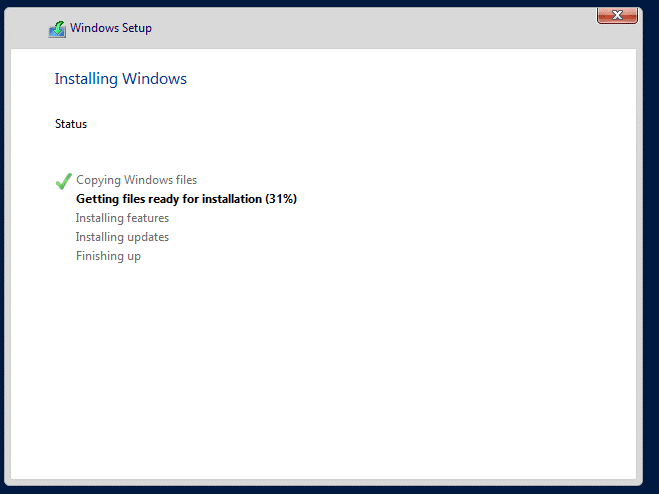
- Then you will enter into Windows Setup page. Enter your language and other preferences and click Next to continue.
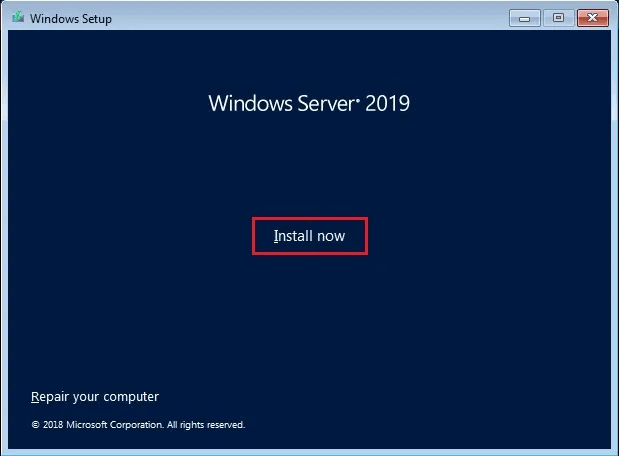
- Click Install Now to start out the Windows Server 2019 installation.
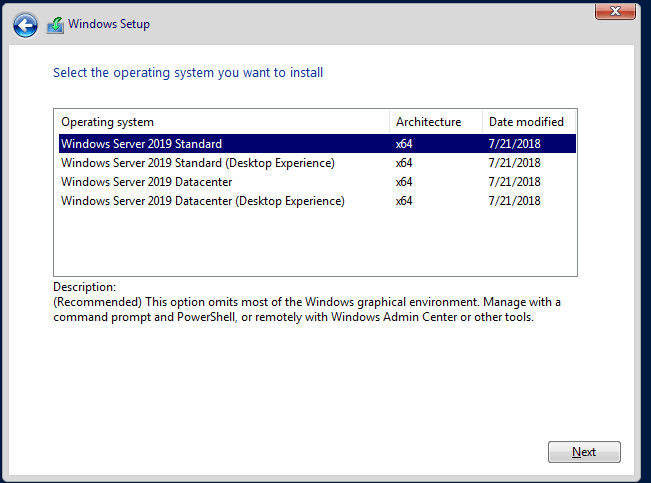
- Select the Windows Server 2019 Standard edition to install and click Next.
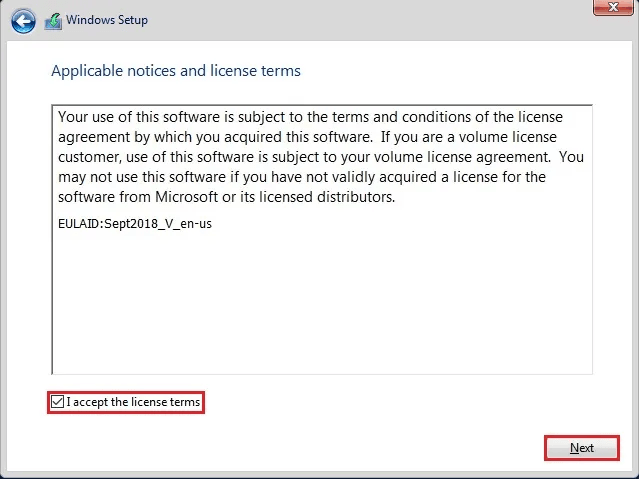
- Select I accept the license terms and click on Next.
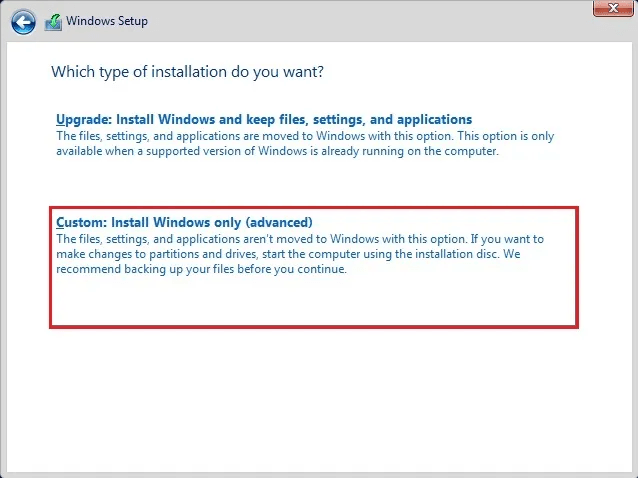
- Then, select Custom: Install Windows only (advanced) to perform a fresh install.
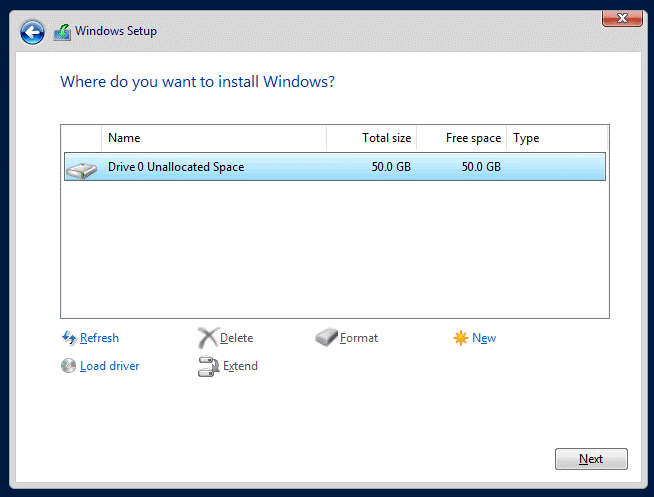
- Select a partition to install Windows Server and click on Next.
- The installation should start, wait for it to finish.
- The system should automatically reboot after the installation.
Backup Server in advance to prevent data loss after the upgrade
As you can see, many unexpected situations such as Windows Server 2019 installation failure may occur during the upgrade process. In order to ensure the integrity of your data on the Server during the upgrade process, we recommend that you make a copy in advance.
We know that Windows Server comes with a backup utility called Windows Server Backup, but if you have ever used it, you will find it very complicated, slow, and incomplete. It has many restrictions, such as the 2 TB limit for backups, the number of backups it can retain, the lack of single file backup capabilities, and so on.
Considering all these issues, I recommend that you use the best Windows Server backup software - AOMEI Backupper as an alternative to Windows Server Backup. It supports:
✮ All Windows Servers and PCs: Windows Server 2008, 2012, 2016, 2019, 2022, 2025 (including R2) and Windows 11, 10, 8.1, 8, and 7 (all 32-bit and 64-bit versions).
✮ Different backup storage: Whether you want to upgrade Windows Server 2012 R2 to 2019, or 2016 to 2019, you can use this software to back up the server to internal/external hard drives, NAS, network shares, cloud services, etc.
✮ 3 backup methods: Full/Incremental/Differential Backup are provided. Incremental and differential backup will save your hard disk storage space.
Backup Windows Server before upgrading:
Step 1. Click the download button below to install AOMEI Backupper Server and then launch it.
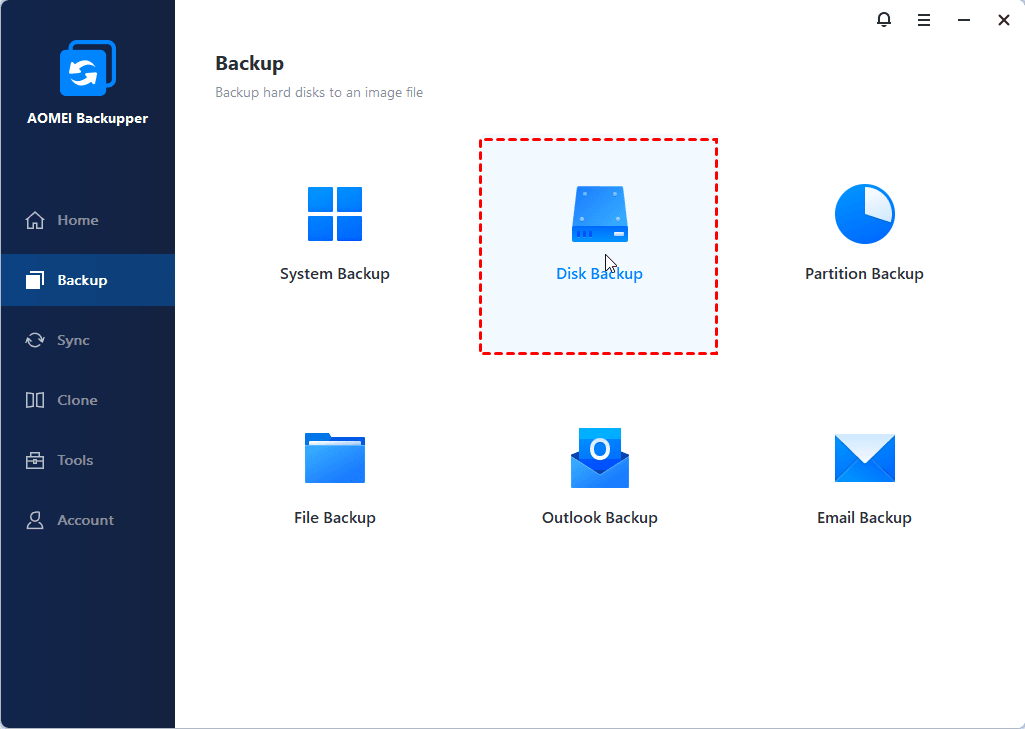
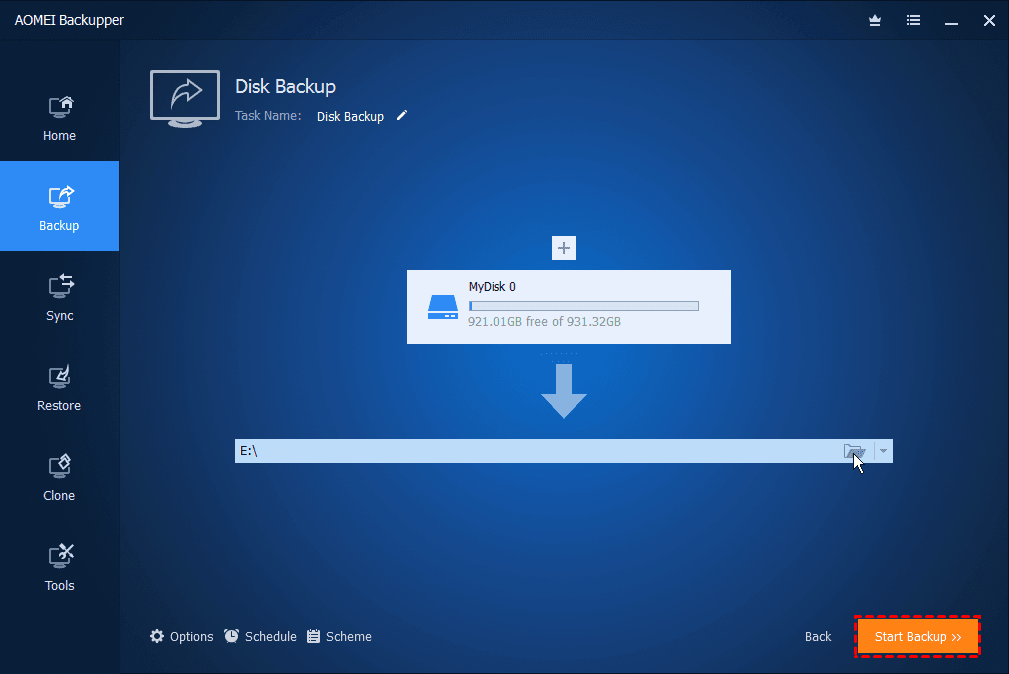
Step 2. Click Backup -> Disk Backup.
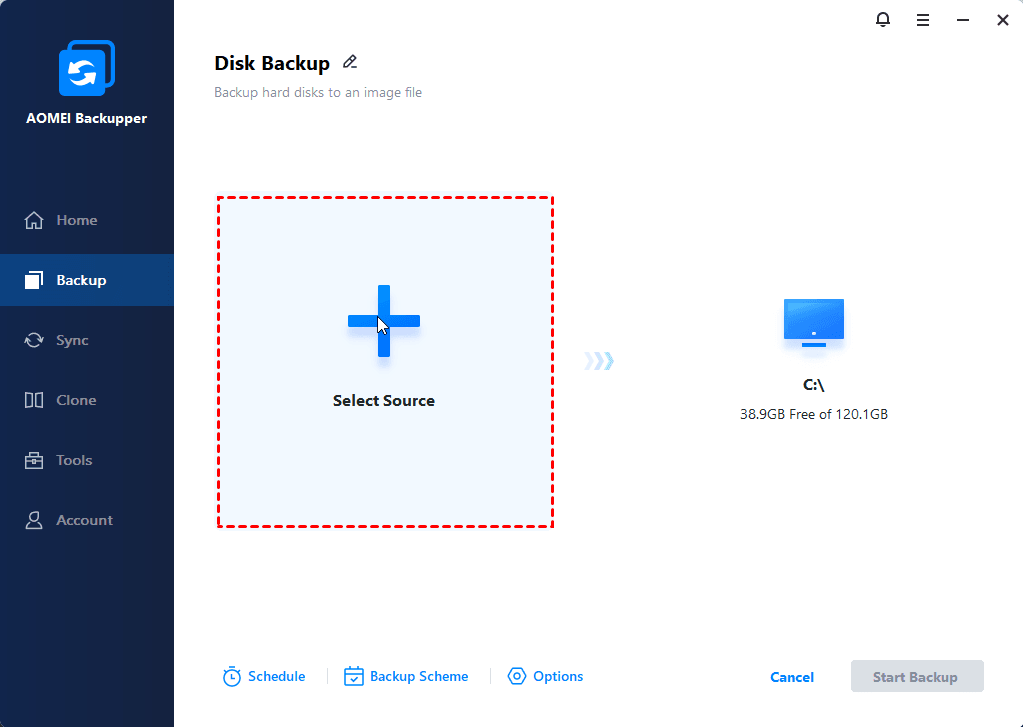
Step 3. Tap Select Source to choose your Windows Server hard disk to back up.
Step 4. Choose a destination to save the Windows Server image backup.
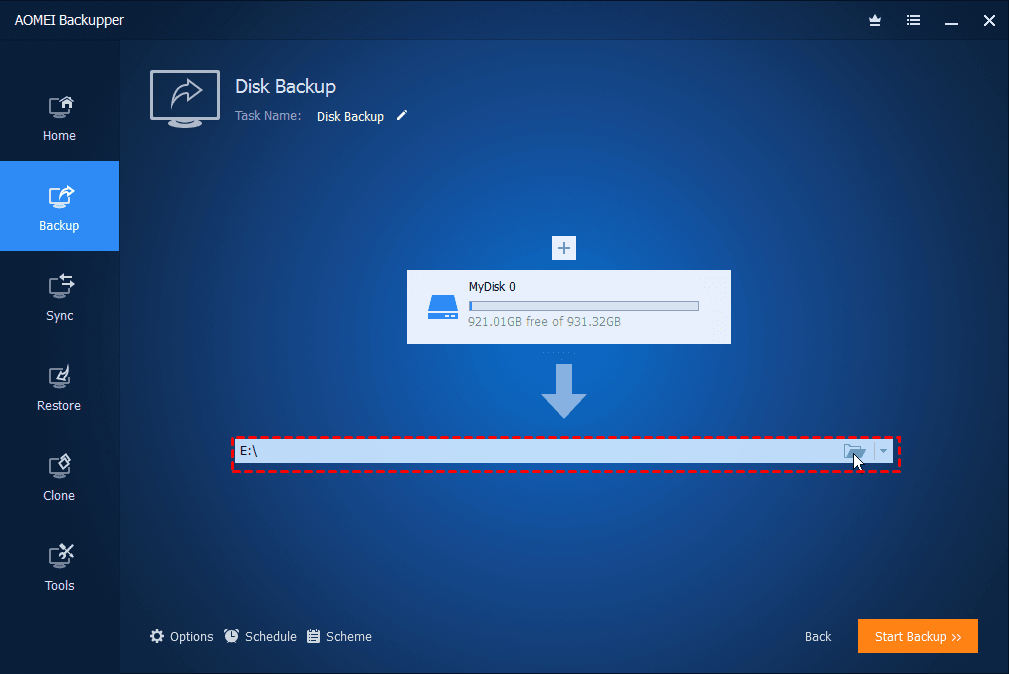
Step 5. Click Start Backup to back up Windows Server.
✬ Useful tips:
✍ Options: You could add a comment for your backup and use other backup settings, such as compression, splitting, and encryption. In addition, you can enable email notification to receive email alerts or SMS notifications after the image backup is complete.
✍ Schedule: It provides you with a flexible way to backup Windows Server 2012/2016/2019/2022/2025/2025 automatically in Daily (By Interval), Daily, Weekly, Monthly (By Week), Monthly (By Date), One Time, or Event triggers.
To sum up
You can find solutions to fix the “Windows Server 2019 installation has failed” error in this article. But to avoid any unwanted data loss, it’s still recommended to backup Windows Server in advance. The most reliable backup & restore software—AOMEI Backupper will help you do this effortlessly.
You can use it to create a Windows Server 2019 bare metal backup. When your Server 2019 fails, you can restore it using the previously created backup. More powerful functions are waiting for you to explore!

