Windows Server 2019 Bare Metal Backup and Recovery: Full Guide
What is bare metal backup? How to perform Windows Server 2019 bare metal backup and recovery? Read this article to get 3 methods to create bare metal backup on Windows Server and easily restore it when accidents happen.
By Jonna Updated on August 28, 2025
Overview: Bare Metal Backup and Recovery
Bare Metal Backup (BMB) is a process of backing up all the critical volumes, including the system partition, boot partition, and other partitions (if you have applications installed elsewhere besides the boot partition) to ensure all the applications are in a consistent state. It is highly useful for migrations and disaster recovery. Bare Metal backups support Full and Incremental backups. Differential backups are not supported.
Bare Metal Recovery (BMR) is a technology that allows you to recover a PC or Server without the need for previously installed software and operating system. The "bare metal" here refers to a completely blank hard drive. Bare metal recovery is also very safe. It removes all existing partitions on the system disk and recreates all partitions, before restoring software onto the PC.
No one wants to suffer a catastrophic server failure, but if this happens, usually the only solution is bare metal recovery. But the prerequisite for bare metal recovery is that you have a bare metal backup. Next, I will introduce three methods for creating Windows Server 2019 bare metal backups.
How to Create Windows Server 2019 Bare Metal Backup and Recovery - 3 Ways
You can rely on third-party professional and easy-to-use server backup and restore software like AOMEI Backupper Server to perform bare metal backup for Windows Server 2019 effortlessly.
Also, Windows Server 2019 provides two helpful utilities to create bare metal backup and recovery, namely Wbadmin and Windows Server Backup (WSB). While the Wbadmin command line offers more flexible backup settings, it is not user-friendly for novices or users who are not familiar with the command line.
Method 1: Create Windows Server bare metal backup and recovery with AOMEI Backupper Server - Easiest
To perform Windows Server 2019 bare metal backup and recovery as simply as possible, I recommend to you the best Windows server backup software - AOMEI Backupper Server. It is designed for Windows Server 2003, 2008, 2012, 2016, 2019, 2022, 2025 (including R2) and Windows Vista, 7, 8, 8.1, 10 (all editions, 32-bit and 64-bit). It also has more flexible backup settings in the following areas.

- Complete Backup Solutions: It supports System Backup, Disk Backup, Partition Backup, and Files Backup.
- Flexible Backup Settings: It supports daily, weekly, and monthly auto backup, and more specifically, you can set backup date, time, or interval.
- Smart Backup Strategy: It intelligently manages the backup space by automatically deleting old backups and saves disk space via incremental and differential backups. What's more, it gives the possibility to realize the 3-2-1 backup strategy.
- Bare Metal Recovery: You can use a bootable USB or CD/DVD to restore the server backup image to a computer with different hardware. Or you can use it to minimize business losses when OS crashes or other unexpected disasters occur.
- Complete Cloning Approach: It also has useful cloning utilities for migrating operating systems to SSDs, replacing HDDs with SSDs, and cloning hard drives on Windows Server.
Download this software and create bare metal backup and recovery for the server!
Note the free trial version is only available within 30 days. It's suggested to upgrade sever trial version if you do not only want to create a bare metal backup.
Step-by-step guide to create Windows Server 2019 bare metal backup
Let's take the system state backup in Server 2019 as an example. If necessary, connect the external storage to your computer in advance.
Step 1. Install and run AOMEI Backupper Server. Click Backup and then System Backup.
🌟System Backup has backed up operating system files and their related partitions. You can use file backup to back up other important user data on "non-critical volumes."

Step 2. The system drive and its related partitions are selected by default. Now, you need to click the destination box to select a path to store the backups. You can create Windows Server backup to external drives, NAS, network share, cloud drive, CD/DVD, flash drives, and so on.

Step 3. Click Schedule beneath to set a backup mode; you can choose daily, weekly, monthly, one time, or event triggers with USB plug-in. The last one is recommended if your target drive is a USB device and you don't want to always keep it connected.

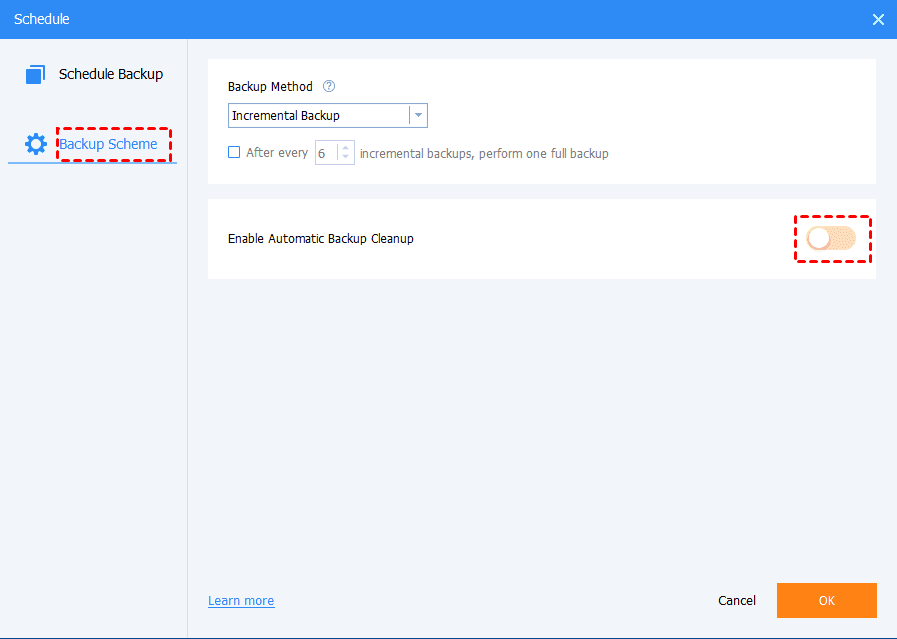
Step 4. (Optional) You can click “Backup Scheme” to set cleanup methods; you have 3 options, including By quality, By time, By daily/weekly/monthly.
By default, the backup method for a scheduled task is Incremental Backup, which backs up only changed files since the last backup, whether it's full backup or incremental backup. Given this rule, ensuring backup integrity and recovery becomes more demanding. It is recommended to try differential backup.
Step 5. Click Start Backup to decide whether to back it up now or later.

Restore Windows Server 2019 from the backup
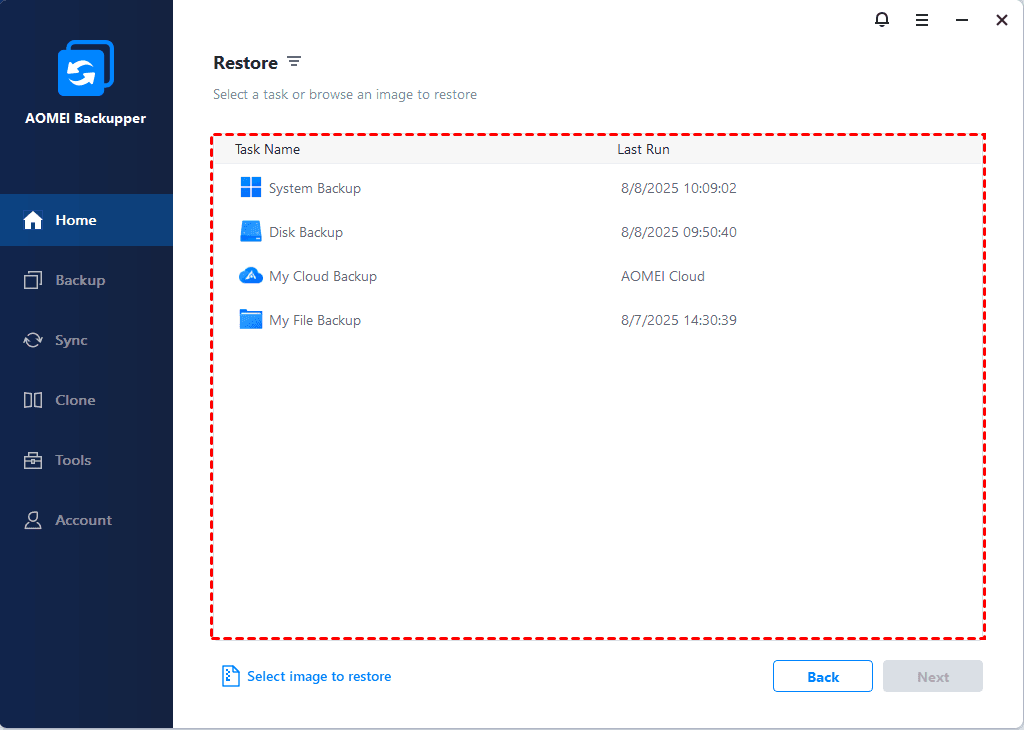
When your Server 2019 fails, you can restore it using the previously created backup by navigating to "Home" > selecting the target task or clicking on "Select image to restore" to pick the needed backup image. If your server fails to boot, you can boot from the Server 2019 bootable USB, and then perform system recovery under Windows PE.
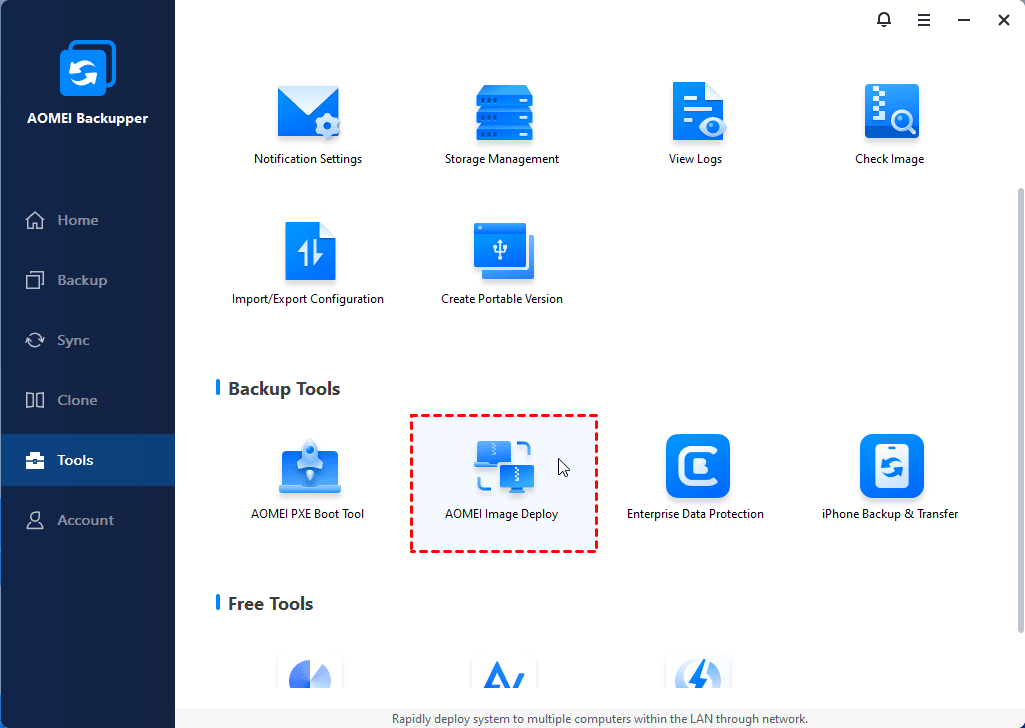
Also, the created system image can be used on unlimited PCs or servers as long as you activate the image deployment software in the technician or techplus edition of AOMEI Backupper. With it, you are able to deploy system image to multiple computers simultaneously over the network. You can enable dissimilar hardware features and preset IP addresses in advance, so you can boot all the client computers successfully and be sure they're connected to a network.
Although the following two methods can perform bare metal backup and recovery for Windows Server 2019, they have some limitations. For example, the Wbadmin command line is difficult for technical novices, and you can't even mistype a single parameter. If you use WSB, the schedule setting is limited to once or day or more than once a day.
Method 2: Create bare metal backup and recovery with WBAdmin
WBAdmin enables you to back up and restore your operating system, volumes, files, folders, and applications from a command prompt. You must run WBAdmin from an elevated command prompt by right-clicking on the command prompt and selecting Run as administrator.
In Windows Server 2019, the WBAdmin command line utility has a few differences. The subcommands are listed here:
- WBADMIN ENABLE BACKUP: Creates or modifies a daily backup schedule.
- WBADMIN DISABLE BACKUP: Disables the scheduled backups.
- WBADMIN START BACKUP: Runs a one-time backup.
- WBADMIN STOP JOB: Stops the currently running backup or recovery operation.
- WBADMIN GET VERSIONS: Lists details of backups that can be recovered from a specified location.
- WBADMIN GET ITEMS: Lists items contained in a backup.
- WBADMIN START RECOVERY: Runs a recovery.
- WBADMIN GET STATUS: Reports the status of the currently running operation.
- WBADMIN GET DISKS: Lists the disks that are currently online.
- WBADMIN GET VIRTUALMACHINES: Lists current Hyper-V virtual machines.
Perform Windows Server 2019 bare metal backup via WBAdmin
To create a bare metal backup for Windows Server 2019, please input the following command and press “Enter”:
☞ Wbadmin start backup -backuptarget:e: -allcritical -vssfull -quiet
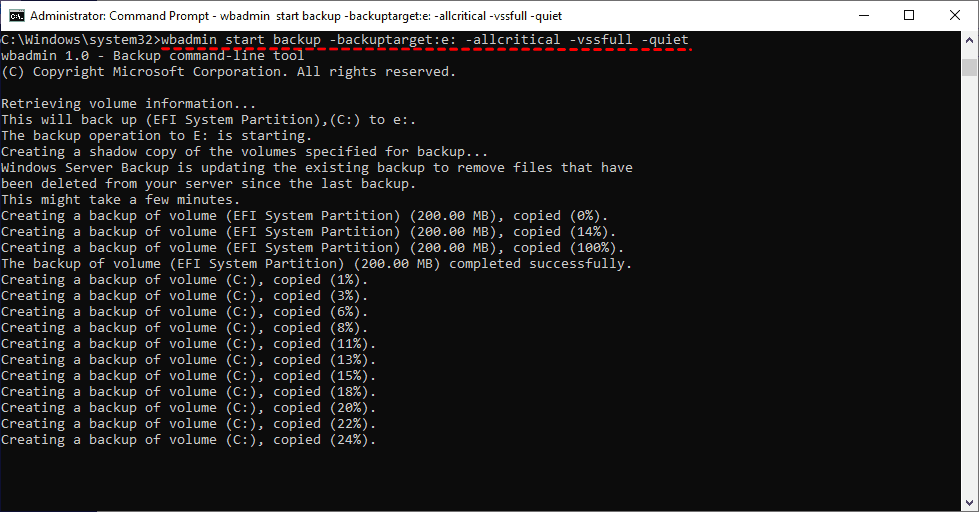
Note✍:
✿ -allcritical: Creates a backup that includes all critical volumes.
✿ -vssfull: run a full backup using Volume Shadow Copy service (VSS).
✿ -quiet: run the command with no prompts to the user.
Perform Windows Server 2019 bare metal recovery via WBAdmin
To perform WBAdmin start backup bare metal recovery, you can use WBAdmin start recovery command line. Just type the following commands and hit Enter:
- wbadmin get versions -backuptarget:E: (E: is the drive that contains backup)
- wbadmin get items -versions:09/11/2019-03:48 -backuptarget:E:
- wbadmin start recovery -version:09/11/2019-03:48 -itemtype:App -items:Registry -recoverytarget:F:\(F: is the path to save your backup)
Method 3: Create bare metal backup and recovery with Windows Server Backup
Windows Server Backup (WSB) is the built-in backup and recovery tool for Windows Server environments. In Windows Server Backup, you can configure it to perform a full or incremental backup when setting up a scheduled backup. How to create a bare metal backup in Windows Server 2019 via WSB? The steps are as follows:
Install Windows Server Backup
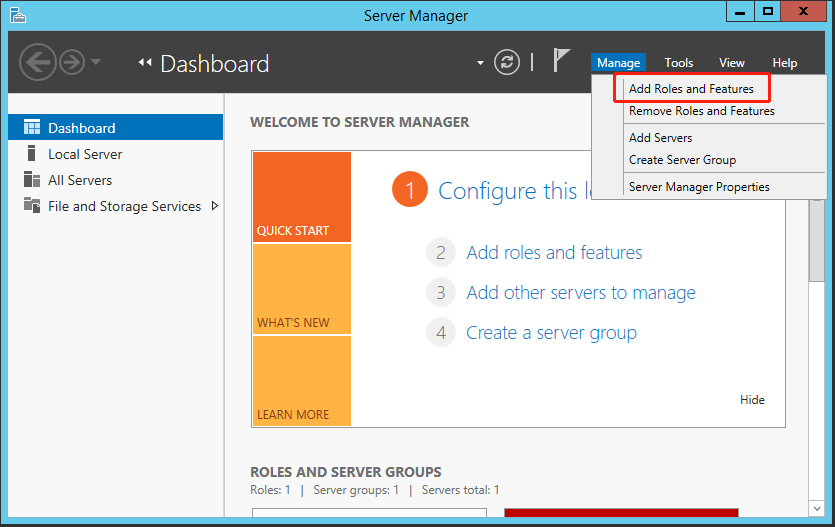
Step 1. Click Start in the lower-left corner of the computer. Type Server Manager in the search box and then open it.
Step 2. Click Add Roles and Features under the Manage tab. Then press Next.
Step 3. Under Select installation type, choose “Role-based or feature based installation” and click Next.
Step 4. Select the destination server. Then press Next.
Step 5. Under Select server roles click Next.
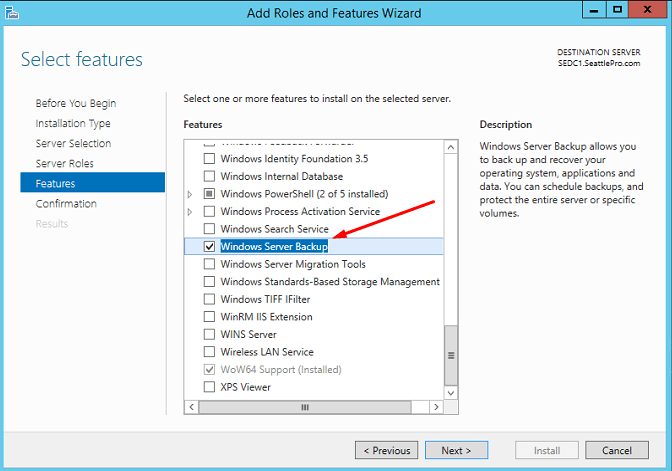
Step 6. Select the “Windows Server Backup” feature from the list, and then click “Next”.
Step 7. Confirm the installation selections. Then click Install to install this tool on the destination computer.
Create a bare metal backup with Windows Server Backup
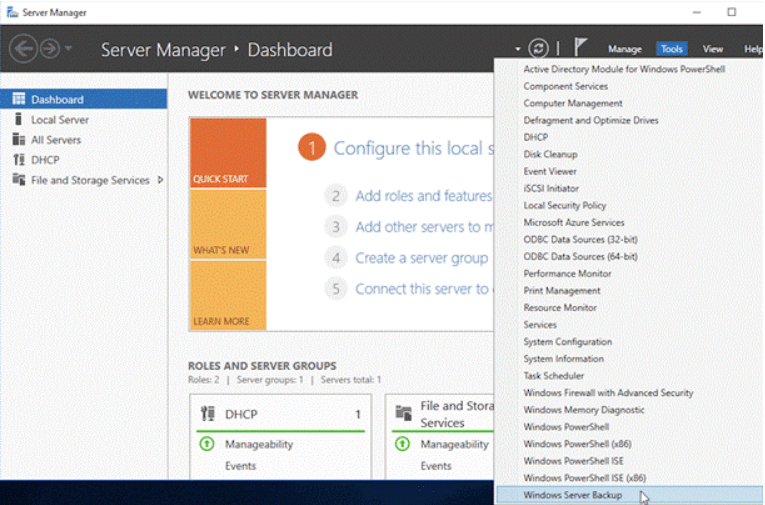
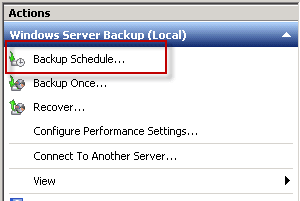
Step 1. To create a backup, launch the Server Manager, select “Tools” and then “Windows Server Backup”.
Step 2. To have an automatic backup on a schedule configured, select Backup Schedule.
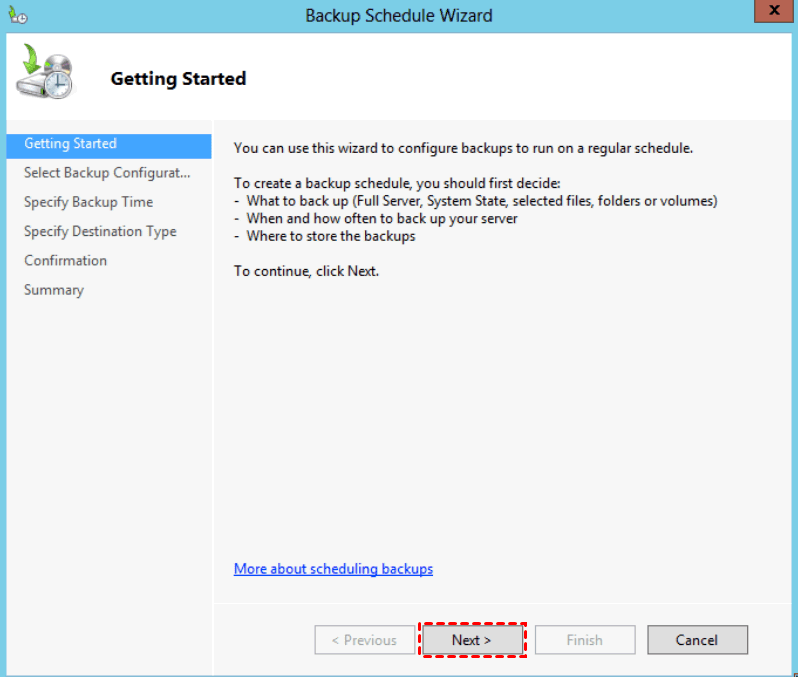
Step 3. This will open up the backup schedule wizard. On the getting started window, click on Next.
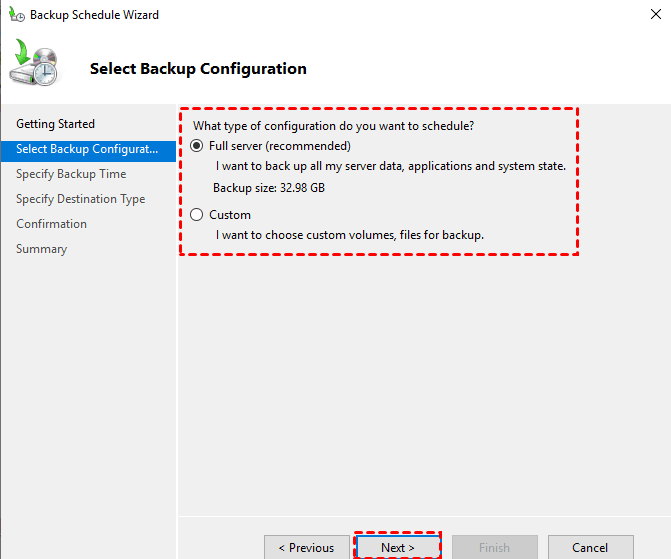
Step 4. In the backup configuration window, you will have to select a backup configuration type. Select “Full server” to create a bare metal backup and click “Next”.
✍Tips:
◑ Full server (recommended): This will back up all server data, applications, and system state.
◑ Custom: This Will allow you to define your backup need by selecting certain volumes or files to be backed up.
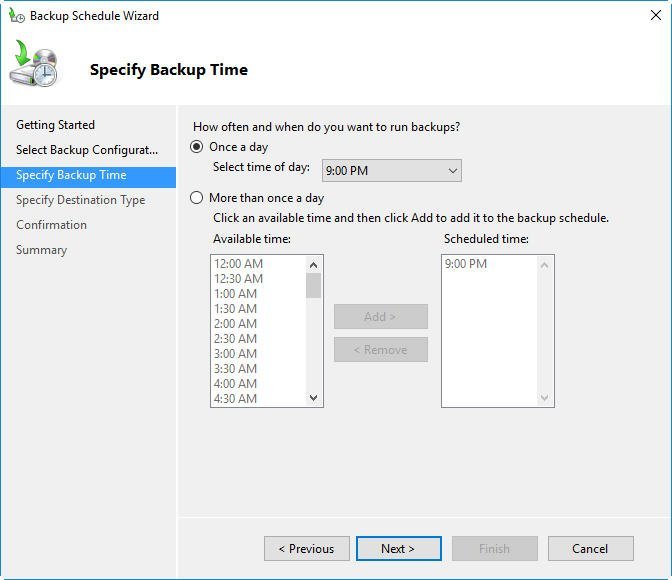
Step 5. In the “Specify Backup Time” window, you can decide to select “Once a day” and select your desired time or select the second option “More than once a day backup”.
Step 6. Choose a destination for storing the backup – that can be other volumes on the server, a network folder path or even an external HDD attached to the server.
Step 7. Backup schedule is successfully configured click on Close.
Perform Windows Server 2019 bare metal recovery from the installation disk
Note✍: Make sure you have given the same or bigger storage space on the physical server you gonna perform the restore.
Step 1. Connect the Drive that contains backup files to the server.
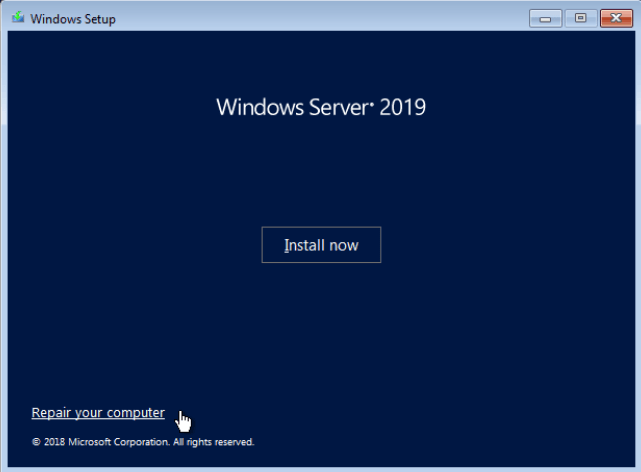
Step 2. Boot from the “server 2019 media” and choose “Repair your computer” option.
Step 3. Click on “Troubleshoot” -> “Advanced options” -> “System Image Recovery”

Step 4. Your server will restart automatically after the Windows Server 2019 OS image is restored.
FAQs about Windows Server 2019 Bare Metal Backup and Recovery
#1. What is bare metal backup in Windows Server?
A bare metal backup in Windows Server refers to a complete backup of the operating system, system settings, installed applications, and all data required to restore the entire system to a new or completely blank (bare metal) machine. This means that in the event of a system failure, such as a hardware crash, disk corruption, or ransomware attack, you can recover the server to the exact state it was in at the time of backup, even on different hardware (with some limitations).
#2. What is the difference between system state and bare metal backup?
For Windows Server Backup bare metal vs system state, while both System State Backup and Bare Metal Backup are used for recovery purposes, they serve different scopes of restoration:
- System State Backup includes the registry, boot files, Active Directory (if domain controller), COM+ database, SYSVOL, and system files. It is usually used to restore the operating system configuration and system files only, for partial recovery on same hardware. Bare Metal Backup includes everything in System State plus full system volumes, drivers, installed roles/features, and optionally data volumes. It can be used to completely restore the entire server, including OS, applications, roles, and settings, for full recovery on the same or new hardware.
#3. What data will be recovered by using bare metal restore in default mode?
When performing a Bare Metal Recovery on Windows Server 2019 in default mode, these files are typically restored: operating system, system settings, boot files & boot configuration data (BCD), system reserved partition, system volume (usually C:), system state components, and other optional volumes.
But it should be noted that in default mode, the bare metal restore focuses on core system volumes only. If additional drives were not included in the backup set, they won't be recovered unless a full volume backup was made.
Summary
This page provides three ways to create a Windows Server 2019 bare metal backup. Compared with the third-party software AOMEI Backupper, the first two built-in tools are a bit more difficult. Considering simplicity and efficiency, the third one will be a better choice for performing bare metal backup and recovery.
As the best backup tool for Windows Servers, it provides you with more powerful functions. It enables you to migrate server to new hardware easily, to do System/Disk/Partition Clone and File Sync to transfer and protect your data. Why not give it a try right now?

