Windows 11: Create Restore Point in 2 Effective Ways
System Restore on Windows 11 creates restore points so that you can restore or recover Windows from disasters or unexpected errors. This tutorial will show you in detail how to create a system restore point and how to use it.
By Miya Updated on December 28, 2023
Need to Create a Restore Point on Windows 11

A restore point is a "snapshot" of computer data saved at a specific time or date. Restore points are the functions and utilities of Windows System Restore. You can schedule your PC to create them automatically, or you can create them manually. Microsoft explains, “System Restore uses restore points to return your system files and settings to an earlier point in time without affecting personal files.”
It is strongly recommended that you create a system restore point before installing new software or when your PC changes. The purpose of this is to always have a copy of the last and the best state of the PC before the change, so that this restore point can always be used to restore the computer to an earlier state in the event of a problem.
The utility creates restore points once a day by default. It continuously monitors system activity and creates restore points when certain activities occur. Types of activities that trigger the automatic creation of restore points include:
✡ Installing software
✡ Updating hardware drivers
✡ Installing new hardware drivers
✡ Manual creations of restore points
👉Easier Way to Create System Restore Point for All Windows
How to Create System Restore Point in Windows 11
System Restore is available on Windows 11, but it is disabled by default. You need to manually enable this feature to use it.
Enabling System Restore Windows 11
When you enable System Restore on Windows 11, as long as you make any changes to the system (such as installing updates, etc.), your system will automatically create a restore point. To enable System Restore on Windows 11, follow the steps given below:
- Press Win + R to open Run dialog box. Type sysdm.cpl and press Enter.

- Then you will enter the System Properties window. From there, select System Protection tab. If you see Protection Off for the Local Disk (C:) (System) drive, click the Configure button.
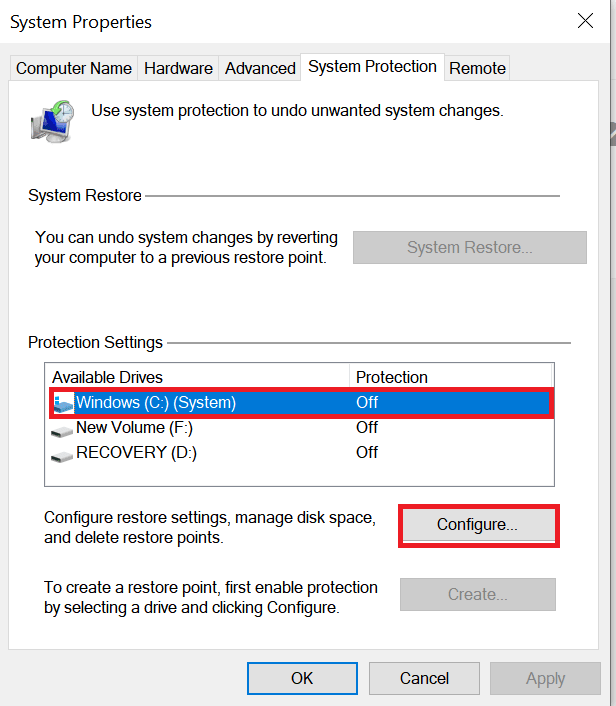
- Then select Turn on system protection and click Apply to confirm the changes and click OK to close the window. Doing so will enable system protection on the local system disk drive.
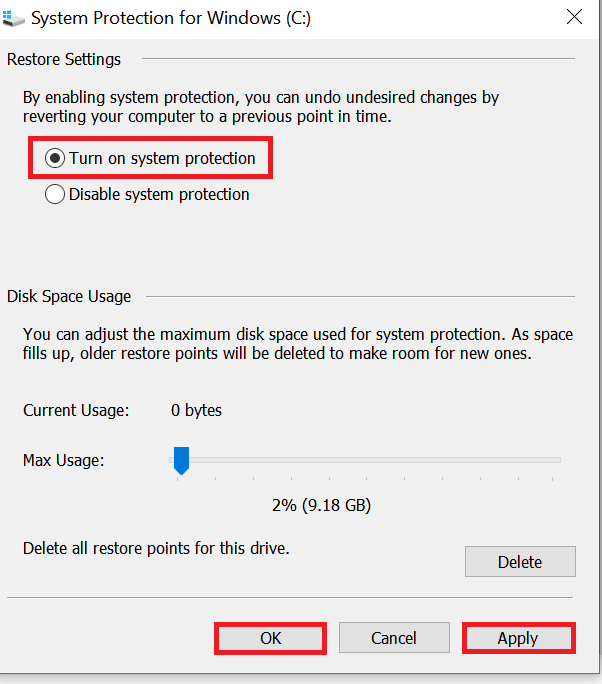
Tip✍: You can also adjust the maximum disk space used for system protection.
The system restore function is now enabled on the drive you selected. Now, whenever you install an application or update your PC, Windows will automatically create a system restore point.
Creating a System Restore Point on Windows 11 Manually
Normally, Windows automatically creates a system restore checkpoint when it detects system changes. However, you can also create a system restore point on Windows 11 manually in case you make some changes to the system configuration yourself.
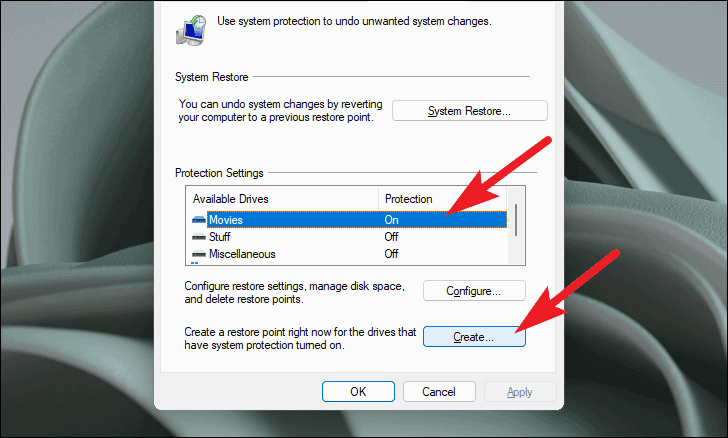
- To manually create a system restore point, select the drive on which you want to create a system restore point from the drives listed under the Protection Settings section of the System Properties window. Then, click the Create button.
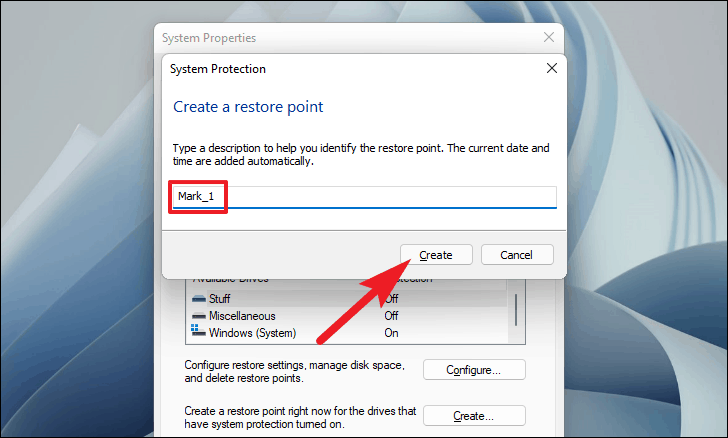
- Type a new name for the restore point and click Create.
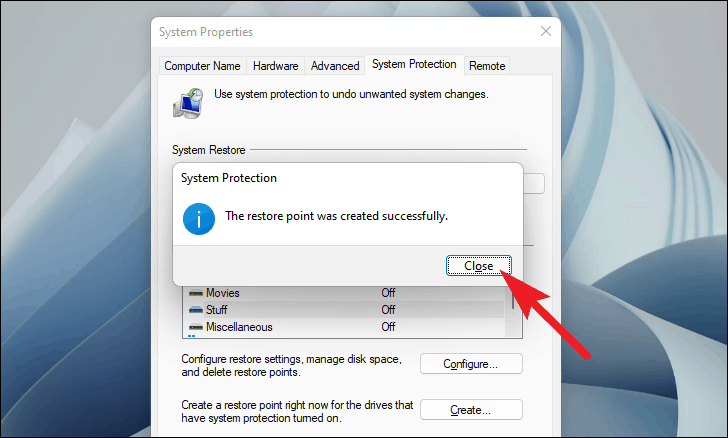
- It takes some time to create a system restore point, please wait for the process to run in the background. After the operation is complete, click the Close button to close the window.
How to Restore from System Restore Points
If you want to undo the changes and restore the system to its previous normal state, you can use the previously created restore point to restore the system. There are two situations for system restore, one is that the computer can be accessed, and the other is that the computer cannot be accessed.
#1. Restore Windows 11 System from Desktop
- Press Win + R to open Run dialog box. Type sysdm.cpl and press Enter to open System Properties window.
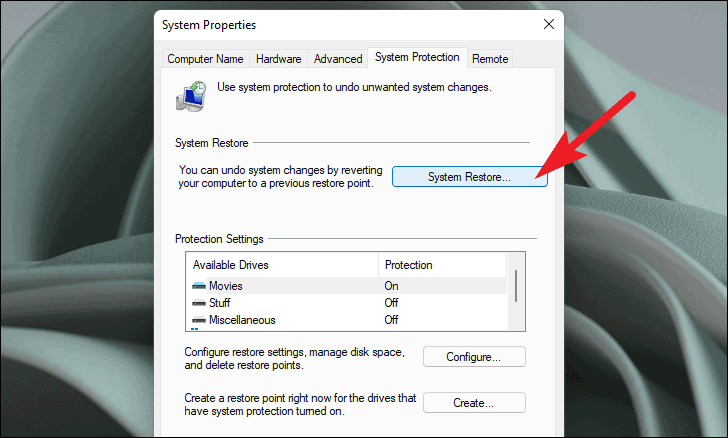
- Click System Restore under System Protection tab. This action will open a new System Restore window on your Windows PC. Click Next on the screen.
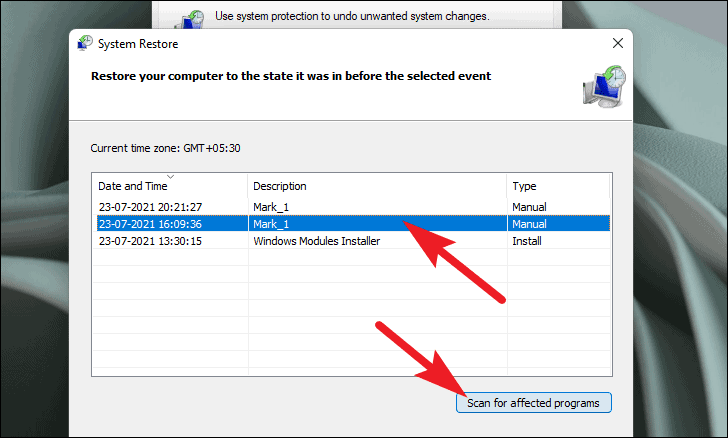
- Select the restore point you wish to restore from the list. You can click Scan for affected programs to see what changes will be made. This will let you know which applications will be deleted or added to your system because they are added or deleted after the restore point is created.
- Then you need to confirm disks to restore and click Next. You must always restore the drive that contain Windows. Restoring other drives is optional.
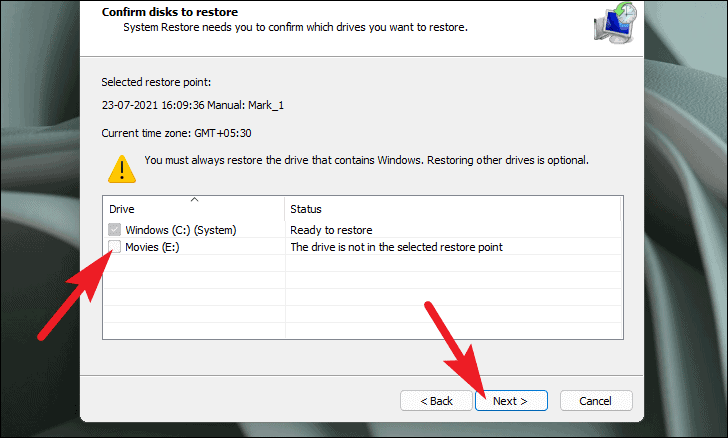
Tip✍: If you have enabled system restore for multiple drives, you can select it by clicking the checkbox in front of the drive in the list.
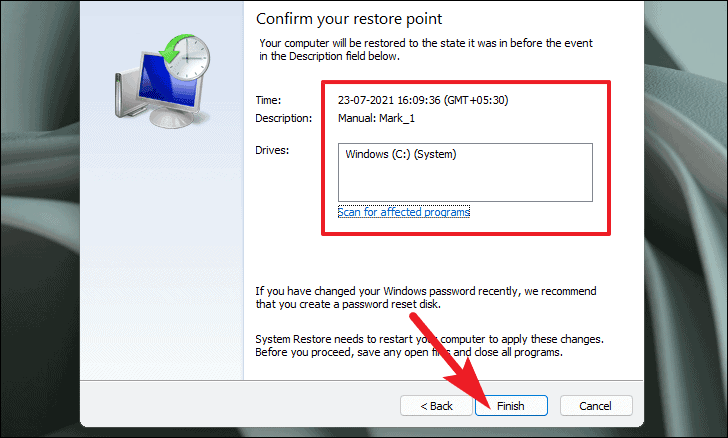
- Then you need to confirm your restore point. Click Finish to start the System Restore process.
#2. Restore The System from the Advanced Startup
If you cannot access the system, you can restore your PC from Advanced Startup.
- First, shut down the computer. Press the power button again to turn it on, and turn it off when the Windows logo appears. This will interrupt the normal startup process. Repeat this operation 4-5 times to enter Windows Recovery Environment (Win RE).
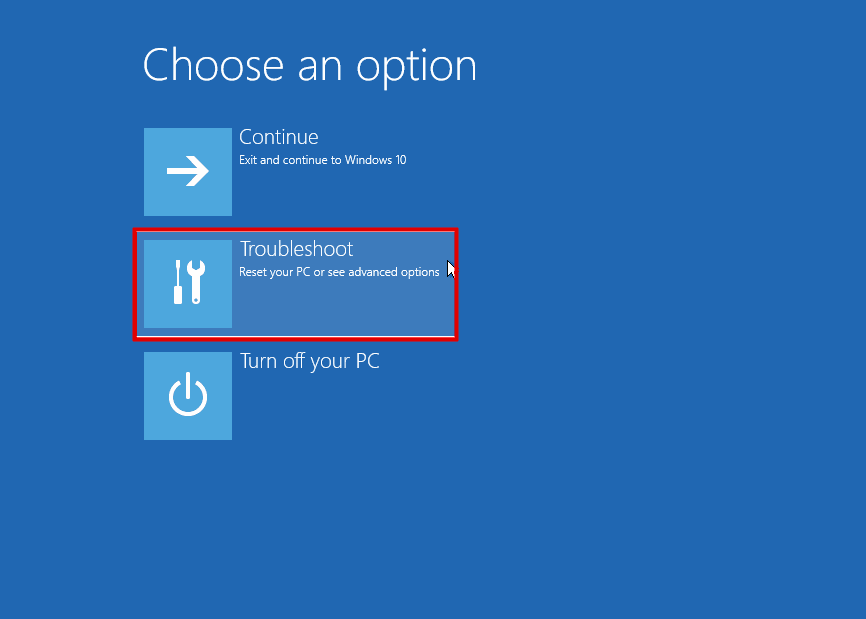
- Click the Troubleshoot option in recovery environment.
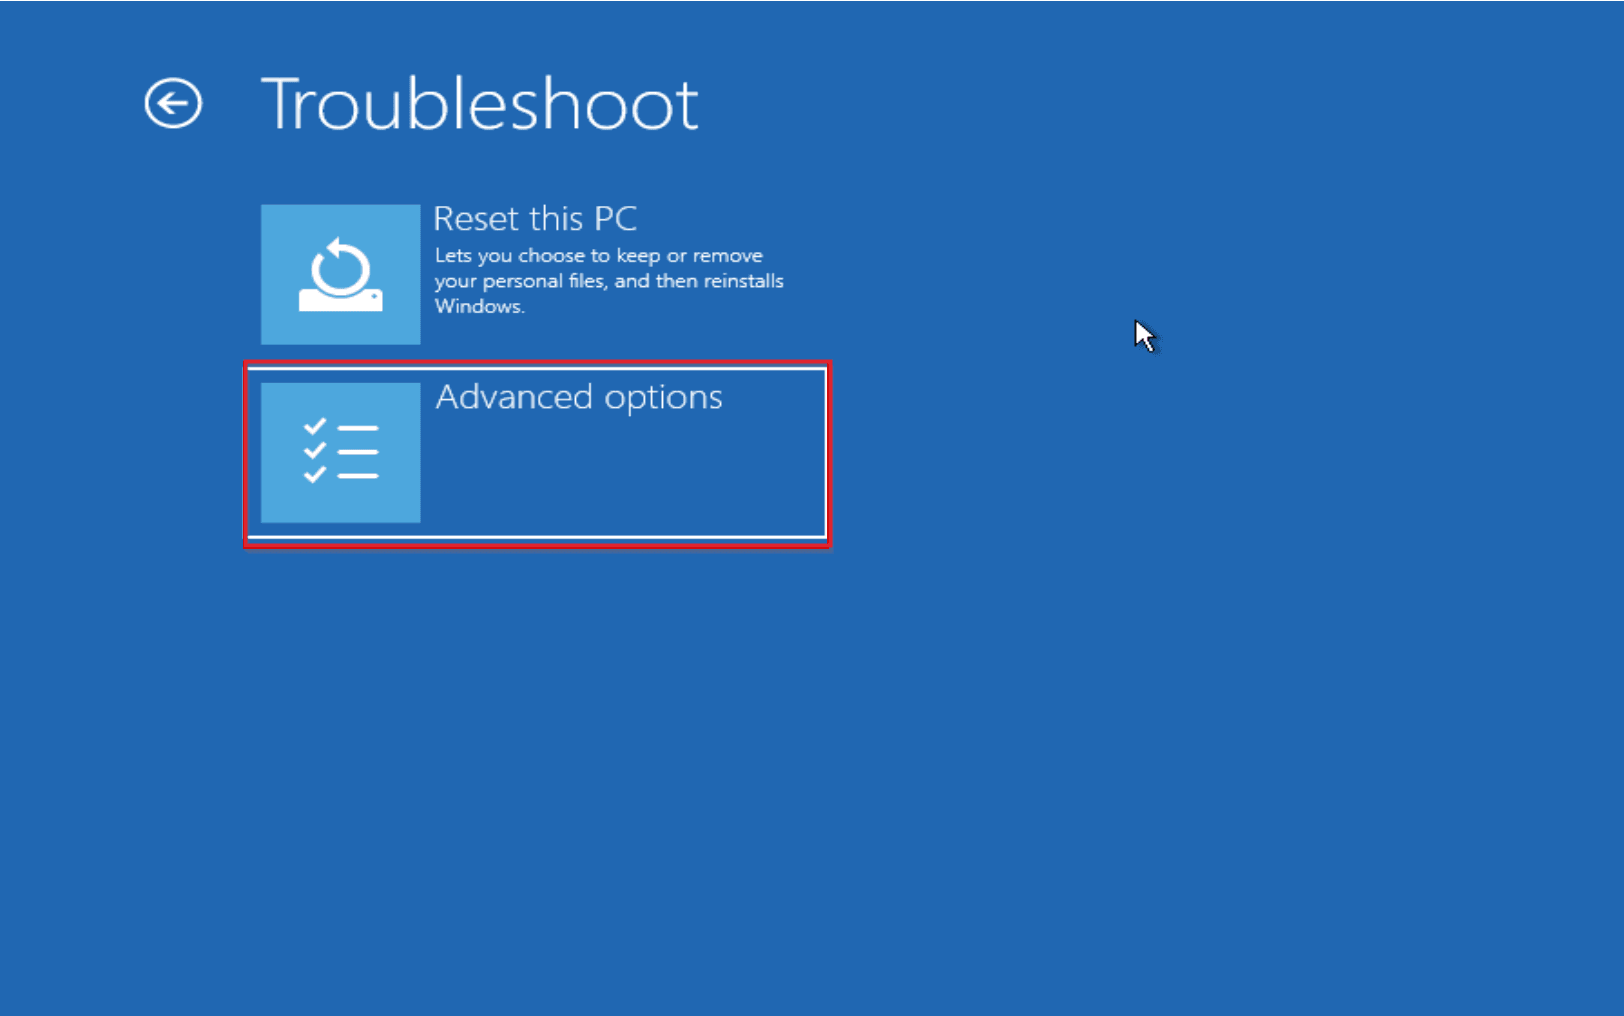
- Then, click on the Advanced options from the Troubleshoot screen.
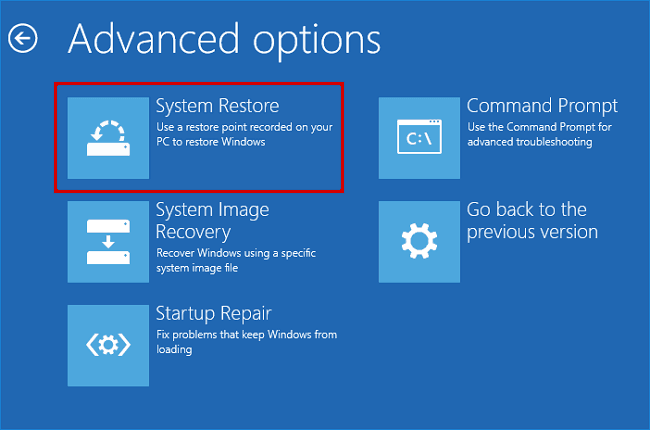
- Next, select System Restore from the list.
- After this, a System Restore window will appear on your screen. The remaining steps are the same as the step 3.4.5 in the previous case.
Easier Way to Create System Restore Point for All Windows
The above is the whole content of the System Restore on Windows 11 to create restore point. It is best to set a restore point before making changes to the system so that if a problem occurs, you can undo the changes immediately. Installing system upgrades, driver updates, or incorrect settings may cause system failures and crashes. For example, the Windows 11 taskbar not working after update.
However, Window's built-in System Restore utility has some limitations.
✧ Default Restore Point Creation: By default, the system creates a restore point once a day. However, you cannot set the frequency yourself.
✧ Limitations on Drive Activation: In addition, enabling system restore for multiple drives simultaneously is not possible. To create restore points for all drives, repeat the discussed activation process.
✧ System Restore Point Limitations: Despite System Restore's utility, it may not reliably recover from issues like system file corruption, ransomware infection, or hard drive failure.
Therefore, I recommend a reliable backup software for you to make it easier for you to create a system restore point. AOMEI Backupper Standard allows you to set automatic backup of your system at Daily, Weekly, and Monthly. In addition to backup your system, you can use it to backup files, partitions and disks on your computer. You can select multiple disks to create restore points on Windows 11 at once. This powerful freeware also supports other Windows operating systems such as Windows 10/8.1/8/7/Vista/XP.
Learn how to create restore point and restore Windows 11 system via AOMEI Backpper. First, download this software on your computer.
Create Restore Point using AOMEI Backup Function
You can refer to the following process to set up system backup tasks.
Step 1. Launch AOMEI Backupper. Click Backup -> System Backup.

Step 2. The program will select the system partition and the boot partition as the source by default, you only need to select the backup destination. You can backup to local disk, external device (USB, HDD, SSD, etc.), cloud drive, NAS or network shared folder.

Helpful Tips✍: You can click 3 options in the lower left corner to set up your system backup.
◑ Options: You can compress and split the backup file, add comments to the backup. If you upgrade to higher editions, you can encrypt your backup.
◑ Schedule: As mentioned earlier, you can schedule automatic backup at Daily, Weekly and Monthly. If you upgrade to AOEMI Backupper Professional, you can enjoy the other 2 ways-Event triggers and USB plug in.
◑ Scheme: You can set rules to automatically delete old backups so that the backup location has enough space (available at least in AOMEI Backupper Professional).
Step 3. After confirming the settings, click Start Backup to begin creating system restore point in Windows 11.

Perform System Restore with Restore Point
After creating a system restore point with AOMEI Backupper, if you encounter problems such as system update installation failure or data corruption in the future, you can use the system backup created before to restore the computer to a working state. You just need to go to Restore -> Select Task/Select Image File to choose a system backup task/image created before.

Final Words
After reading this article, I hope you can understand how System Restore on Windows 11 creates restore point. Considering the ease of operation and the comprehensiveness of computer protection, it is recommended that you use AOMEI Backupper to create a system restore point.
With its help, you can easily set up system backups according to your needs. You can also use it to backup other disks on the computer. What’s more, you can use this powerful software to create a bootable media to help you deploy Windows 11 image via WinPE USB disk. With this freeware, you will never worry about system problems. Try it now!

