How to Deploy Window 11 Image via WinPE USB Disk
If you want to deploy Windows 11 image via WinPE USB disk, you need to create a Windows 11 WinPE bootable USB at first. You can get a complete guide of these two operations in this article. If you are interested, please continue reading.
By Yuka Updated on August 9, 2024
What is a WinPE bootable disk?
WinPE, also known as Windows Preinstallation Environment, is a lightweight operating system with limited features. It can be used to install, deploy, and repair Windows desktop editions, Windows Server, and other Windows operating systems.
To use Windows PE, you need to create a bootable disk. You can boot WinPE from USB, CD/DVD/ISO, or a virtual hard drive. You cannot use Windows PE as the main operating system.
It was originally developed to replace MS-DOS booting with ready-to-boot environments that can be loaded from CDs, DVDs, USB flash drives, etc. Since it can be easily loaded from a USB drive or CD Rom, it is used on many occasions.
How to create a Windows 11 WinPE bootable USB
The Windows Preinstallation Environment provides users with a quick and easy way to run the installation of primary Windows. In this part, we will teach you how to create a bootable WinPE USB in Windows 11 in no time.
Before we start creating Windows PE bootable USB, let us discuss some of the things you need throughout the process.
◑ Backup files before creating a bootable USB. Because all data on the USB will be overwritten. In case of data loss, you can easily restore the data if you have a backup of it.
◑ Make sure you have a stable internet connection. You need a good internet connection to download Windows and then create a bootable USB drive.
◑ Make sure you have a USB drive with at least 8GB of storage space. You will need it to create a bootable USB drive from the Media Creation tool.
Method 1: Create a WinPE bootable USB via Media creation tool
- Insert a USB flash drive (8GB minimum) into your computer.
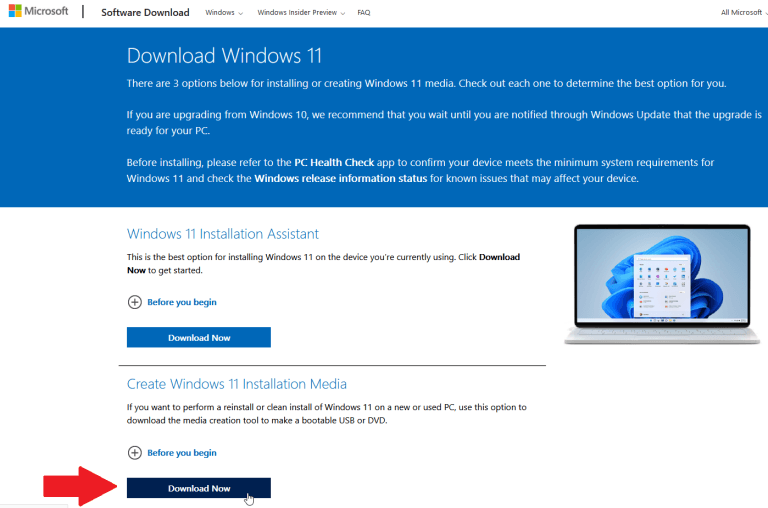
- Click on the official link from Microsoft to open the software download page. Find Create Windows 11 Installation Media and click on Download Now.
- After downloading the media creation tool for Windows 11, run it on your PC. You will be asked to accept the license terms. Once you have done this, you will see a screen that says " Getting a few things ready."
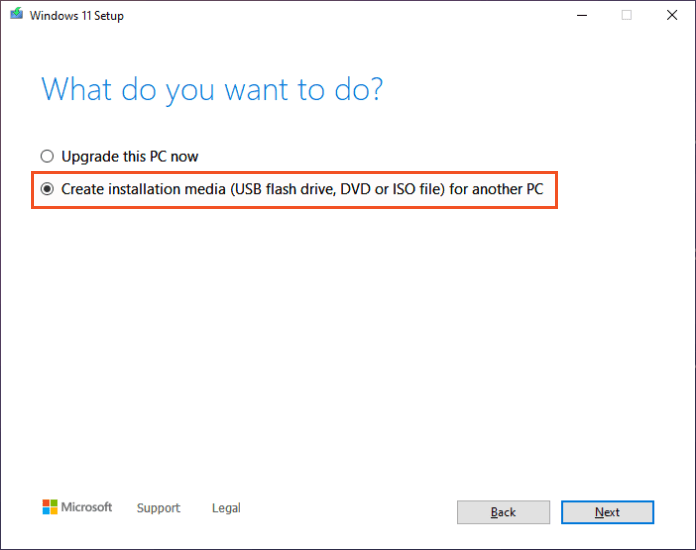
- Next, you will see two options on the screen, select “Create installation media for another PC” and click on Next.
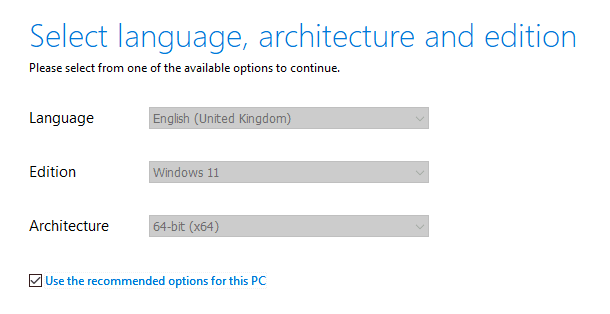
- Then, it will automatically fill in the configuration of your PC. If you want to change these options, simply uncheck the option that says “Use the recommended options for this PC” and make the necessary changes. Then click the Next button.
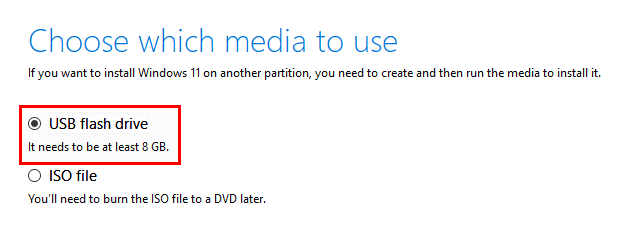
- Now select the “USB flash drive” option and click Next.
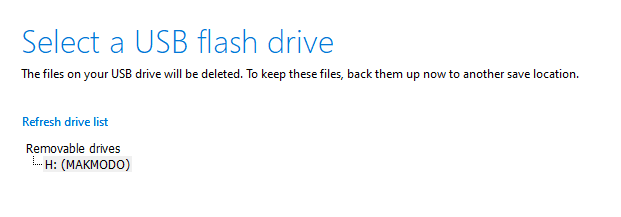
- The tool will automatically detect the USB flash drive you have previously connected. If not, click the Refresh drive list option. If everything is normal, click the Next button.
- This will begin the creation of the installation media of the Windows 11 operating system. Once finished you will get a Windows 11 WinPE bootable USB.
Method 2: Create a bootable WinPE media with the most convenient software
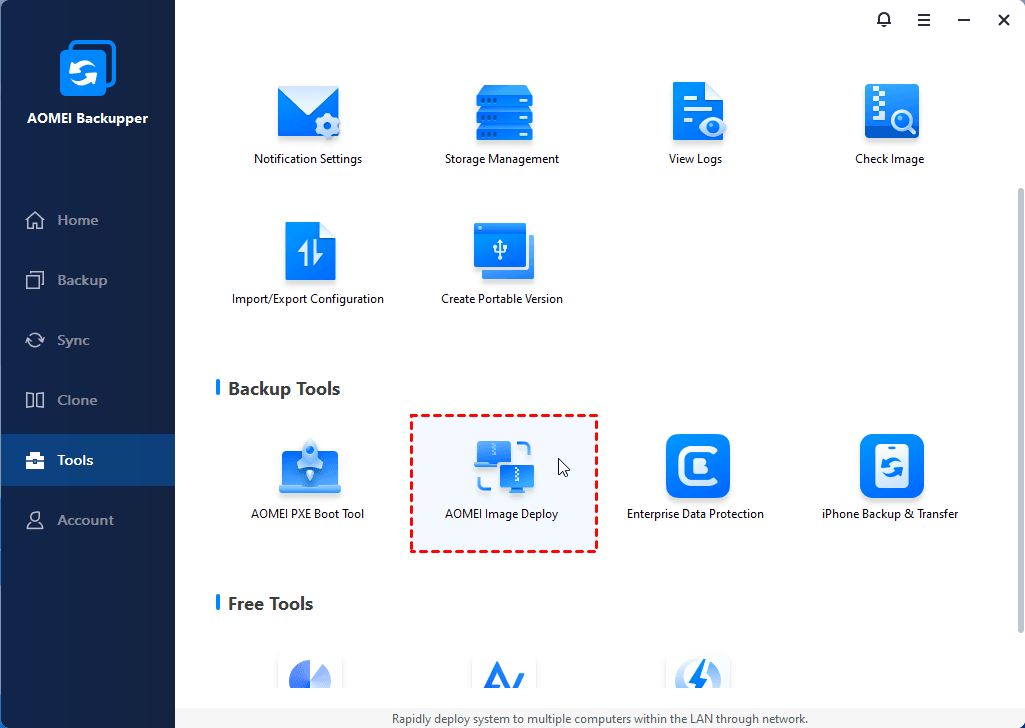
There is another reliable third-party software that can help you create Windows 11 WinPE bootable USB drives. AOMEI Backupper Professional helps you create bootable media and easily deploy Windows system images to another computer with different hardware with its Universal Restore feature.
Creating a bootable media will help you successfully start your computer. AOMEI Backupper supports creating two kinds of bootable CD or USB Flash Drives. One is a Linux boot disc, and another is a Windows PE boot disc.
In this part, learn how to create a bootable WinPE media via AOMEI Backupper.
Step 1. Download AOMEI Backupper Pro and install it on your computer.
Step 2. Launch this software. Go to the Tools tab and click Create Bootable Media.

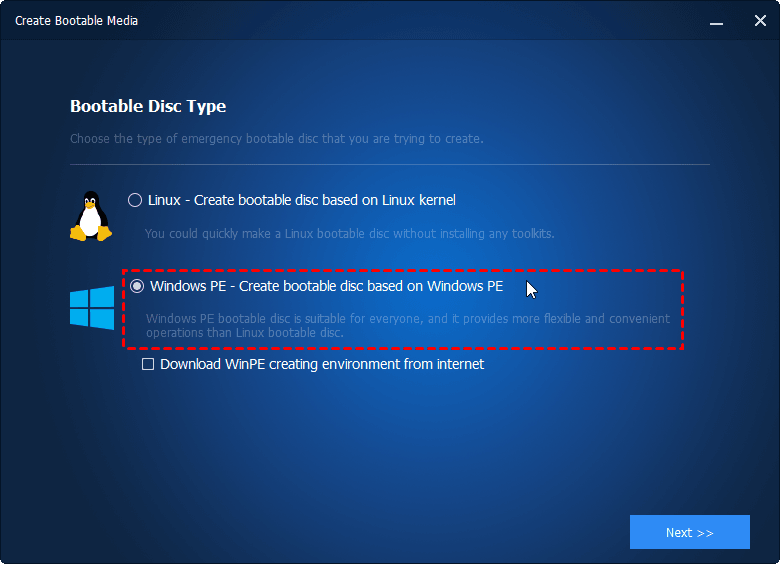
Step 3. Choose a bootable disc type, Windows PE is the recommended one, and the created disc will support both legacy and UEFI boot modes.
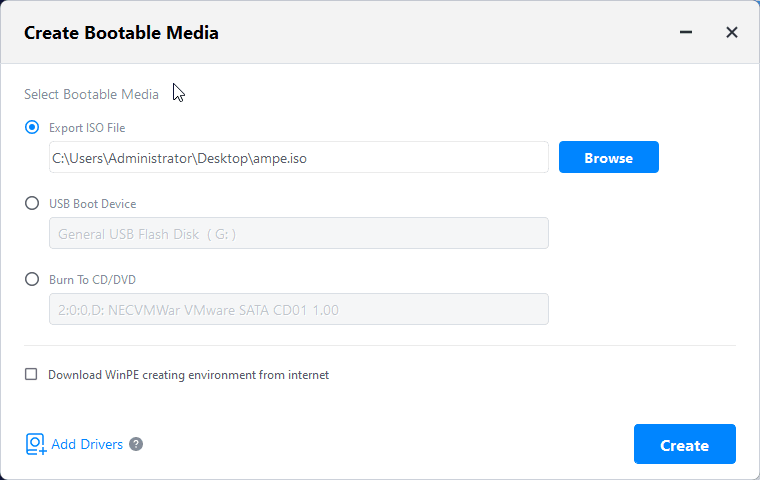
Step 4. Then you’ll be asked to choose bootable media. Select USB Boot Device if you want to create a Windows 11 WinPE bootable USB and then click on Next.
Guide to Window 11 image deployment via WinPE USB disk
There are many Windows 11 deployment tools to deploy the Windows 11 operating system and applications. Those tools include DISM commands, Windows System Image Manager (Windows SIM), and Windows Preinstallation Environment (Windows PE).
After creating a bootable Windows PE USB drive, you can deploy Windows 11 images via WinPE USB disk to different computers. Two methods are provided in this part, select one according to your needs.
Method 1: Deploy Windows 11 image via Windows 11 Media Creation Tool
- Plug the bootable USB drive you previously created with Media Creation Tool into the computer in which you want to deploy Windows 11. Start the PC.
- On prompt, press any key to boot from the Windows 11 bootable USB.
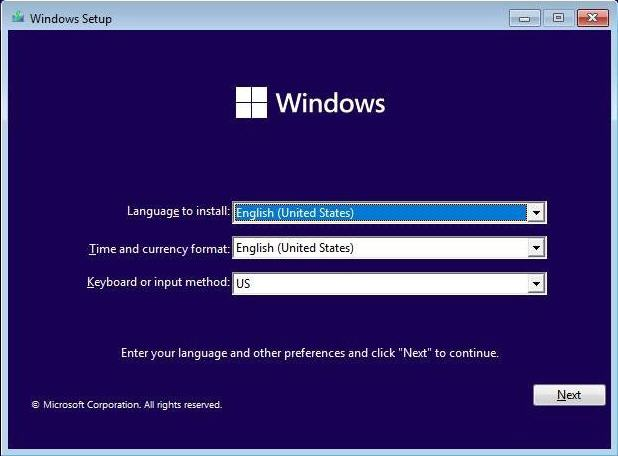
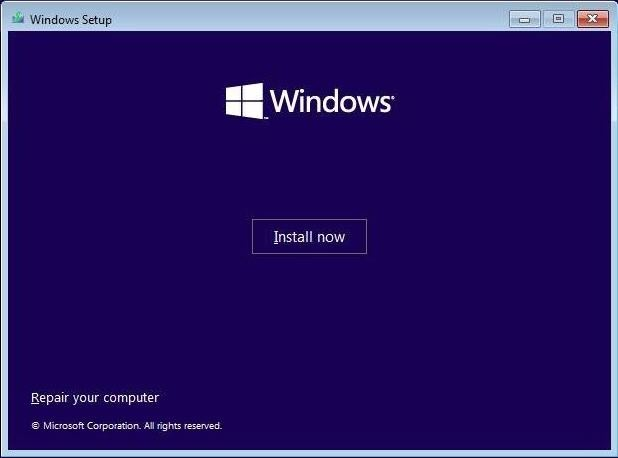
- On the "Windows Setup," click the Next button.
- Then click on the Install now button.
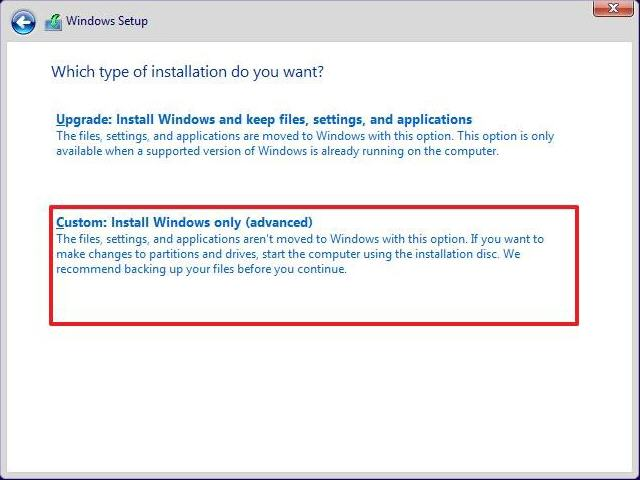
- Next, you will be asked to choose which type of installation you want. Select Custom: Install Windows only (advanced).
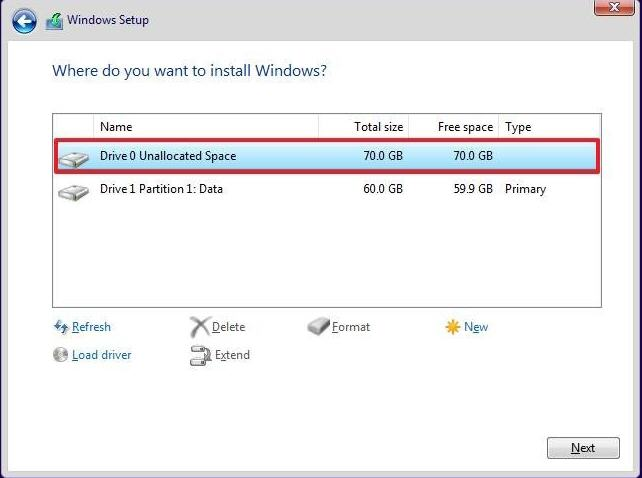
- Select the partition with the current installation (usually "Drive 0"), and click the Delete button.
Note✍: If "Drive 0" has multiple partitions, you must select and delete each partition to allow the setup to use the entire hard drive for new installations.
- Then select the empty drive (Drive 0 Unallocated Space) and click on Next.
After completing these steps, the setup will install a fresh copy of Windows 11 on your computer. After the system is installed, you need to set up the system from scratch.
Method 2: Restore Windows 11 image via WinPE USB disk
Performing a clean installation of the Windows 11 image can be time-consuming, and the operation is relatively cumbersome. There is another method available to help you with Windows 11 image deployment. You can use the best Windows PC backup software—AOMEI Backupper to deploy Windows 11 images via WinPE USB disk. If you use AOMEI Backupper to restore the Windows 11 image, there is no need to reset the system from scratch, saving time and effort.
As mentioned in the previous part, the software provides a Universal Restore function, which supports restoring system images to different hardware in Windows 11, 10, 8, and 7. It is an all-in-one, reliable, easy-to-use backup and recovery software, and has a user-friendly interface.
Before deploying the Windows 11 system image to new hardware, there is something you must do in advance:
◐ You need to use AOMEI Backupper to create a Windows 11 system image. The software allows you to store the system image to an external hard drive, USB flash drive, or network drive. Make sure that the place you choose can be accessed by another computer.
Next, I will show you how to use this software to deploy Windows 11 images to new hardware with a WinPE USB disk. Assume that you have stored the system image on the network location.
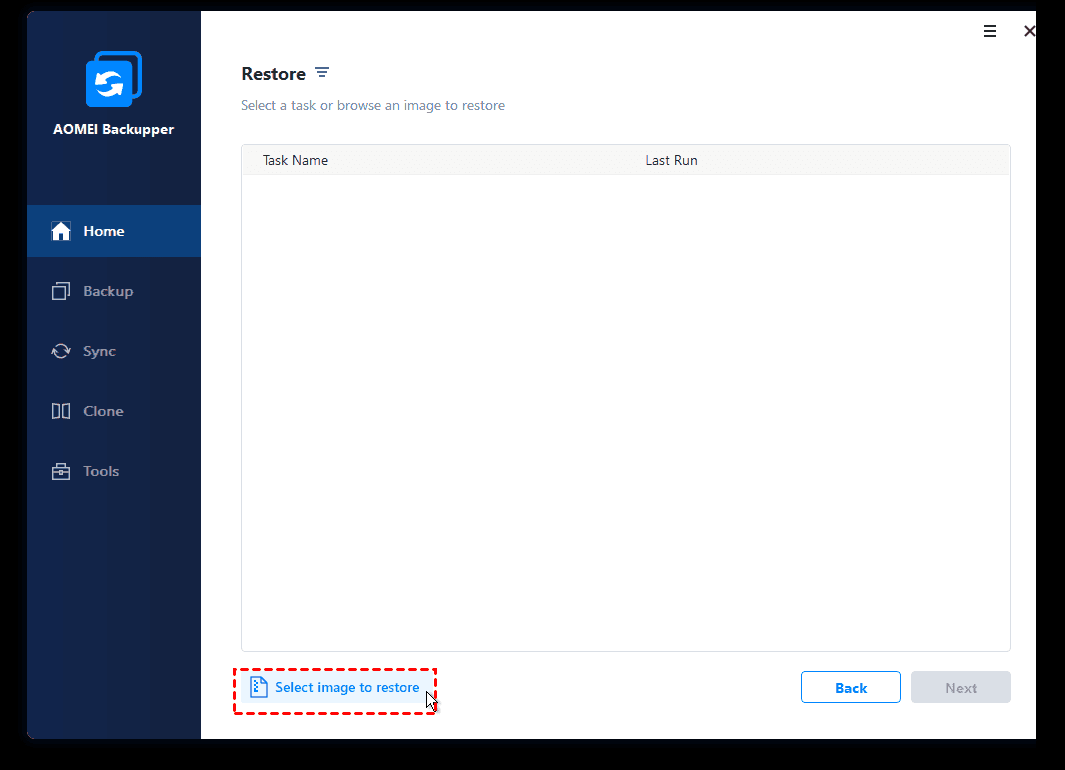
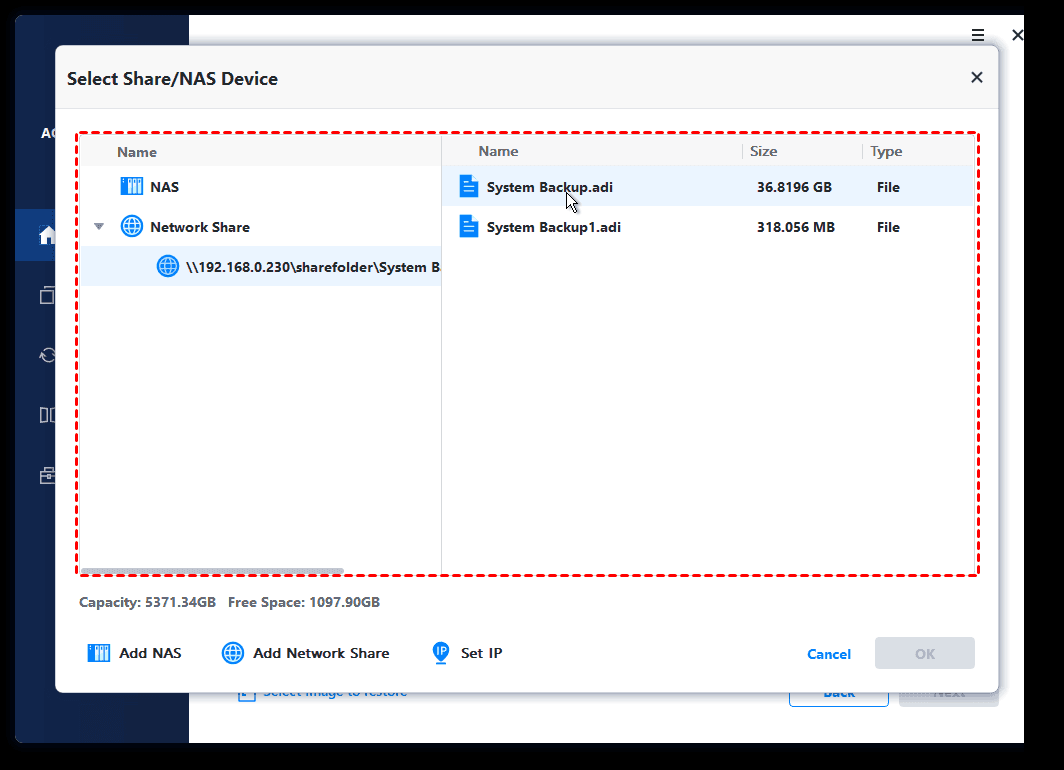
Step 1. Insert the bootable media to start the target computer into Windows PE. Go to the Restore tab in the popping-out window, and click Select Image File.
Step 2. Locate your system image backup stored on a network location and click OK.
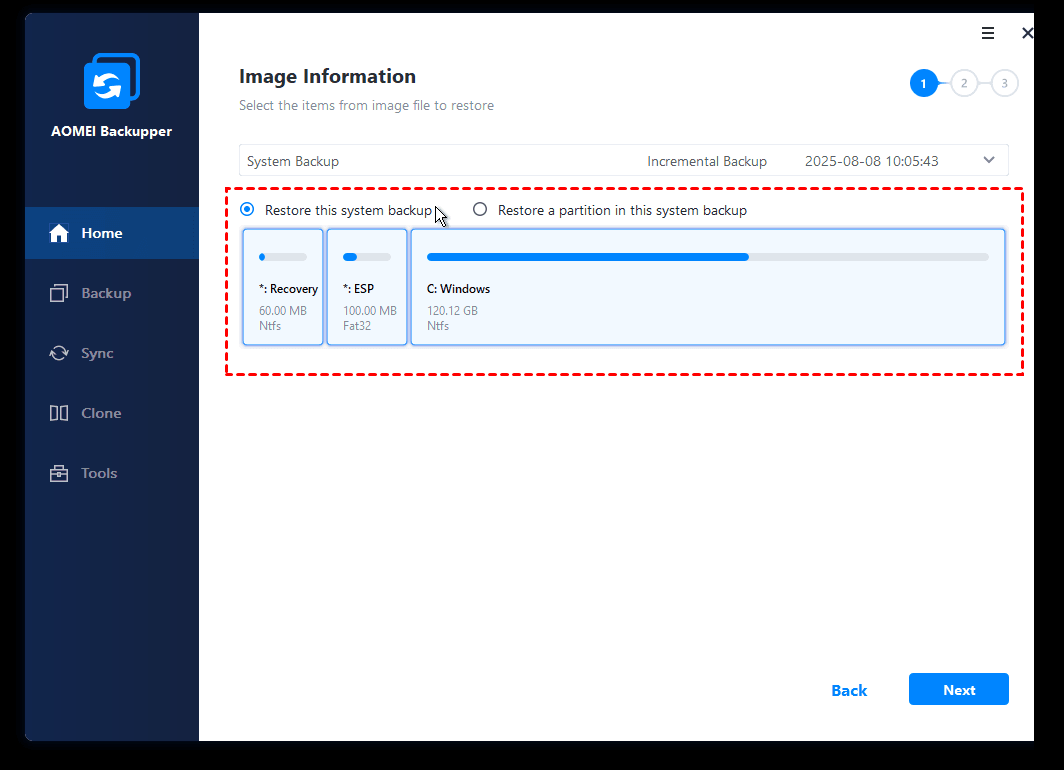
Step 3. Select Restore this system backup and click Next.
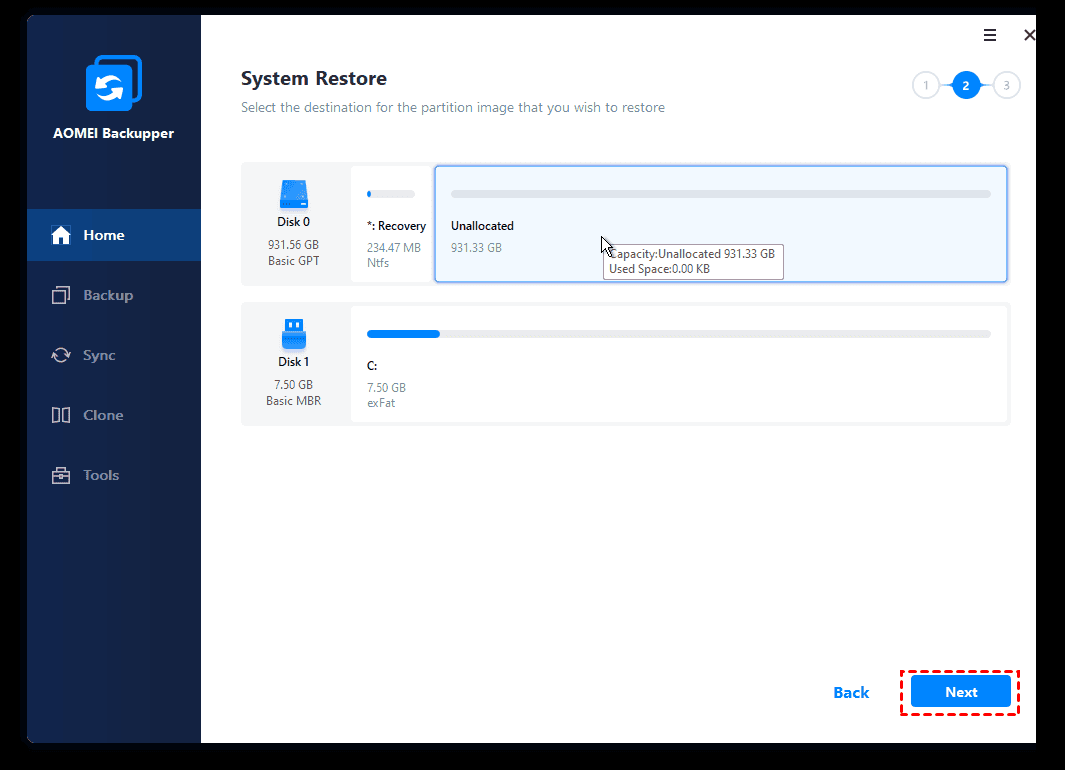
Step 4. Select the destination which you plan to restore the system image on and click Next. If the target partition is not empty, it will pop up a window to remind you that it will be overwritten. Click Yes to continue.
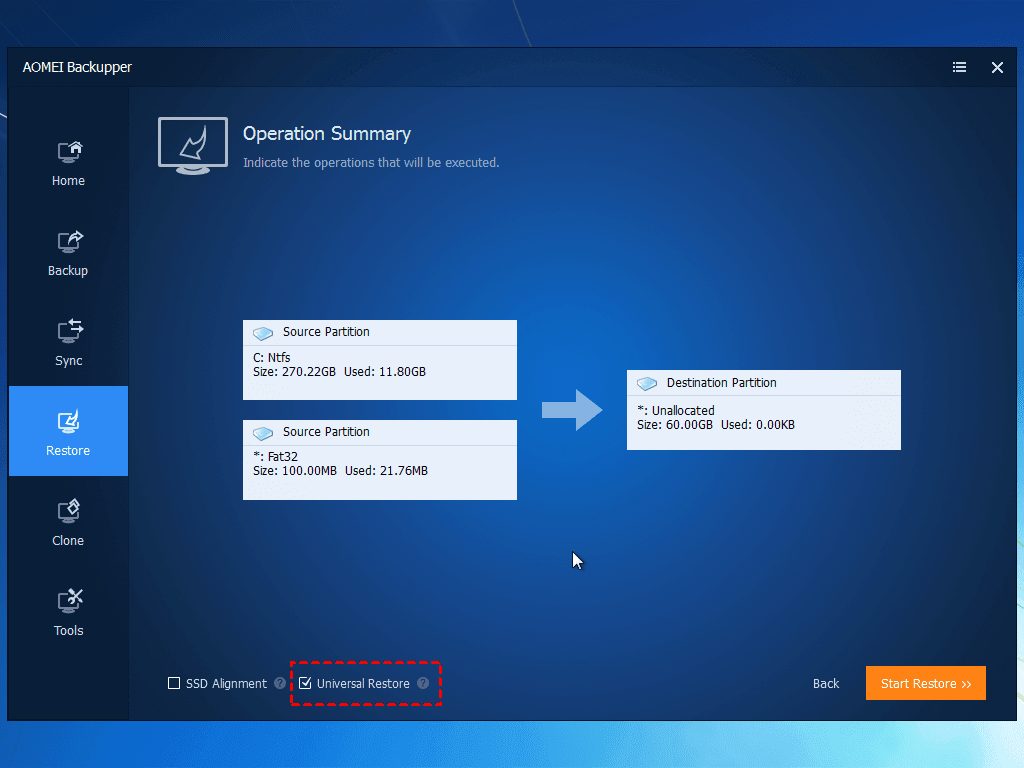
Step 5. Confirm the operation, and check the Universal Restore to ensure the system is bootable after restoring to dissimilar hardware. Then click Start Restore.
Tips✍:
✬ If the destination disk is an SSD, you can tick the box SSD Alignment in order to get better performance after restoring.
✬ The bootable disk is suitable for one or two computers. If you want to deploy an image to multiple computers, you could consider using the PXE boot tool (supported on AOMEI Backupper Workstation).
Step 6. When the progress reaches 100%, click Finish to exit.
📕Note: If you need to restore the system image file on the server computer to multiple client computers at the same time over a network, you can upgrade to AOMEI Backupper Technician to achieve the goal easily.
Bonus tip: Deploy Windows 11 image without USB
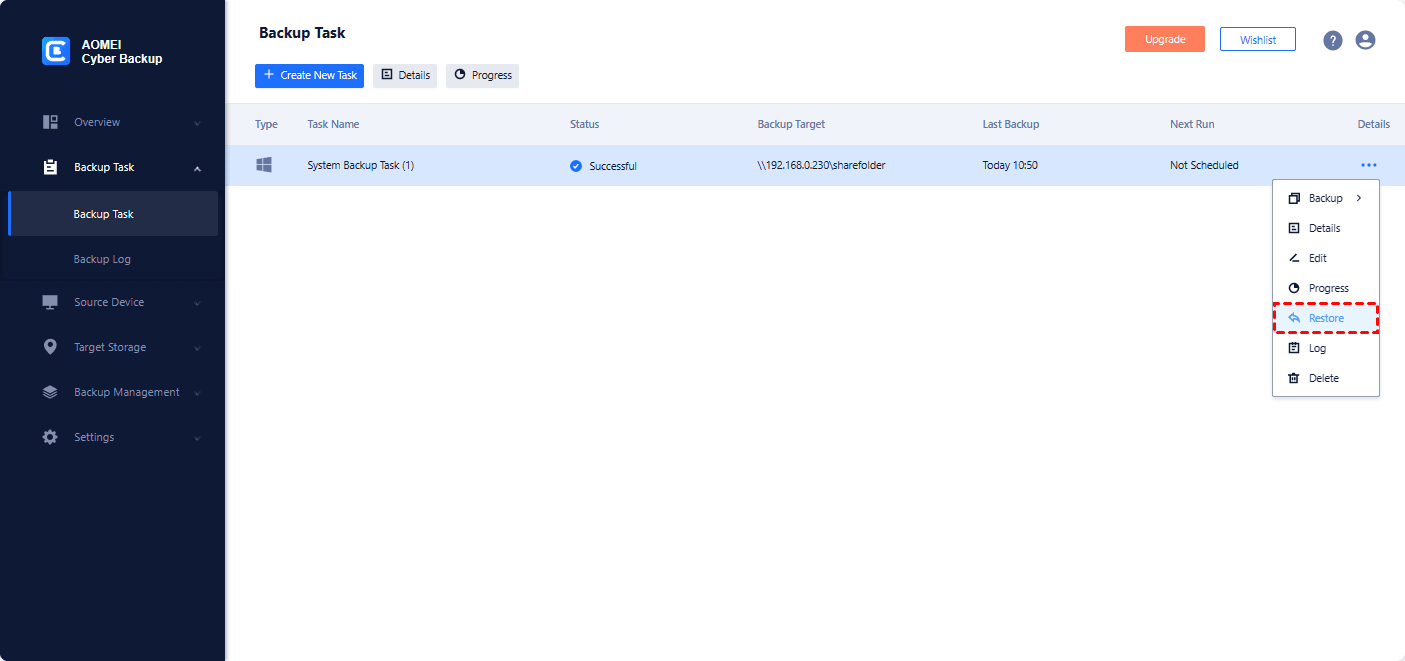
Using a WinPE USB disk isn’t the only way to deploy Windows 11 images to another computer. You can also deploy Windows 11 images from one computer to another over the network. The best enterprise backup software - AOMEI Cyber Backup can help you with Windows 11 deployment.
- It enables you to create a system image, disk image, or partition image for client Windows PCs.
- The created backup image can be restored to the original location or a new location.
- For regular backup, you can enable a schedule to backup changed data automatically.
- It supports full/incremental/differential backup methods.
Download this powerful enterprise backup software now to have a try!
Let’s say you have already created a Windows 11 system image with AOMEI Cyber Backup. Follow the steps below to deploy Windows 11 to the target computer.
Step 1. Run and log on AOMEI Cyber Backup.
Step 2. Click Source Device > Windows > Add Windows Device to add the computer which you want to deploy the Windows 11 image. You need to enter the IP address, username, and password of it.
Note: You need to turn on the target computer before you add it.
Step 3. Start Windows 11 deployment.
- Click Backup Task on the left menu bar and click the three dots icon on the system backup task you created before. Then select Restore.
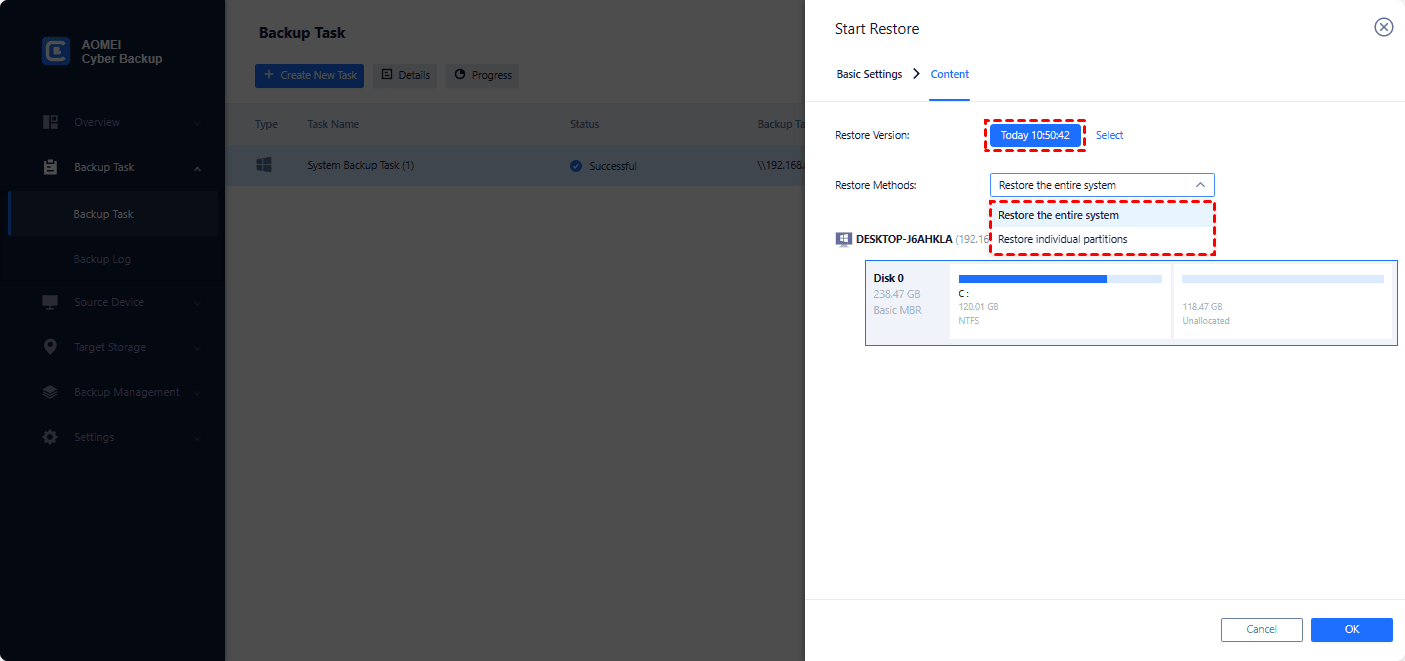
- Select the restore content, including the restore version and restore method. Here I choose the latest version and Restore the entire system.
- Select the target location. Choose Restore to new location and select the target device and target disk.
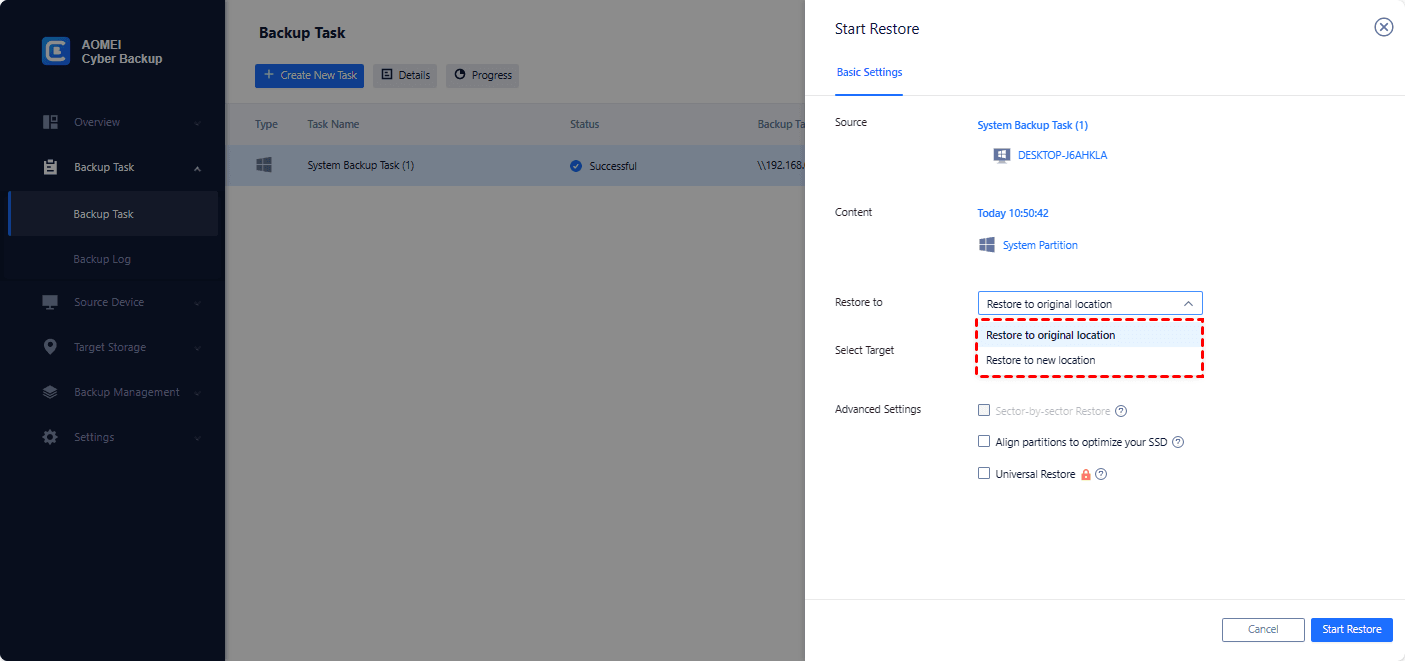
- Check the Universal Restore option to ensure a secure boot after recovery.
- Click Start Restore to launch the system recovery process.
Conclusion
Both of the above methods can help you deploy Windows 11 images via WinPE USB disk. Although the Windows 11 deployment tool-Media Creation tool can help you do this, it sometimes has some problems. In order to get rid of these unnecessary troubles, use a professional backup tool AOMEI Backuppper is your best choice.
After deploying the Windows 11 image to other computers, you can also use this software to protect your data and system. At the same time, you can use it to perform a bootable clone on Windows 11. Whether you want to transfer data or the system, it will provide you with the best experience without any data loss, you only need a few clicks. Try it now to discover more!

